How to protect critical data from ransomware in Windows 10
What is Controlled Folder Access?
The Windows 10 Fall Creators Update (FCU) places a lot of emphasis on security. While some of the security features target enterprises, home and pro users also have a fair amount of options to play with. The FCU brings an improved version of Windows Defender — Microsoft's inbuilt all-in-one security offering. While there are some great third-party security suites to choose from, Windows Defender is a fairly capable software that gets the basics right. Plus, its deep integration into Windows 10 means fine-grained control and easy deployment across the domain.
A new addition to Windows Defender in the FCU is the ability to protect certain folders or apps from being modified by external programs. This means, one can protect important folders from being encrypted or altered in the event of a ransomware or other malware attack. This feature is called 'Controlled Folder Access' and it prevents unauthorized modifications to user designated files or folders. This tutorial will teach you how to enable Controlled Folder Access on a Windows 10 PC using either Windows Defender or the Group Policy Editor. Note that for this feature to work, you must be running the Windows 10 Version 1709 (FCU) or above.
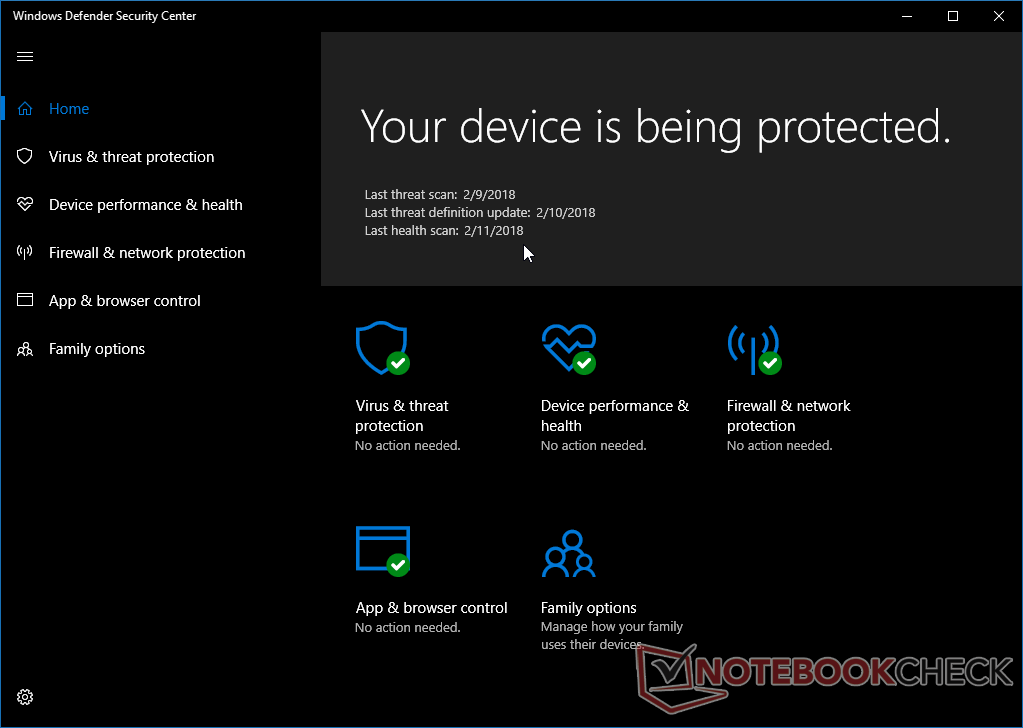
Step 1: Open Windows Defender Security Center
Go to Start and search for Windows Defender Security Center. This will open the app window. In case you are taken to the Windows Defender option in the Settings app, just click on the Open Windows Defender Security Center button and the app will open.
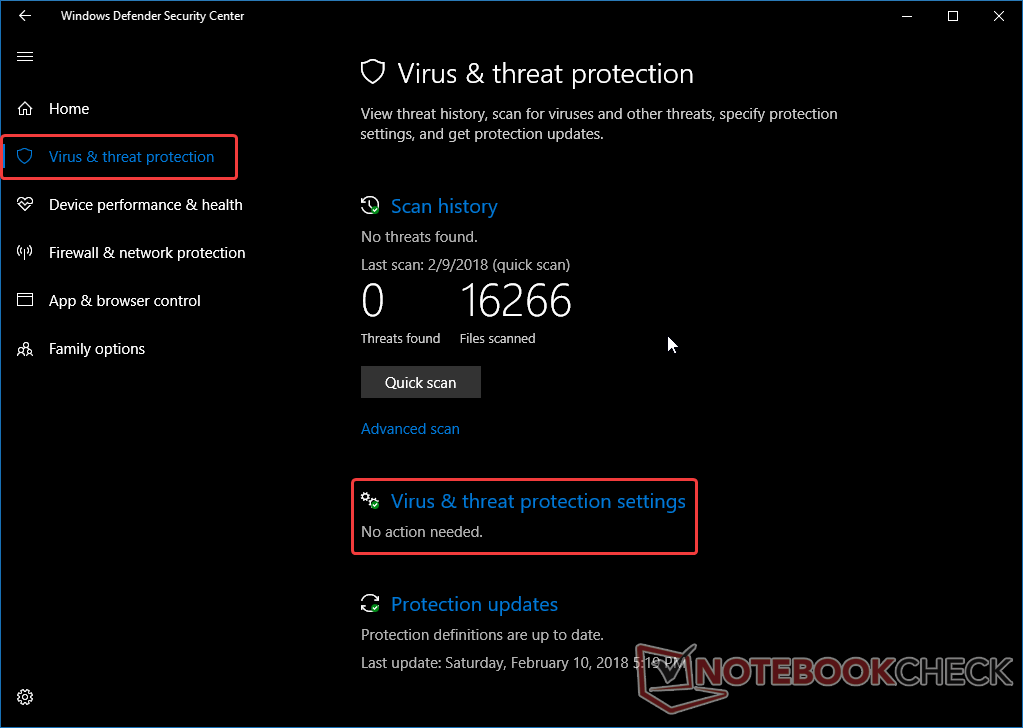
Step 2: Open Virus & Threat Protection Settings
On the left side menu, select the Virus & threat protection page and in the right pane, click on Virus & threat protection settings.
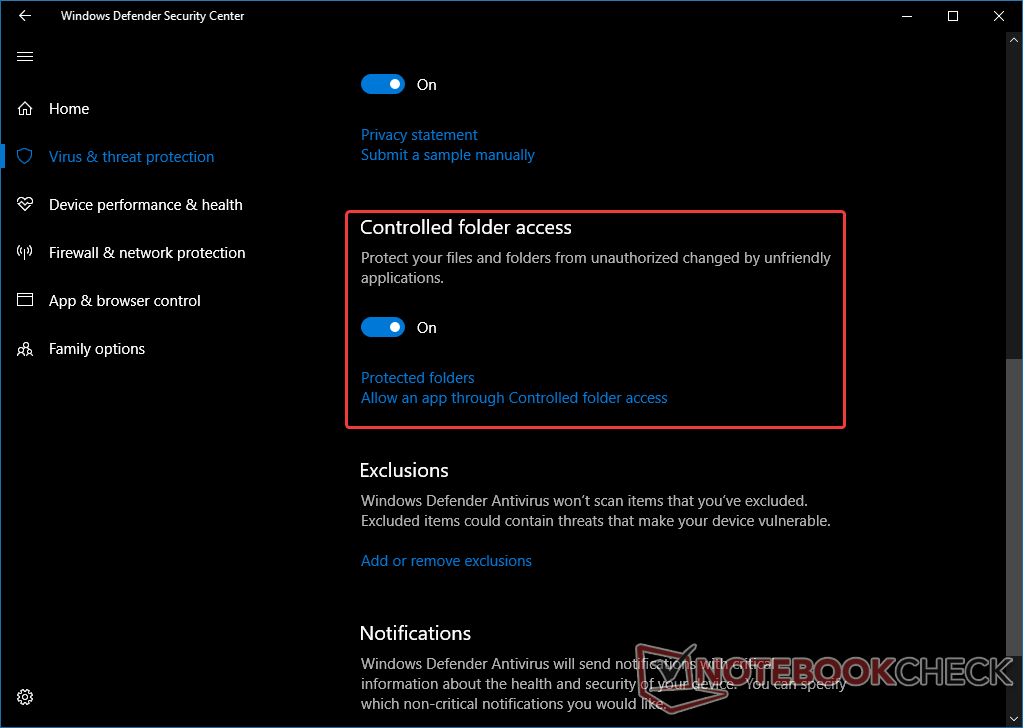
Step 3: Turn on Controlled Folder Access
Scroll down till you find the toggle option for Controlled folder access and enable the toggle. You will see an User Account Control (UAC) prompt for permission to proceed. Click Yes to turn on the toggle. Note: This feature requires admin privileges. If you are not logged in as a system default Administrator or a user account with admin privileges, you will be asked to provide an Administrator username and password in the UAC prompt in order to enable Controlled Folder Access.
As soon as you enable Controlled Folder Access, you will find two options listed below the toggle — Protect Folders and Allow an App through Controlled folder access. We will explore them in the next steps.
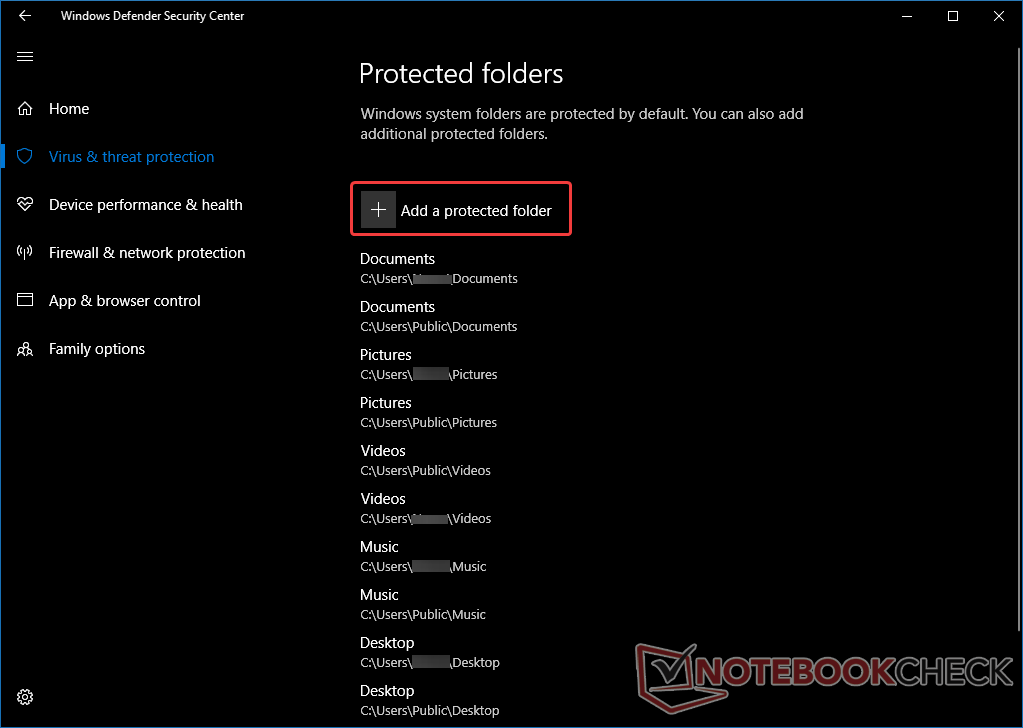
Step 4: Add a folder for protection
Click on Protected folders to open a list of folders that are protected by Controlled Folder Access (CFA). Windows system folders are protected by default. You can add the folders you want to protect from malicious programs by clicking the + sign beside Add a protected folder.
Step 5: Allow a trusted app to make changes to protected folders
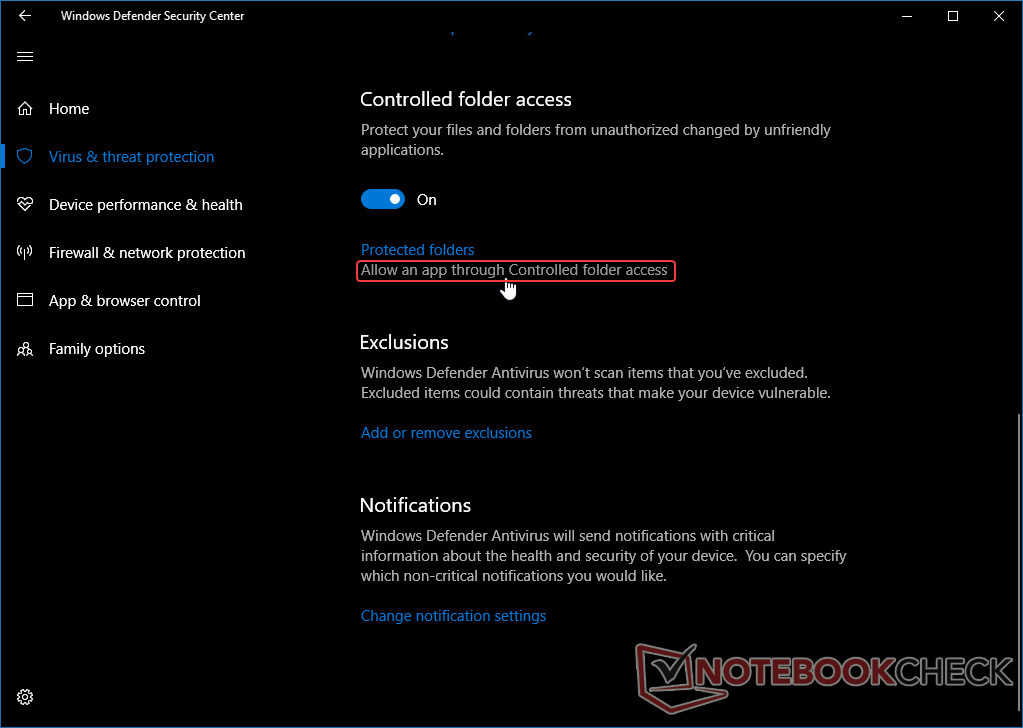
While programs identified as malicious will be unable to make changes to Protected folders, those that are listed as friendly by Microsoft are always allowed via CFA and will be able to access and modify Protected folders as needed. You can also add your own trusted programs so that they are allowed by CFA to modify Protected folders. To do so, go back to the Virus & threat protection settings page, scroll down to Controlled folder access option and click on the Allow an app through Controlled folder access option.
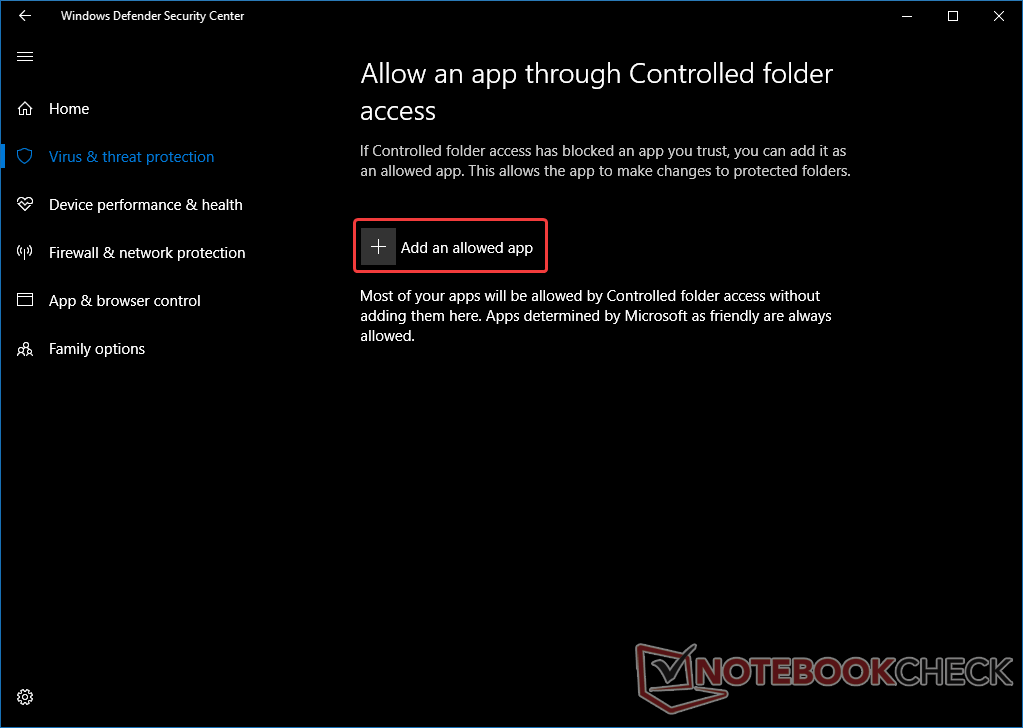
In the page that opens, click on the + sign beside Add an allowed app and browse to the program's executable on disk.
Step 6 (Optional): Enable Controlled Folder Access via Group Policy Editor
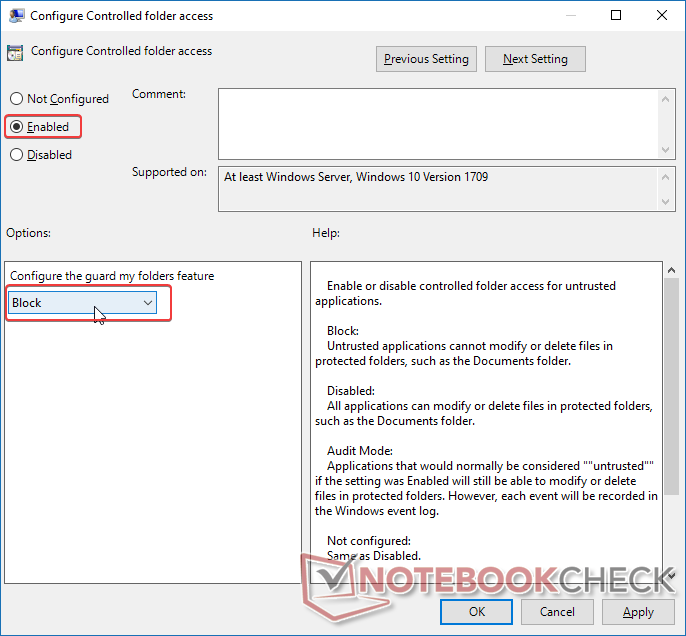
Using the Group Policy Editor, network admins can easily control which users need CFA enabled and can roll out app and folder permissions across the domain very easily (Note: Group Policy Editor is not available in Windows 10 Home). To configure CFA using Group Policies, open the Group Policy Editor by going to Start > Run and typing gpedit.msc or simply type Group Policy in the Cortana search box. In the left hand pane of the Group Policy Editor, go to Computer Configuration > Administrative Templates > Windows Components > Windows Defender Antivirus > Windows Defender Exploit Guard > Controlled Folder Access. You will see three policies. Double-click on Configure Controlled folder access to access the policy settings. Set the policy to Enabled and in the Configure the guard my folders feature dropdown menu, select Block. (Note: In some versions of Windows, you might see Enable instead of Block). You can use the other two policies to add apps and folders similar to how we added them earlier via the Windows Defender Security Center app. Now, all computers in the domain, which inherit this policy will have CFA enabled along with permissions for individual apps and folders.
Step 7: Testing out Controlled Folder Access
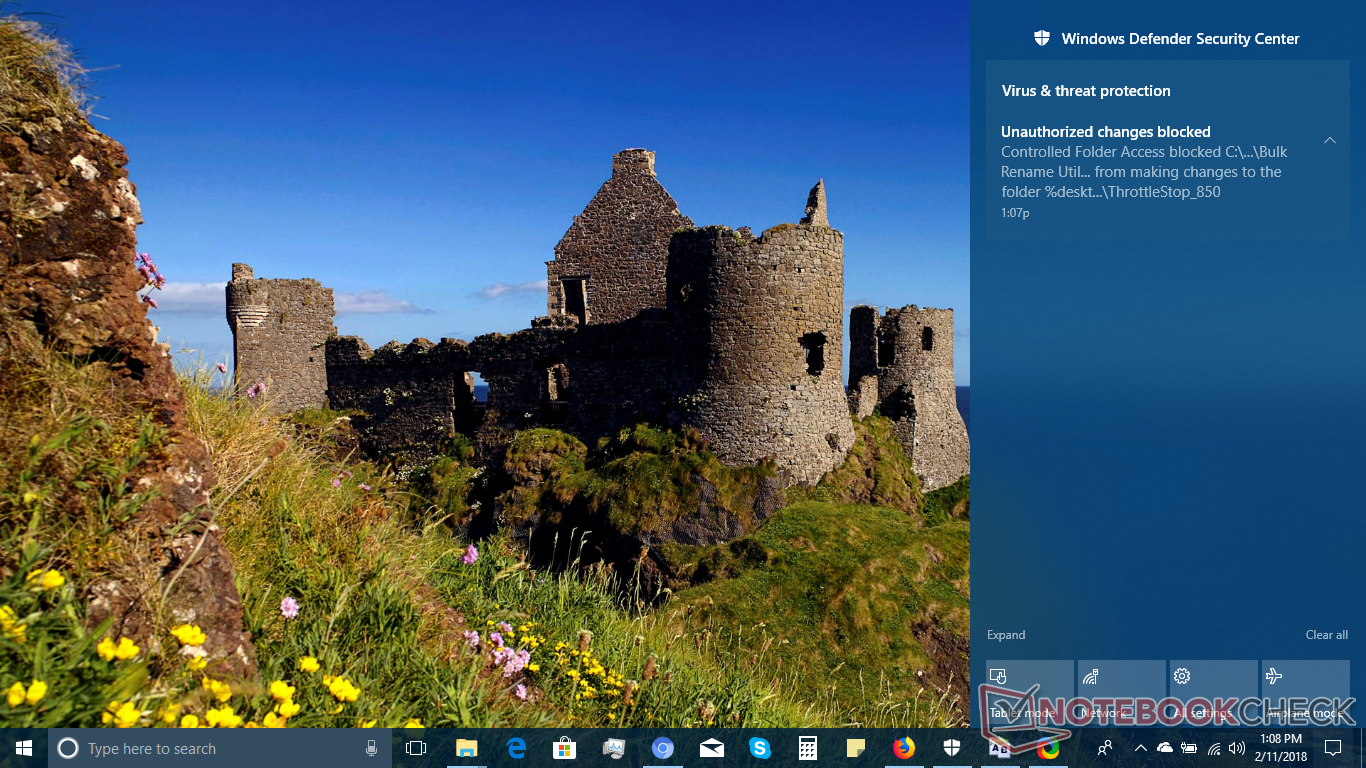
You can test out the feature by trying to save or rename a file in a protected folder from a third-party program. If the program has been whitelisted either by you or Microsoft, you should be able to perform the required actions in the protected folder. However, if a non-trusted program tries to make any changes, Windows Defender immediately prevents it and shows a notification informing you of the action.
Conclusion
The recent spate of ransomware exploits have had enterprises and end-users alike on their feet. The Controlled Folder Access feature can be extremely useful in protecting critical data from malware such as ransomware and also to ensure that sensitive information is not accidentally overwritten. However, it must be kept in mind that this feature helps only to prevent file and folder modification and not remove the malware itself. The malware can still affect or encrypt other files and folders on the system not protected by CFA. Whether you wish to secure private information in your home PC or protect enterprise data from unauthorized modification, Controlled Folder Access can be extremely handy. It's bundled with the OS and updates automatically. You can also use CFA even if you're using a third-party antivirus to get the best of both worlds.
