How to block annoying ads and secure your PC in any OS
What is the Hosts file?
User data has become one of the most precious assets online and a lot of companies do all they can to get their hands on your data — with or without your consent. Over the past couple of months, we've been seeing how analytics firms such as Cambridge Analytica can harvest user data from social networks and gather a lot of information about their likes and dislikes. Not just Cambridge Analytica, even regular online services you use everyday can somehow harvest your data by luring you into surveys and making you click on ads and links that can potentially breach your privacy. While it may sound daunting, it is actually very simple to safeguard your PC from connecting to such trackers in the first place. This guide helps you to achieve a higher level of privacy by teaching you how to modify the Hosts file in your OS.
The Hosts file is a plain text file used by the OS to map domain names to IP addresses. When you enter any website in a browser, to resolve the website or domain name, the computer queries what can be called as the phonebook of the internet or a Domain Name Server (DNS). Think of the DNS as a public phonebook and the Hosts file as your own local version of it. During bootup, the Hosts file is loaded in memory and the OS queries it before looking up the address on a Domain Name Server (DNS). Since the Hosts file is first queried before the PC even connects to the DNS, any domain entered in a browser will redirect to the corresponding address in the Hosts file. This feature can be used for enabling certain functionality such as blocking malicious or unwanted websites, preventing ad trackers, or even accessing websites with a shortcut. The best part about using the Hosts file to block websites is that the changes happen at an OS level and it, therefore, negates the use of third-party ad and pop-up blocker extensions. So, without further ado, let's start tinkering with the Hosts file and see how it can help augment your PC's security and privacy.
Opening the Hosts file
Let's start with the important step of knowing how to locate and open the Hosts file in the first place. Knowing this is important as the Hosts file is generally placed in a system folder and does require elevated permissions in order to be edited. While it is possible to remove the Admin privilege requirement, it can make the Hosts file amenable to malware resulting in possible re-directs to malicious websites. Also, note that the Hosts file does not carry any extension and will not work if an extension, such as .txt, is appended to it.
There are a few ways in which you can locate and open the Hosts file for editing but the most straightforward way for each OS is as follows —
For Windows users
For Windows users (Windows 7 and up), open Notepad as Administrator by right-clicking the Notepad shortcut in the Start Menu or desktop and selecting Run as Administrator. Then go to File > Open and navigate to the C:\Windows\system32\drivers\etc folder, choose to display All Files, and then open the file named hosts. You can add each IP address and the corresponding domain name in separate lines and save (do not use Save As) the file in Notepad.
For Linux and macOS (OS X Lion 10.7+) users

The process of opening the Hosts file in Linux and macOS is the same. Open a Terminal window and type sudo nano /etc/hosts. Type in your root password when prompted. This will open the hosts file in the terminal using the simple nano text editor. You have to use keyboard navigation here to make the desired changes. Once done, press Control + O on the keyboard to WriteOut (aka save) the file. You will be asked to confirm the name. Press Enter to simply overwrite the file. Press Control + X to exit nano and return to the terminal.
Note 1: If you are on Mac OS X 10.6 or earlier, the hosts file can be found in /private/etc/hosts.
Note 2: If you are using Windows Subsystem for Linux (like in this example), the Hosts file for the Linux environment is auto-generated from the Windows Hosts file.
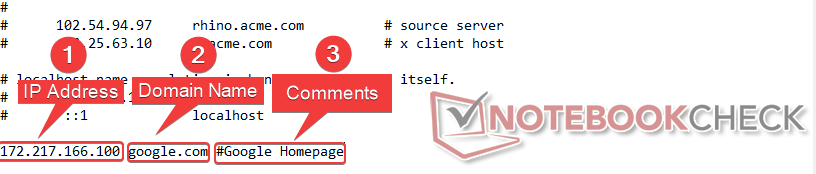
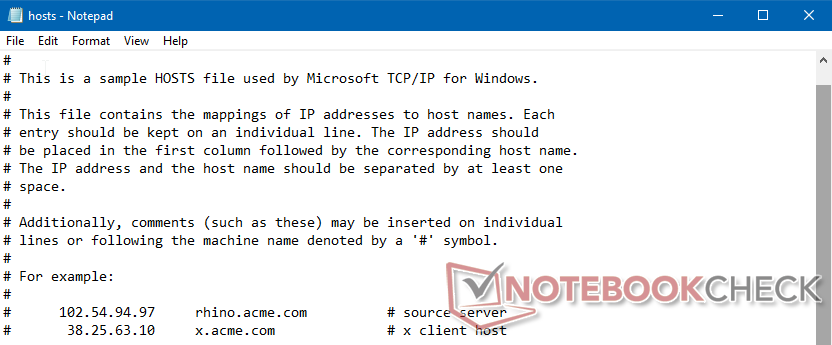
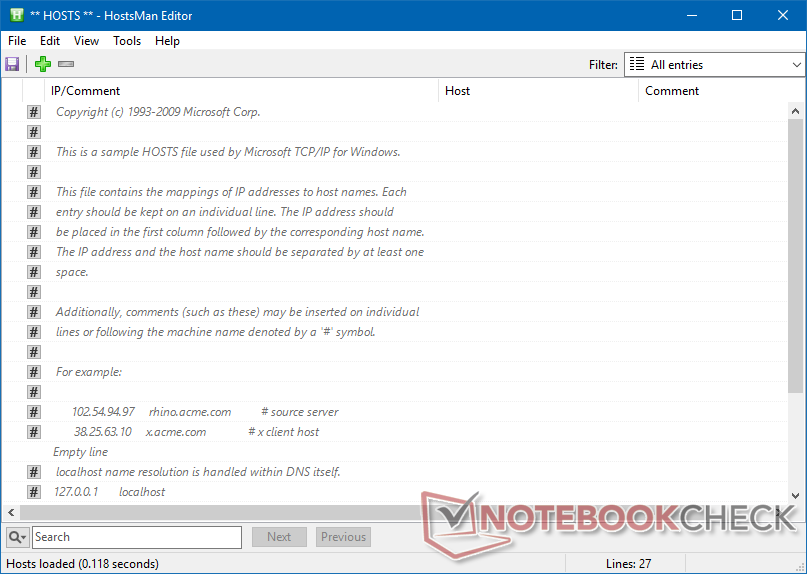
Every entry in the Hosts file consists of three components — the IP address, the domain name mapped to the IP address, and an optional comment preceded by a # sign. Each entry has to be entered in its own line. Generally, there is a single space separating each of the components of the entry but it is not uncommon to see Tab spaces (8 spaces) as well.
Before getting to modify the Hosts file, it is always a good idea to take a backup. To backup the Hosts file, simply copy it from the original directory to another folder location such as the Desktop. Again, make sure not to append any extension to the Hosts file.
Block access to a website
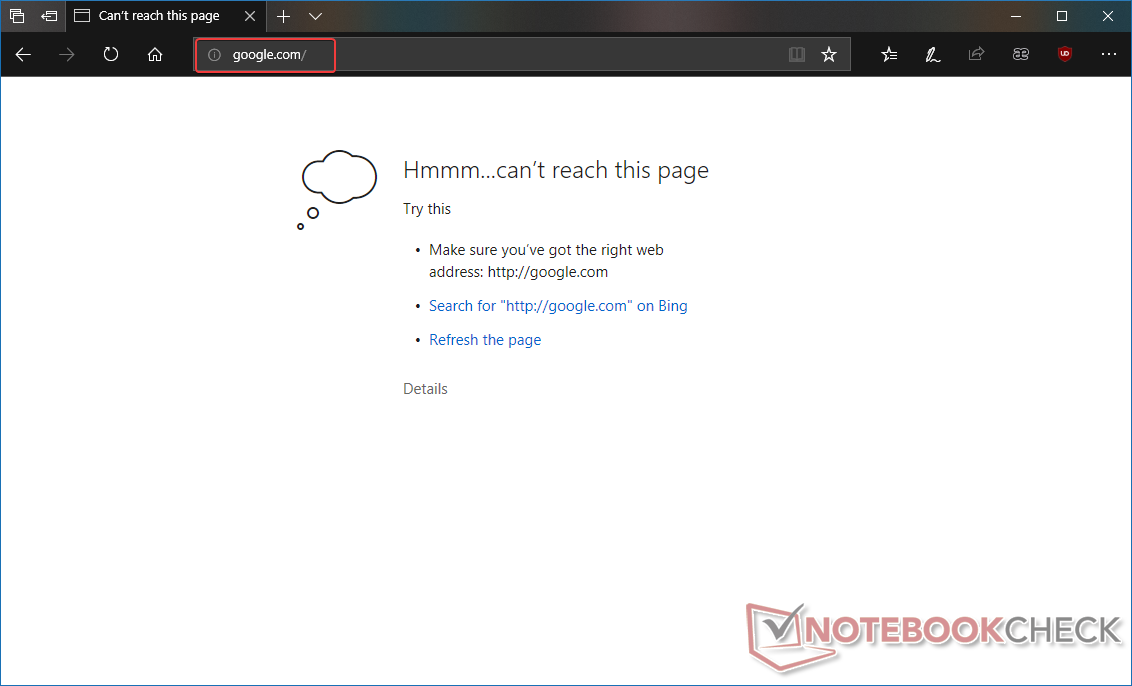
One of the primary reasons for editing the Hosts file is to block a specific site. This could be because you know that a site is malicious, or you'd like to prevent kids from accidentally stumbling upon something bad, or prevent employees from accessing prohibited websites in a corporate environment. Whatever the intention, the process is fairly straightforward. It must be remembered that 'blocking' here simply means re-directing the website request back to the localhost.
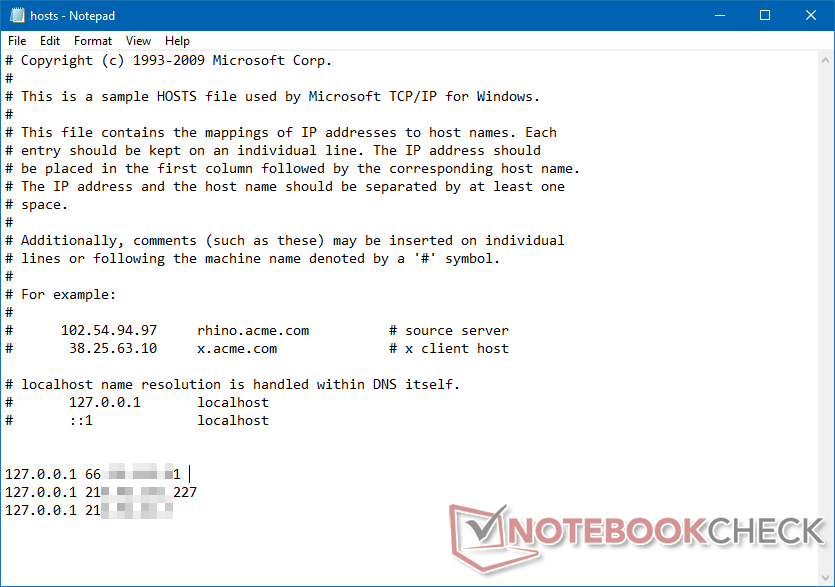
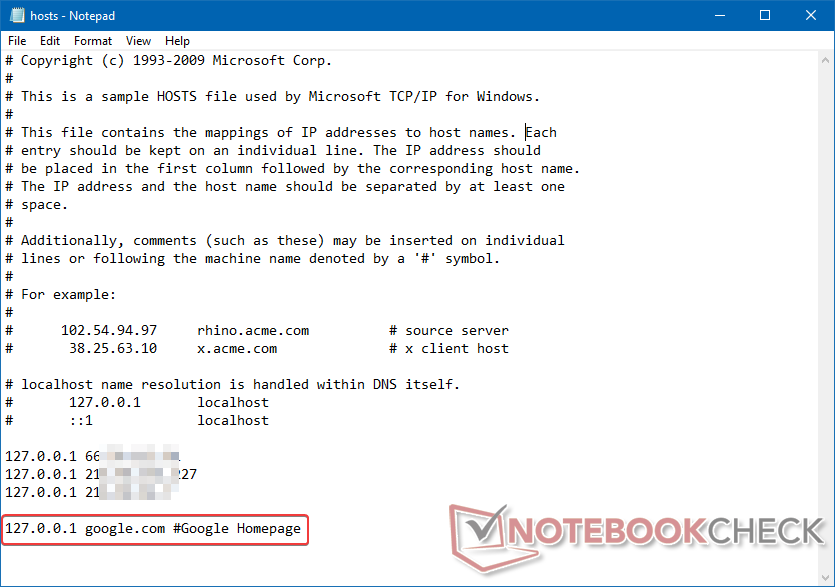
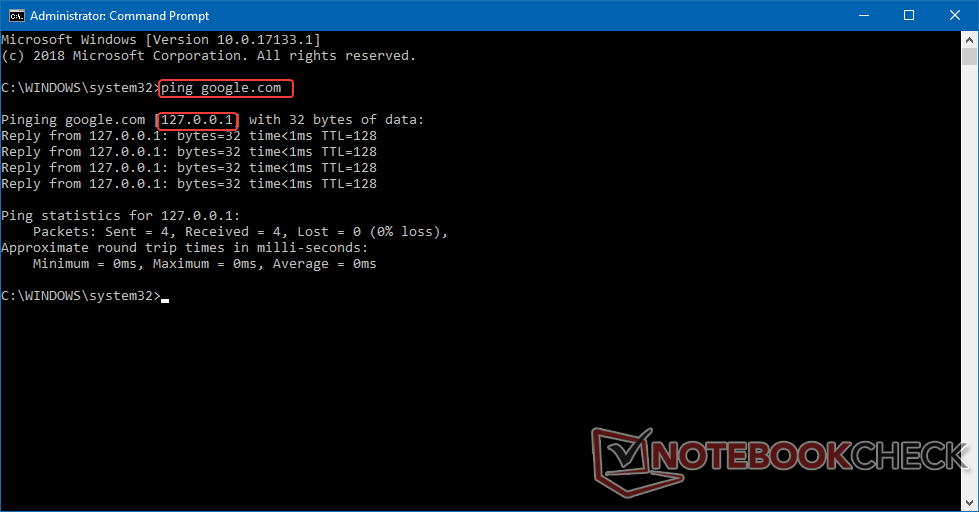
For example, let us say we'd like to block access to google.com from the PC. Simply add the google.com domain alongwith 127.0.0.1 in the Hosts file and save it. You can also use this method to block a specific ad server. If you have identified a domain that is serving intrusive ads say for example adserver.abv.bg, simply adding this domain along with 127.0.0.1 to the Hosts file will block all content from that server, thereby preventing the ad from being displayed. Hosts file changes impact the entire OS therefore, the PC will not be able to access the blocked domain irrespective of the browser. You can also verify this by trying to ping the blocked domain from the Command Prompt or Terminal.
Block ads and tracking websites
As mentioned earlier, in the modern age of web commerce, ad traffic and user telemetry is everything. While we always encourage non-intrusive ads, sometimes too many ads can increase a site's loading time. Some websites also plant tracking cookies in your PC to observe your usage patterns and browsing habits. If you are really privacy conscious, the Hosts file can do its bit to help prevent such intrusions.
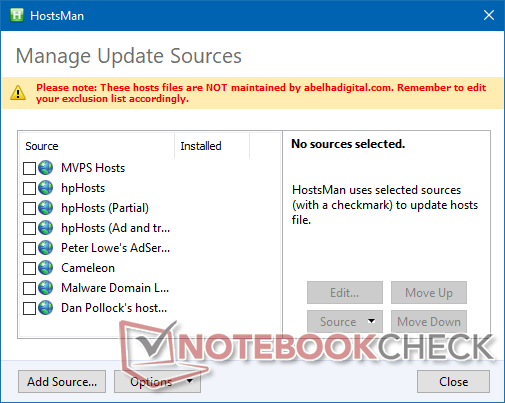
It would be a tad tedious task to manually gather pop-up and ad links from every website you visit and enter their IP addresses in the Hosts file. Therefore, sites such as MVPS Hosts provide Hosts files, which are updated at a regular cadence. The most recent text version of the MVPS Hosts file can be found here. You can directly copy-paste the entries into your own Hosts file or simply run a batch file provided on the site to integrate these entries with your local Hosts file. Linux users can follow the instructions available here to create a simple Bash script for downloading the online hosts file and replacing the local copy. If you prefer a GUI interface, HostsMan comes across as an intuitive tool to manage, edit, update, and backup your Hosts file on Windows.
Apart from blocking specific domains, ads, and other unwanted sites, there are a few other uses for the Hosts file as well such as redirecting to another website or assigning a custom name to local computers on the network. Let's have a look at these below.
Redirect to a different website
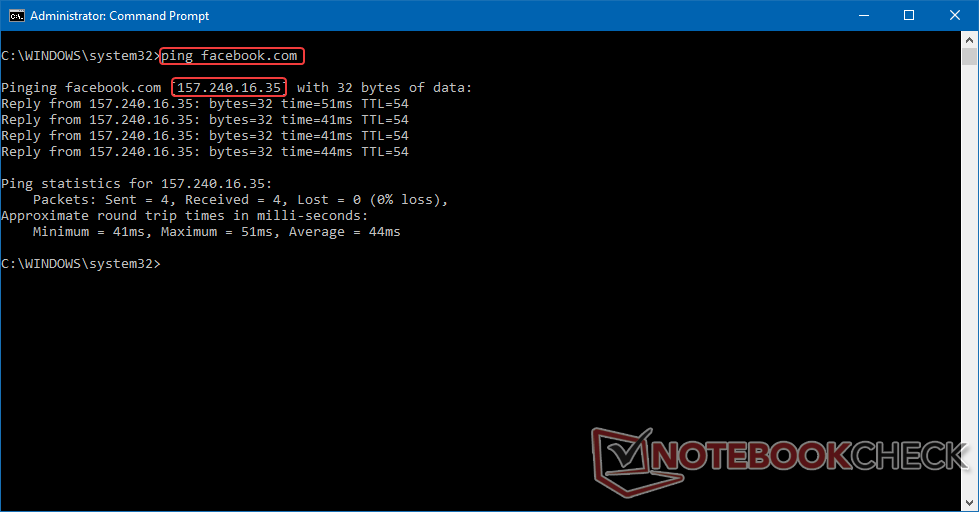
You can also use the Hosts file to redirect to a different website. For example, you can redirect users from Google to Bing, from Facebook to Twitter, or to corporate intranet sites etc. Redirection to another site requires knowledge of that site's IP address. To know that, open a Command Prompt window (or a Terminal window in Linux/macOS) and type ping <website name>. You will get the IP address of the website in the ping.
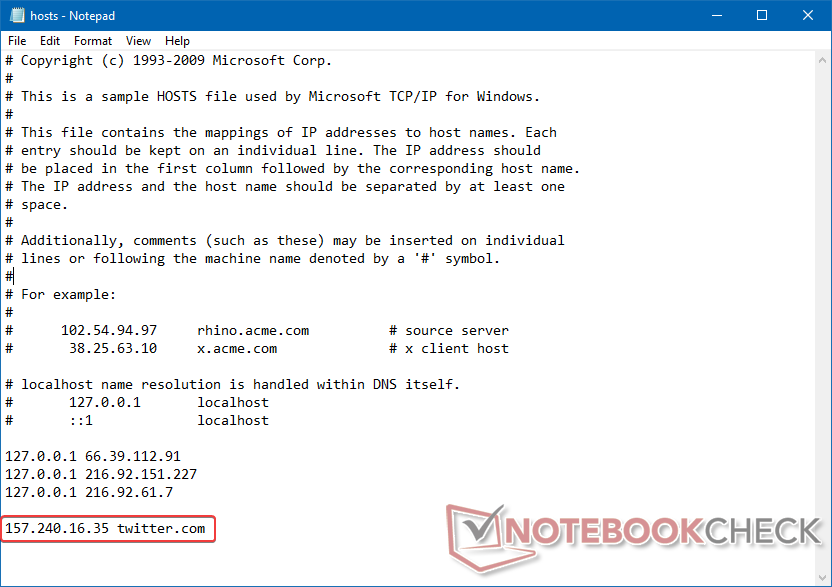
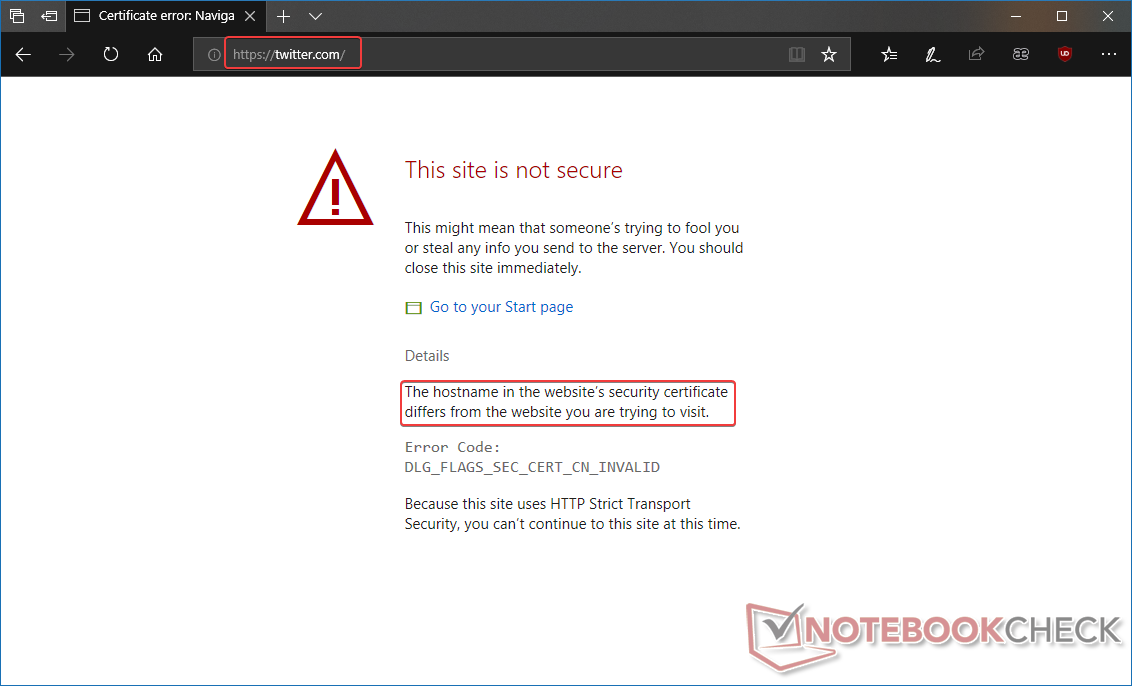
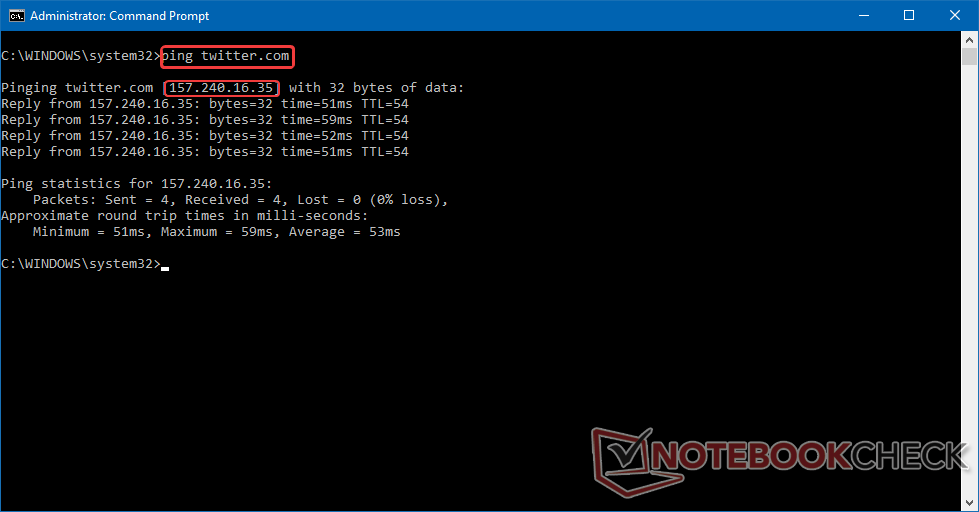
For this example let us redirect Twitter to Facebook. From the ping command, we come to know Facebook's IP address to be 157.240.16.35. Make the corresponding entry in a new line in the Hosts file and specify the domain name as twitter.com. Save the Hosts file and try accessing twitter.com from your browser. You will see that you get an SSL error. This is because Facebook uses the HTTPS protocol by default, which requires the domain name entered in the browser to match the name in the site's certificate. If the matching does not occur, the browser cannot access the site as a security measure. However, you can verify that the redirection has indeed occurred by pinging twitter.com, which now redirects to Facebook's IP address.
Assign names to local addresses
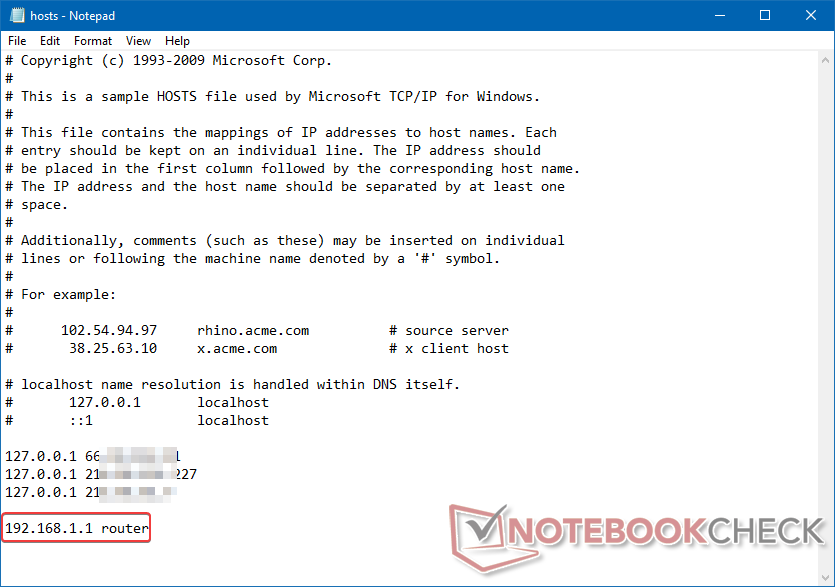
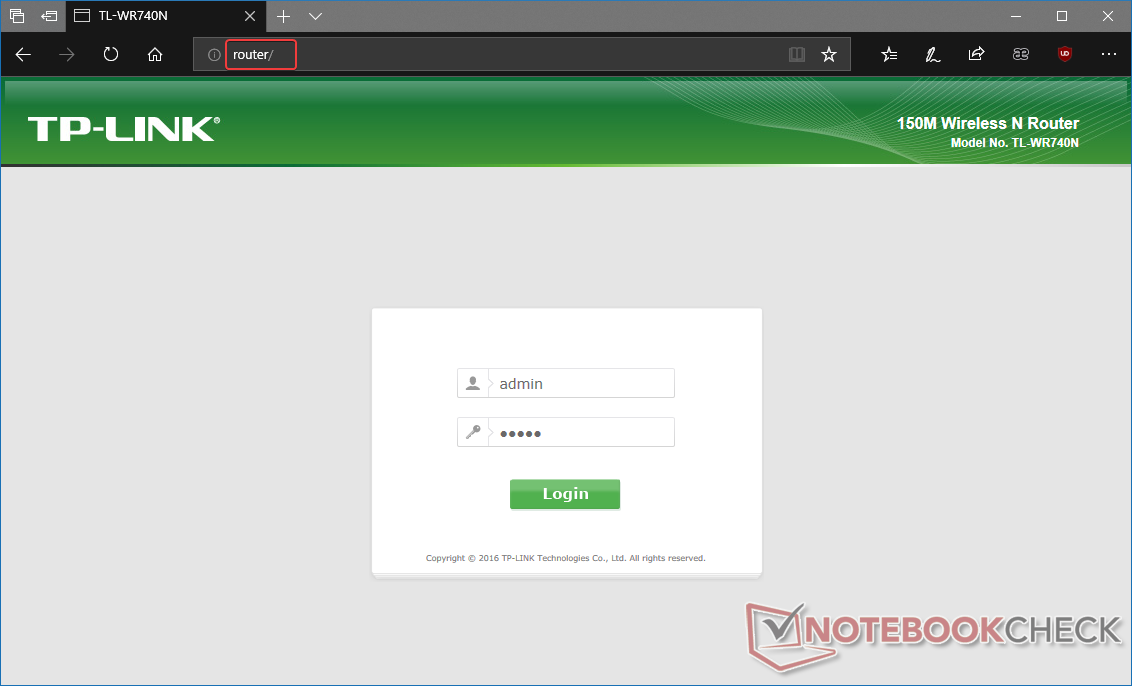
Let's say you need to access a local computer or router on the network. Instead of typing in the IP address manually every time, just give a name to the system on the network in the Hosts file. In this example, my local Wi-Fi router's homepage IP has been assigned the name 'router' in the Hosts file. Now, whenever router/ is typed in any browser window, it automatically redirects to my router's homepage. Make sure to put a / at the end of the name in the browser as otherwise modern browsers tend to initiate a web search for the name and you might end up with a search result for 'router' instead of being taken to your router's actual homepage. While you could just create a bookmark for the same, say if you're a part of a larger network, any user can access a remote PC or website simply by typing in the designated name instead of having to memorize IP addresses or create bookmarks in every browser.
Conclusion
The Hosts file helps in redirecting domain names to specific IP addresses and is the first thing to be queried by the OS even before connecting to a DNS. In this guide, we've outlined some of the ways in which you can leverage the Hosts file to block, redirect, and even assign custom names to IP addresses. The process itself should not cause any issues if you've followed the instructions above but it always helps to take a backup of the existing Hosts file before attempting to modify it. Also, keep in mind that while publicly available lists can be very useful in keeping unwanted trackers, ad servers, and pop-ups at bay, sometimes a public list might end up blocking a known domain. It is a good practice to check that any public list you use does not inadvertently block a required domain.
Intrusive ads and other unwanted elements in a webpage can pose a serious security risk. Data mining for analytics apart, today, many seemingly genuine websites and browser extensions are laden with cryptocurrency mining scripts that can hijack unsuspecting users and drain CPU resources for someone else's profit without even being noticed. Using the Hosts file to block such ads and scripts goes a long way in protecting your security and privacy on the Internet. The Hosts file is certainly not the ultimate answer to all security woes but understanding how it works certainly does confer an additional security layer for your PC in this always-connected era.
