Be sure to read the Dell XPS 14 service manual before opening up the 2026 model
The XPS 14 and 16 are getting complete makeovers this year from their exterior shells to their interior processors. Consequently, the procedure to service these models has changed significantly from what owners of previous XPS models are likely accustomed to. Dell thankfully has the digital manual freely available to download here for owners or potential buyers.
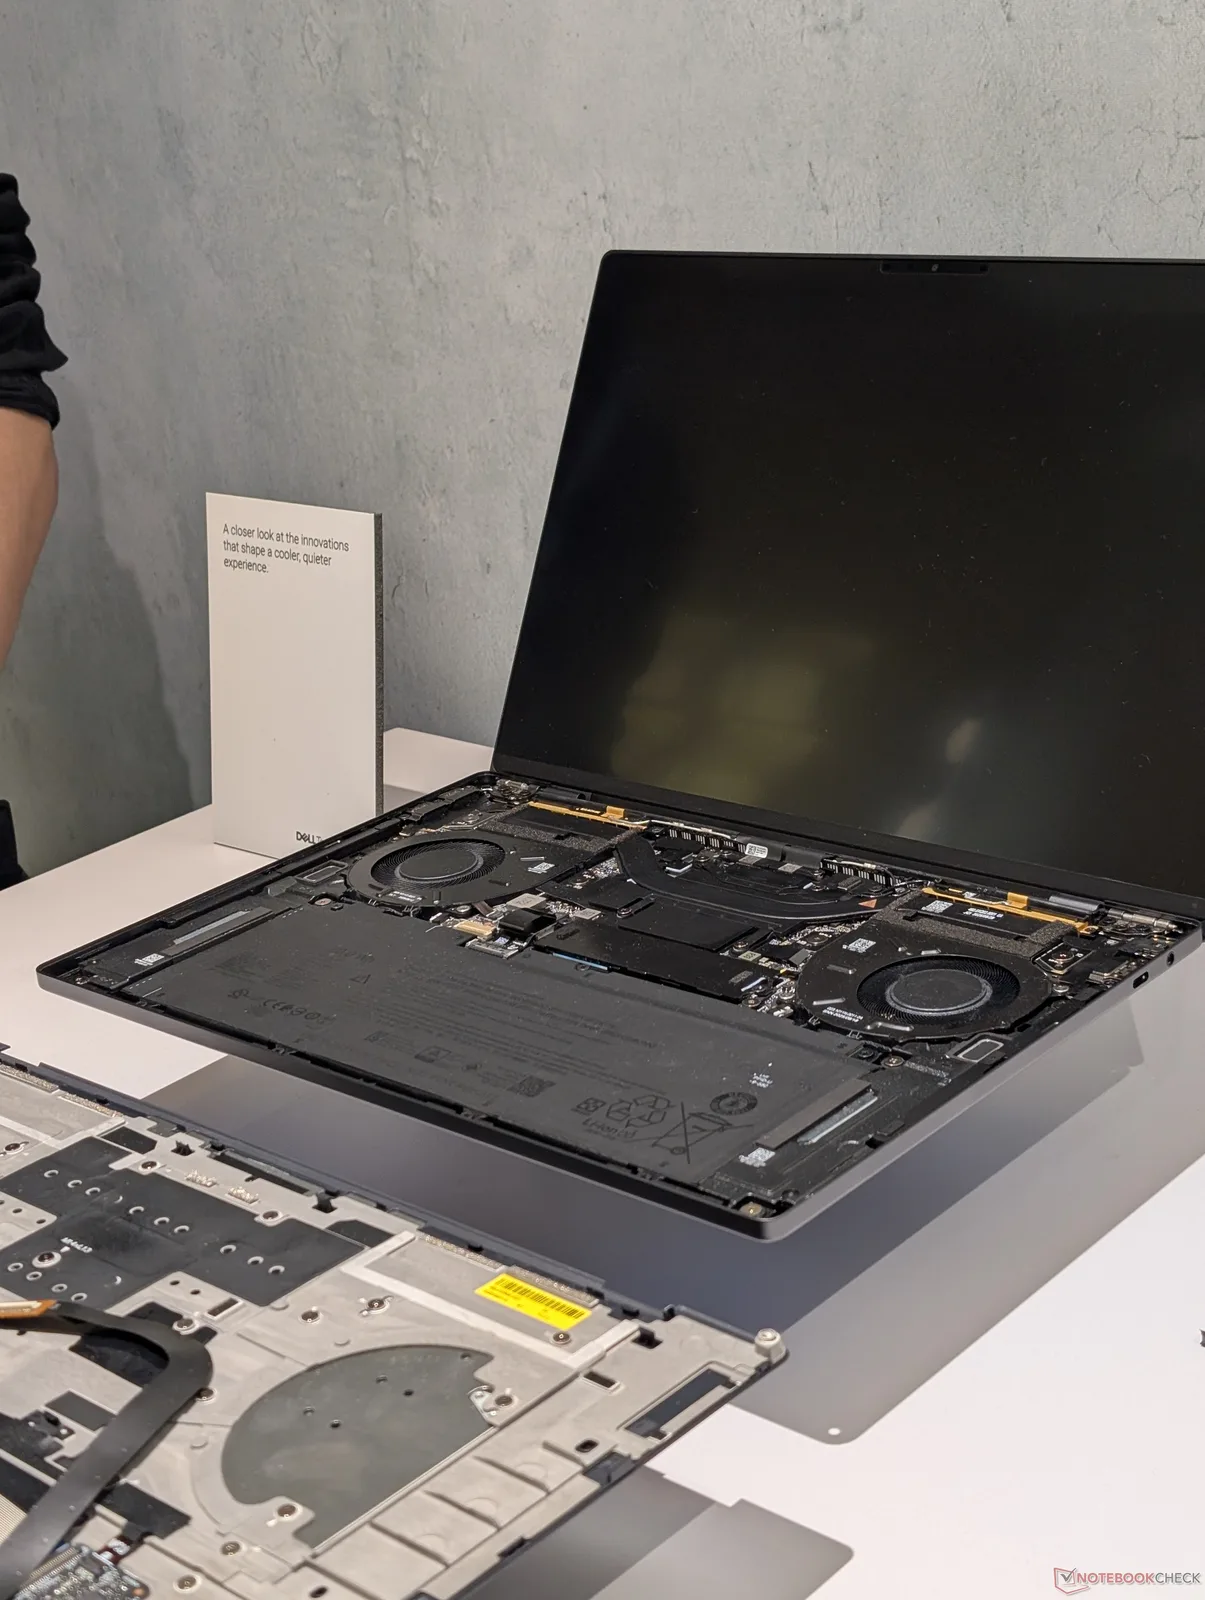
To properly access the motherboard, users must still need to remove the T5 Torx screws on the bottom panel first as usual. Once removed, users will then need to insert the Torx screwdriver back into the empty holes to push the corners of the keyboard deck (C cover) away from the bottom panel (D cover). The two covers can then be carefully separated around their edges with a sharp plastic edge.
Key components like the cooling solution, battery, and SSD are now accessed by removing the C cover instead of the D cover as shown by the image below. Users should be careful to not damage the fragile ribbon cable connecting the keyboard to the motherboard during this step.

The above procedures are unlike the vast majority of laptops in the market where users simply need to remove the D cover for any upgrades or repairs. Servicing is therefore a bit more involved on the 2026 XPS series when compared to older XPS models, but the improvements to chassis rigidity make the tradeoff worthwhile.
The Framework Laptop takes a similar approach to the new Dell design when it comes to servicing, but the new XPS exhibits noticeably less flexing and creaking.
Check out our full review on the 2026 Dell XPS 14 for more benchmarks and comparisons.


Source(s)
Notebookcheck
