Creality Sermoon S1 3D scanner review: Precision for everyday engineering
Forget manual measurements.
The Sermoon S1 3D scanner, like other handheld scanners of its kind, can help you get rid of the manual task of measuring every facet of a complex object to recreate it in software. With the S1, you can rest assured that your dimensions will be accurate.Vineet Washington Published 🇫🇷 🇪🇸 ...
Verdict - Quick, accurate, and consistent scanning for most use cases
The Sermoon S1 from Creality is a reliable and smart alternative to rulers and vernier calipers. Granted, for simple objects, a caliper or ruler will be faster, but for everything else, the Sermoon S1 wins. Especially when it comes to reverse engineering. It is highly accurate for pretty much any use case considering we only noticed inaccuracies of under 0.4 mm, in certain cases, and under 0.1 mm in most others. Not as accurate as Creality’s claims but still accurate enough. So, for anything other than certain industrial applications, the Sermoon S1 is a great fit. And, when paired with a 3D printer, a 3D scanner such as this can be a very handy tool for at home fabrication and reverse engineering.
The Creality Scan 4 software is quite user friendly as well. It has explanations for most of the settings so first-time users will be able to pick it up easily. Other than the USB detection issue and some trailing when IR scanning, which Creality told us can be negated by turning on the 'Exclude Flat Base' option, the Sermoon S1 and Creality Scan 4 work as intended.
Pros
Cons
Price and availability
The Sermoon S1 is priced at $2,699 but at the time of publishing, it is on sale for $2,399 on Amazon. The official Creality store has it listed for $2,399. The more premium and newer Sermoon X1 with better accuracy range and the Scan Bridge included is priced at $5,999. The cheaper and older Raptor Pro is priced at $1,999, but is currently on sale for $1,519.
Specifications
| Scanning accuracy | 0.02 mm |
| Volumetric accuracy | 0.02 mm + 0.08 mm/meter |
| Scanning modes | Blue laser + NIR |
| Scanning features | 34 cross lines up to 70 FPS, 7 parallel lines/single line up to 90 FPS |
| Scanning range | 5 mm³ - 4000 mm³ |
| Weight | 508 g |
| Software | Creality Scan 4 |
| Connectivity | USB, Wi-Fi (with Scan Bridge accessory) |
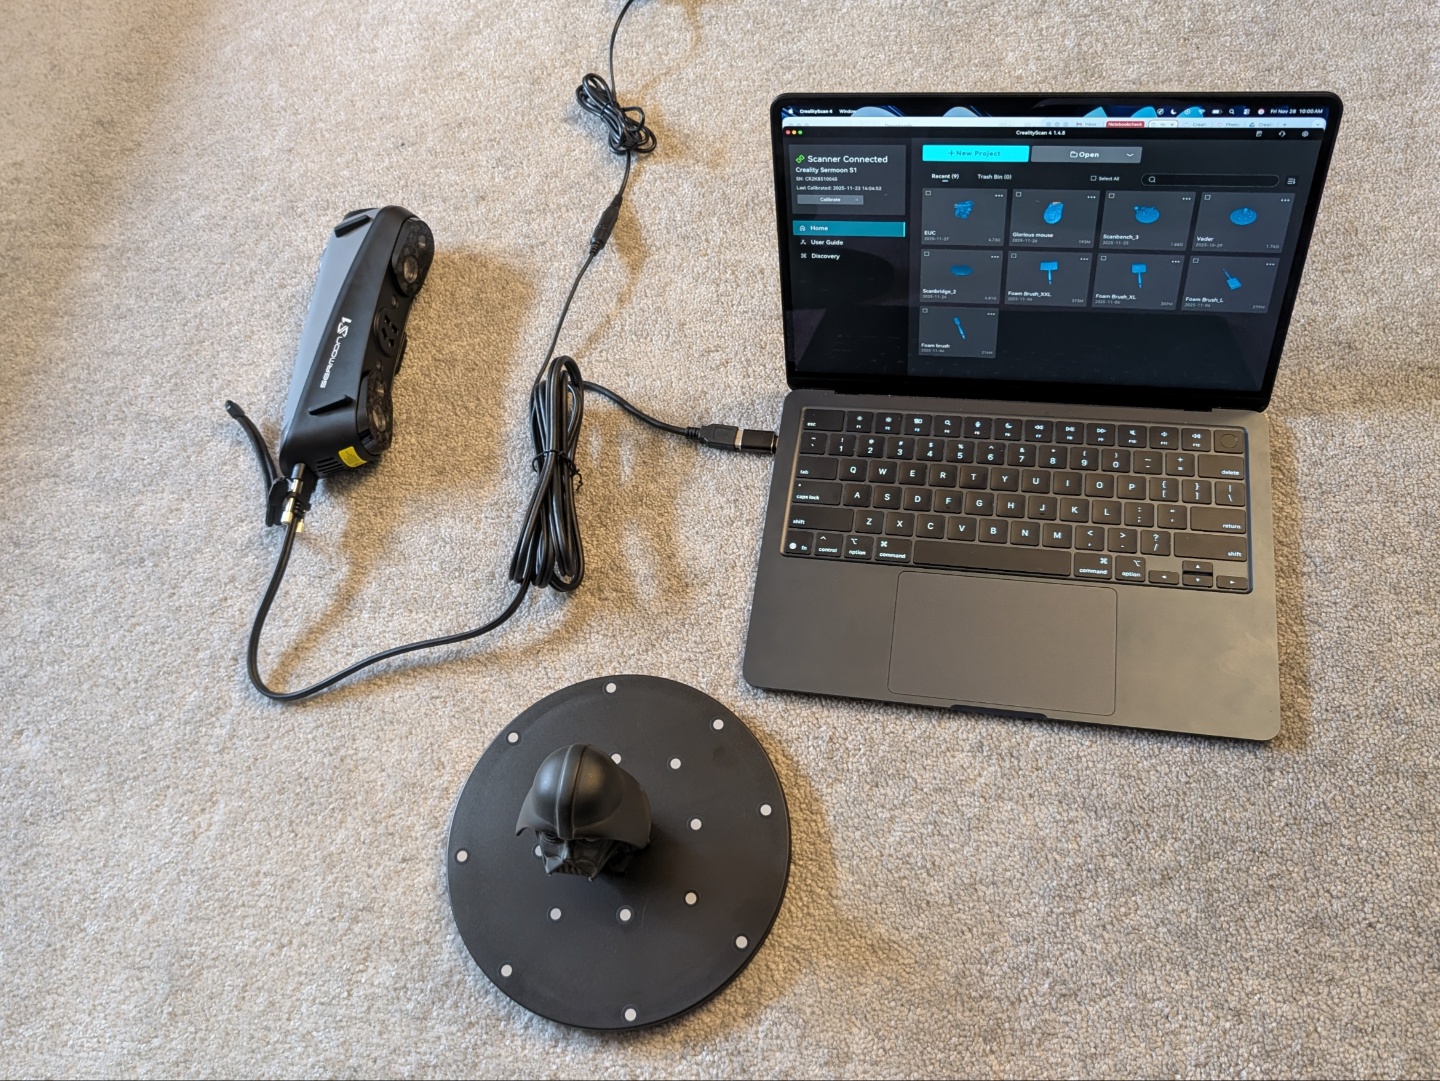
Unboxing and accessories
- Sermoon S1 3D scanner
- Power adapter and regional plug attachments
- USB Type-C cable
- USB Type-A to Type-C converter
- Calibration board
- Markers
- Microfibre cloth
- Documentation
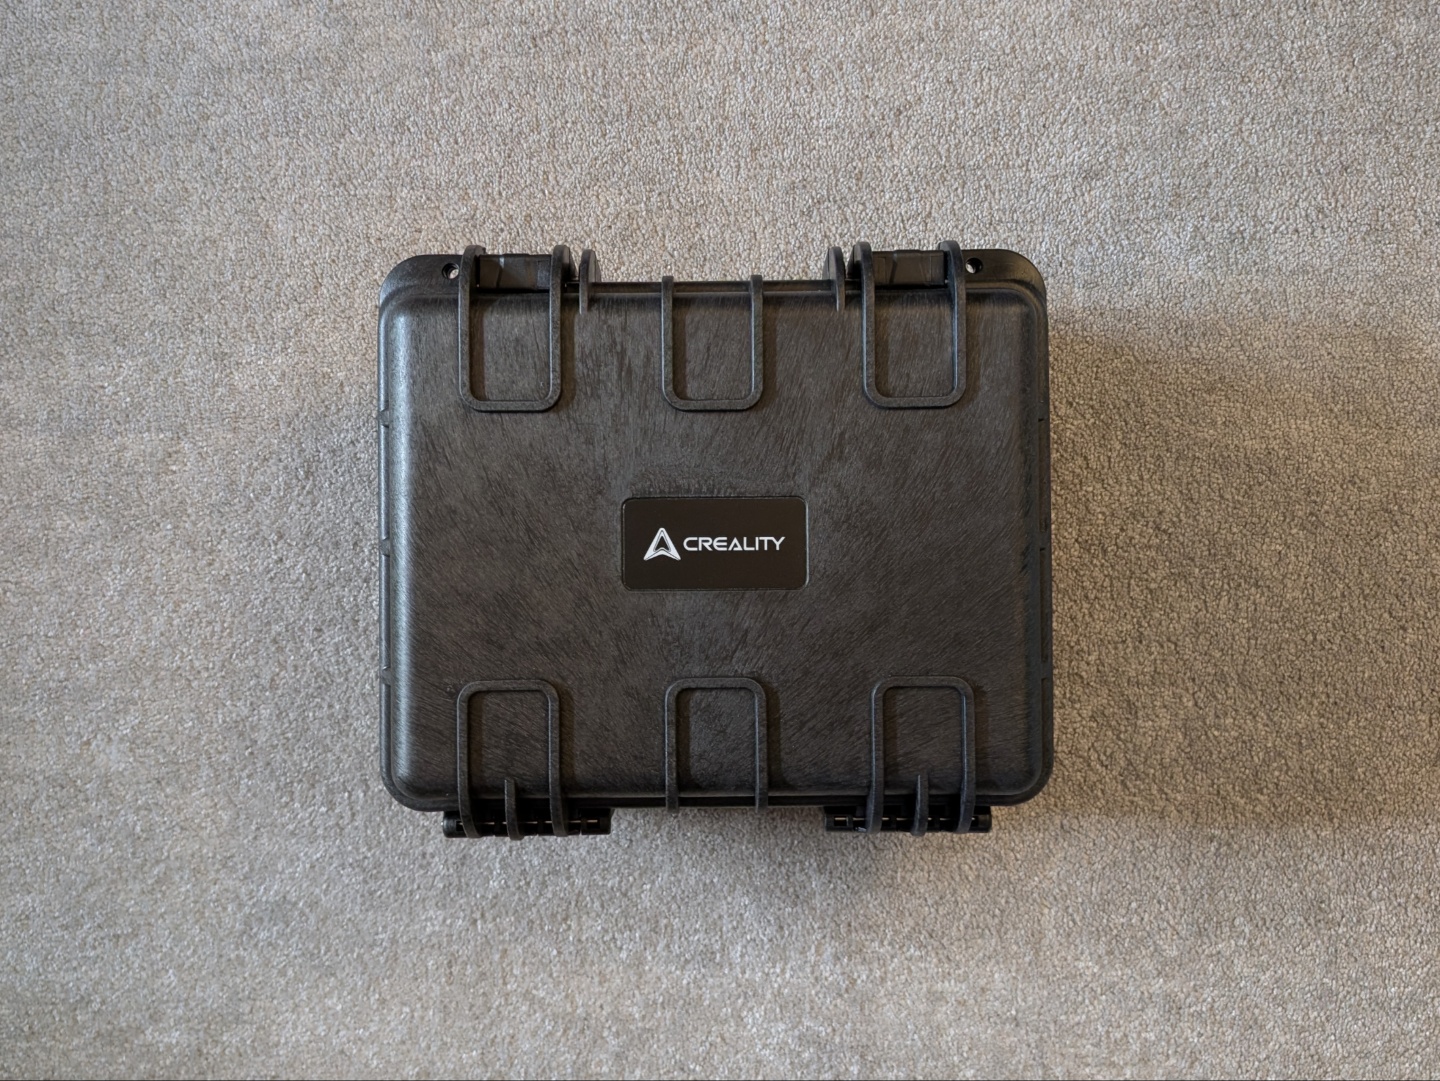
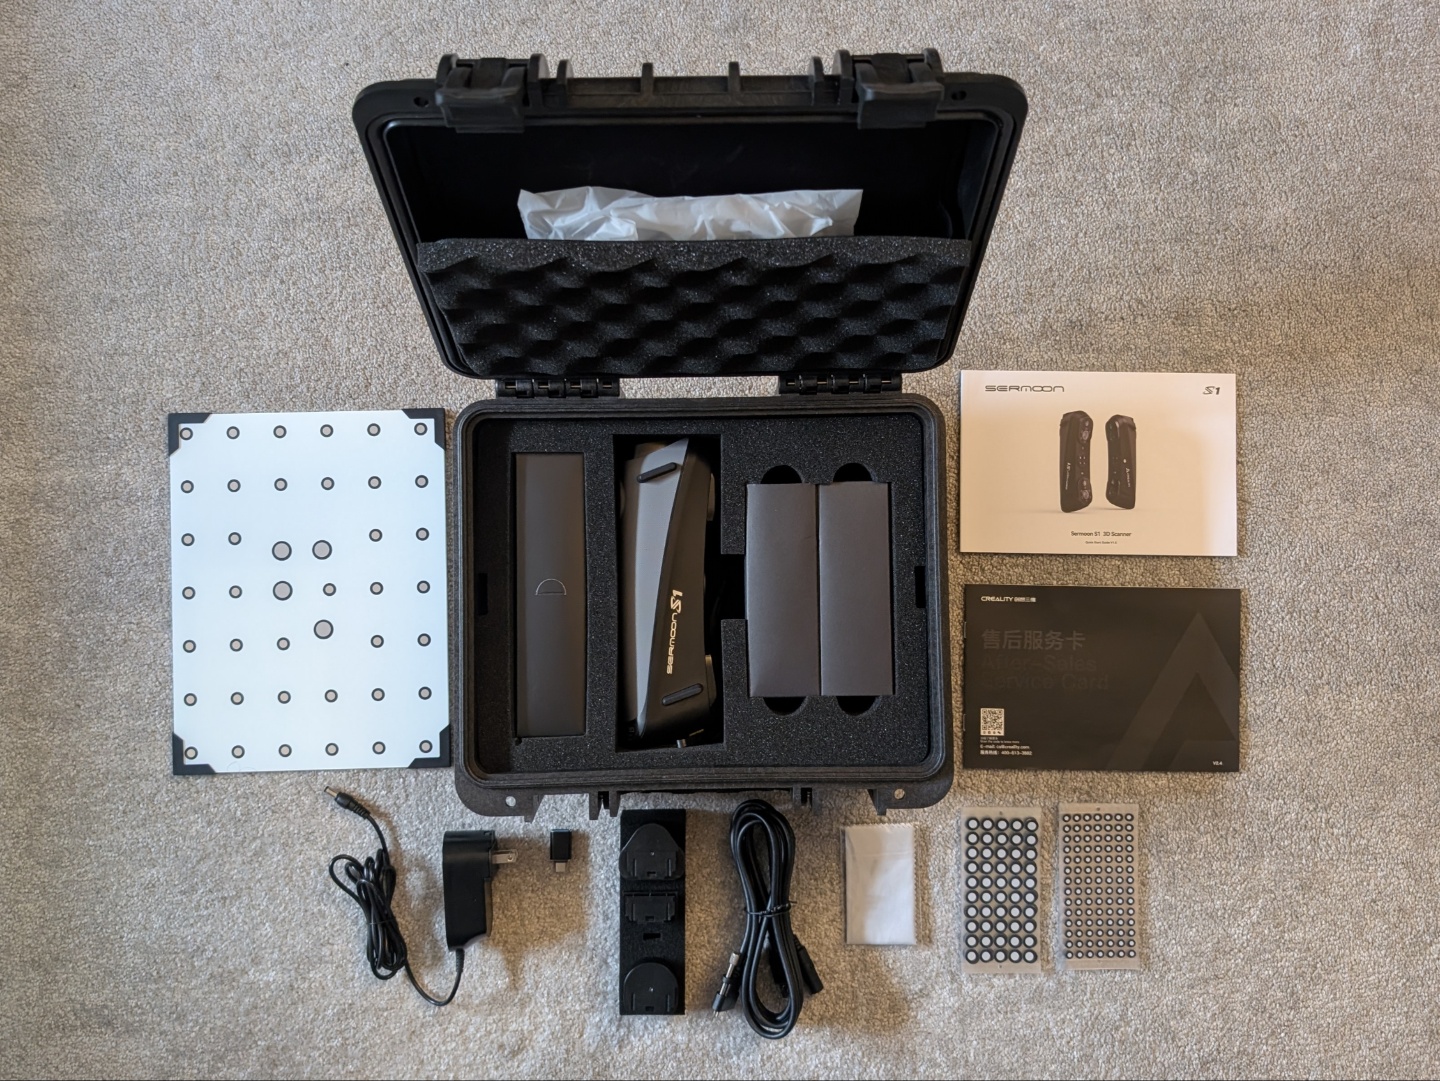
The Sermoon S1 is packed safely inside a pelican case making it easy to store and carry around. The cables have and power adapter have their cutouts in the foam, and there is a pocket on the lid for all the documentation and the ample markers. The pelican case also houses the calibration board at the bottom, neatly hidden away since it’s not required often.
Design and setup
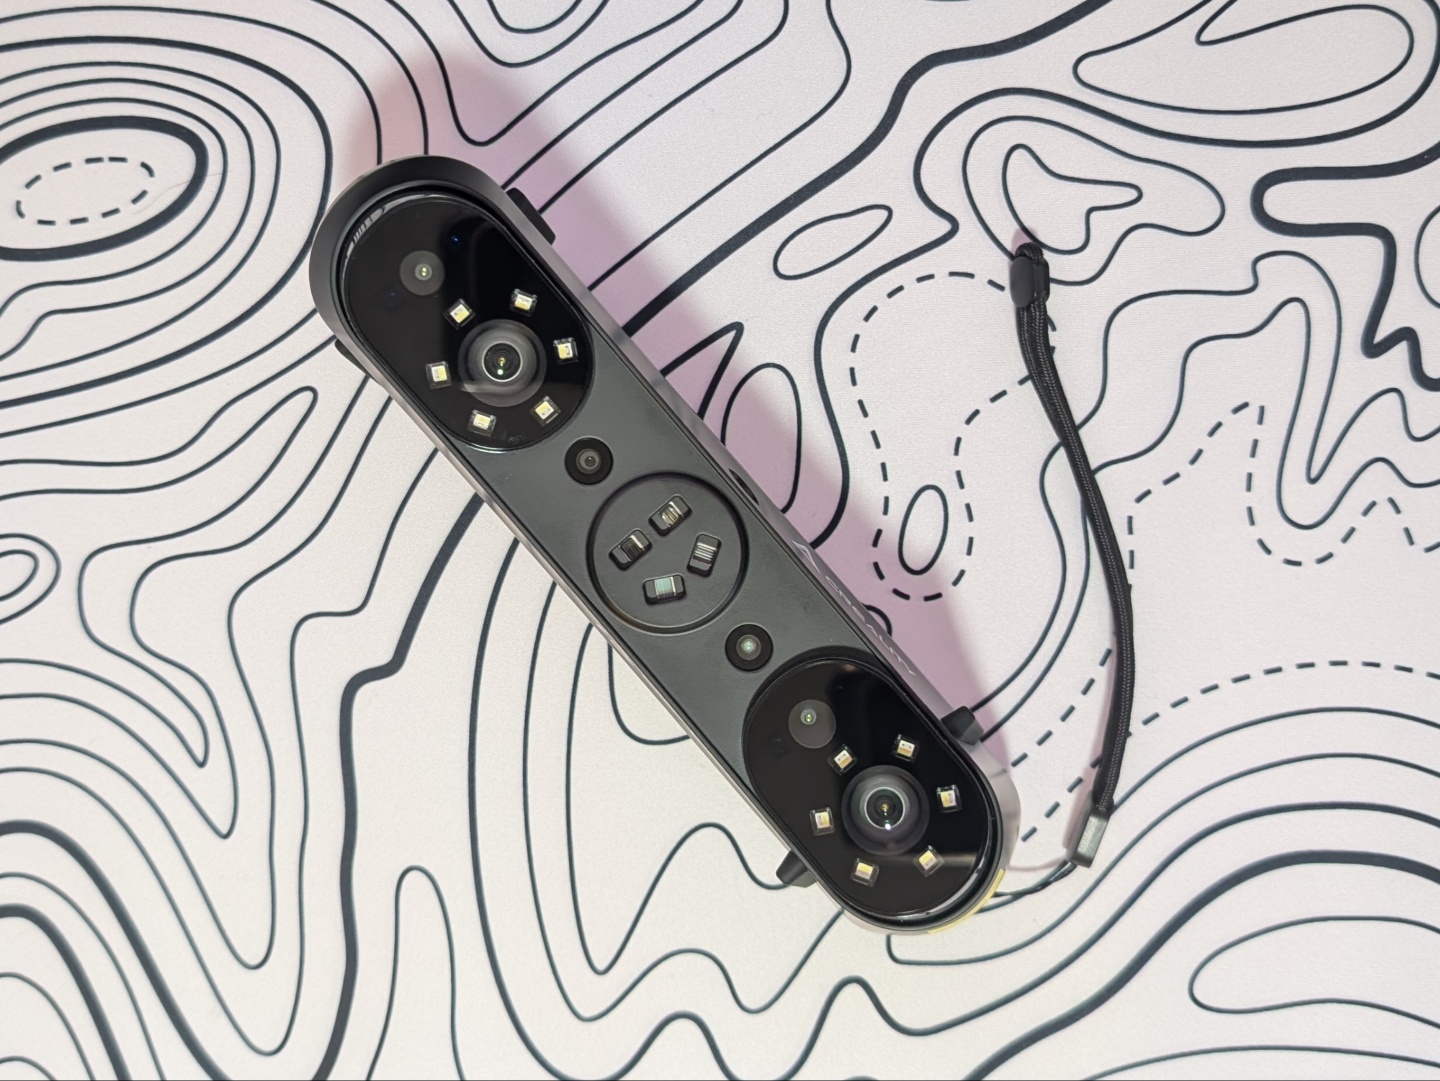
Following the handheld design of the Raptor series of 3D scanners, Creality has maintained the same form factor and overall shape with Sermoon S1. It feels solid in the hand and the rubber grip make it comfortable to hold. There is a sling attached to the bottom to ensure the scanner doesn’t fall but we never had that issue anyway. There is also a locking USB Type-C port at the bottom to ensure stable connection during scanning.
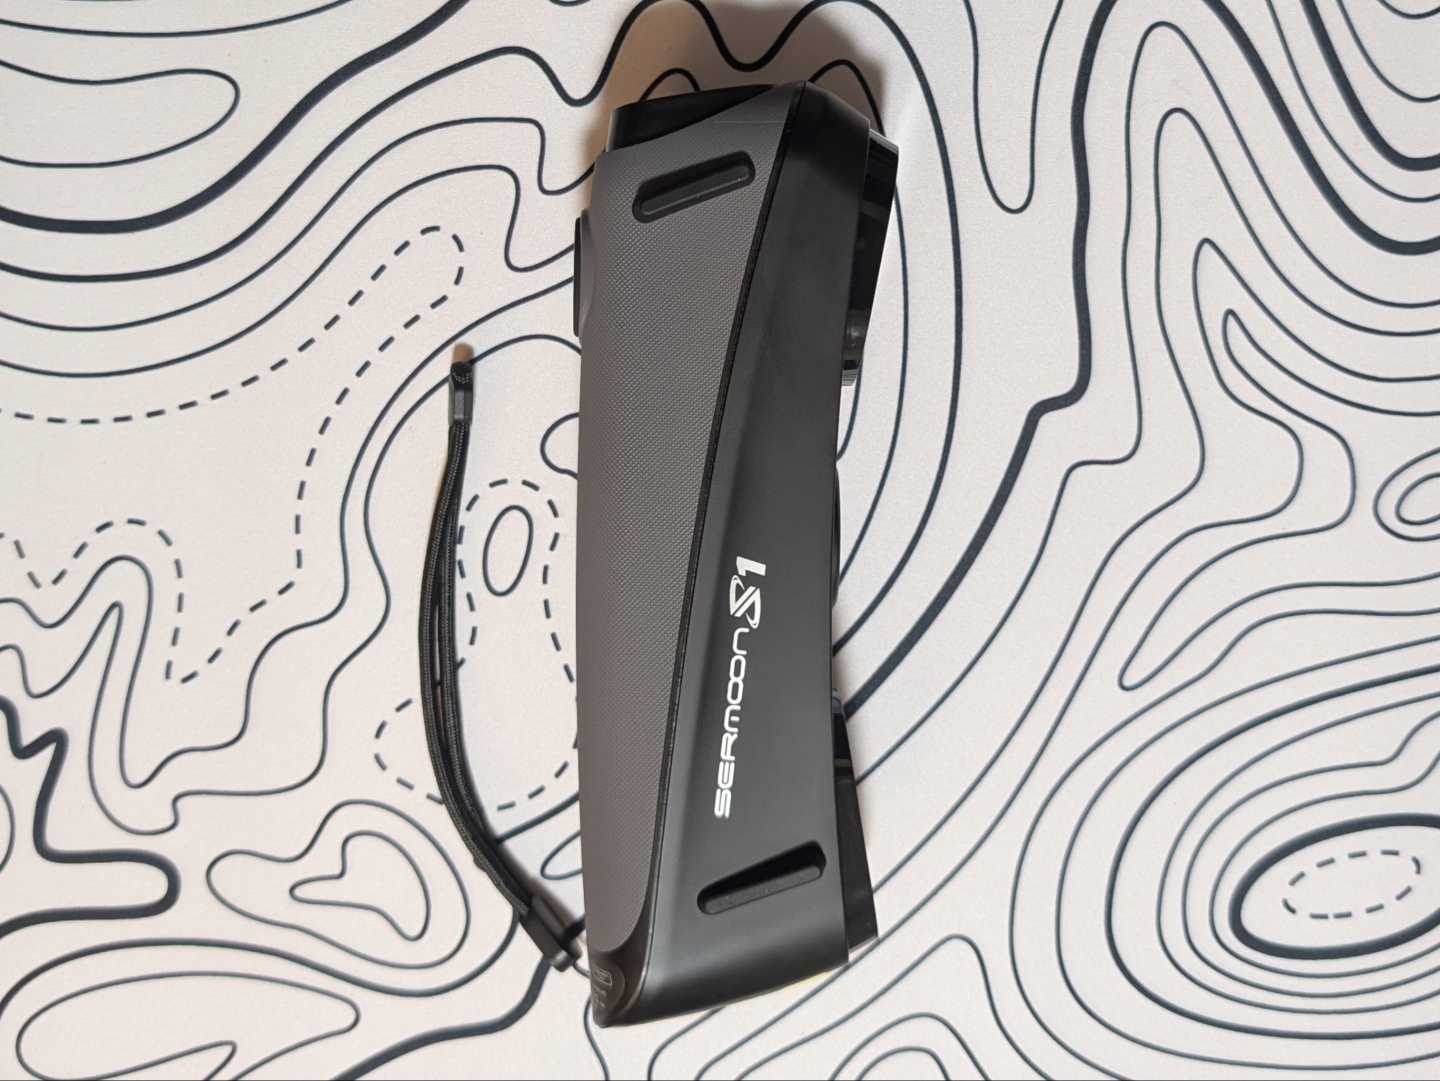
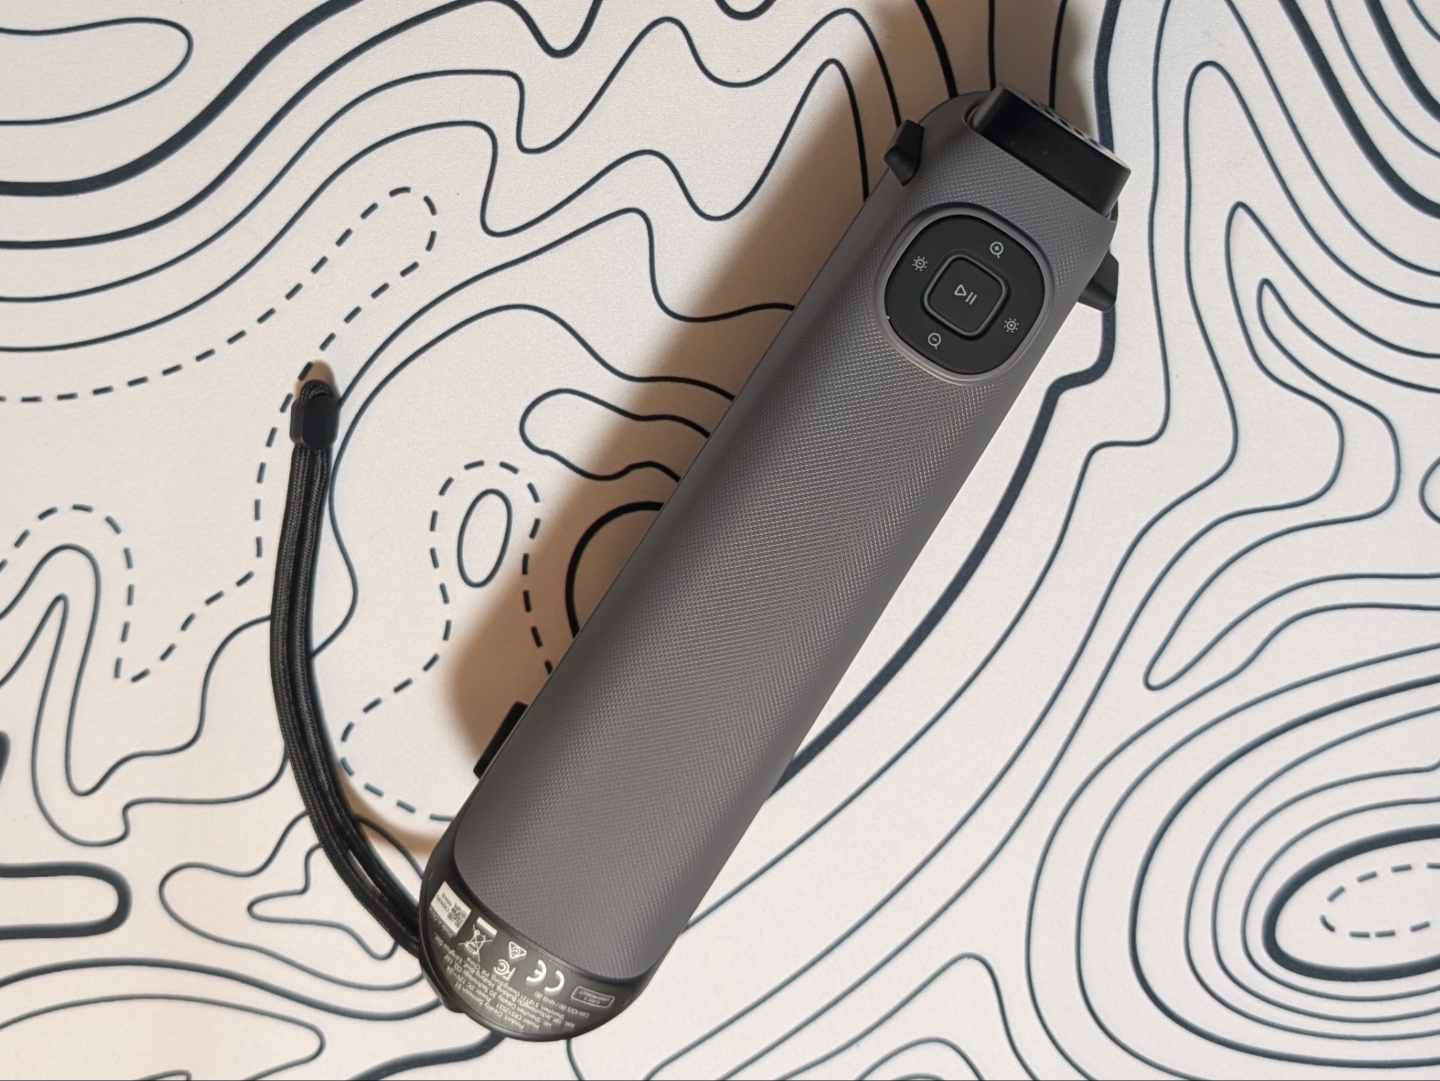
The Sermoon S1 has active cooling inside so you can hear the fan going when in use. It’s audible but not loud so nothing to worry about there. Once hooked up to a computer or laptop, the Creality Scan software handles the rest of the setup. The scanner demands a USB 3.0 connection and can sometimes detect a USB 3.0 port as a USB 2.0 port. The only solution to this is trying to reconnect till it accurately recognizes the port. We faced this issue a few times during the test period on Windows, but it worked seamlessly on an M4 MacBook Air.
Features and capabilities
The Sermoon S1, like the Raptor series, has blue laser and infrared or NIR (Near-Infrared) scanning. The blue laser mode can be used with cross lines, parallel lines, and single line, each with their benefits and shortcomings (more in the performance section). For cross lines, there are 34 blue lasers that illuminate the object and capture detail impressively quickly. The seven parallel lasers also capture detail quite fast and allow scanning more closely for finer details. The single line laser is ideal for scanning holes and grooves as it can relay depth better than the other two.
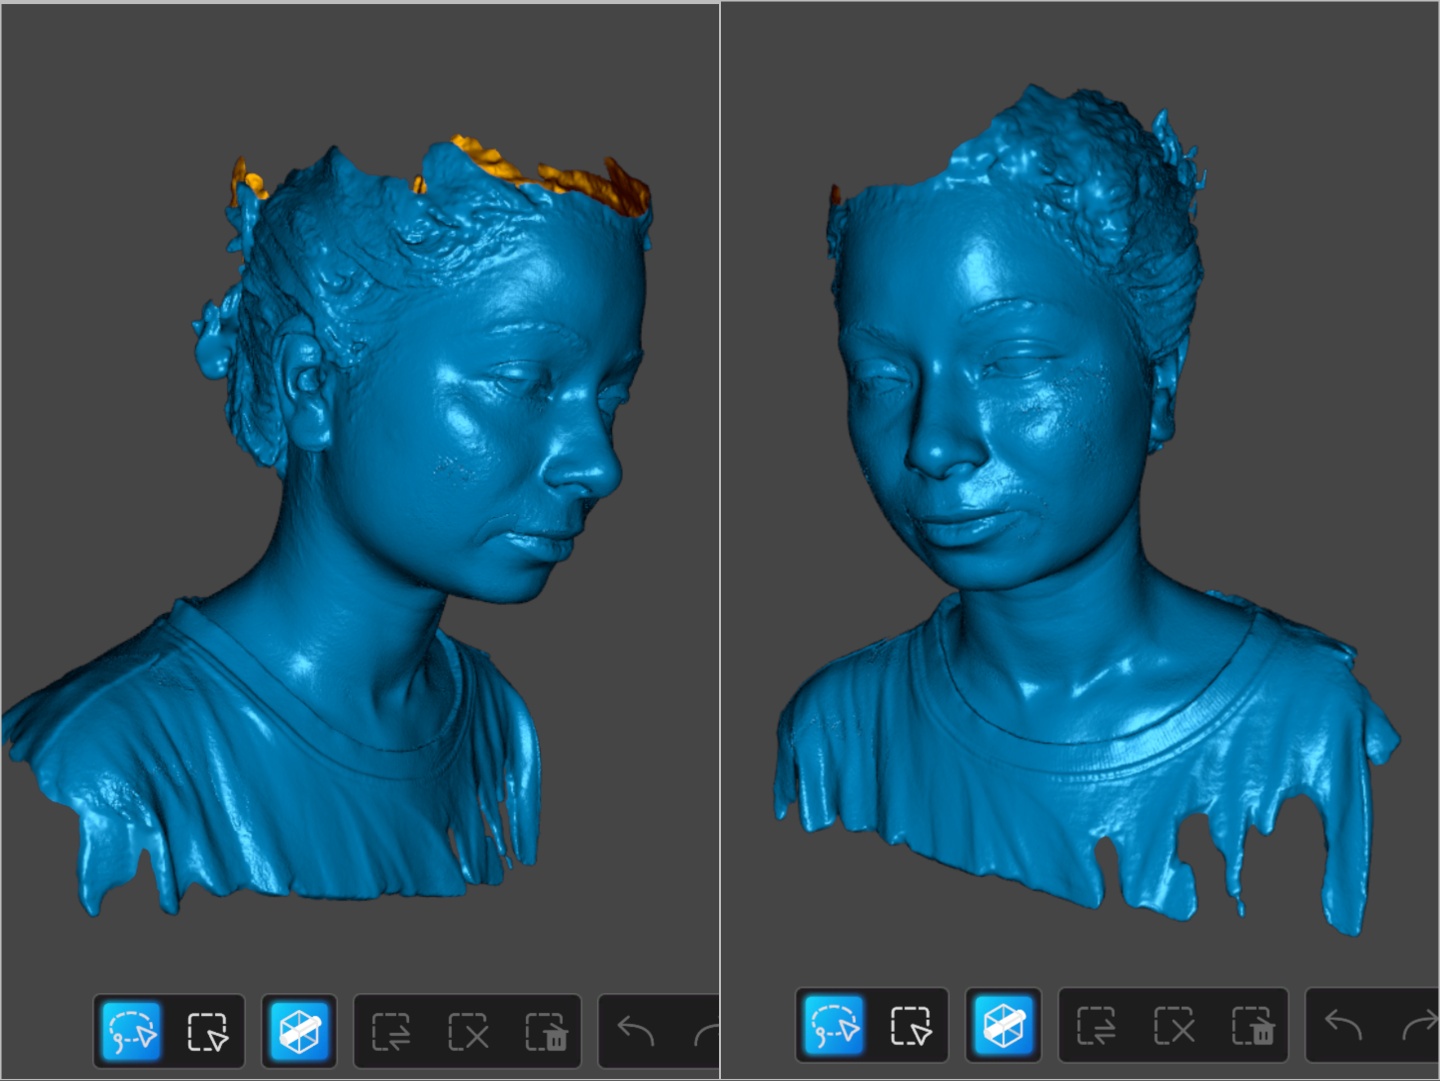
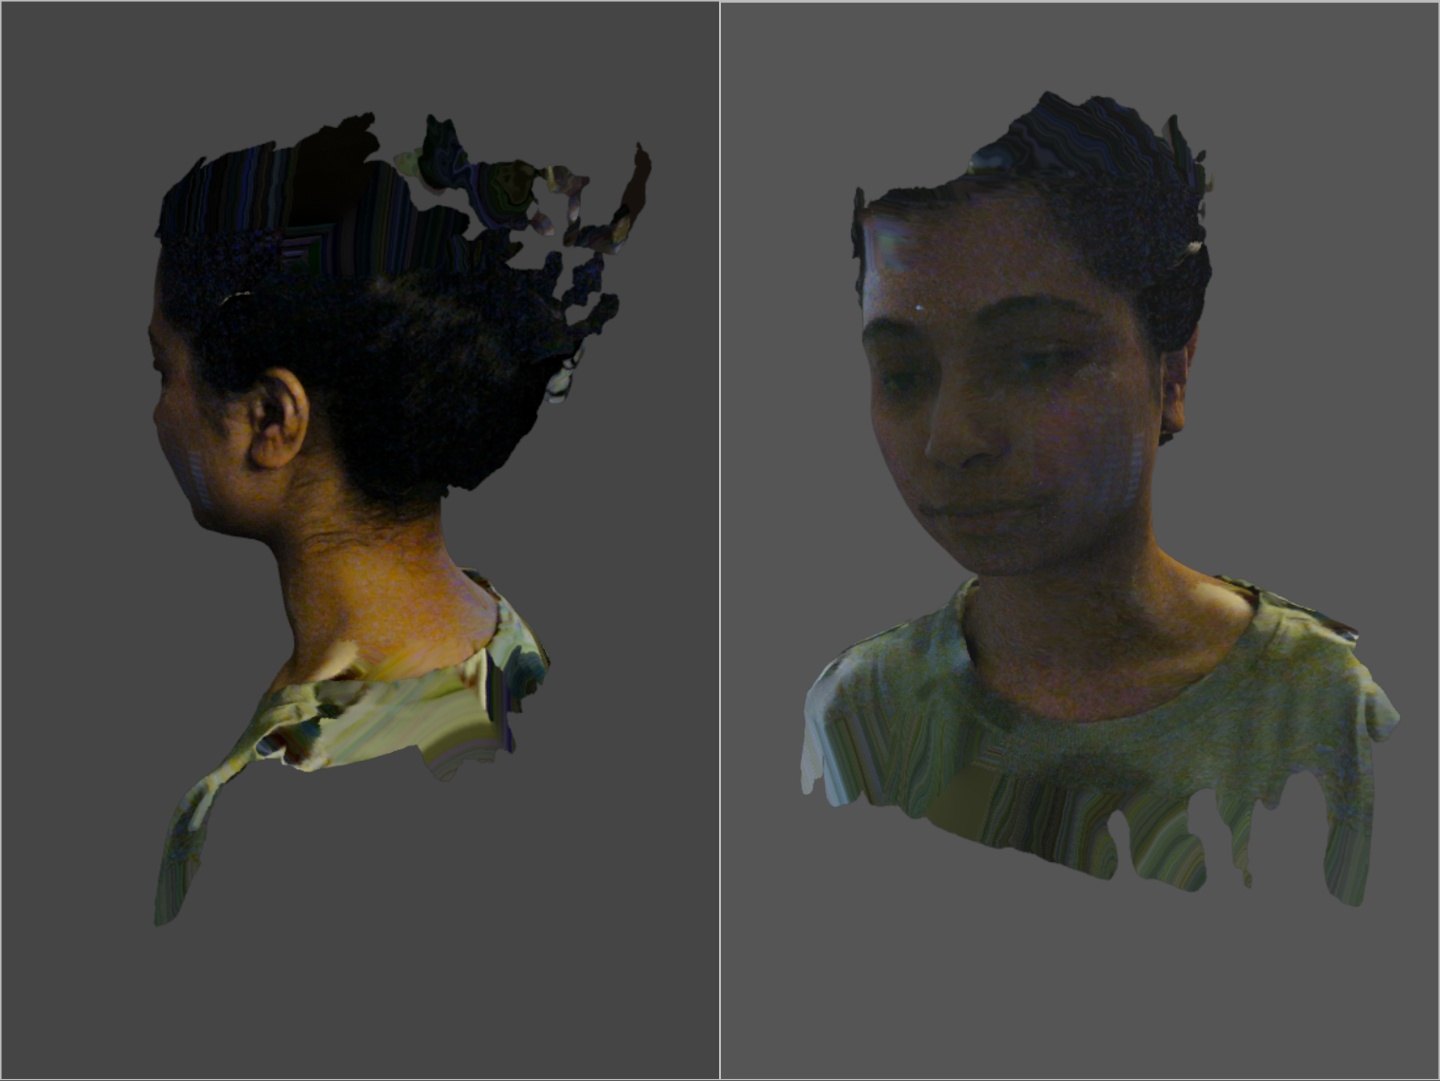
The Sermoon S1 is packed with cameras including two wide-angle, a color camera, two high-accuracy cameras, and as mentioned before, an NIR camera. The four-lens NIR scanning allows for fast, marker-free scanning of large objects as well as the human body or parts of it. It can also capture a color map for a sufficiently close 1 to 1 virtual representation of a real-world subject.
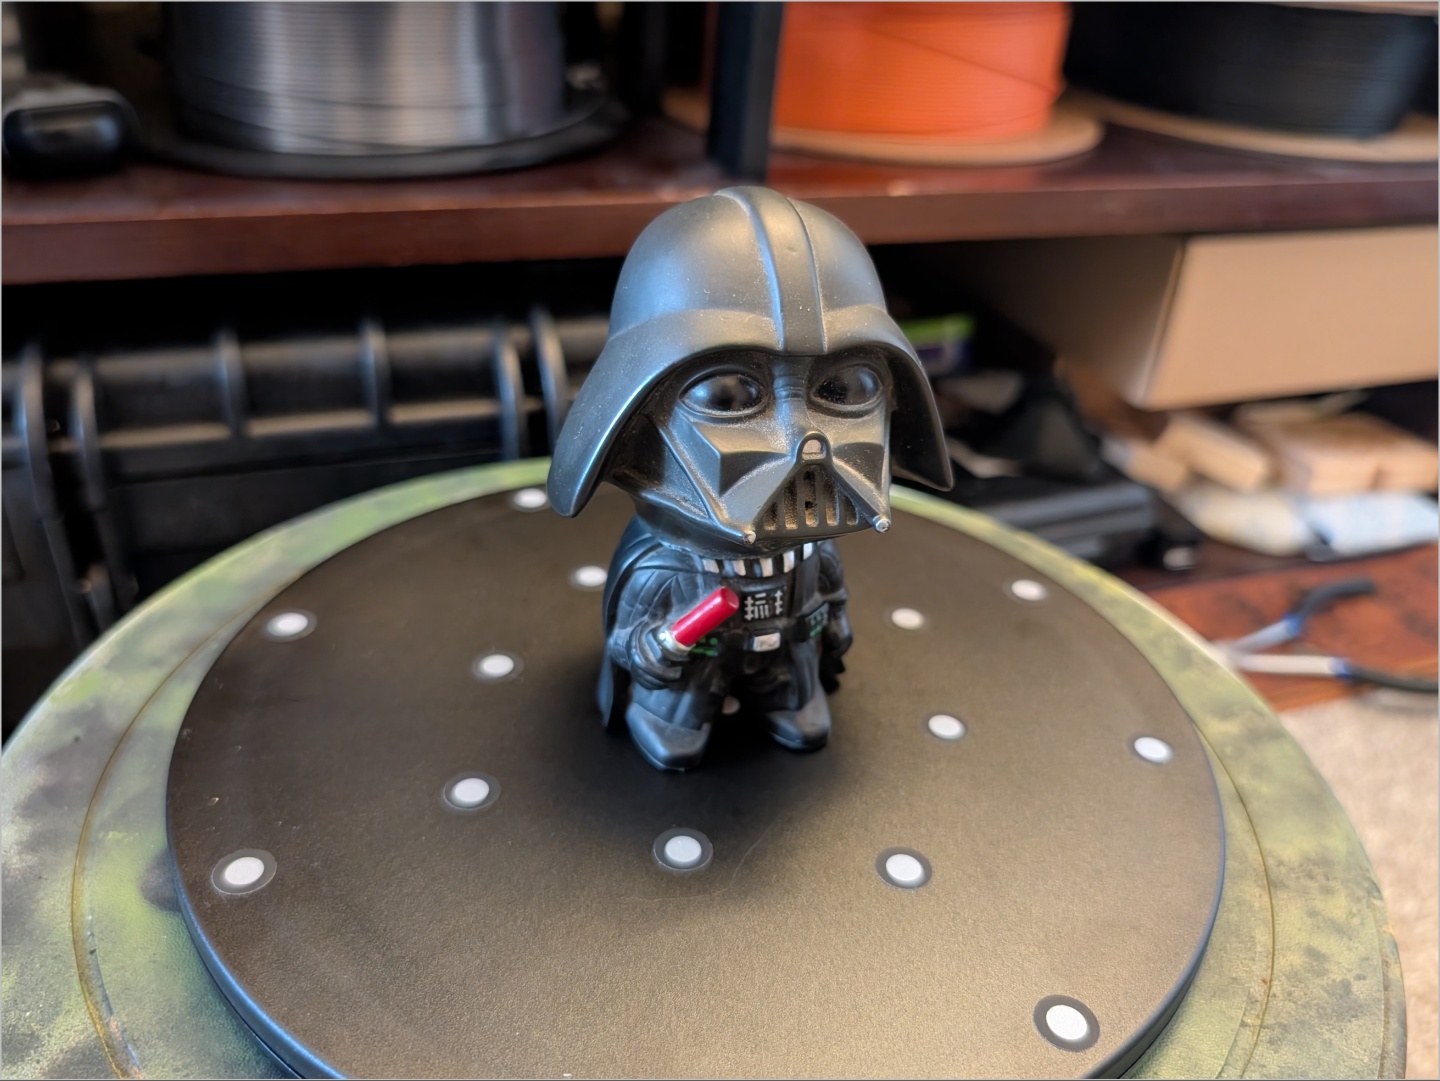
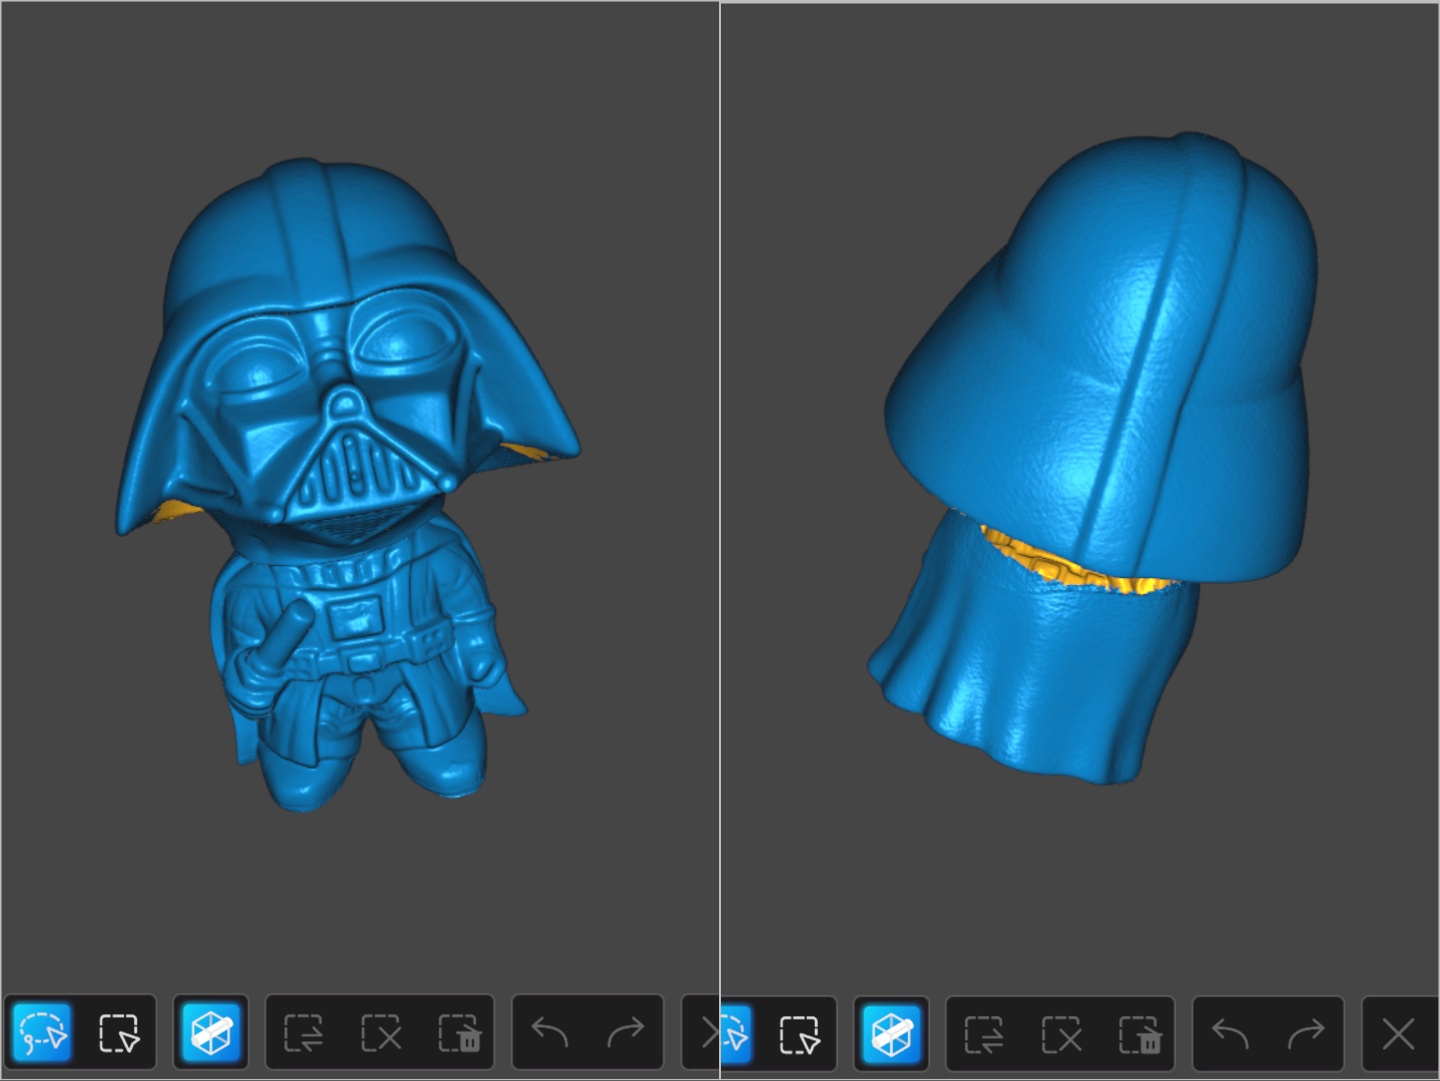
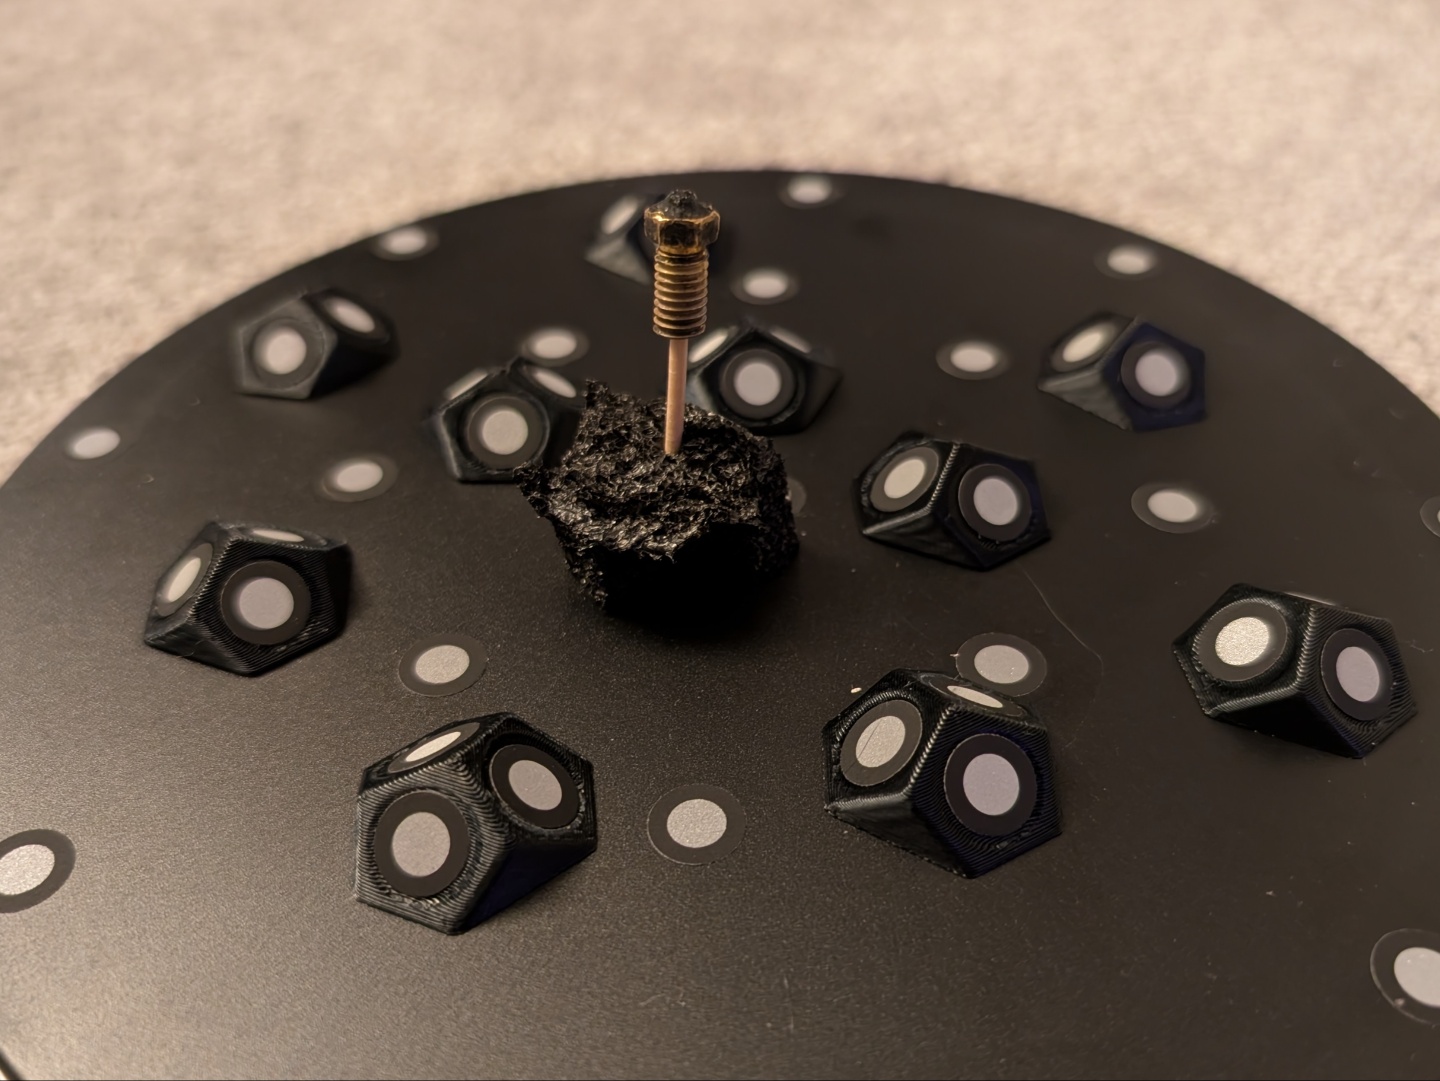
It is known that 3D scanners often struggle with black objects and reflective objects as they disrupt the lasers from returning to the scanner. As seen with some of the scans in the performance section, the Sermoon S1 does well with black objects when enough markers have been placed.
Performance, accuracy, and software
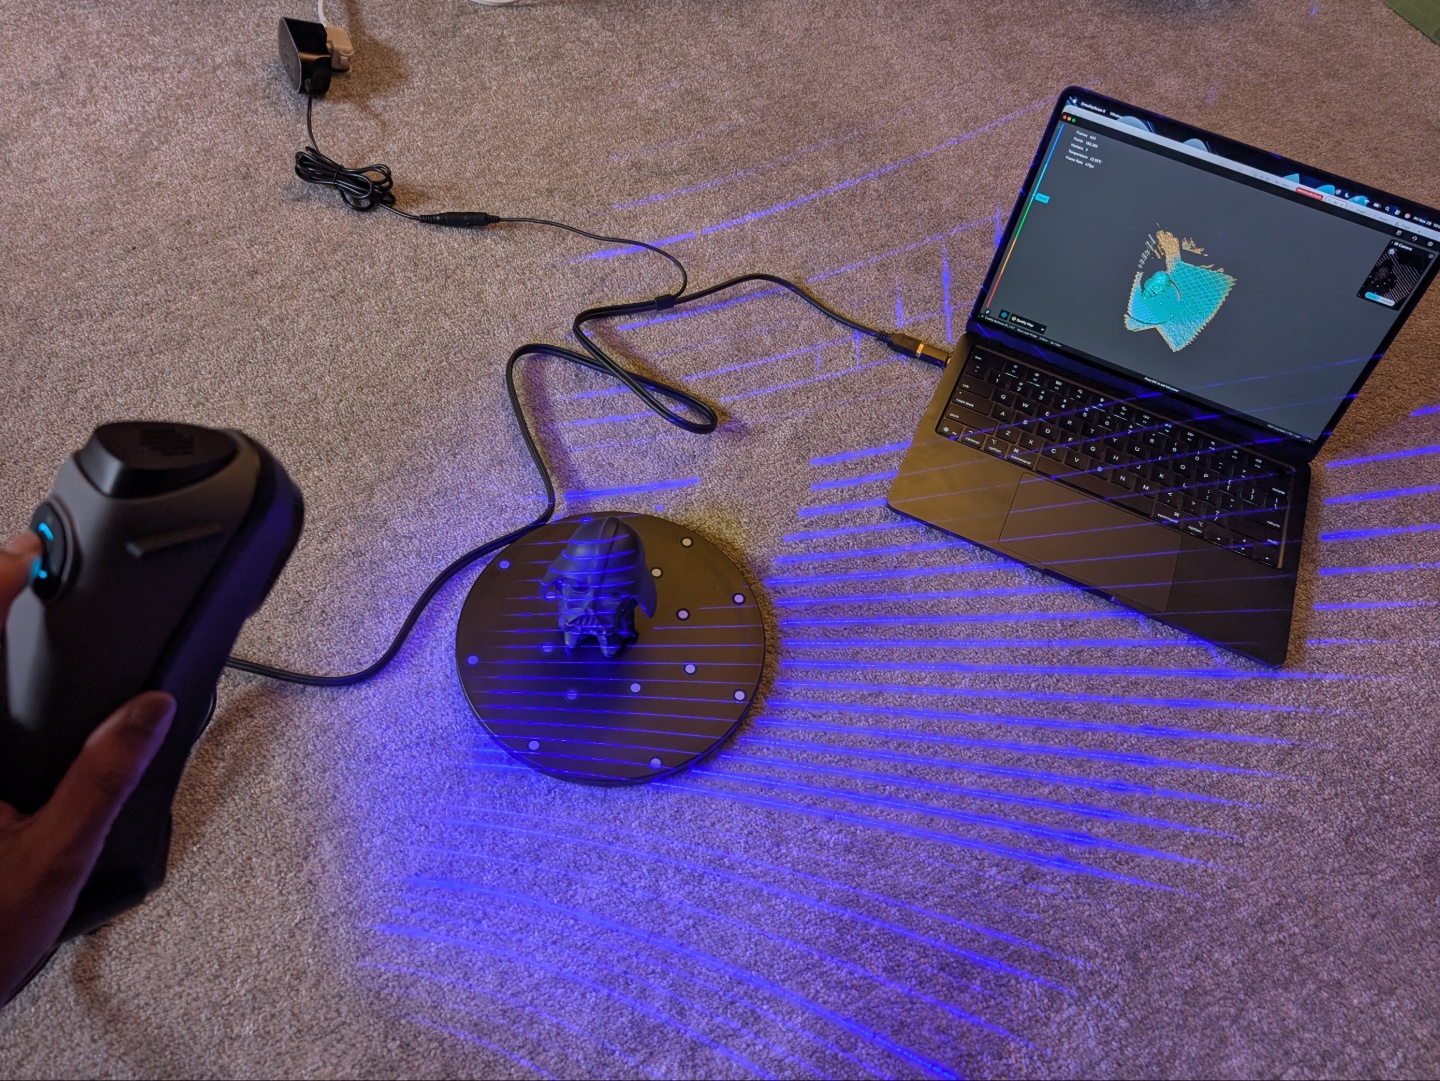
The Sermoon S1 3D scanner is capable of up to 90 FPS scanning speed, but that depends on the capabilities of the system it is connected to. On first connections, the Creality Scan software runs a performance test to determine the same. It reported the M4 MacBook Air to have “Average PC performance” for up to 57 FPS in blue laser mode and up to 30 FPS in infrared mode. A wireless connection through the Scan Bridge limits that to 45 FPS and 20 FPS respectively.
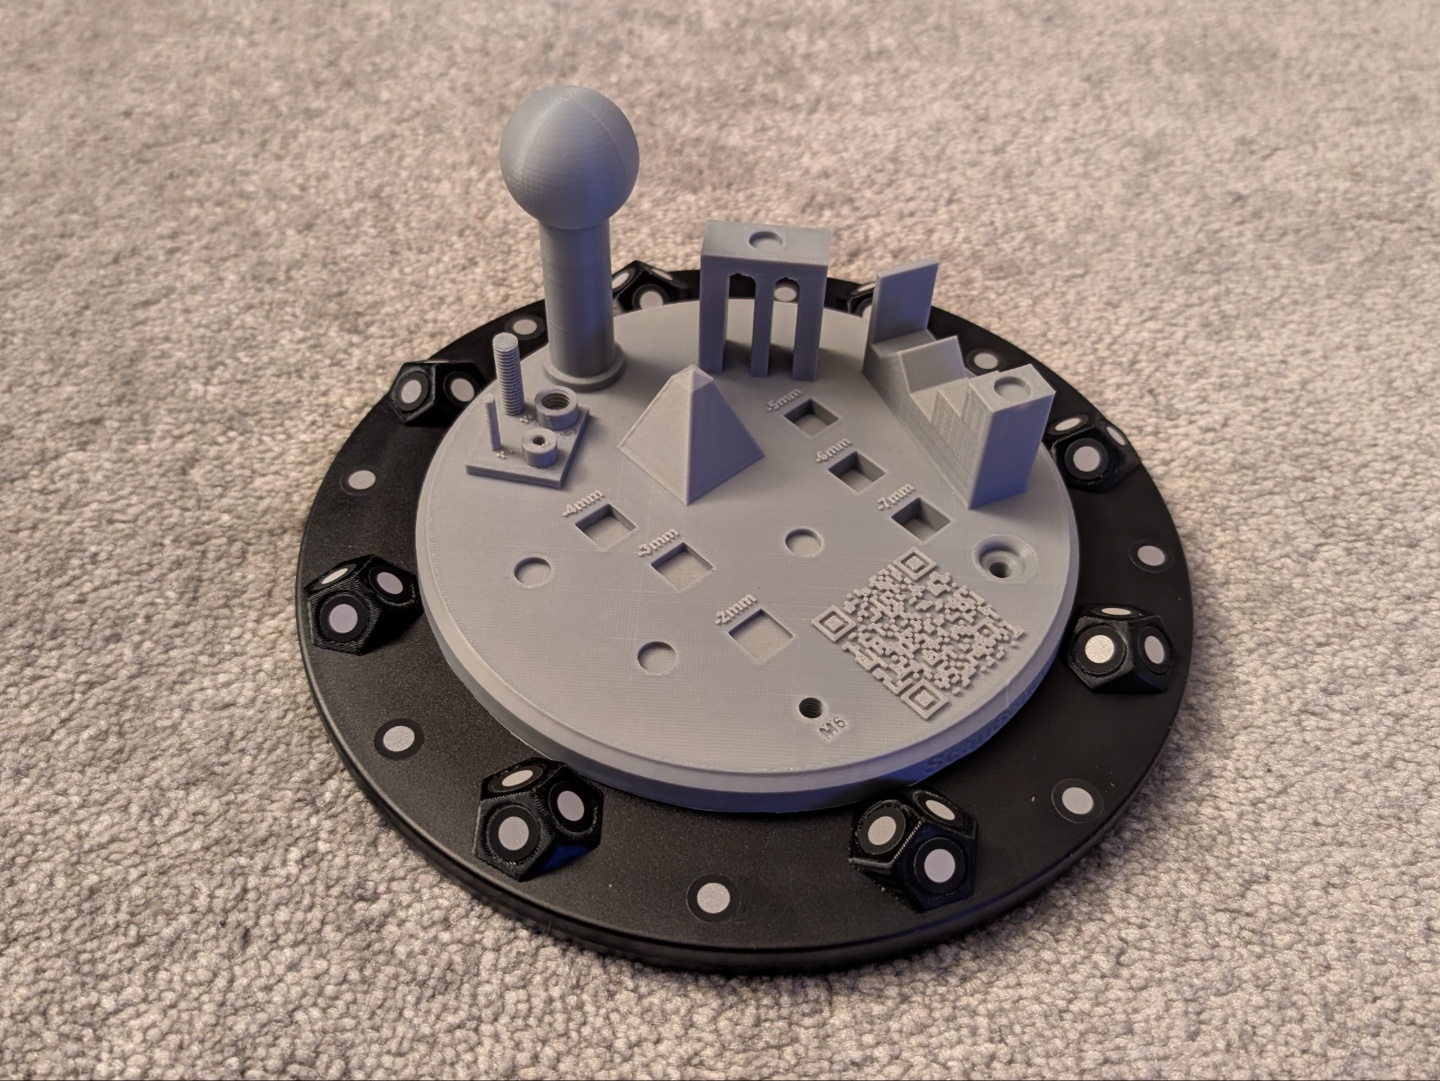
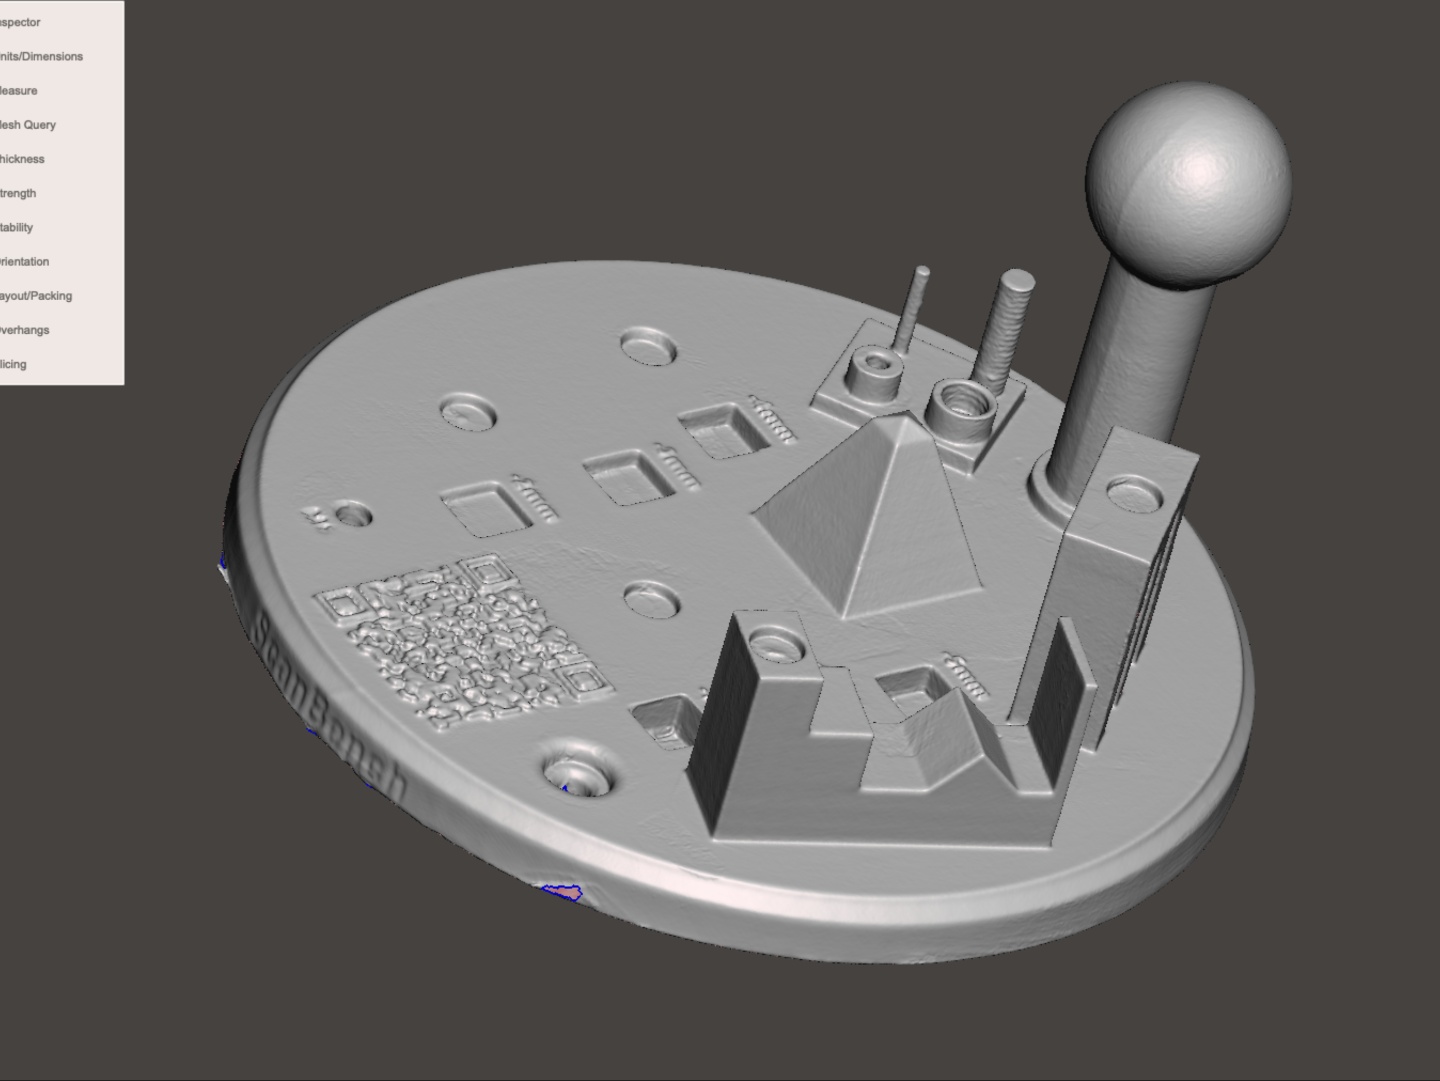
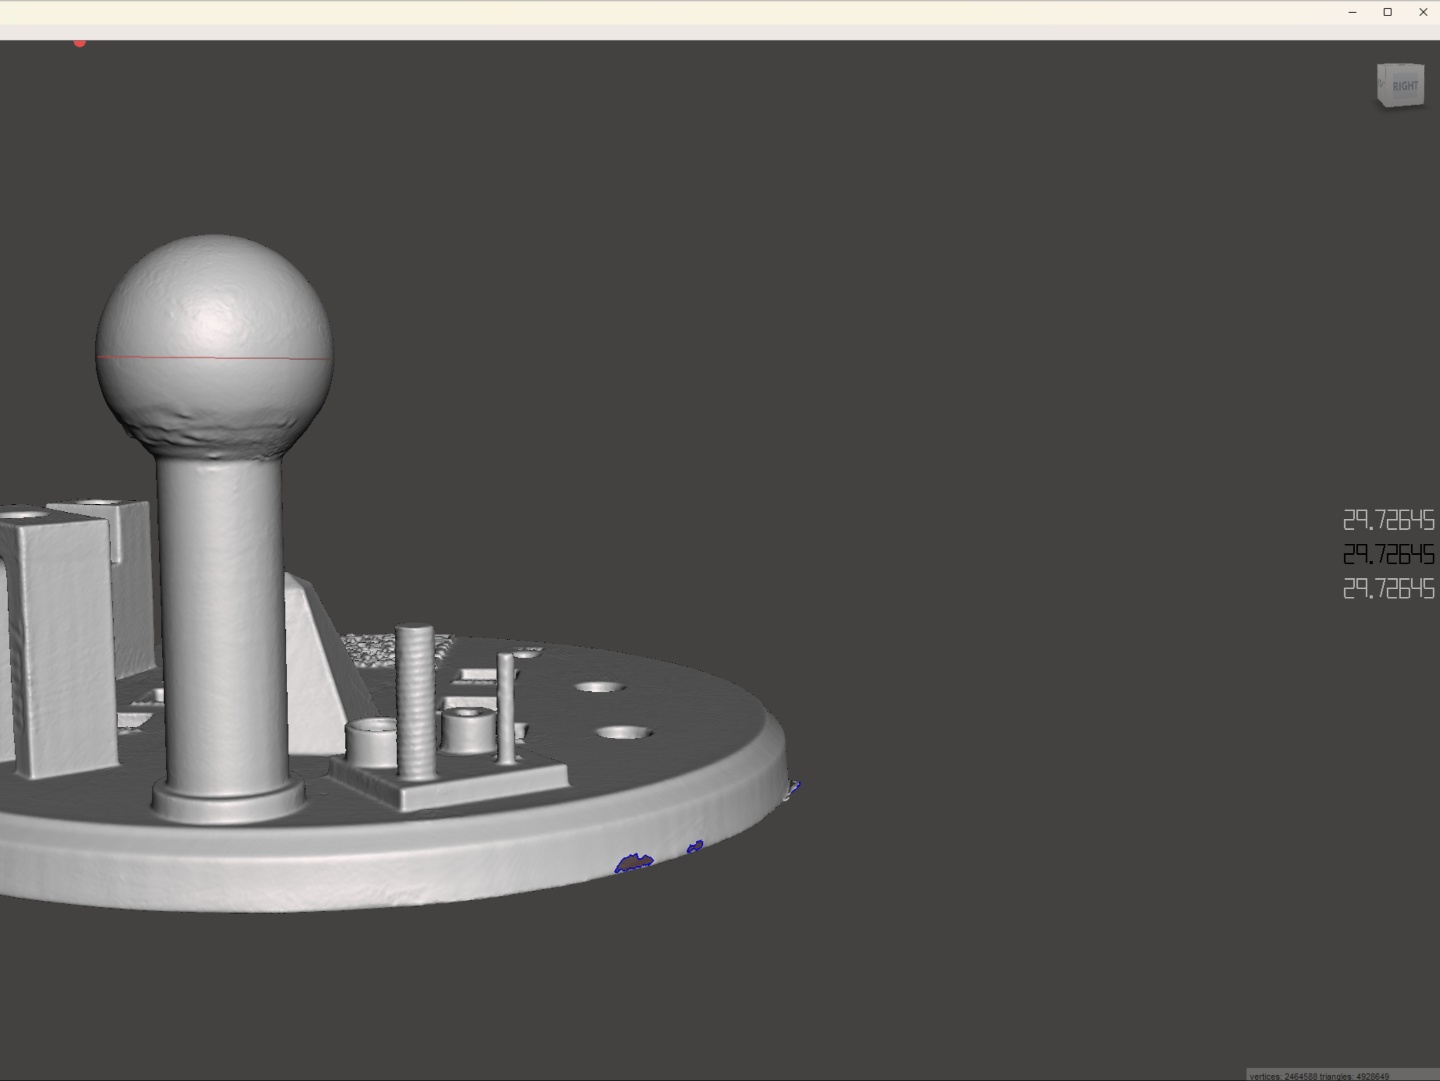
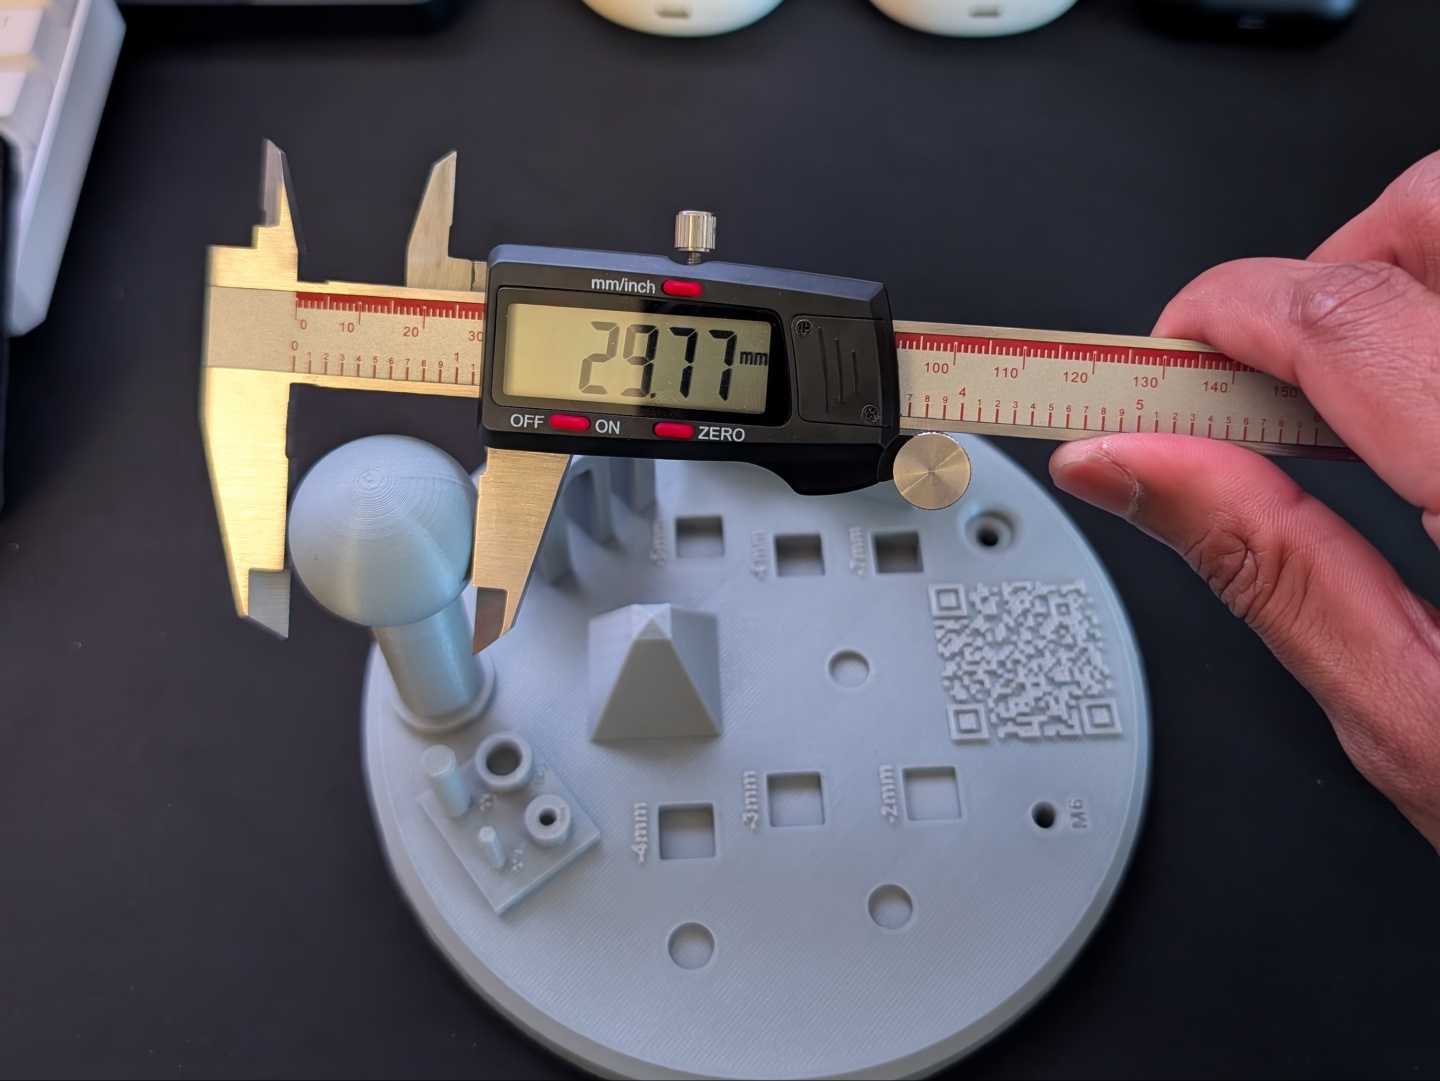
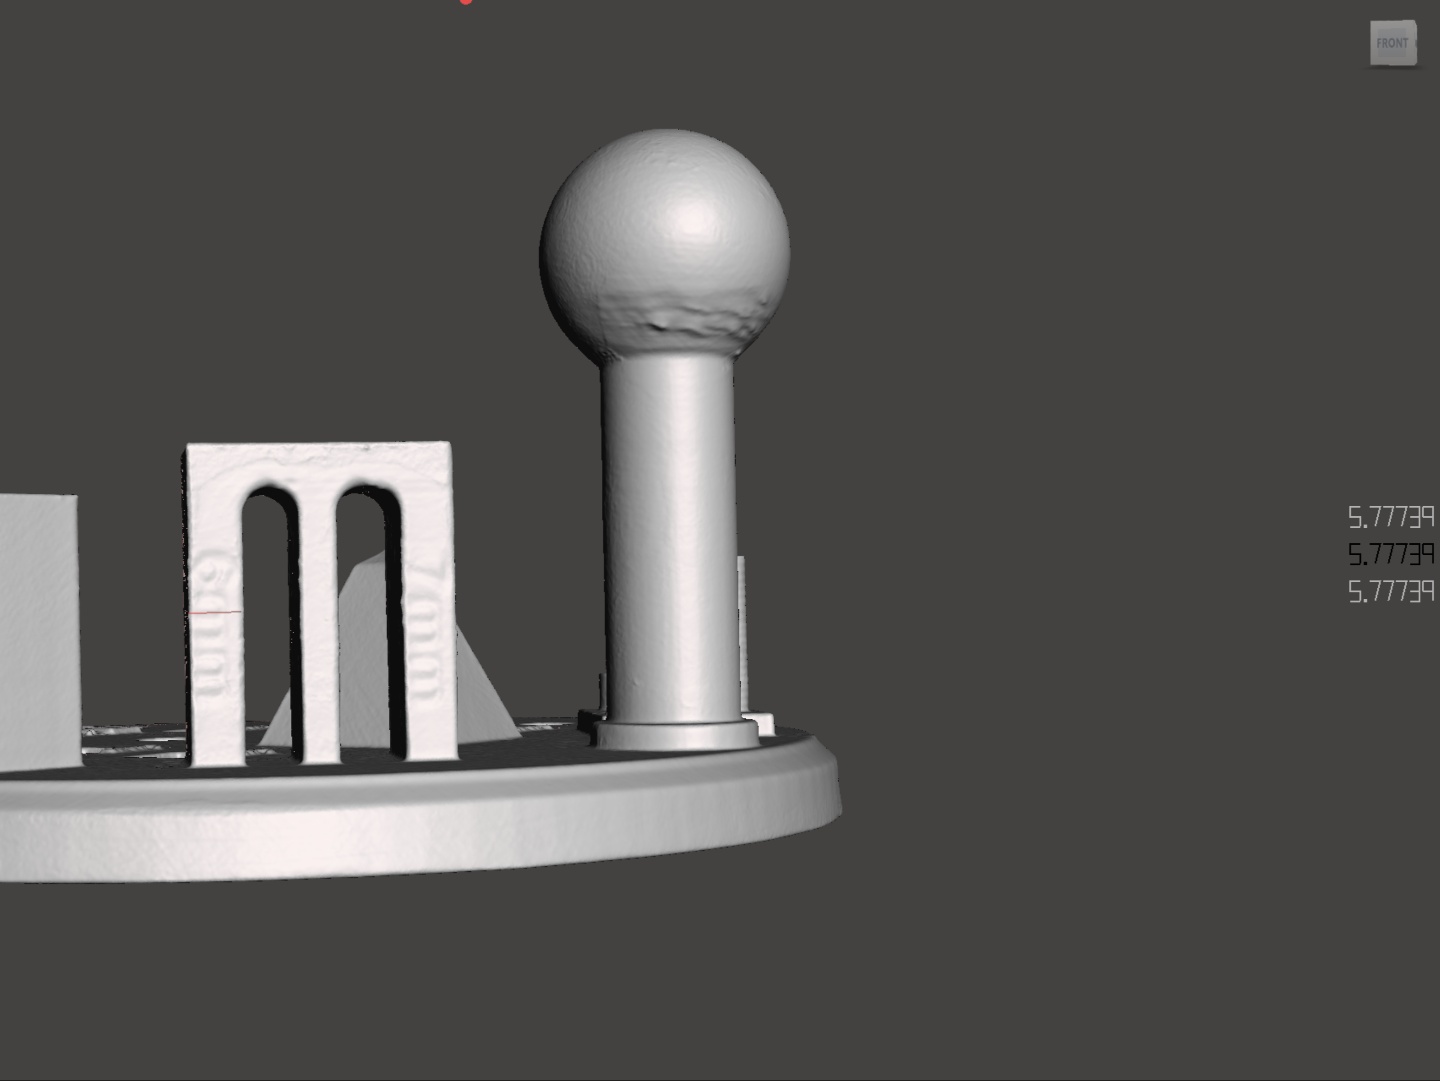
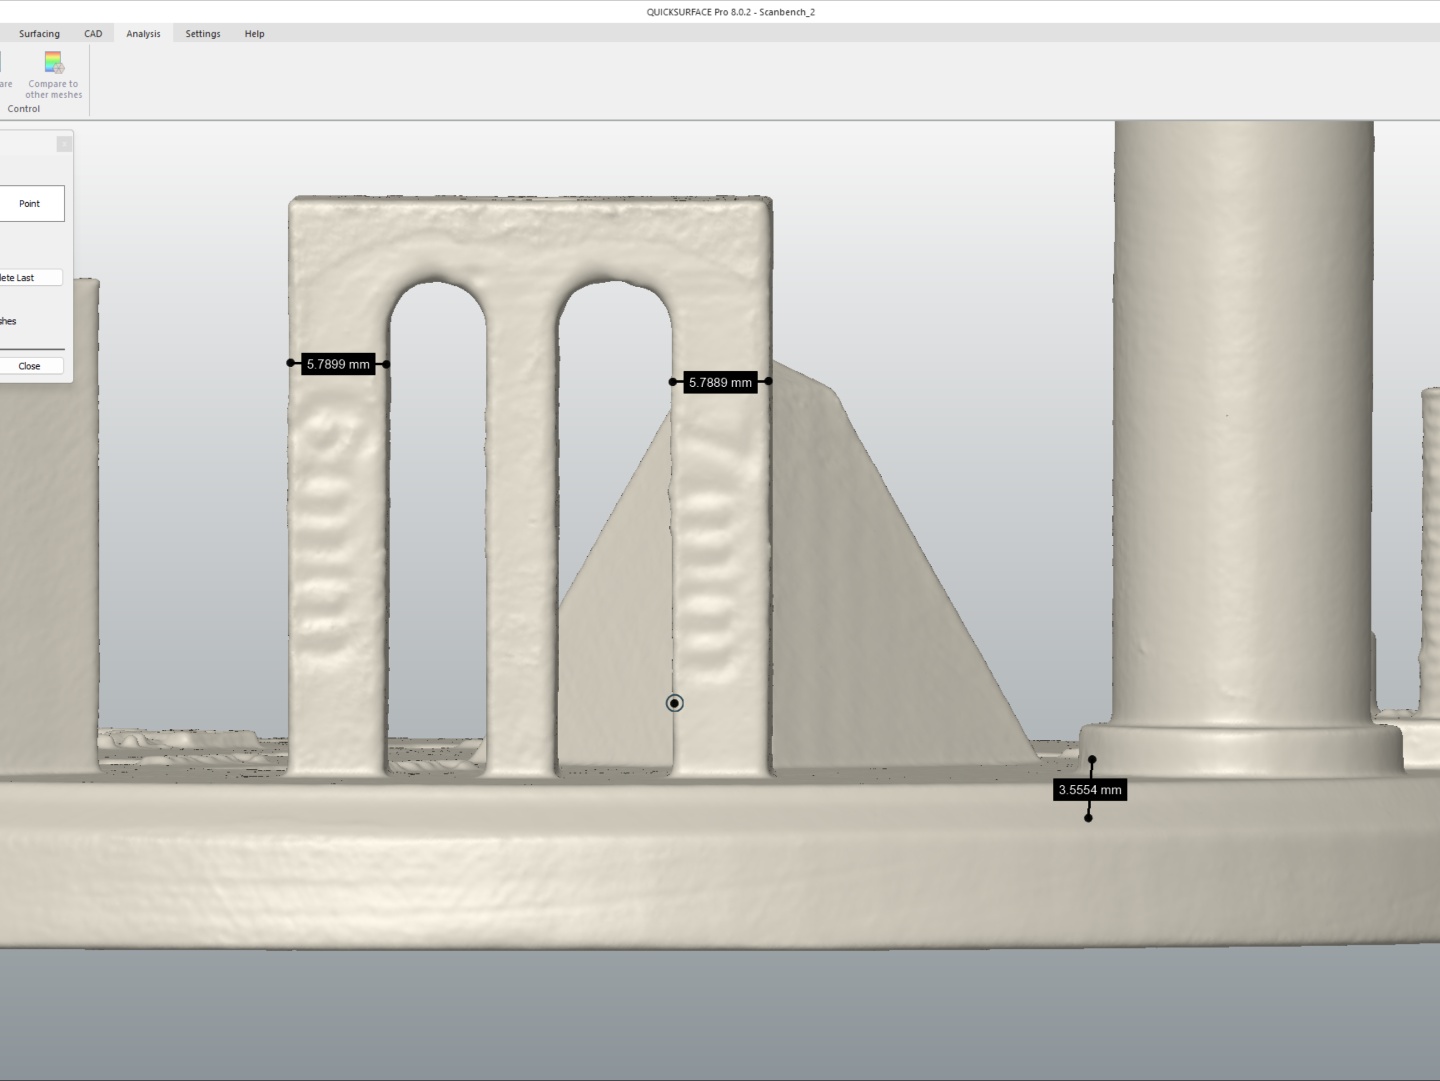
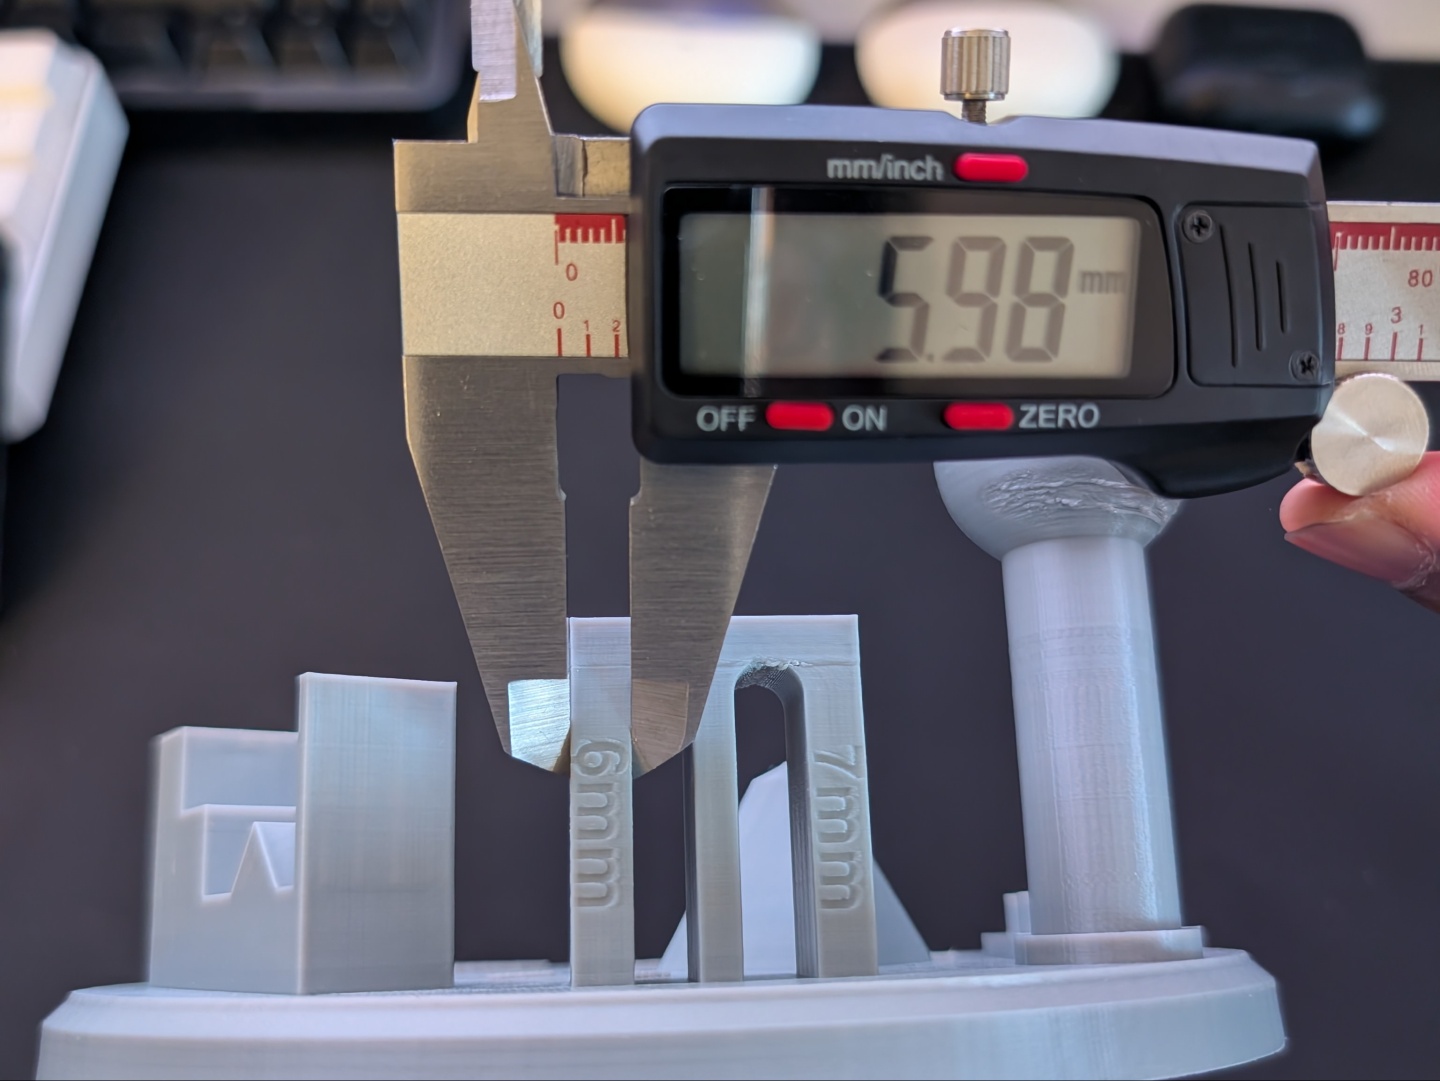
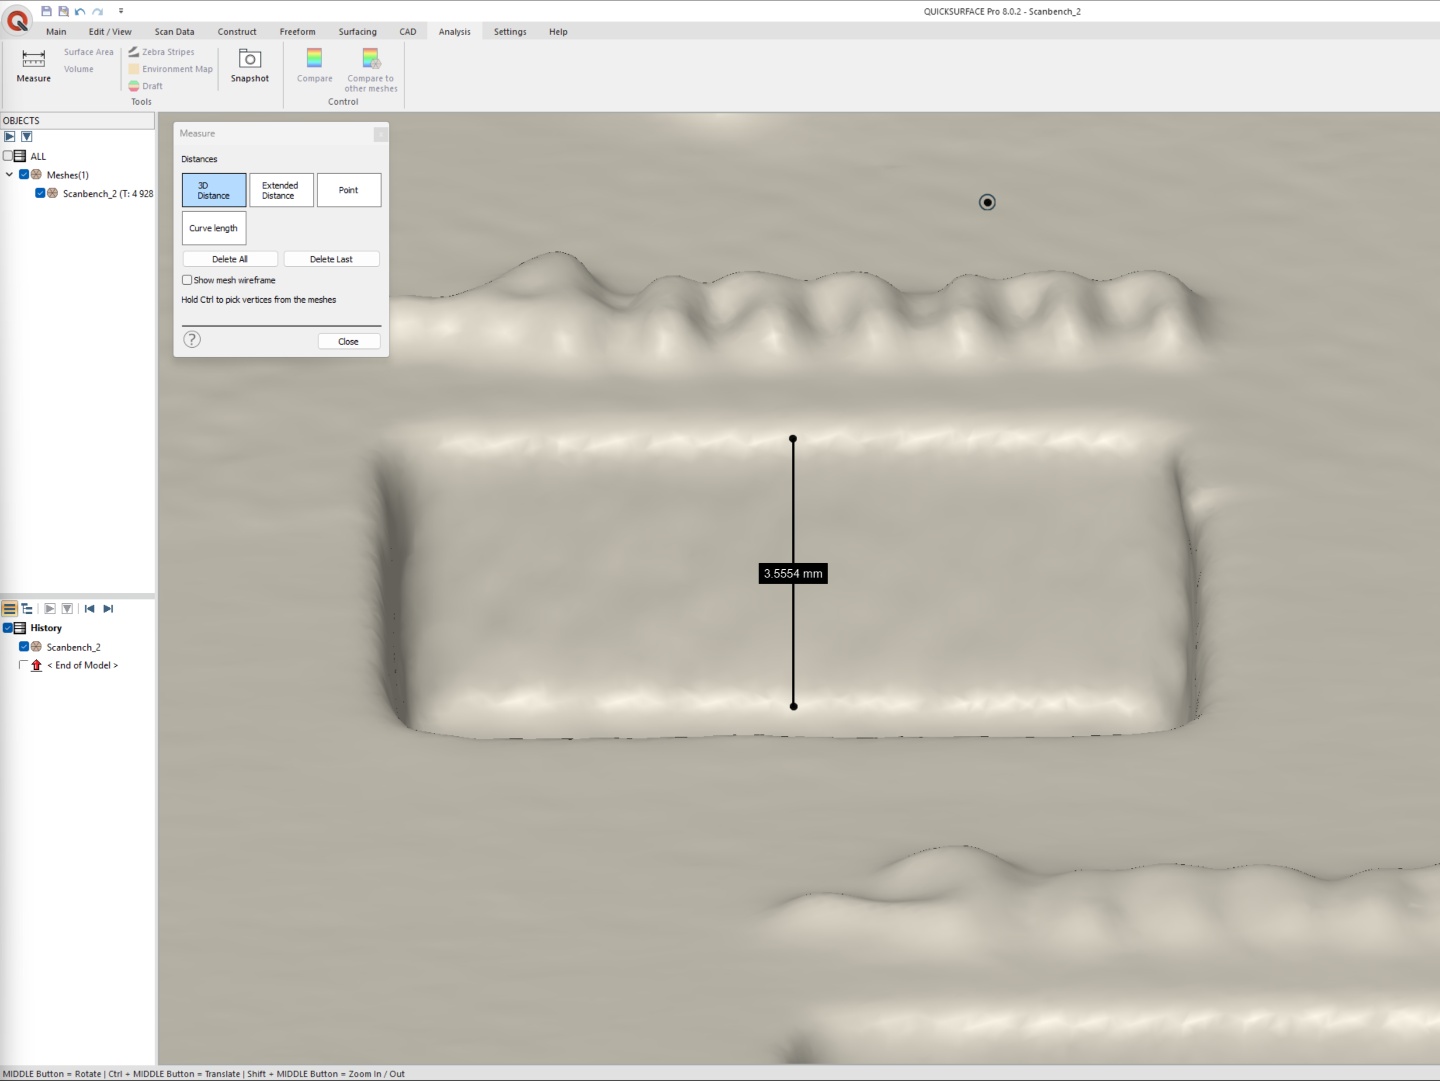
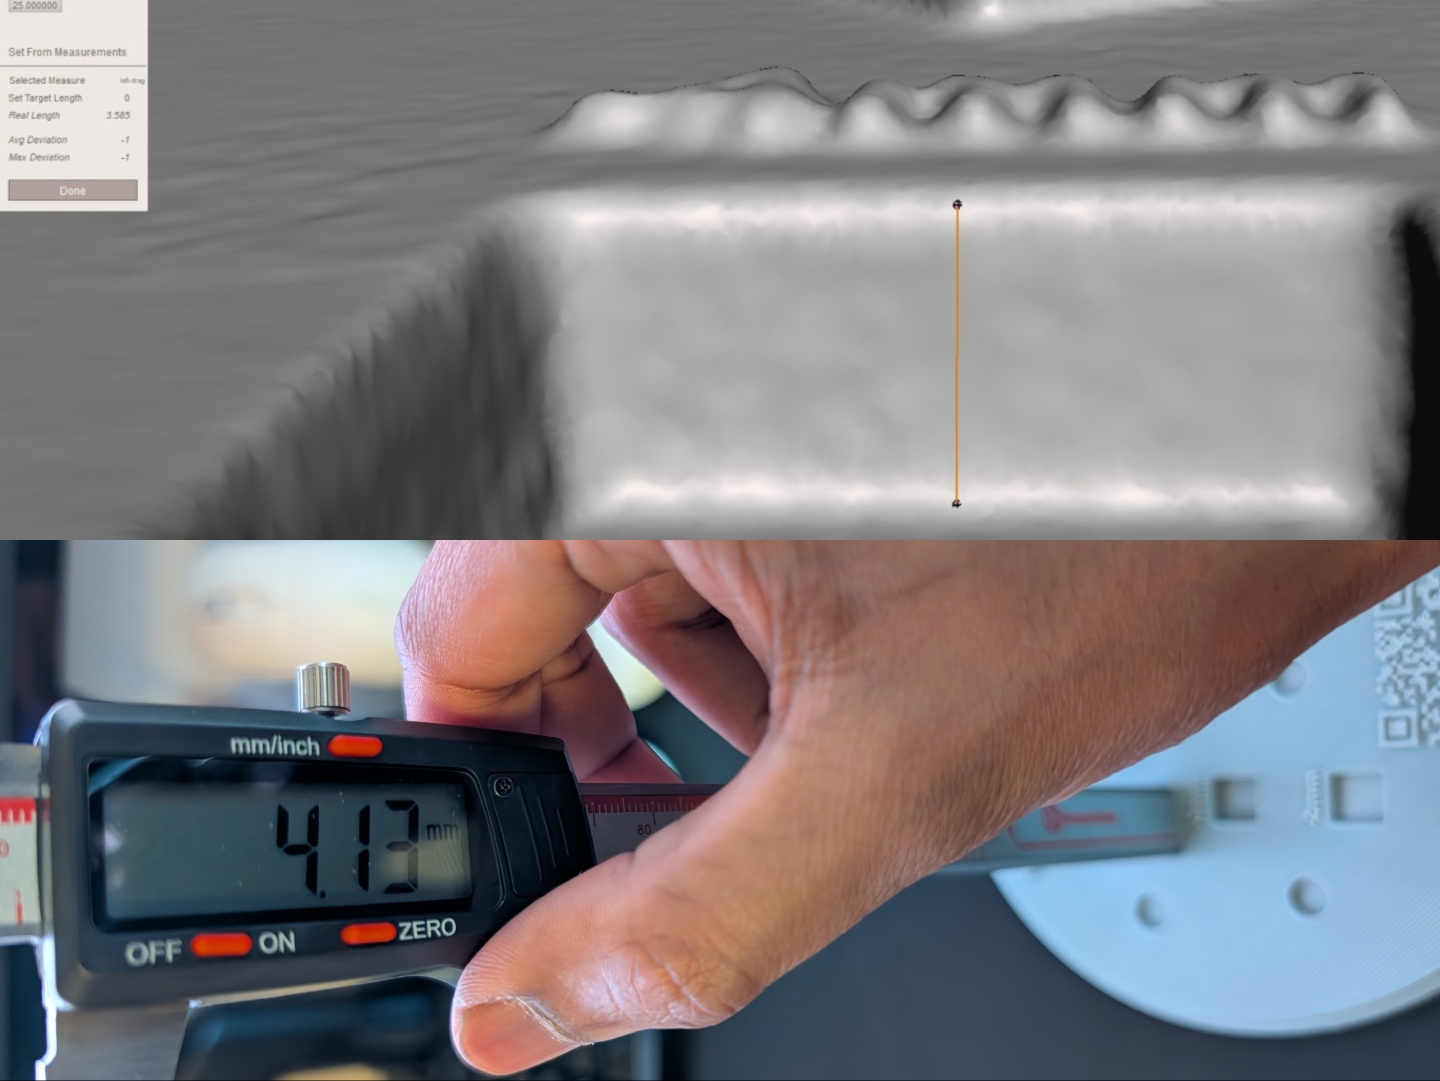
We tested the accuracy and usefulness of the Sermoon S1 with a few different applications. The 3D printed Scanbench (designed by ‘mairyjulien’ on Makerworld) has quite a lot of facets to put the scanner through its paces. We used MeshMixer and QuickSurface to identify measurements for the 3D model created by the scanner using a combination of all three blue laser modes. The Sermoon S1 showed variances of under 0.30 mm with most facets. However, it struggled more with depth detail as the variance was in the 0.50 to 0.60 mm range. The ball in the Scanbench was in the 0.02 mm to 0.04 mm accuracy range but the other measurements showed higher variance. We also noticed that sometimes while scanning, the blue laser is too bright in auto mode, which leads to artifacts in the scan. Fortunately, Creality Scan 4 does a good job of eliminating these artifacts when processing. Whatever's left behind can be manually removed easily.


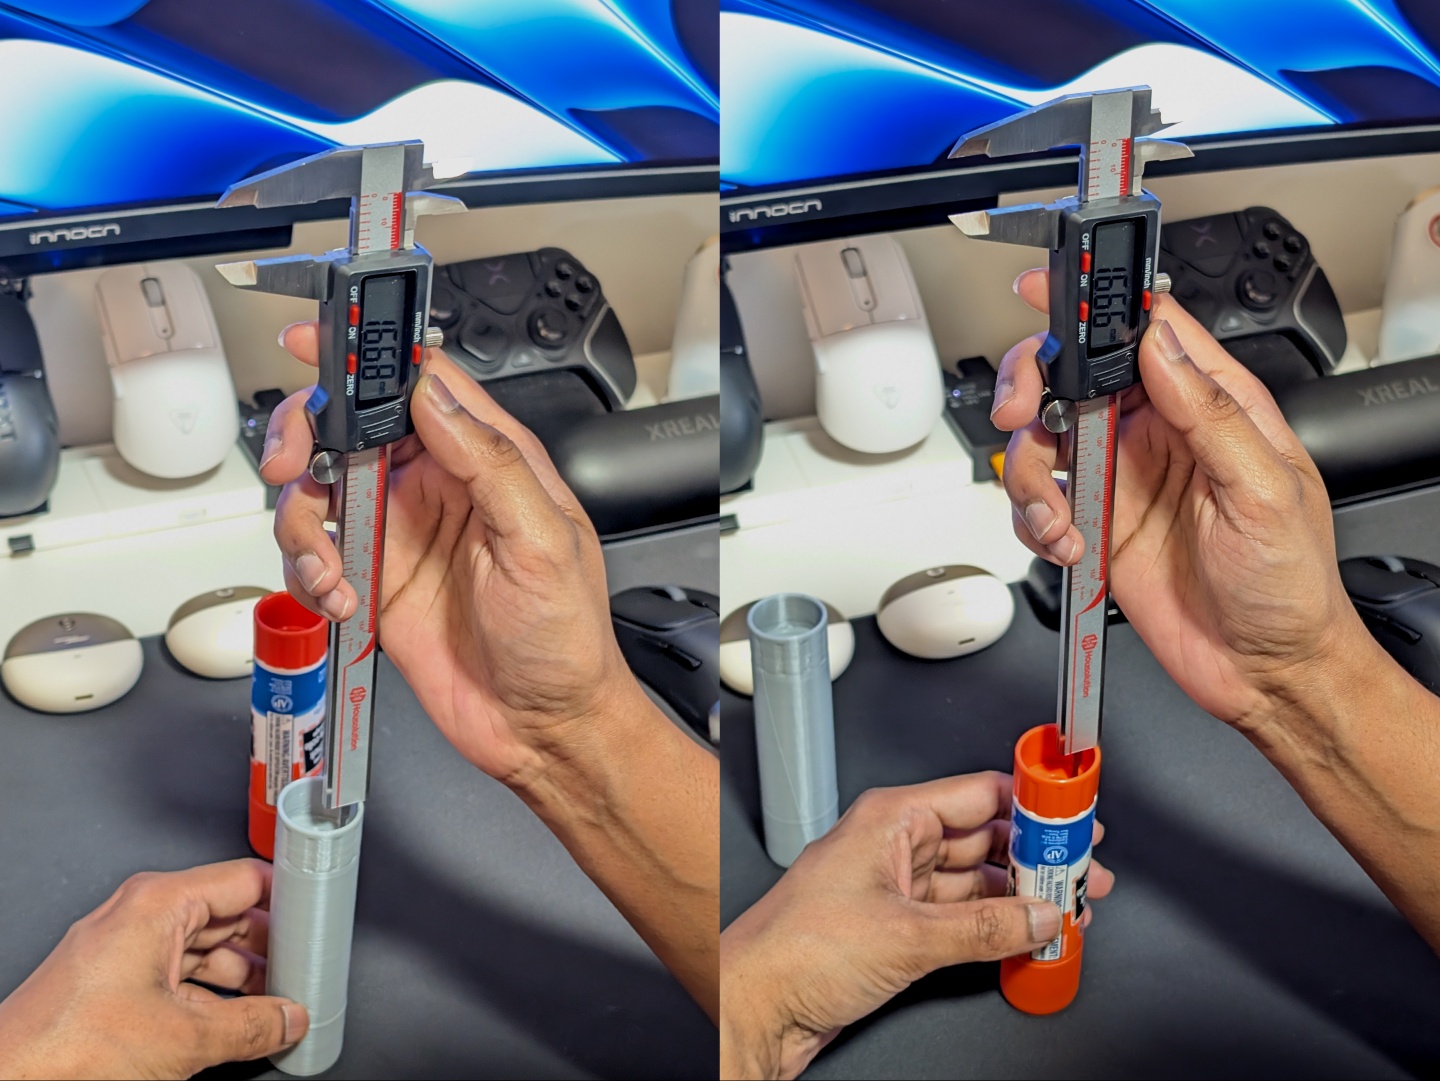
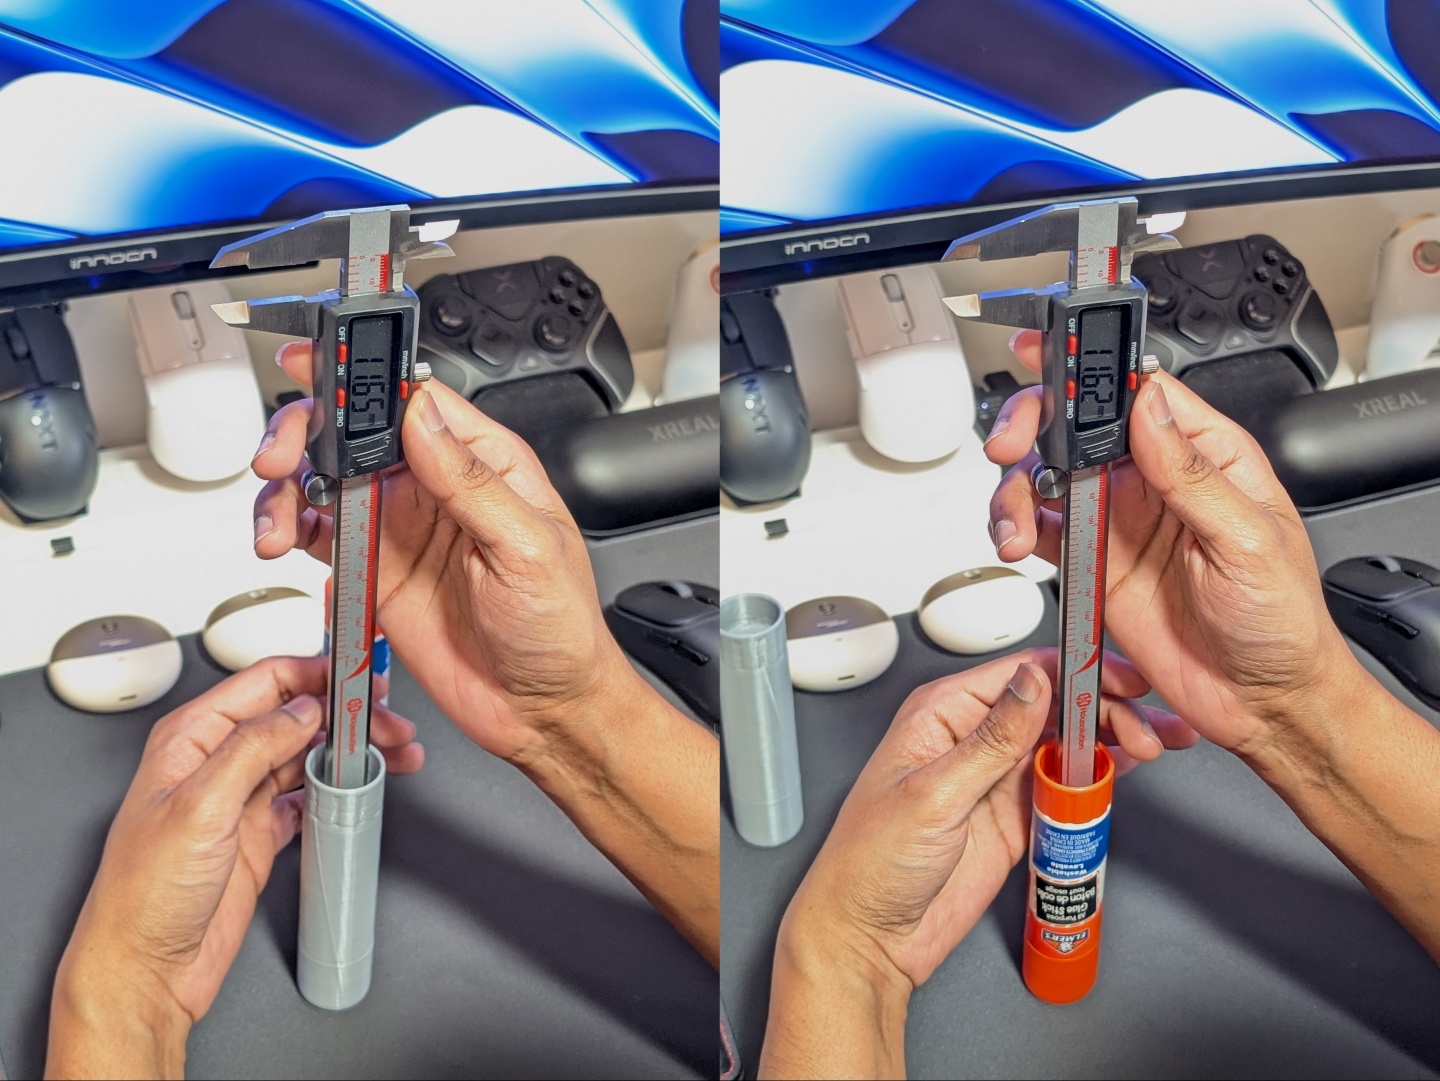
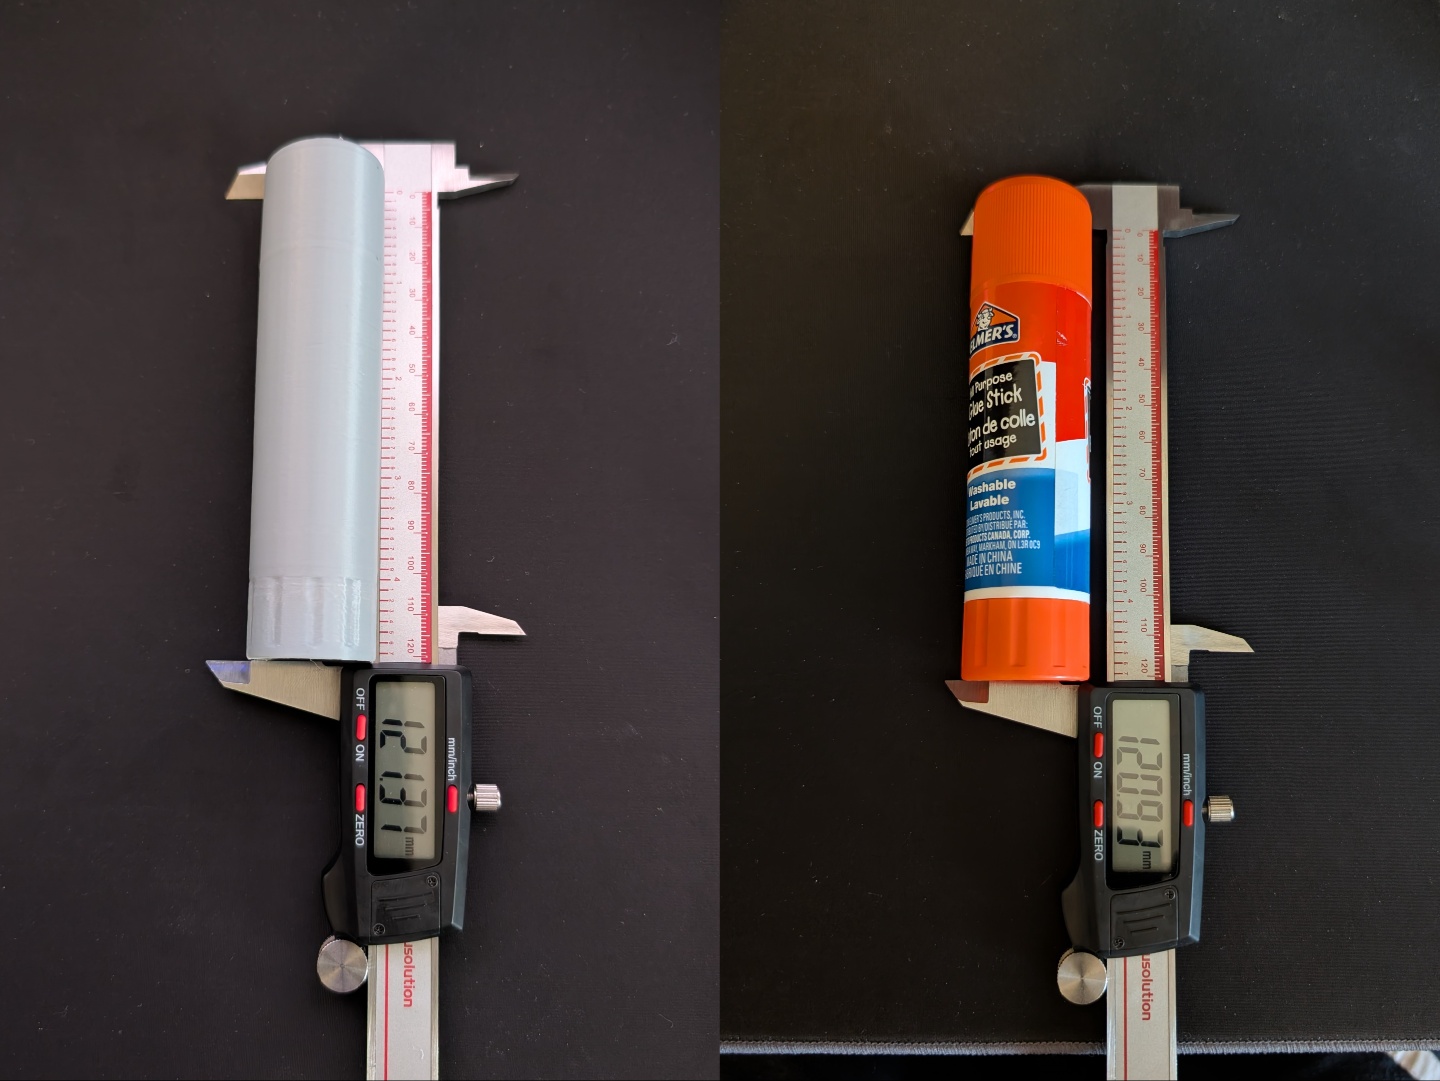
That being said, the results were a lot more accurate with individual shapes and objects. The glue stick was scanned using a combination of parallel and single laser, and then 3D printed. As can be seen in the images below, the shallow part was within the claimed accuracy while the deeper part was off by 0.03 mm. The diameter was off by 0.04 mm but the height was off by 0.24 mm considering there's a 0.2 mm brim layer on the print.

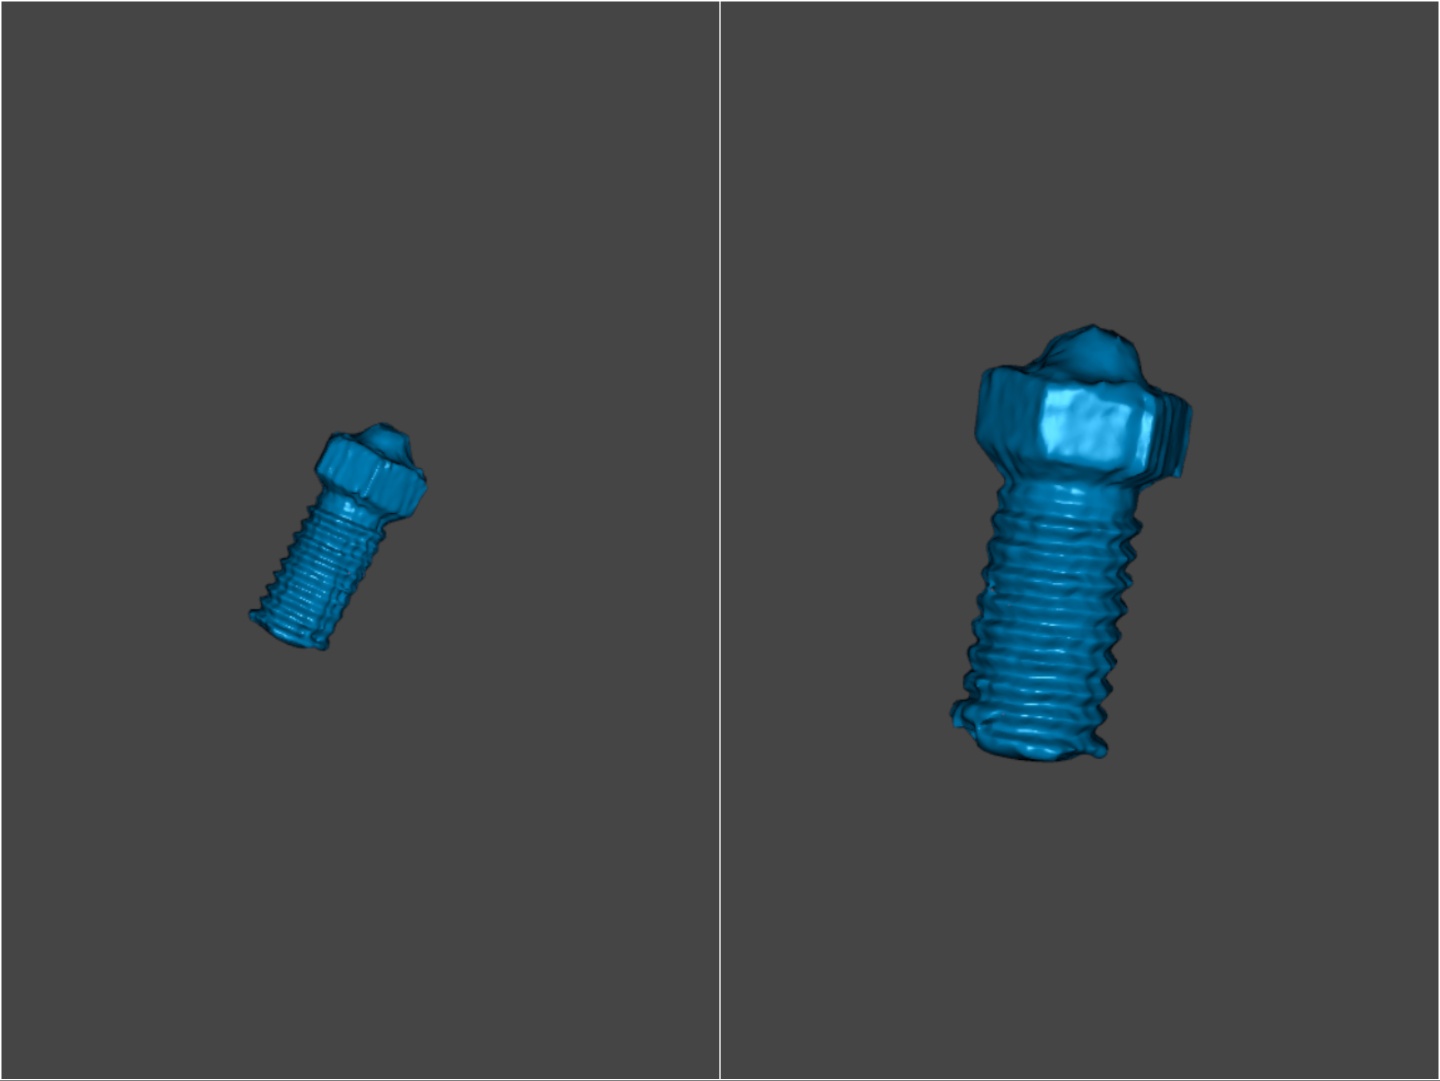
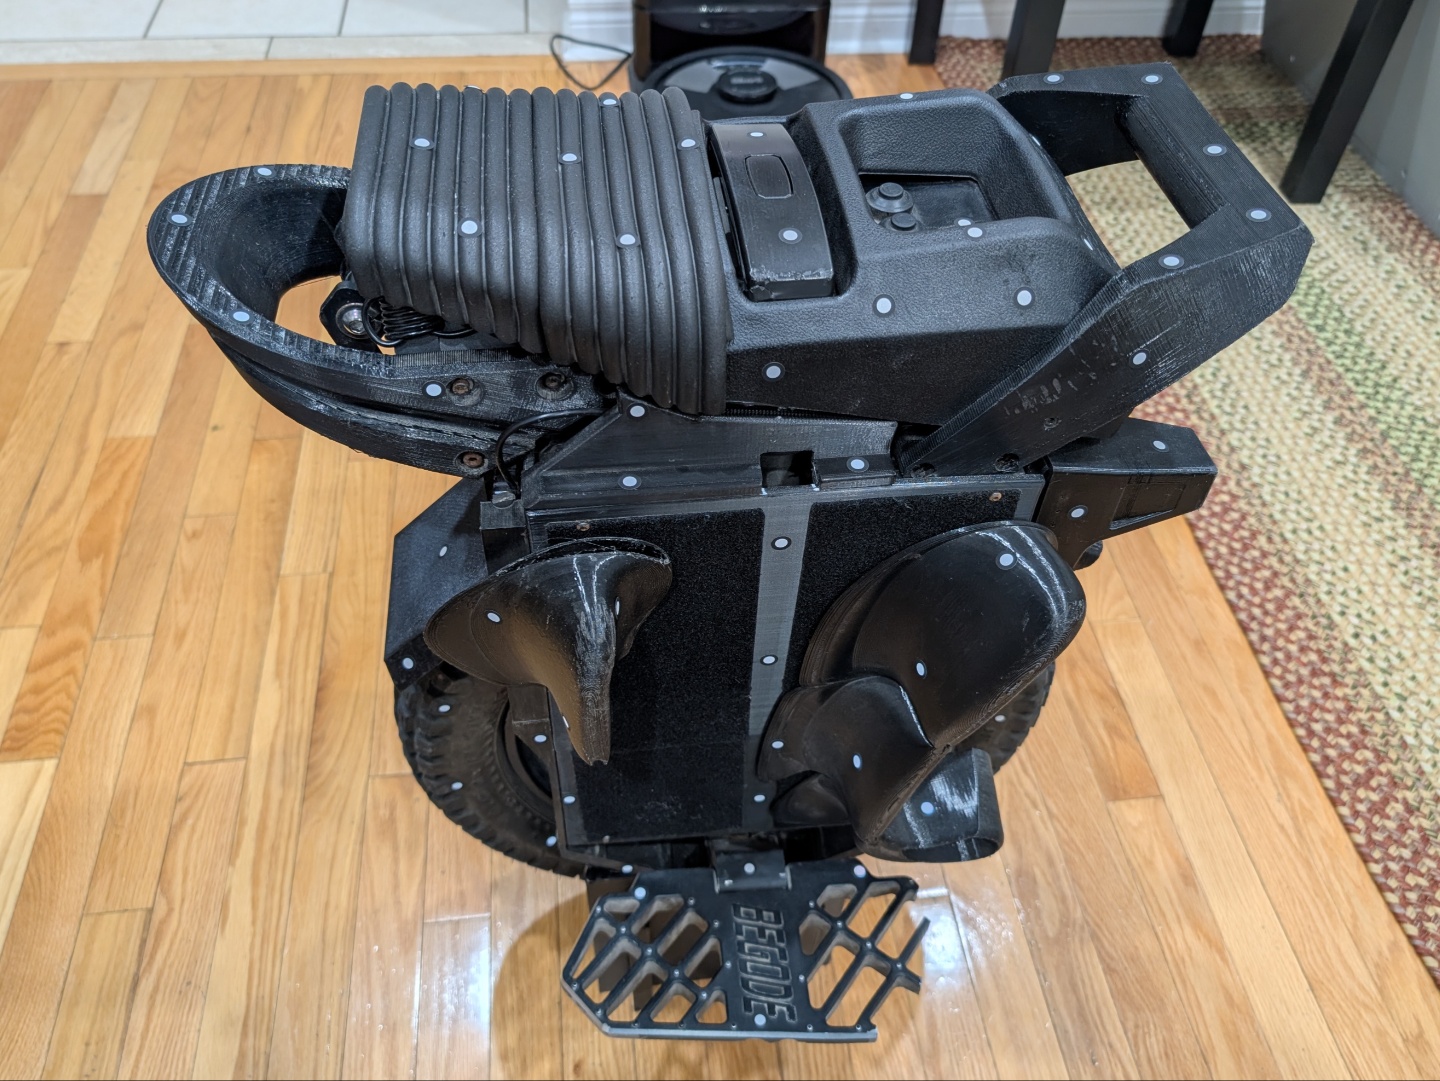
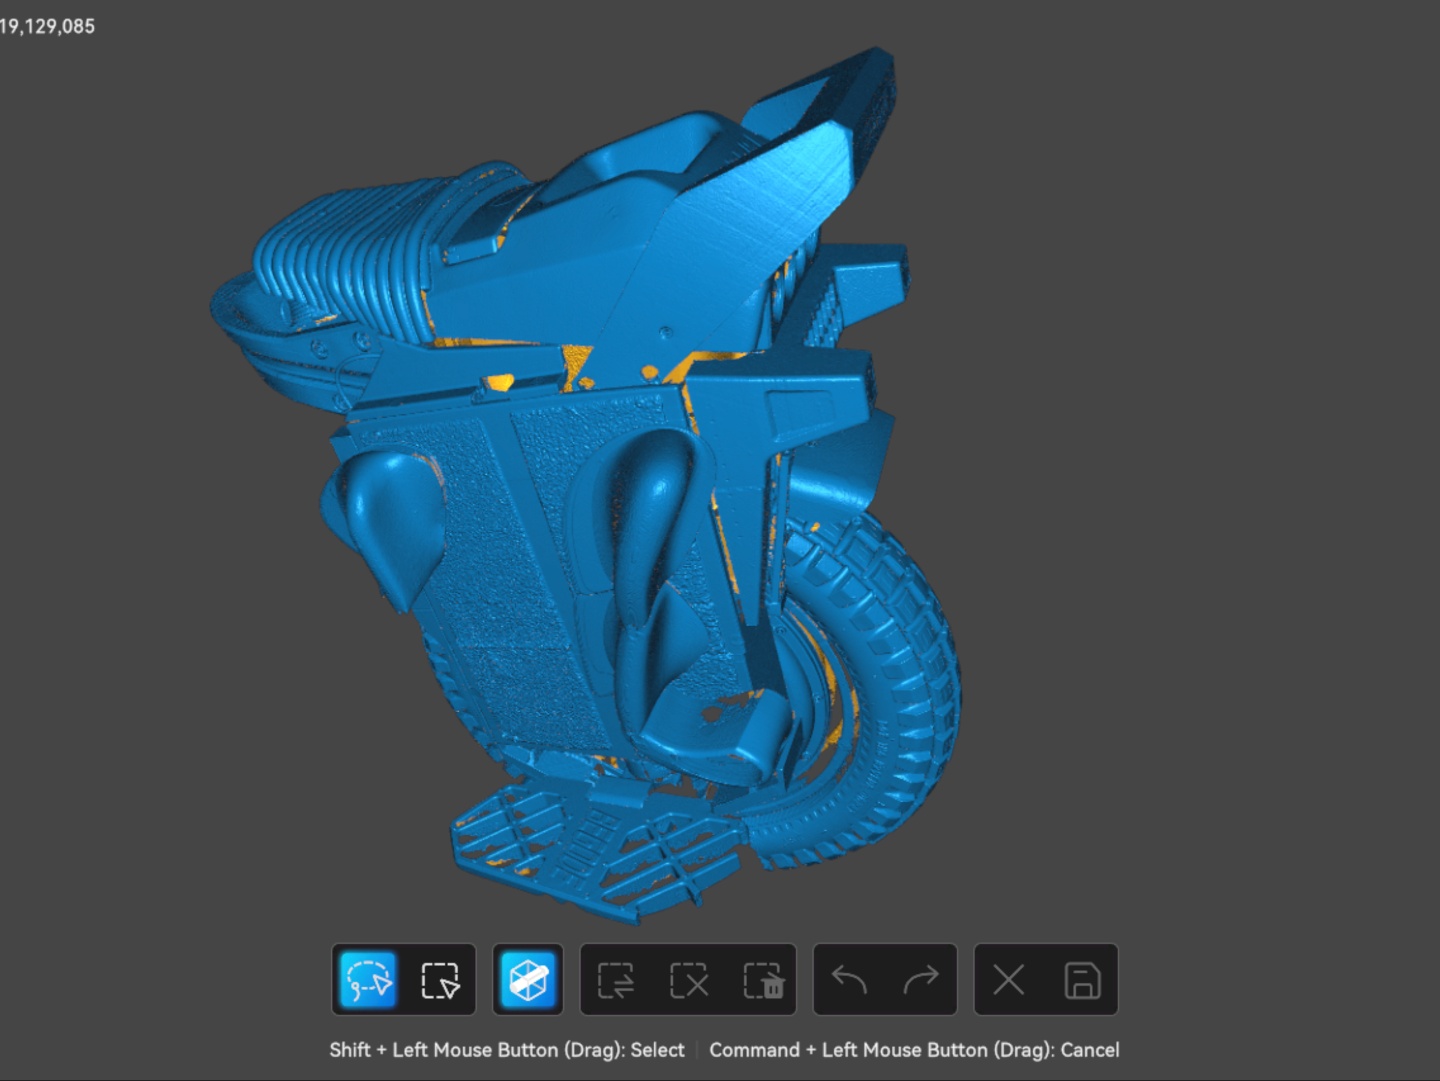
For a smaller scan, I used a broken nozzle from a 3D printer and the Sermoon S1 seemed to loose some detail in the threads. For a larger scan, I scanned a mostly black Electric Unicycle (EUC) with some reflective parts using the cross line mode. It took under 10 minutes to produce the initial scan, which was about how long it took to stick the markers on. So, a process-ready scan was created in under 20 minutes. Though the fusion and mesh processing took another five to seven minutes on the Macbook Air.
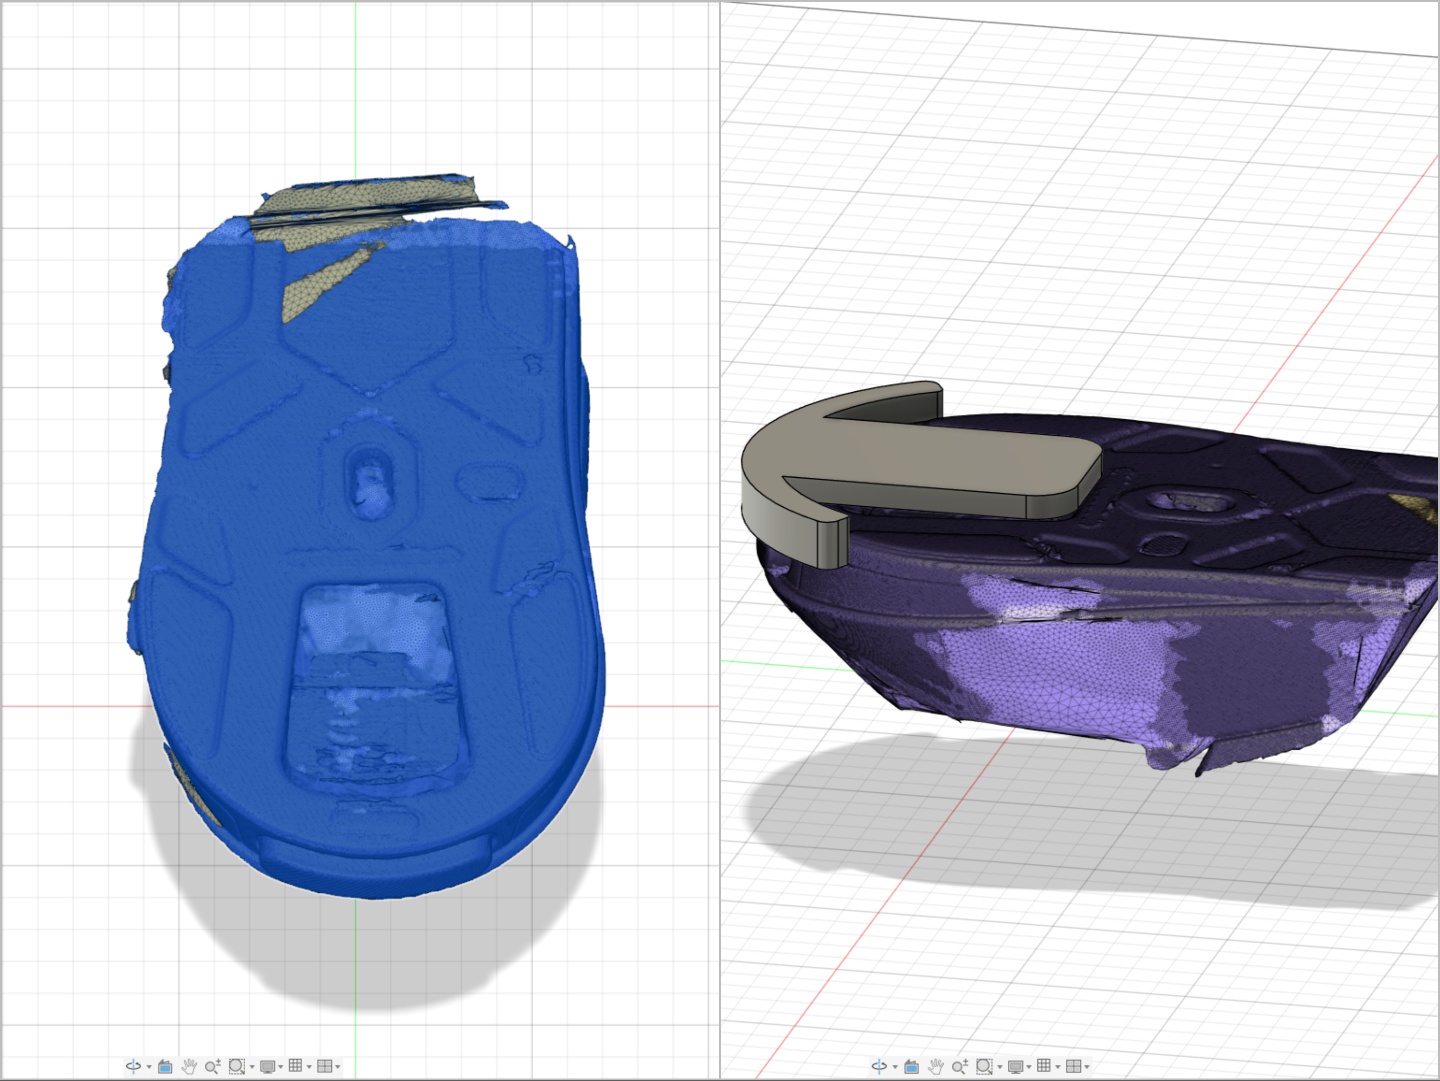
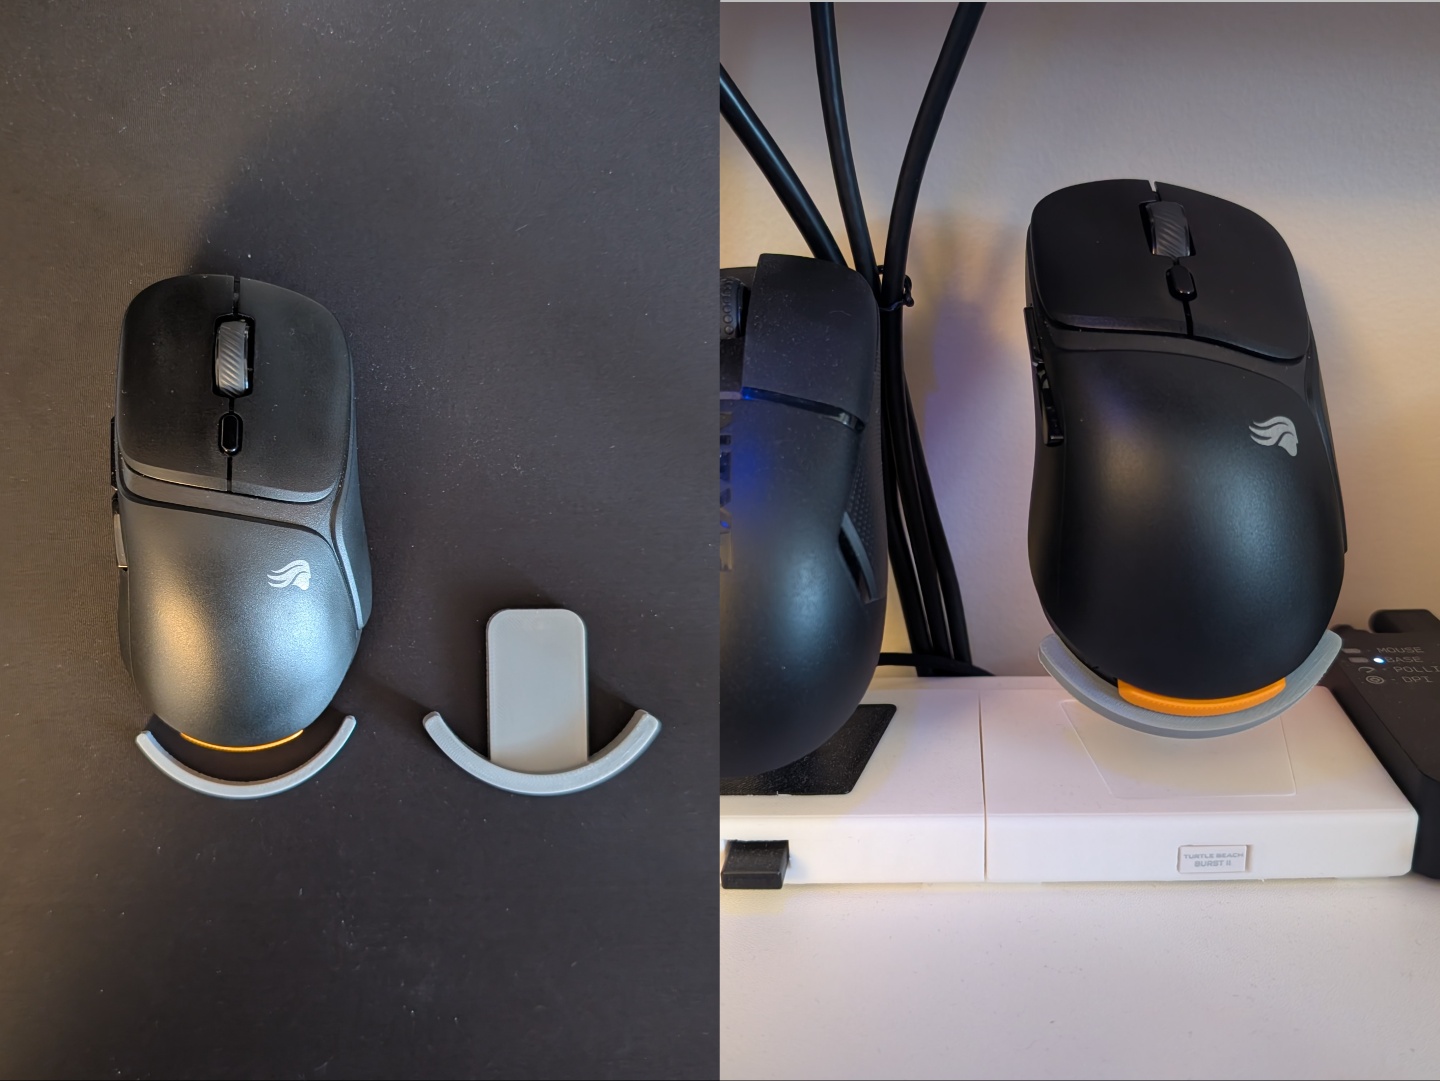
For more practical and organizational uses, I was able to design a holder for some mesh brushes I had laying around. Having a 3D model of the different sized brushes helped visualize how they would look in a 3D space as per my design requirements. Creality Scan, like other 3D scanning software, has an alignment feature where two scanned halves can be merged together for a complete model. This helped creating accurate 3D models for the brushes. Next, I was also able to make a quick design for a mouse stand to organize my desk by scanning the bottom of said mouse, and went from scanning to designing to having a printed prototype in under 30 minutes.

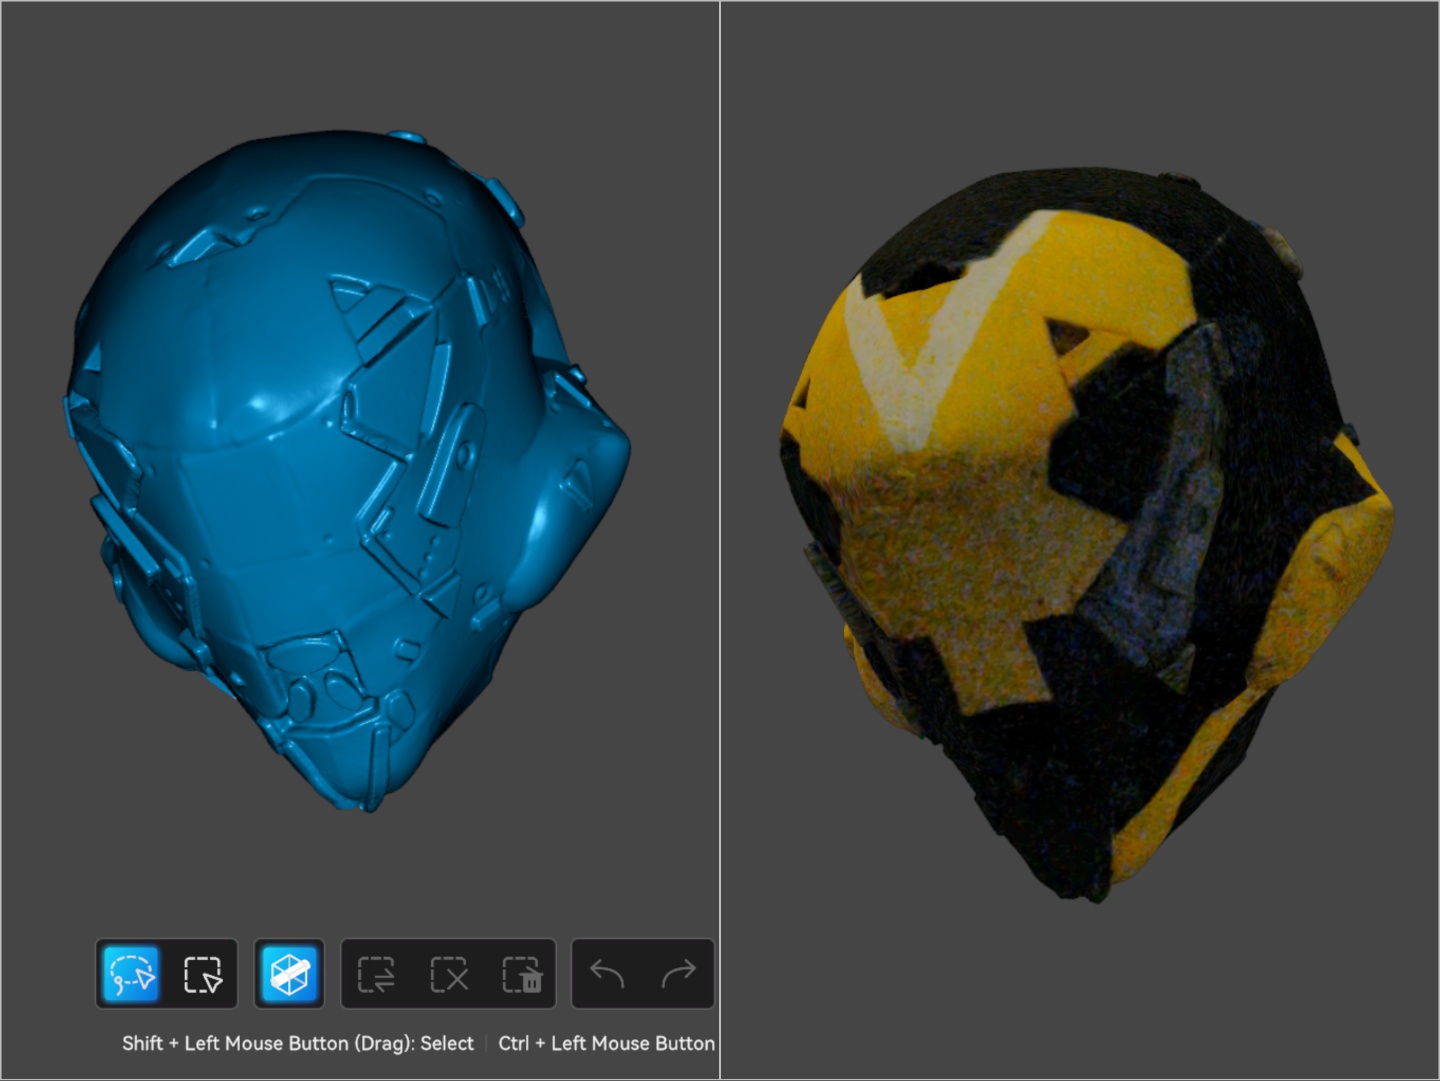
Lastly, testing the infrared scanning involved a hand-made foam helmet of a ranger from the game Anthem as well as a human. The NIR scanning is quick and depending on the lighting, it can produce a color map that is quite accurate. For human scans, the Sermoon S1 struggles with hair but that's a known limitation of 3D scanners.
Transparency
The selection of devices to be reviewed is made by our editorial team. The test sample was given to the author by the manufacturer free of charge for the purposes of review. There was no third-party influence on this review, nor did the manufacturer receive a copy of this review before publication. There was no obligation to publish this review. As an independent media company, Notebookcheck is not subjected to the authority of manufacturers, retailers or publishers.
