Part 2: The build process for our NZXT H1 mini ITX gaming rig
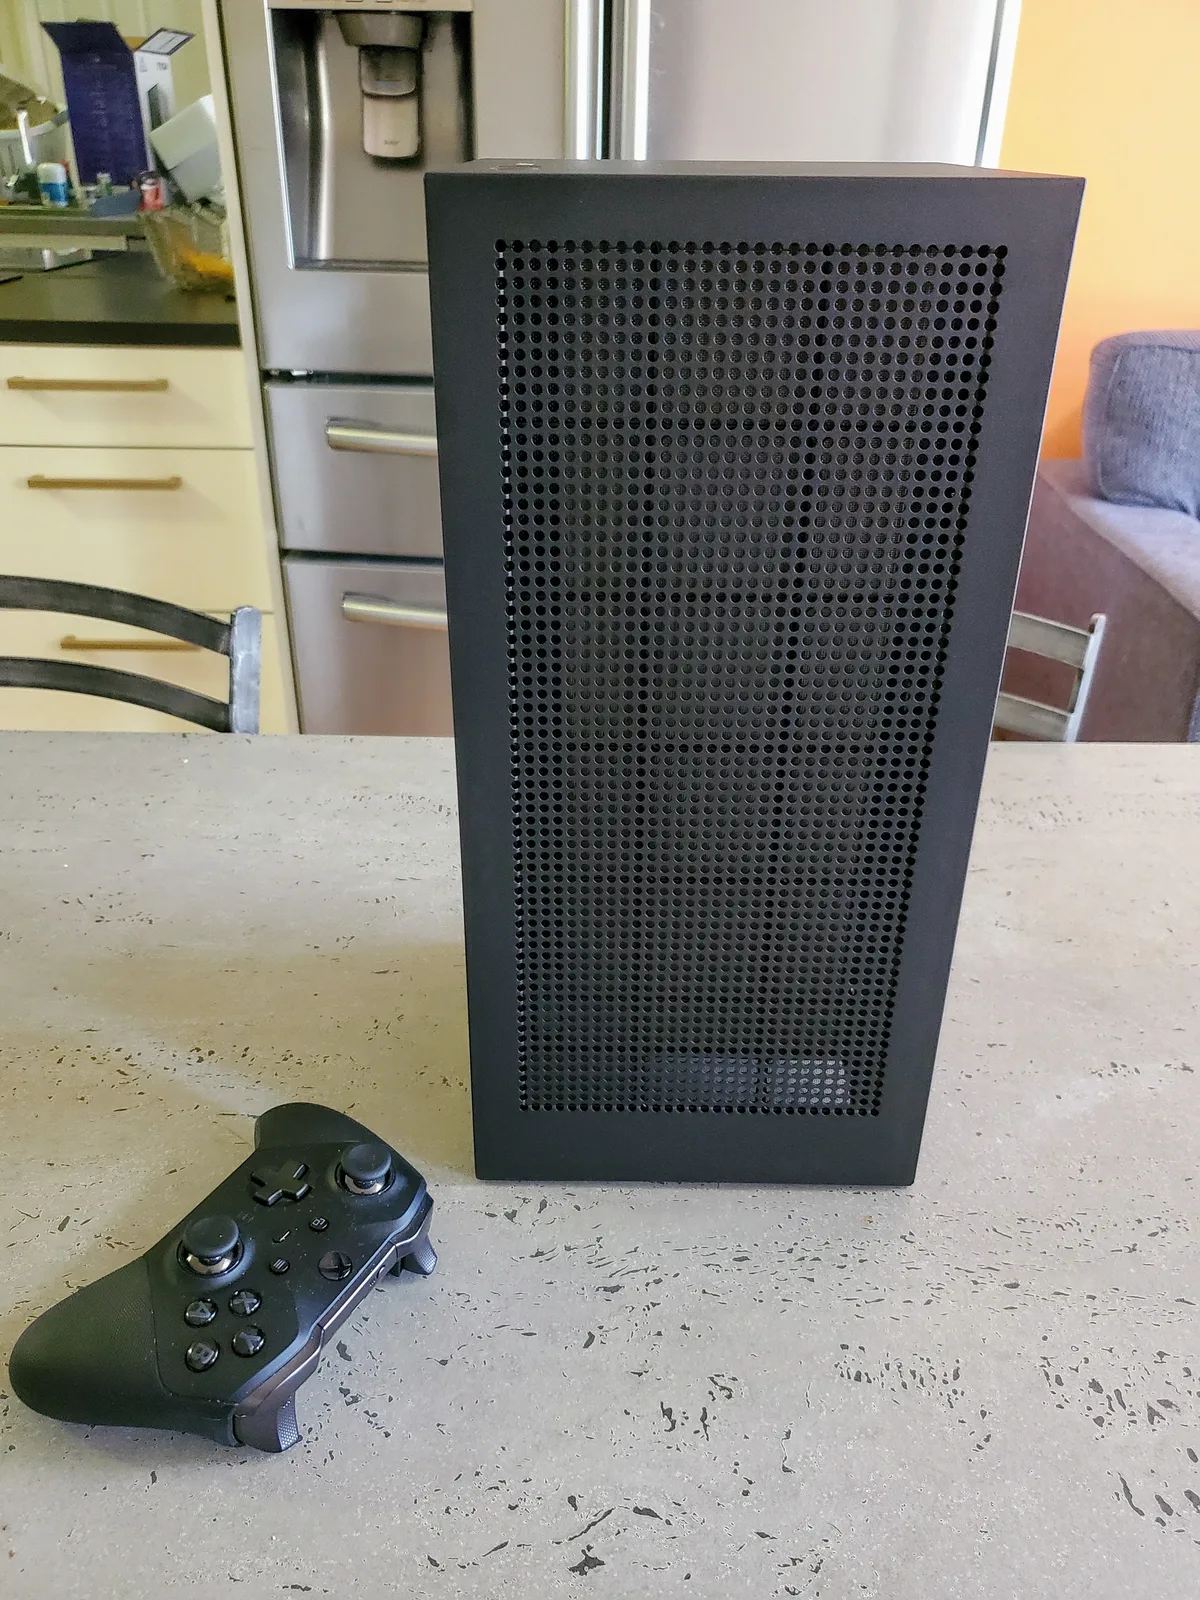
The NZXT H1 case has caused a bit of a buzz since it was launched as it is among a small handful of cases on the market that takes an upright approach to the mini ITX form factor. For many people, it is reminiscent of the Xbox Series X console that is due later this year, although its internal architecture is not remotely similar. The H1 isn’t as compact as the Xbox Series X either, but it does offer support for a full size 2.5-slot graphics card which means that it has plenty of scope to make it a very powerful gaming rig, should your budget extend that far.
Our build, while not cheap at under US$1,400, puts it in the mid-range while our choice of components, detailed last week, aims for a configuration that can play the latest games at frame rates of around 60 fps at 1440p with high settings. A key advantage of going with the NZXT H1 for this build is that it includes a built-in liquid cooler and 650 W modular power supply, which is included in the price. It’s not a massive timesaver, but it does make sourcing components easier and speeds up the process a little.
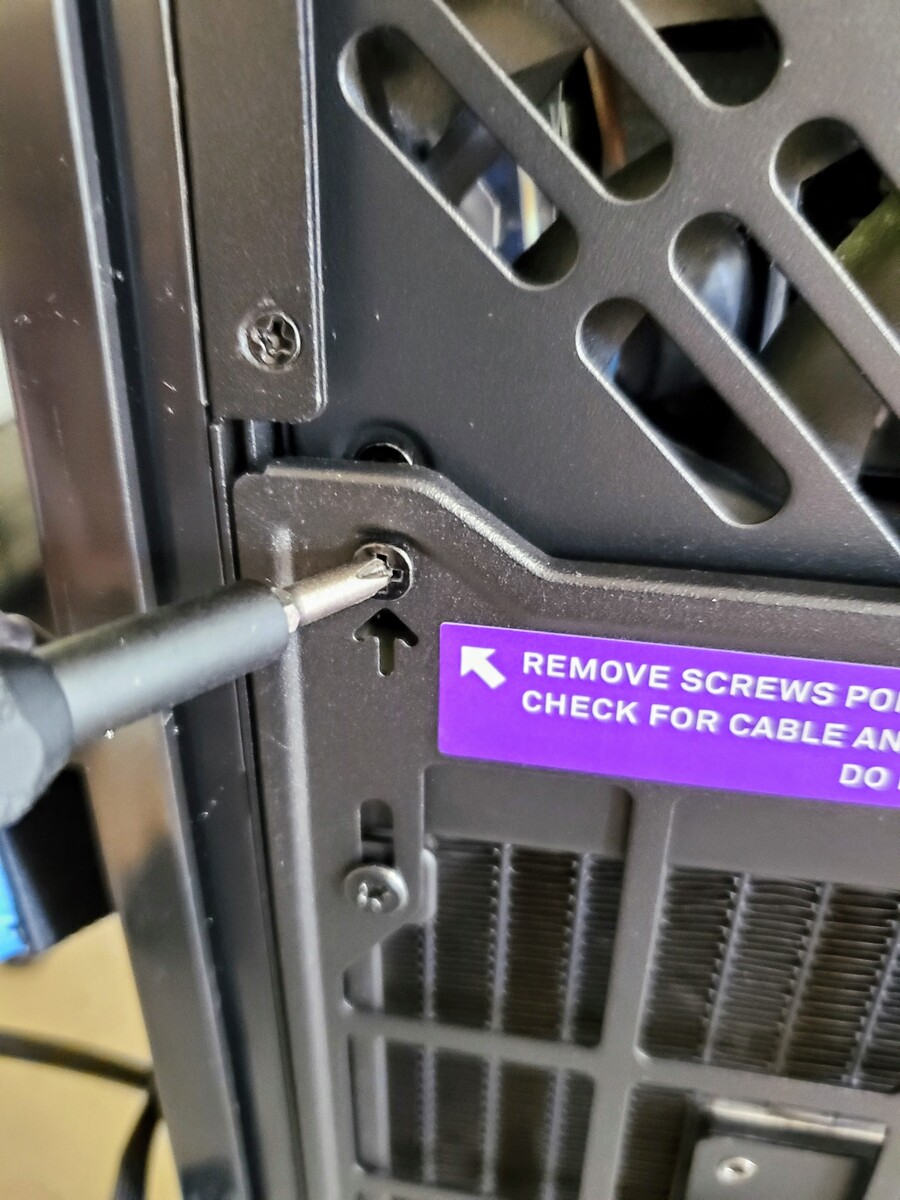
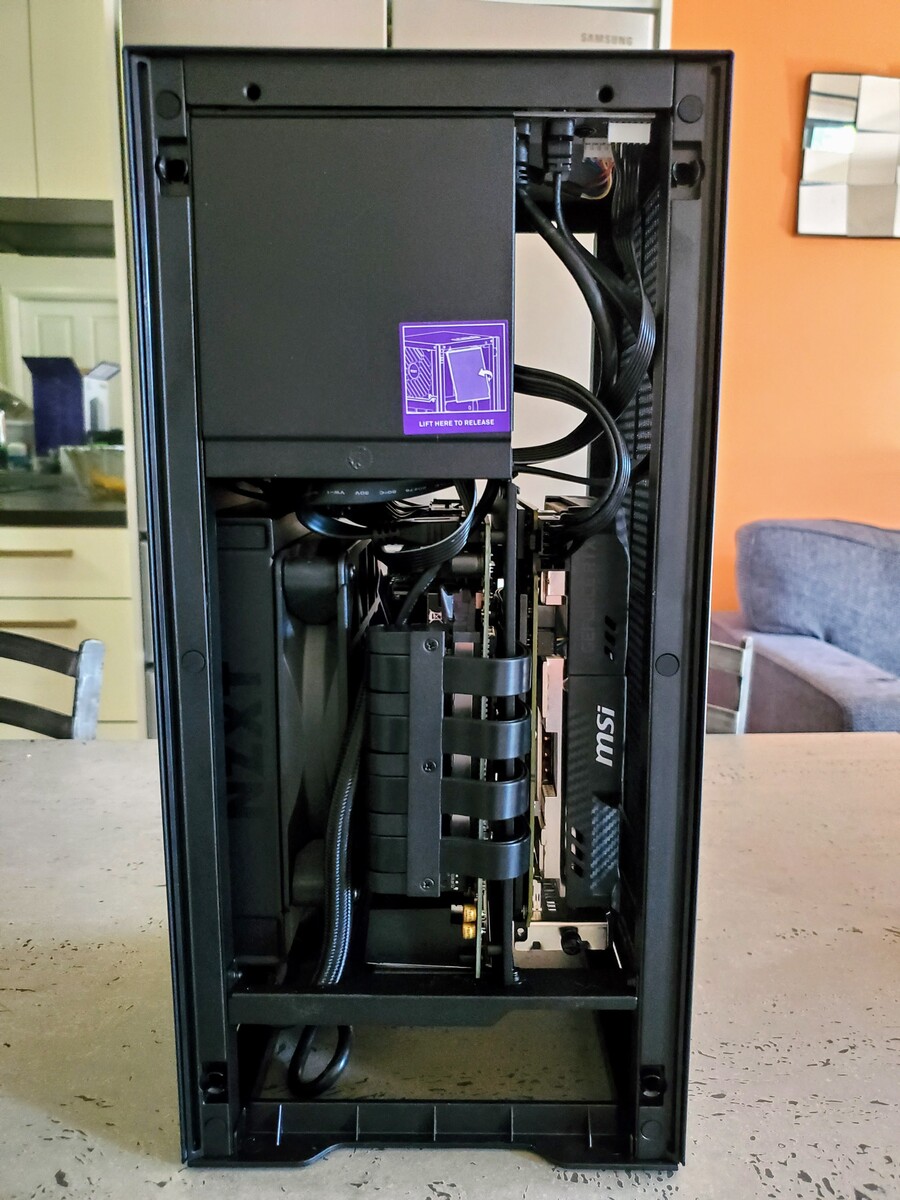
As you may discern from the photos accompanying the article, another key advantage of the NZXT H1 case is that its enclosure is completely tool-less when it comes to taking it off. NZXT has even included some stickers that guide the user with which sections to take off in order. You start with the side panels, one of which is ventilated while the other is the front side that comes with transparent tinted tempered glass. One thing you notice as you are taking things apart is the quality feel of the components the NZXT is renowned for. Once the front and back sides are pulled off, the top and remaining sides slide upwards and off, revealing the internals.
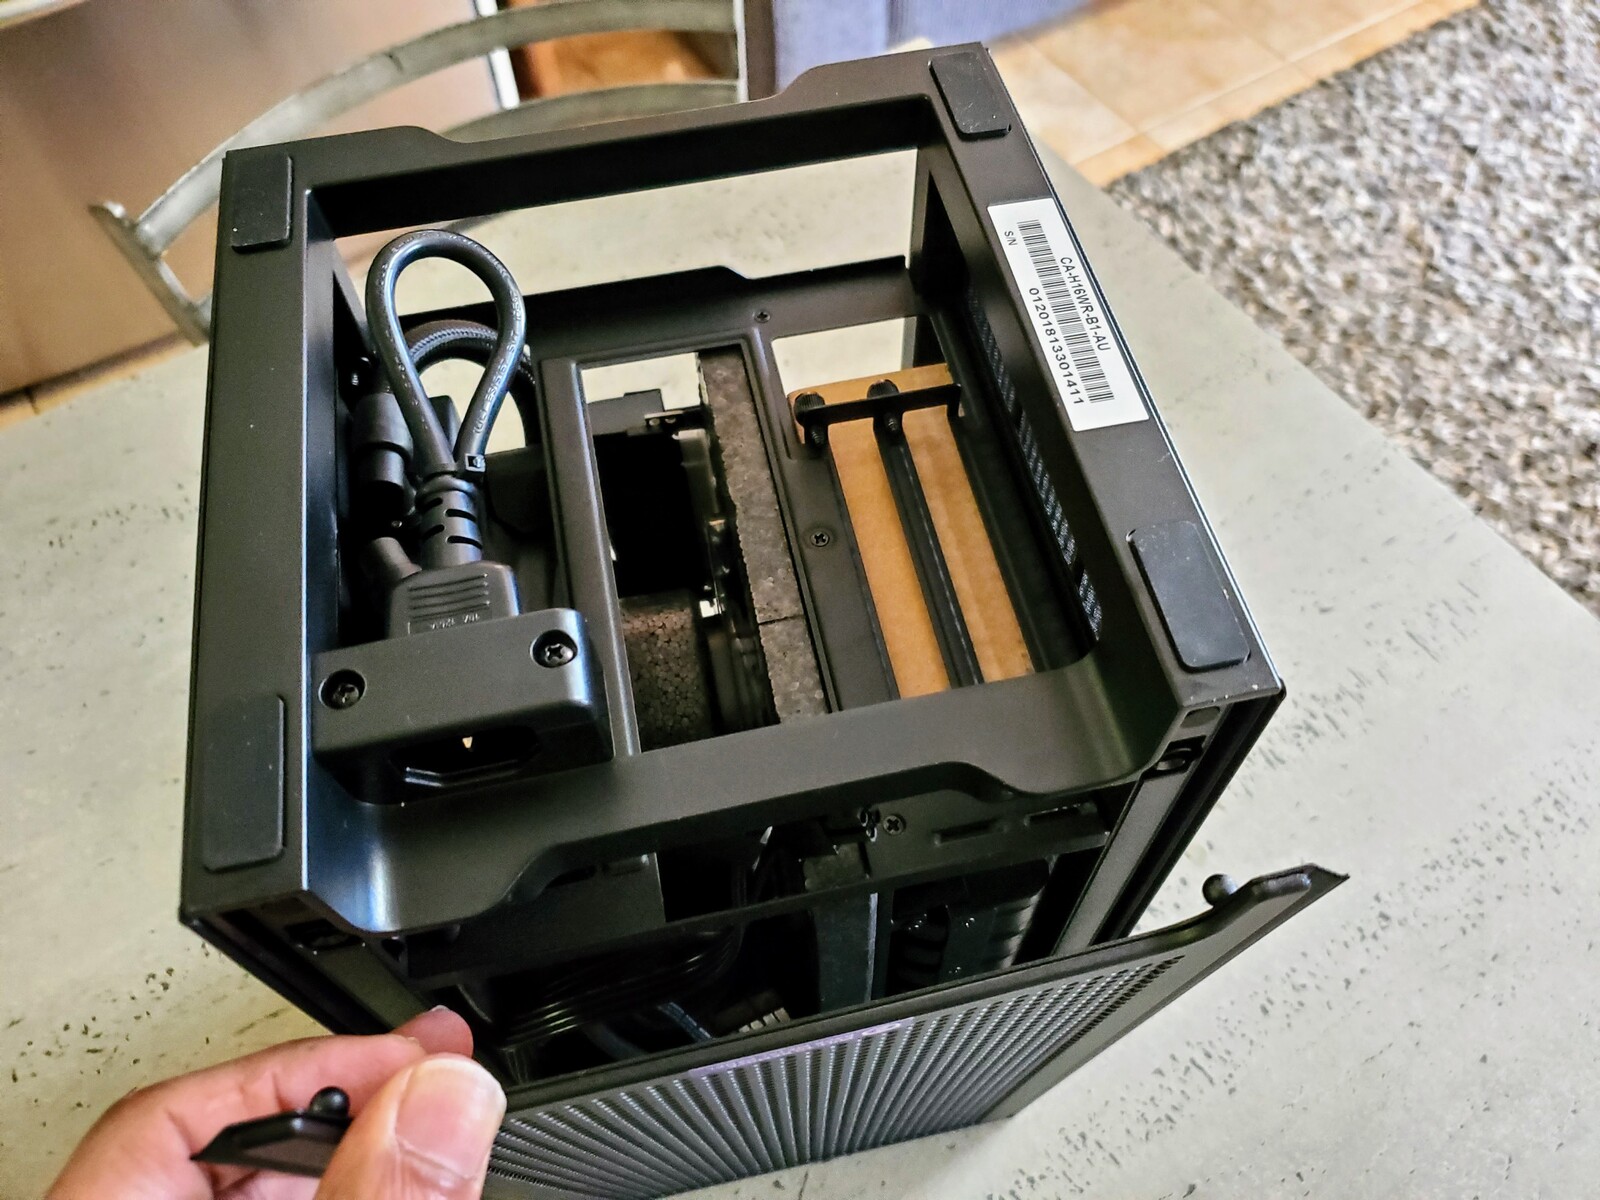
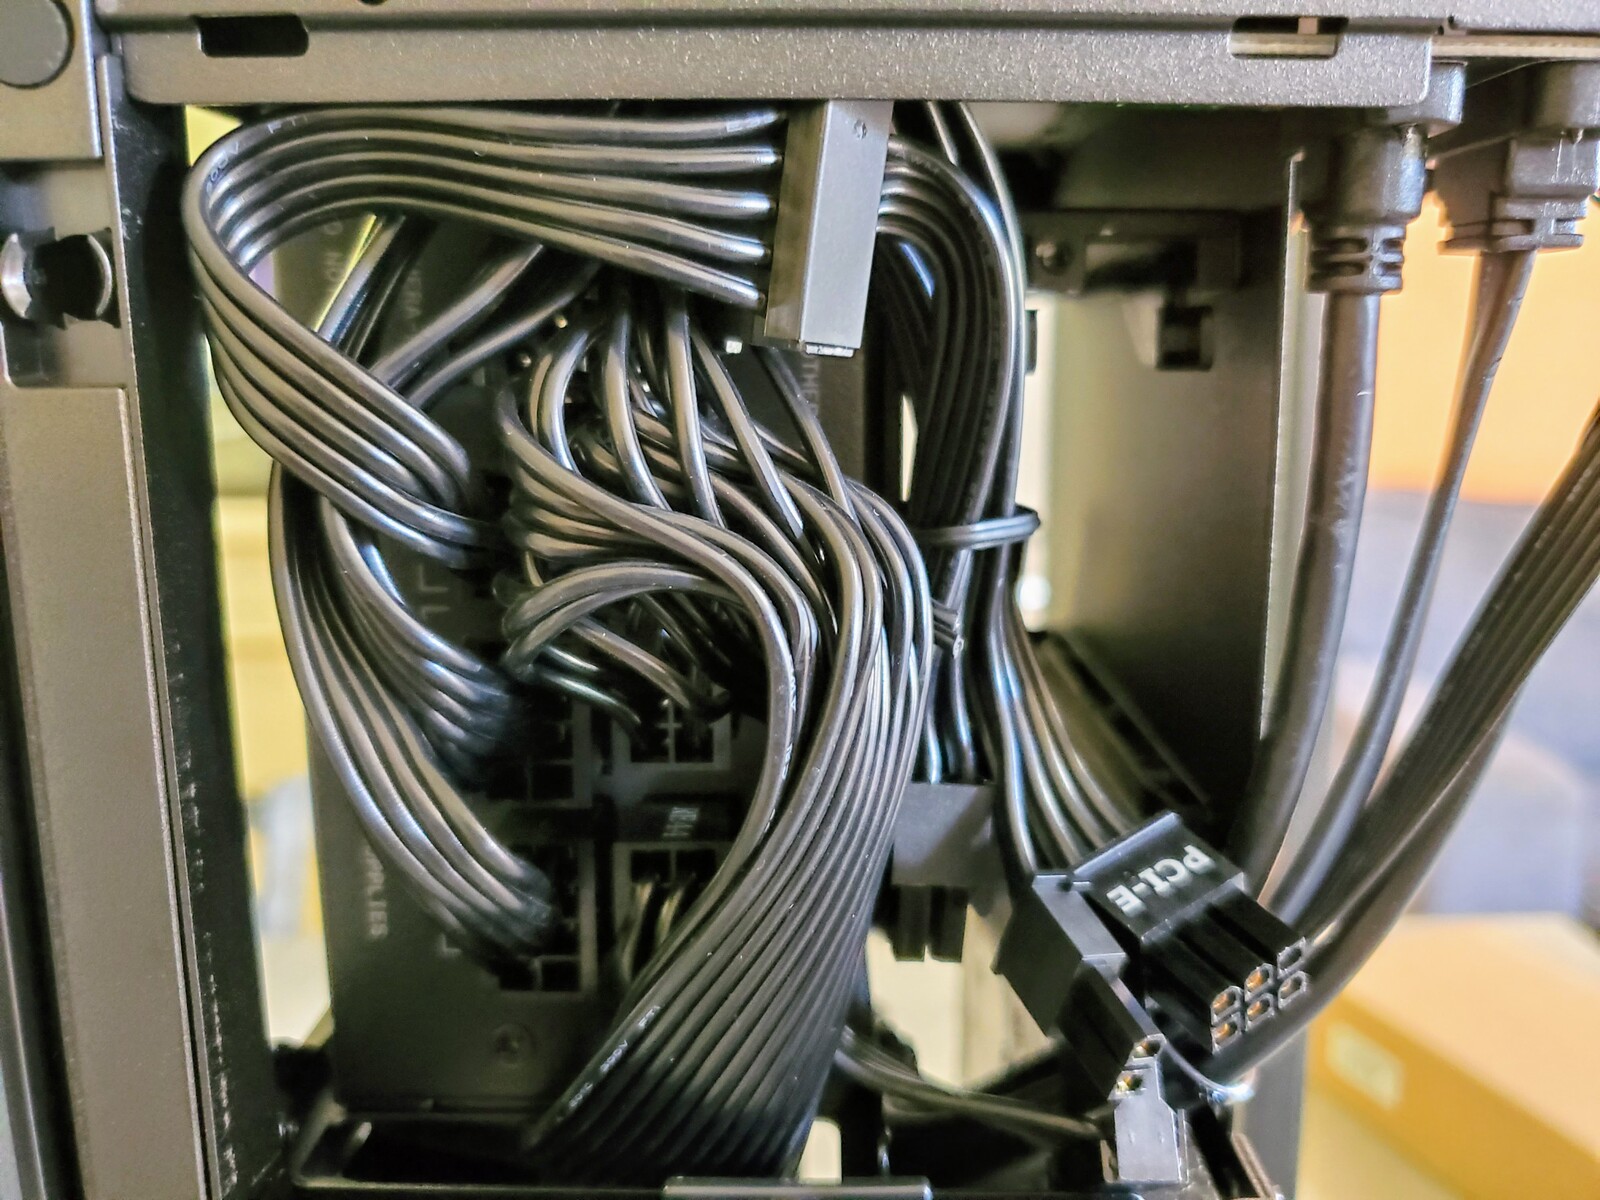
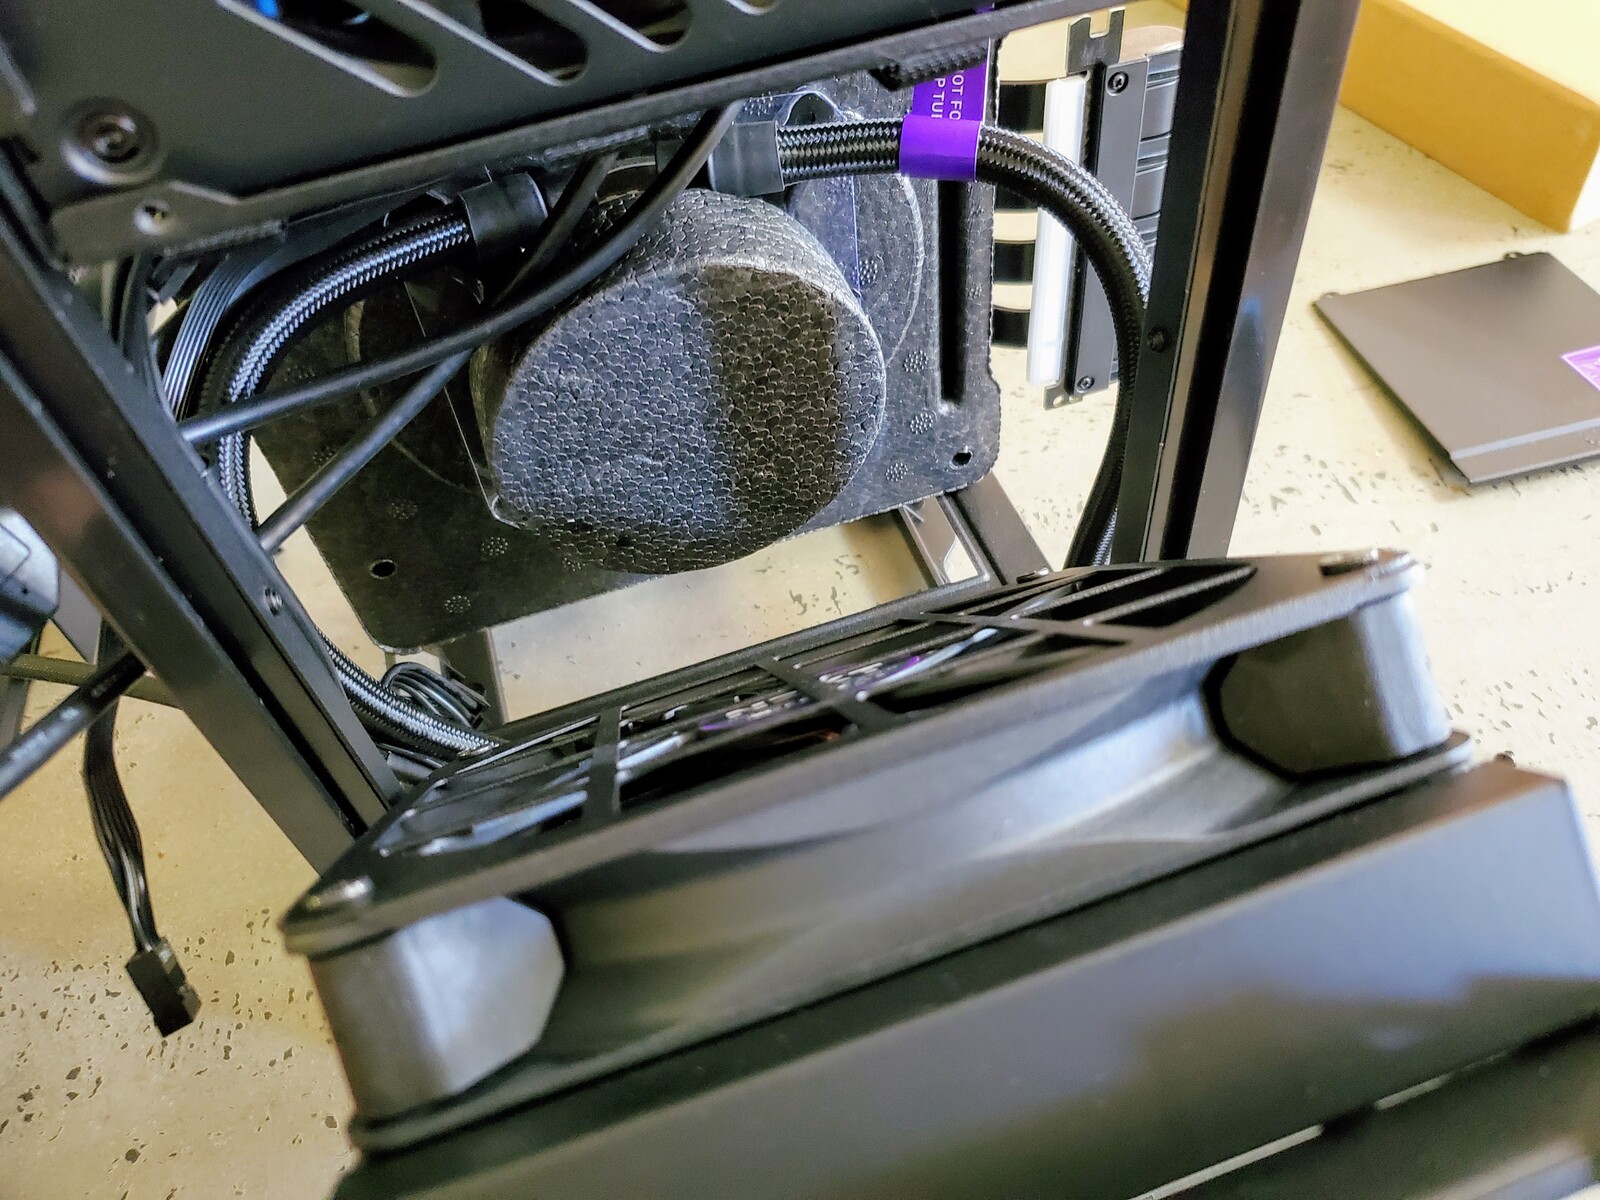
In a typical case, you wouldn’t see any cords when you open it up, and you would see lots of empty space. With the NZXT H1, you are greeted by all the cords and cables that you are going to need to connect to the motherboard, once it is in place. For anyone who has never built their own PC, the view could be a little overwhelming, but it isn’t really anywhere as difficult or challenging as you might think. Pretty much every cord and cable has a place where it will eventually be connected, either to the motherboard or to the graphics card. In many instances, this is obvious, because the connector can clearly only connect to certain ports or they are labeled accordingly. The motherboard schematic that comes in the box also helps illustrate where certain cord and connectors need to go.
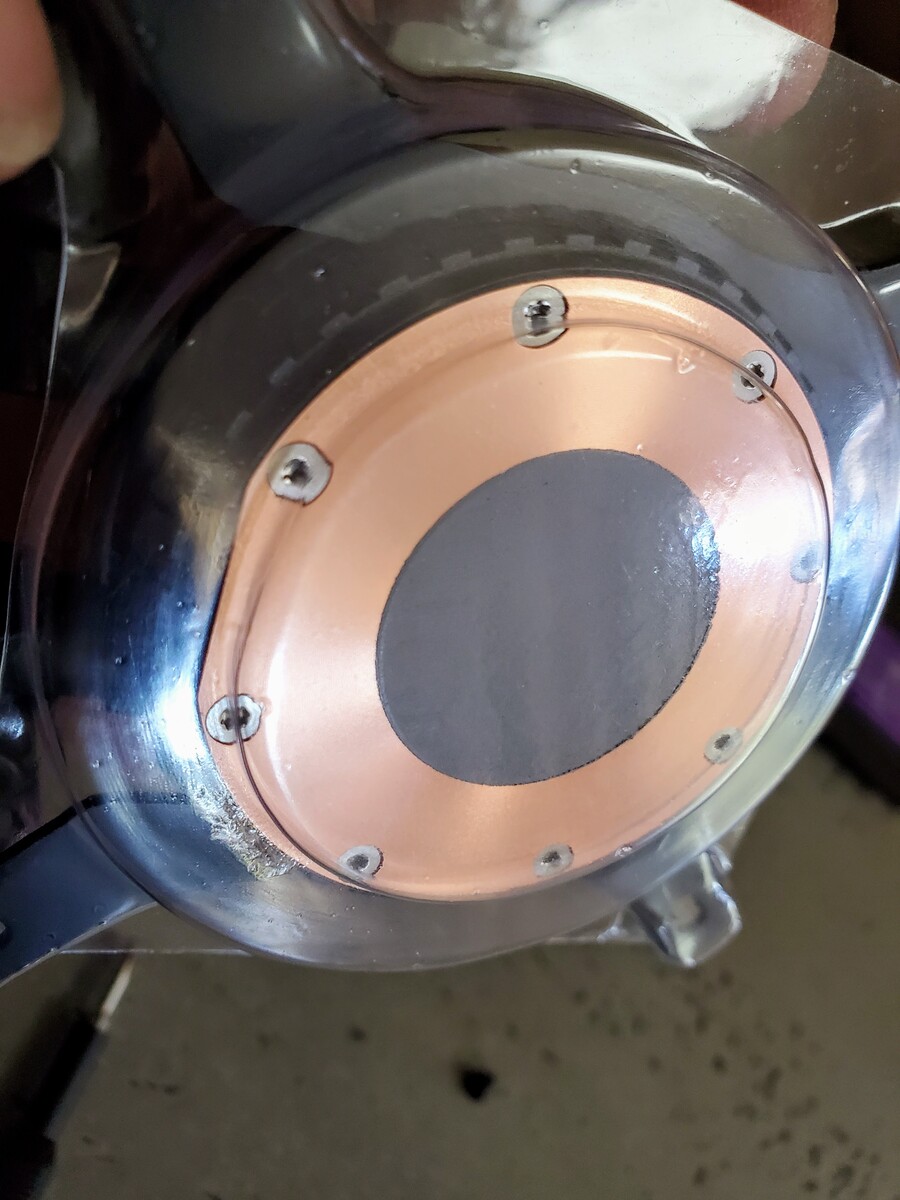
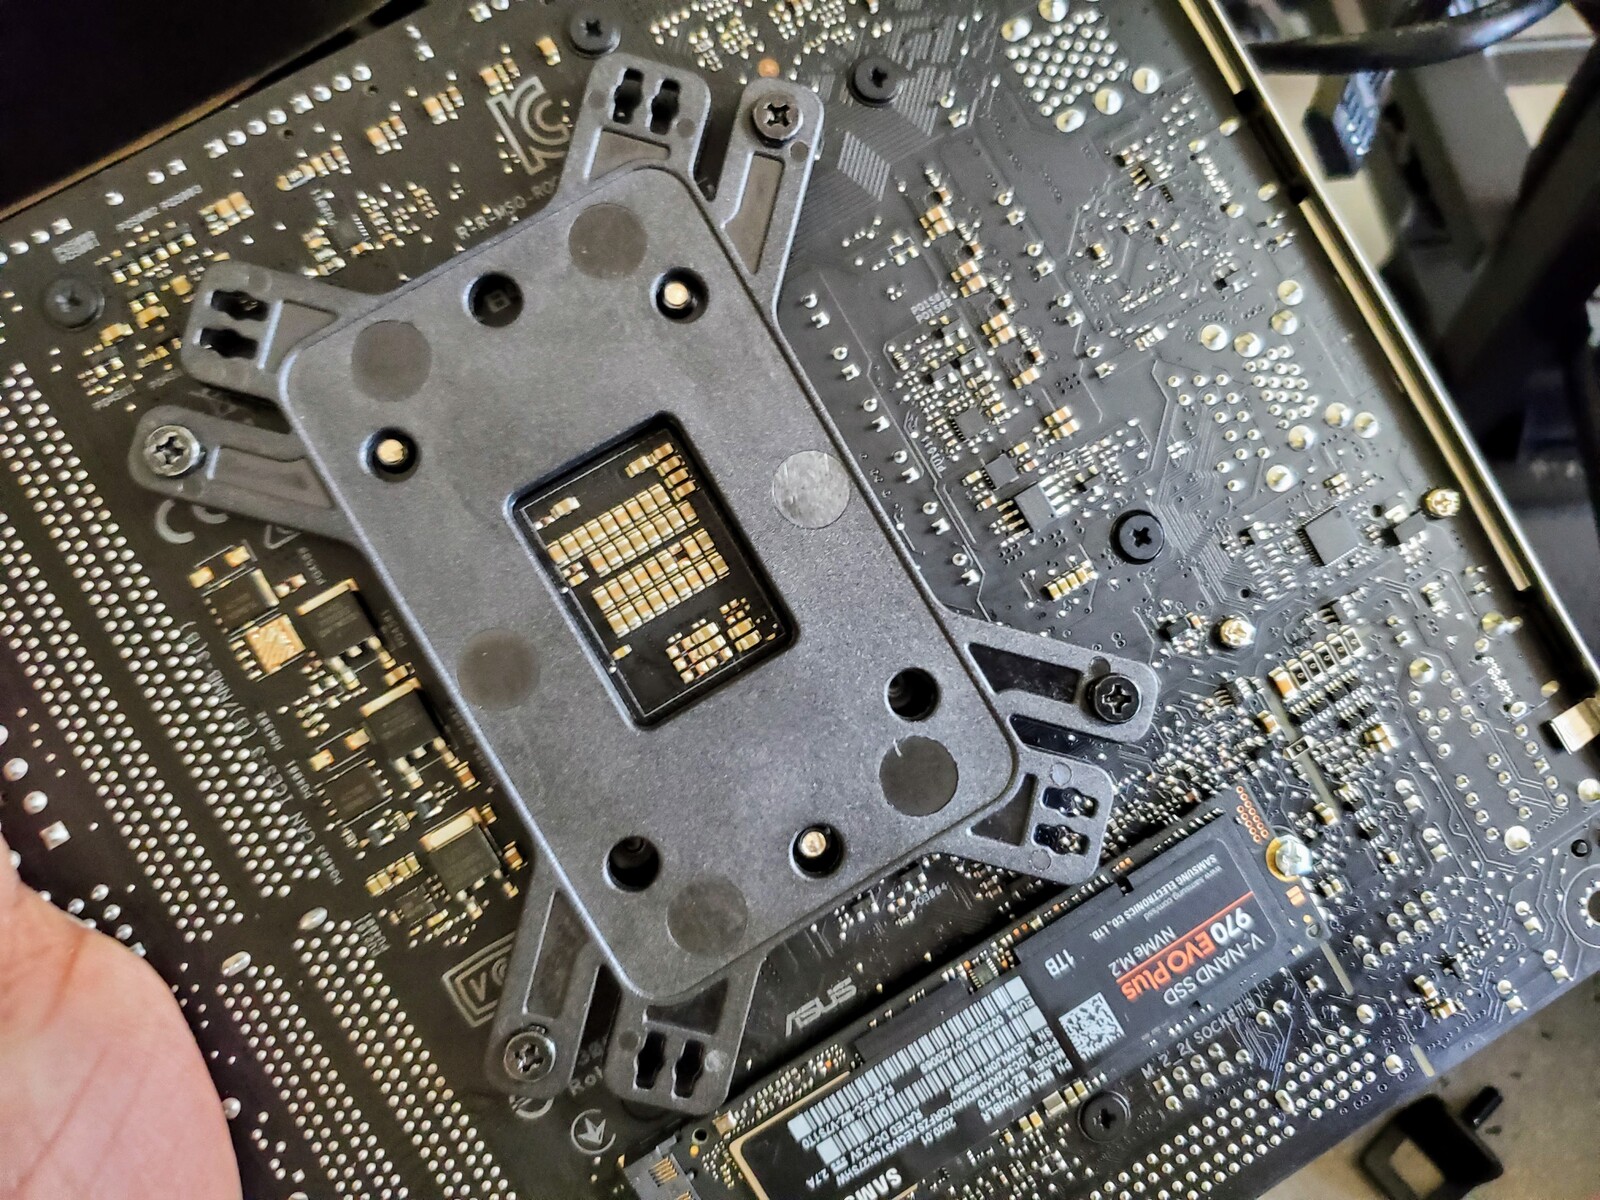
Also packed into the chassis is a box that includes the power supply cord and the CPU cooling-mount components. Pretty much the only unscrewing you need to do is in regard to the two screws holding the cooling fans in place, to release it in order to gain access to the liquid cooling heat sink itself and to find the place where you will locate the motherboard. As you will note, we preinstalled all the main components on the motherboard in Part 1, which is a far more sensible approach. A rookie mistake would be to install an empty motherboard into the case first and add the components later – while still possible, it is a lot more awkward even in a quite open and accessible case as this is. The liquid cooler is covered in a plastic protective cover to protect it and the thermal paste that is already pre-applied on the heat sink. This sits atop a foam mount during shipping which is where the motherboard will be located.
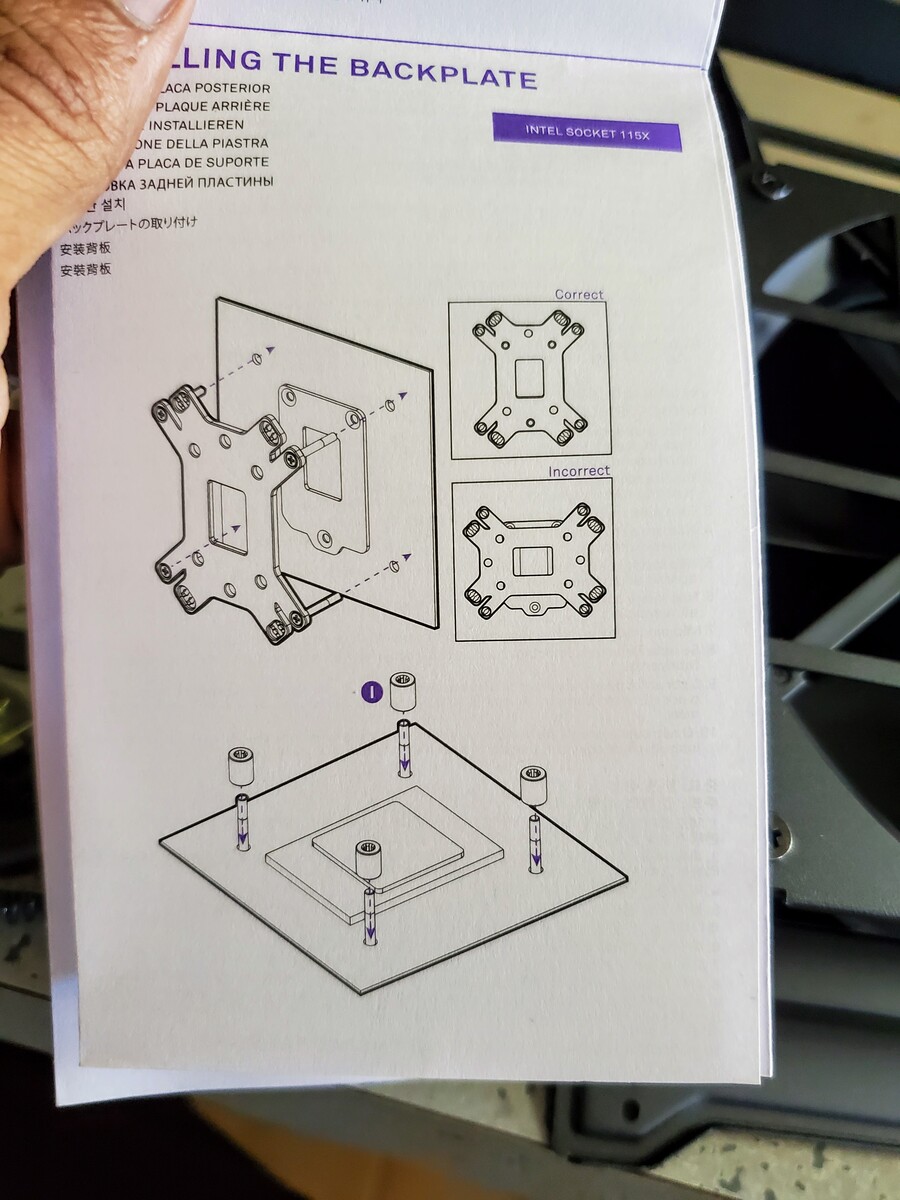
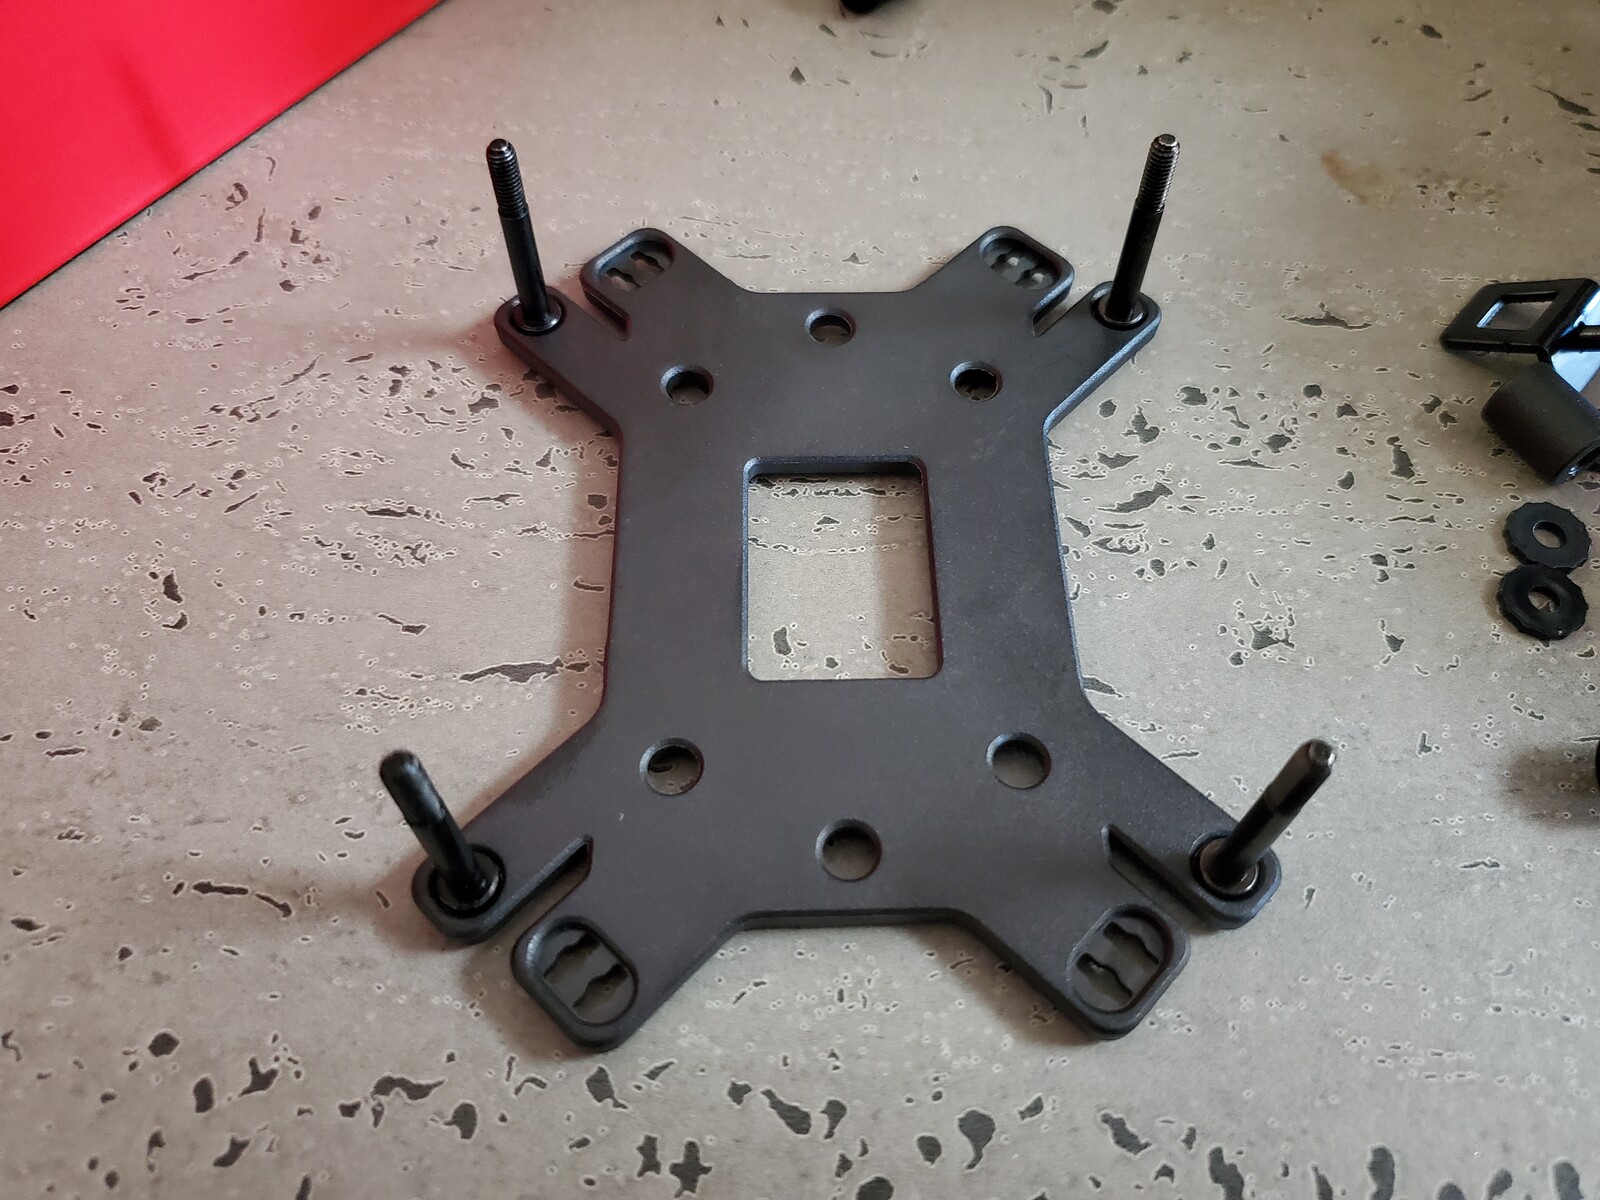
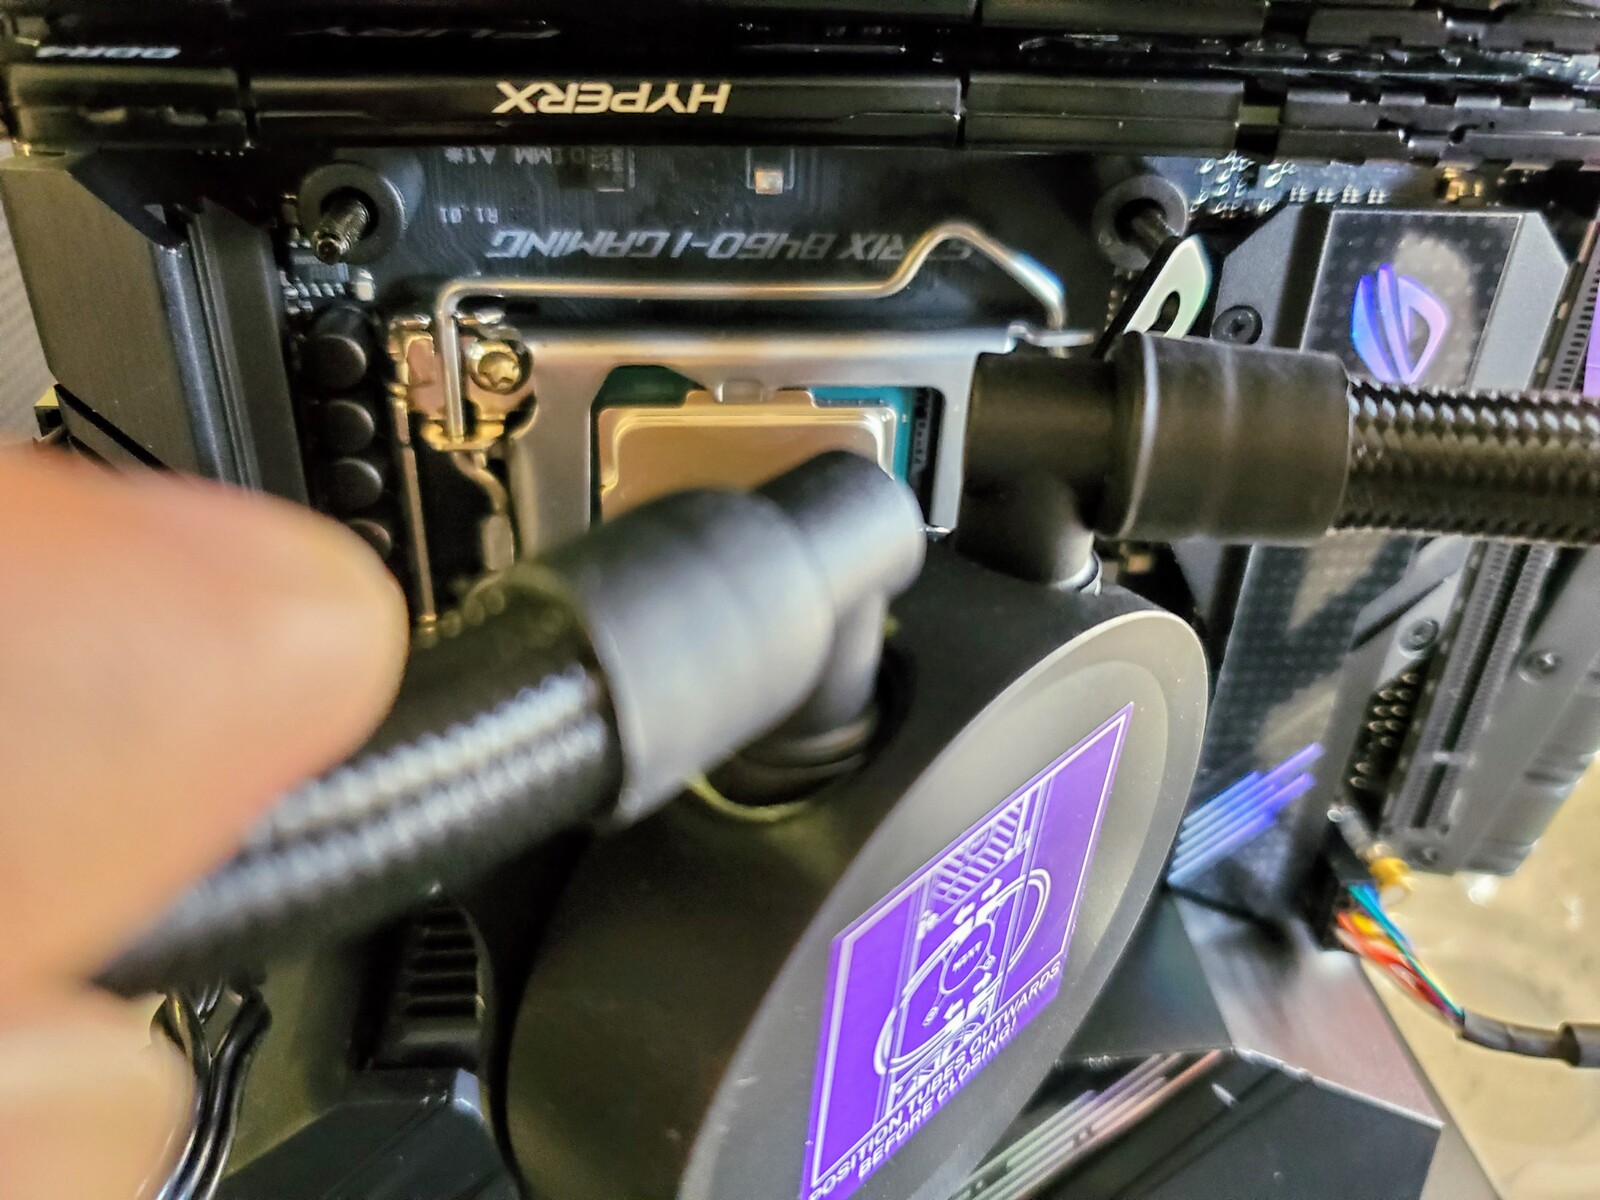
Before installing the motherboard, you will need to install the liquid cooling mount. If you look at the liquid cooler, you will see the Intel mount is preinstalled. It is, however, easy to swap this out for the optional AMD AM4 adapter and mount. Putting together the mount and installing it through the rear of the motherboard so the mounting stands for the cooler protrude through the front of the mobo is quite straightforward – NZXT’s included instructions are clear and easy to follow. Positioning the motherboard in place means temporarily pulling out the cooler to one side and actually installing the motherboard with its ports facing downwards, towards the bottom of the case – odd, no question, but in the end it makes a lot of sense in terms of keeping the build as neat and seamless as possible. The case has a raised section that allows all outward connecting cords to be tucked out through the rear of the case at table level.
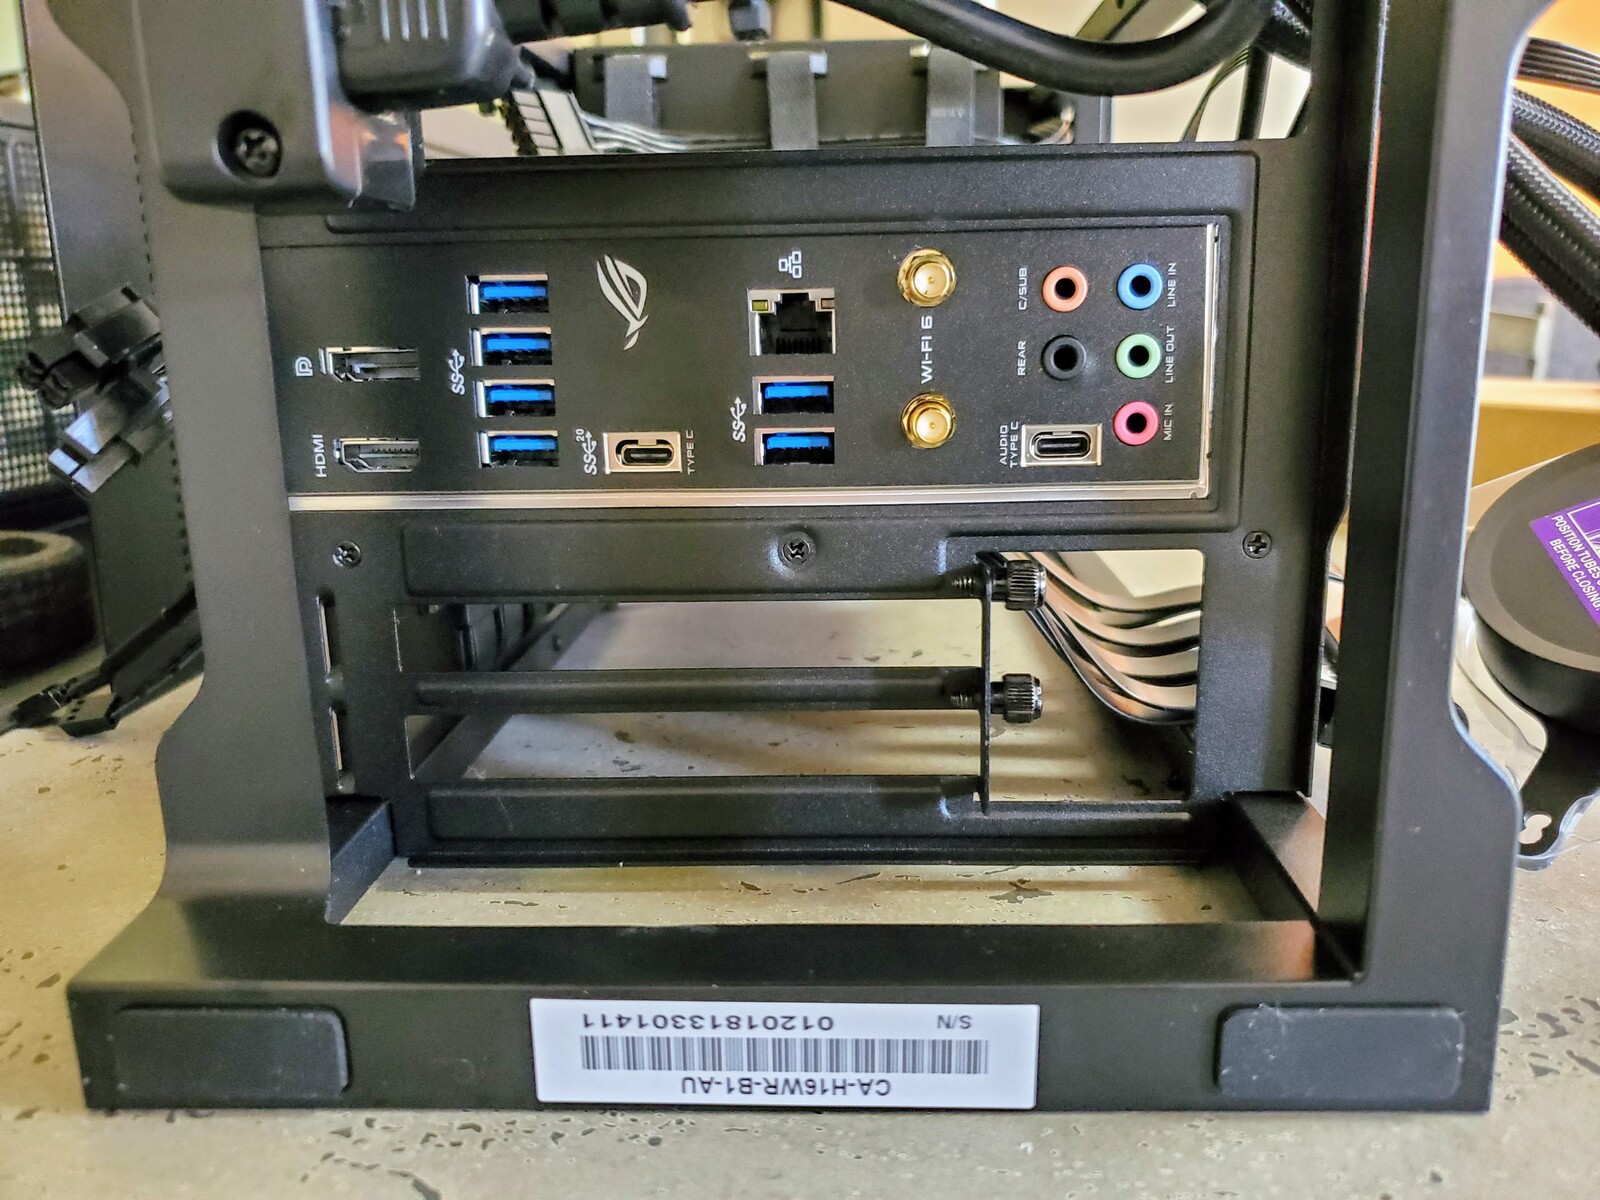
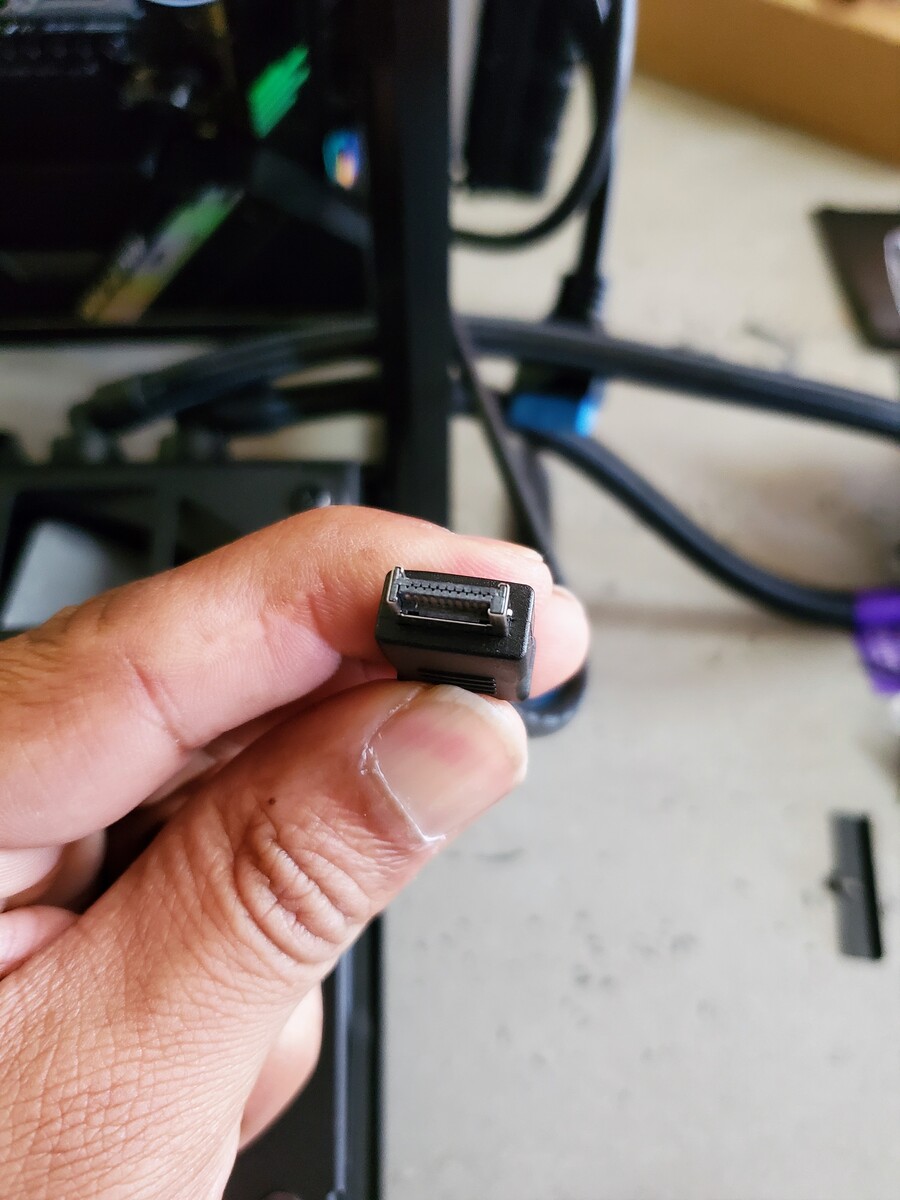
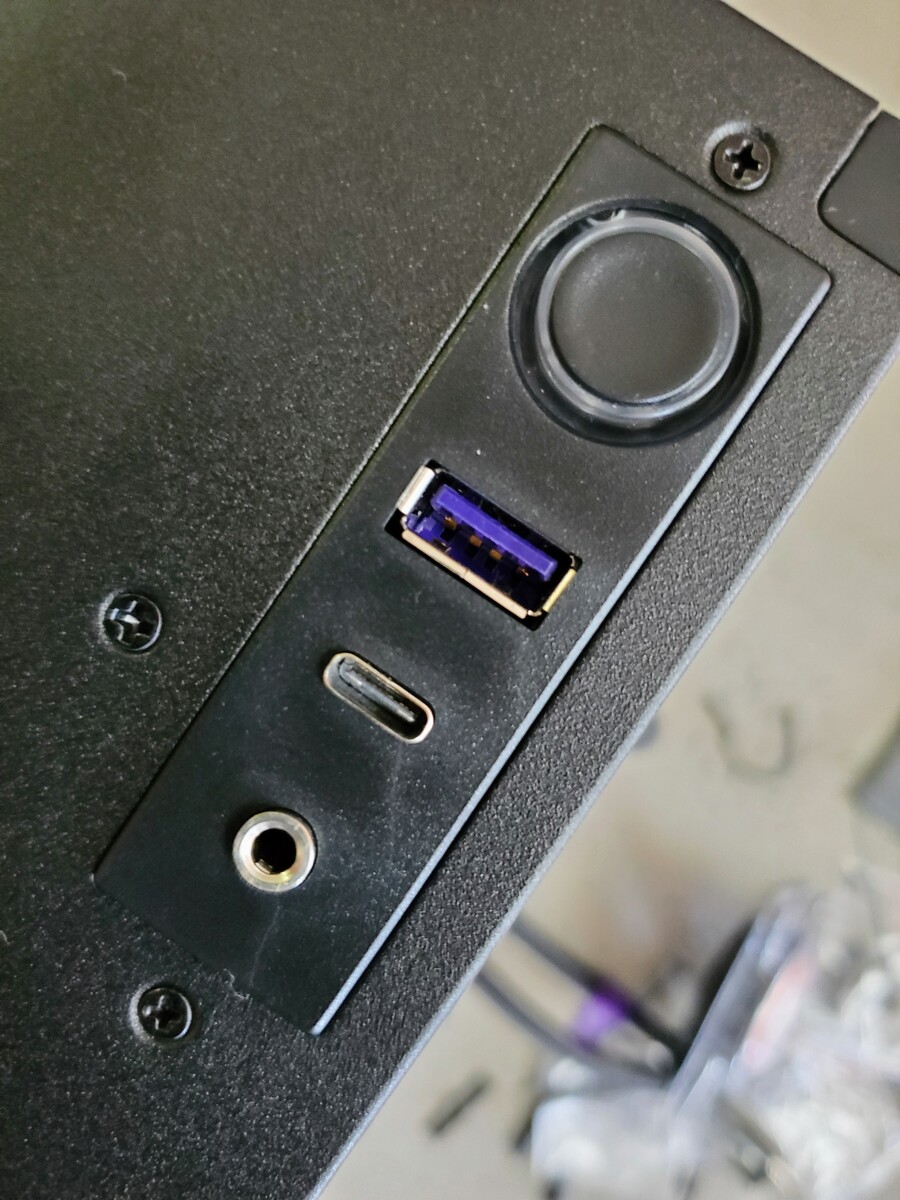
Once the motherboard has been secured using the four screws supplied by NZXT and included with the mounting components, it is then time to start plugging the cords into the various headers built in to the board. As NZXT has included a power switch on the top of the case, along with a USB-A port and USB-C port as well as a 3.5 mm jack, these cords will also be connected to the motherboard. This proved to be the main downside with choosing the ROG B450-I motherboard as it doesn’t include a USB-C 20-pin A-Key header to connect this particular cord. This renders the Type-C connector on the top of the case unusable. There are a few new high-end mini ITX boards that do incorporate this new connector, but they are at least US$100 more than the board chosen here, which otherwise does a great job.
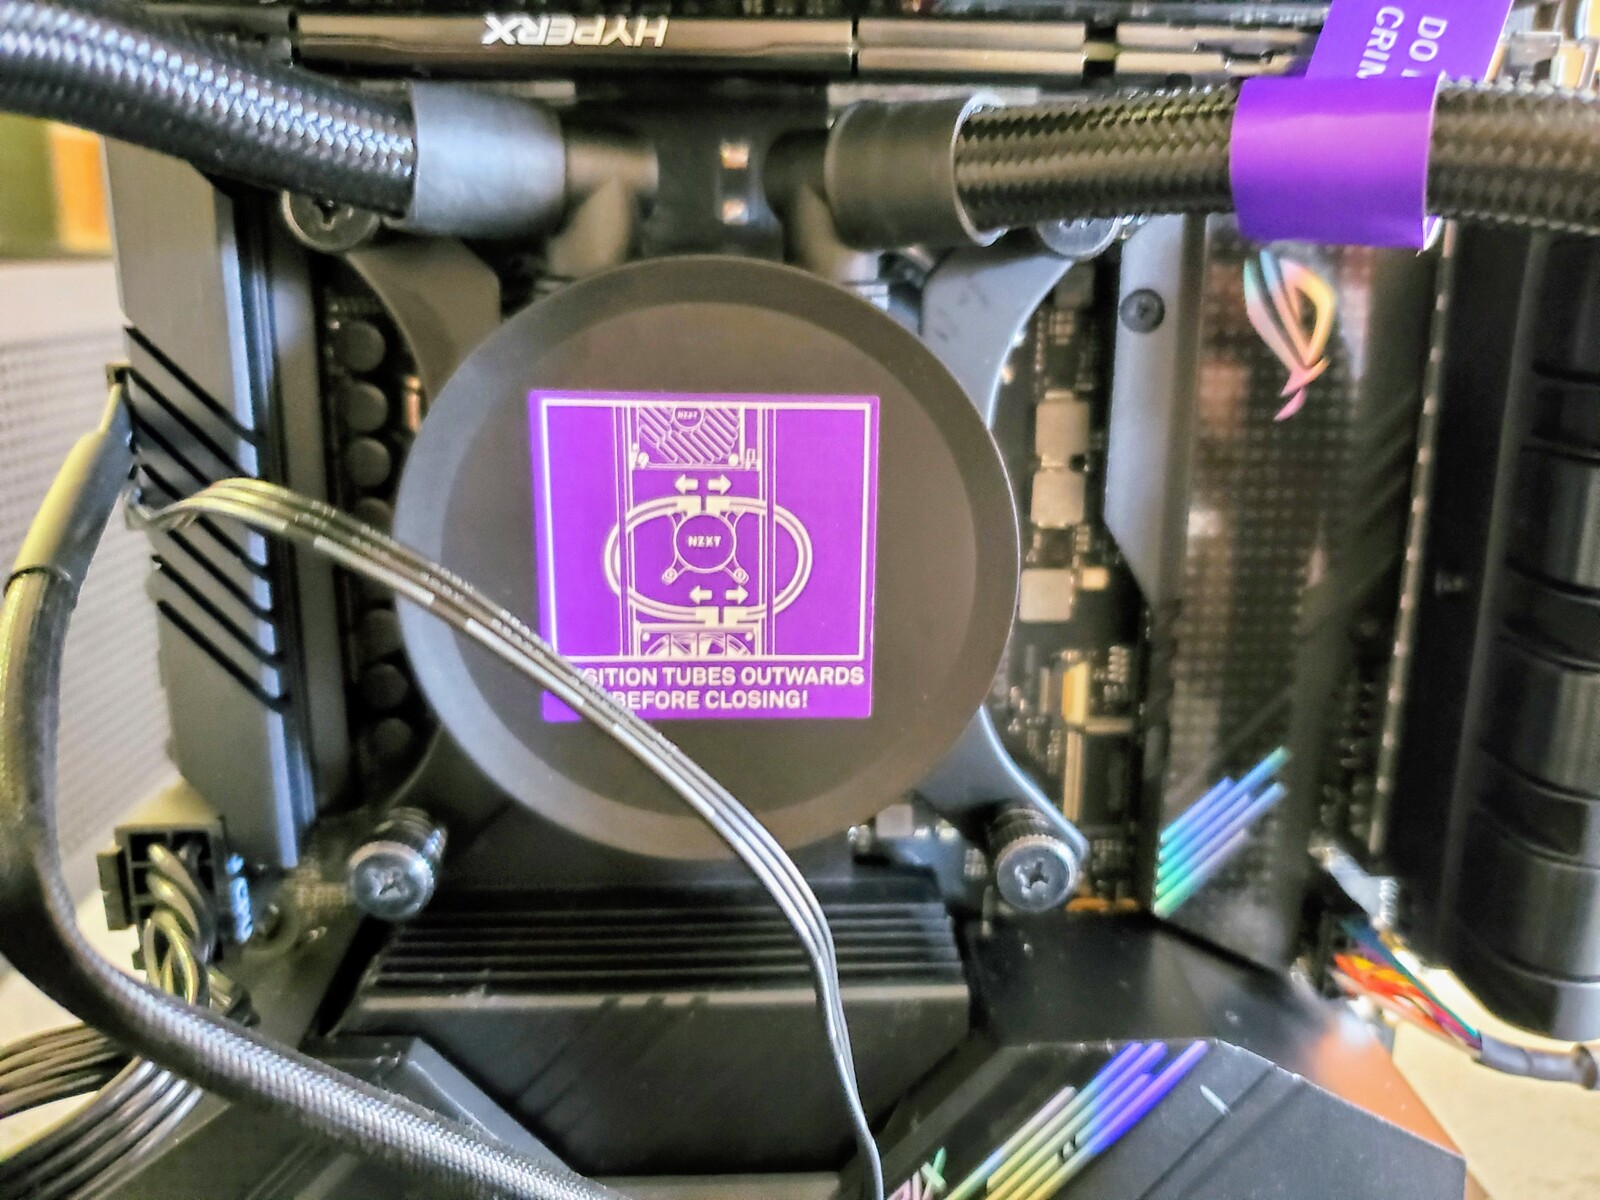
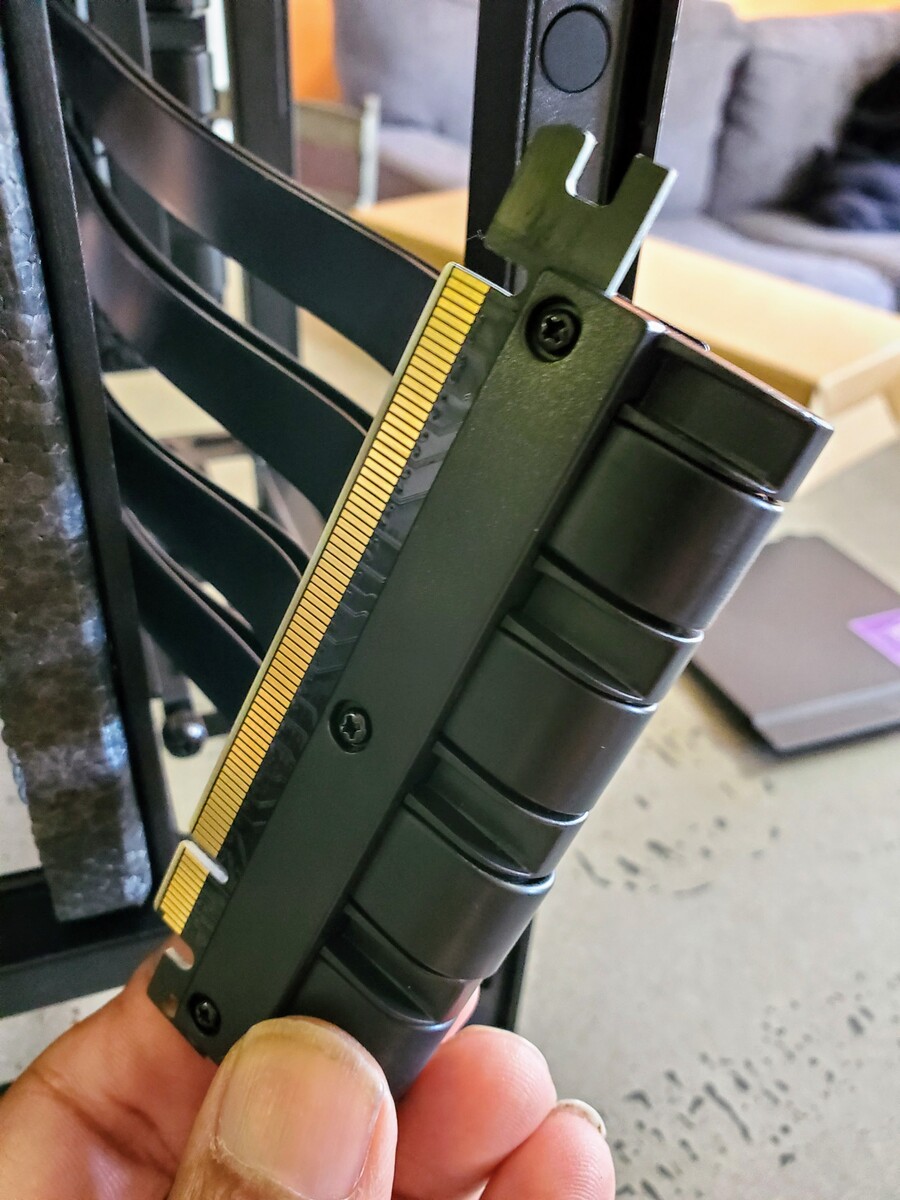
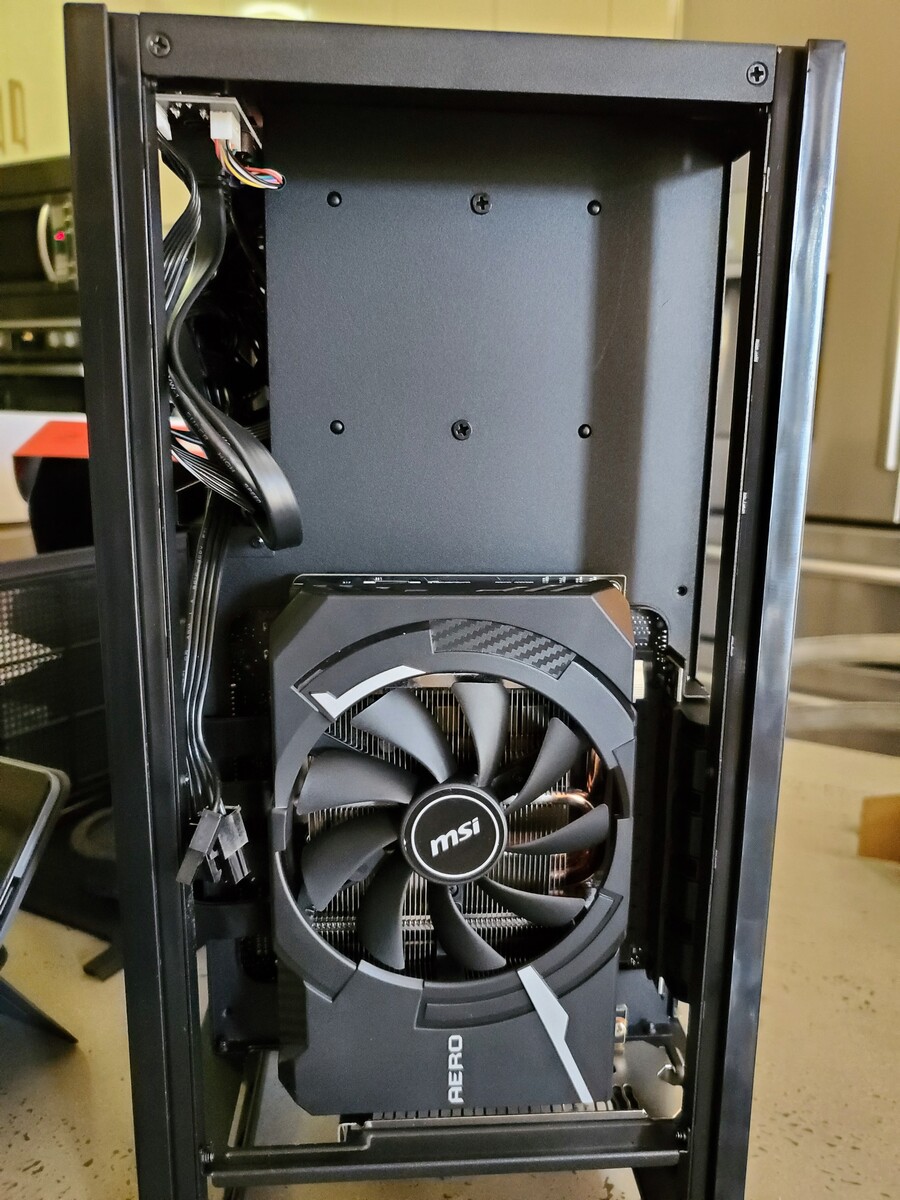
With the motherboard in place and all the cords connected to the corresponding headers (including the GPU riser which slots into the PCIe 16x lane slot), it is time to install the liquid cooler to the mount that was installed earlier. This too is relatively straightforward and involves using the spring-loaded screws and washers also supplied by NZXT. Once this has been screwed firmly in place, we can then screw the fans back in, making sure that the liquid cooling cords are pushed outwards either side of the cooler heat sink (as pictured in a helpful NZXT sticker). The last component to add is the GPU, which sits behind the motherboard in a separate compartment.
It is then time to put back in place all of the tool-less panels and boot up the system. As we mentioned in Part 1, we used WinToUSB to preinstall Window 10 with all the necessary utilities required to just turn on the system and get it up and running. Booting up for the first time will take you straight into the motherboard BIOS which is pre-configured in such a way that you can simply exit it and launch into the Windows 10 boot up and install cycle. You can, of course, tweak the settings in the BIOS at any time, which includes adjusting things like the fan mode and turning on the XMP functionality of the DDR4 RAM among other tailored optimizations.
The NZXT H1 is an excellent case that makes building a high-performance mini ITX build as straightforward as you will find. It’s pricey, but the included CPU liquid cooler and 650 W power supply make the price easier to swallow. That it is among the few compact upright PC cases on the market also helps it warrant an additional premium as does NZXT’s use of high-quality materials and clever internal design approach. Make sure to keep an eye out for Part 3, the final part of this NZXT build, to find out how the 6-core Intel 10th gen Comet Lake-S Core i5-10400 CPU and NVIDIA RTX 2060 Super GPU perform in some gaming and other benchmarks.

Source(s)
Own
