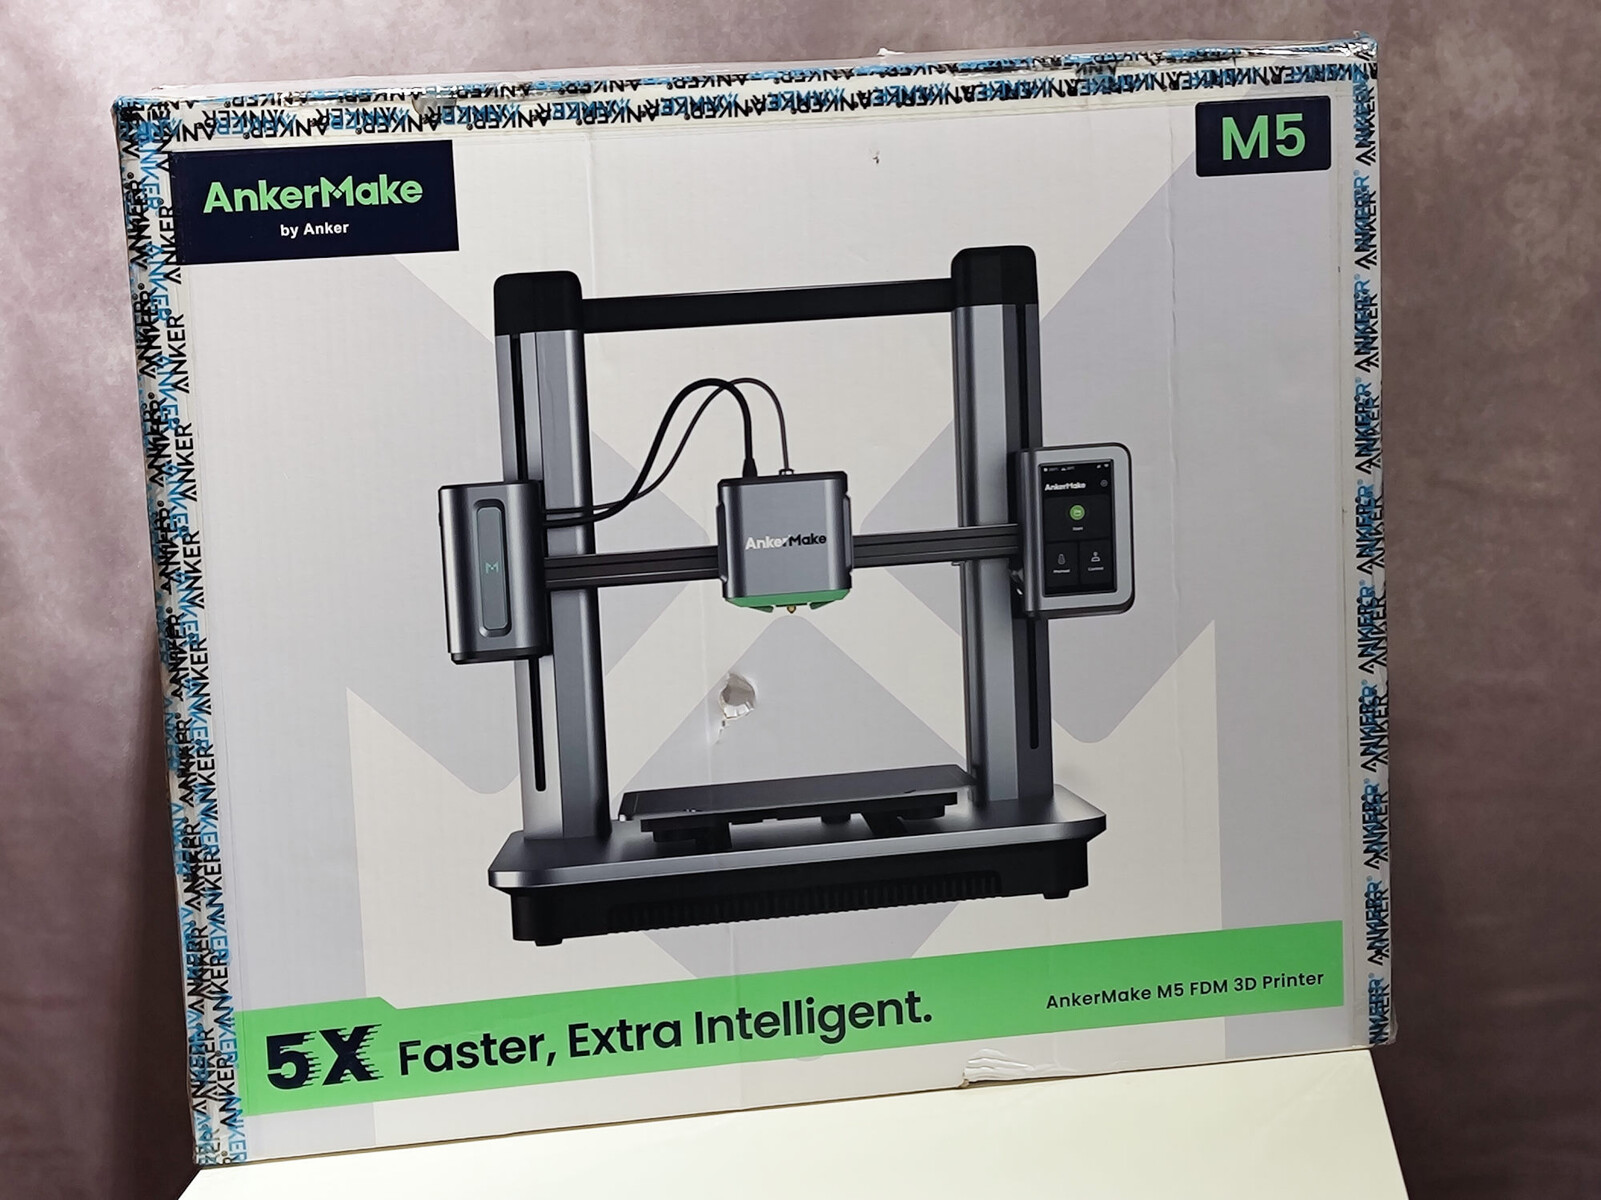
AnkerMake M5 3D printer review: Printing under the watchful gaze of AI

At one time only known for cheap and good quality replacement batteries, Anker has now grown into a company which offers all kinds of PC and smartphone accessories. In addition to this, they continue to manufacture rechargeable batteries in the form of the Powerstation. At the beginning of this year, Anker launched an exceptionally successful Kickstarter campaign for the AnkerMake M5, attracting 11,313 backers and raising more than 8 million US dollars in the process. In the meantime, they have started fulfilling their promises by shipping M5 batches to Kickstarter backers.
As part of the campaign, Anker promised one of the fastest, easiest to use, high-quality 3D printers. In this department, it has not only kept those promises but also fully delivered on them. On top of this, AI monitoring is able to assist the printer in identifying misprints or printing errors and, if necessary, pause the printing process until the user has solved the problem. In doing so, the AnkerMake M5 is able to print almost non-stop at a speed of 250 mm/s. This is made possible by high acceleration values, and a robust direct drive extruder contributes to very high constructional rigidity.
Technical data
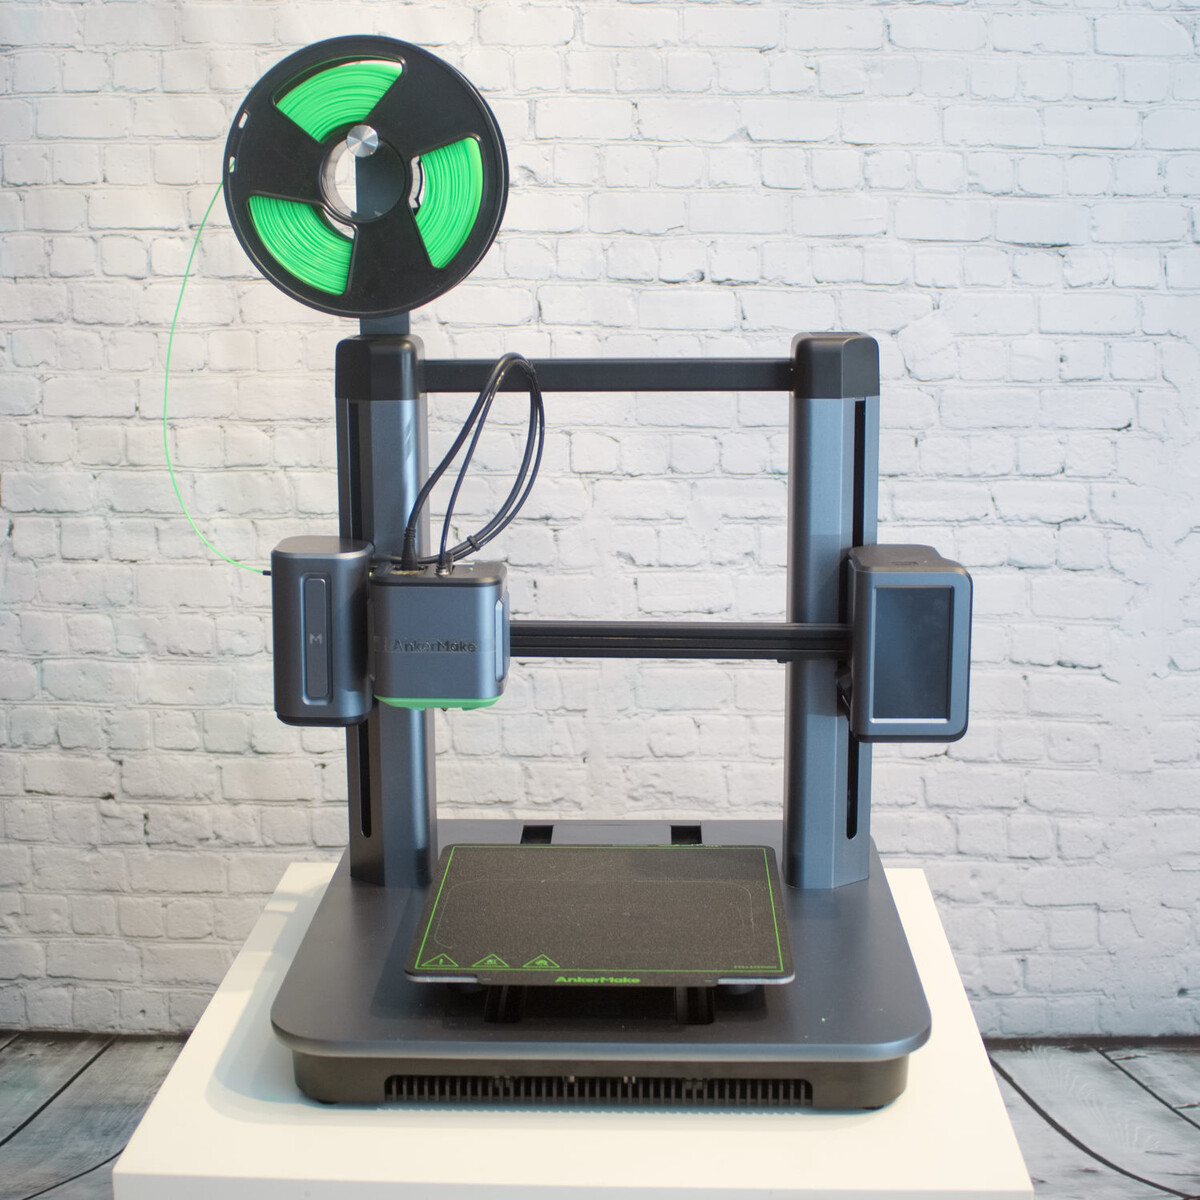
If you take a closer look at the AnkerMake M5 you will recognize many familiar components and parts. The build is similar to the well-known Creality Ender 3. However, in many areas the M5 shines, with clever design choices which are responsible for added stability as well as reducing the number of moving parts.
| AnkerMake M5 | 3D printer |
|---|---|
| Implemented technology | FDM, FFF |
| Maximum print volume | 235 × 235 × 250 mm (~9.3 x 9.3 x 9.8 in) |
| Assembled size without cables, filament rolls | 50.2 × 43.8 × 47 cm (~19.8 x 17.2 x 18.5 in) |
| Motion system | Prusa/Mendel X,Y,Z single drive |
| Extruder | Direct Drive Extruder (Ultra Direct Extruder) |
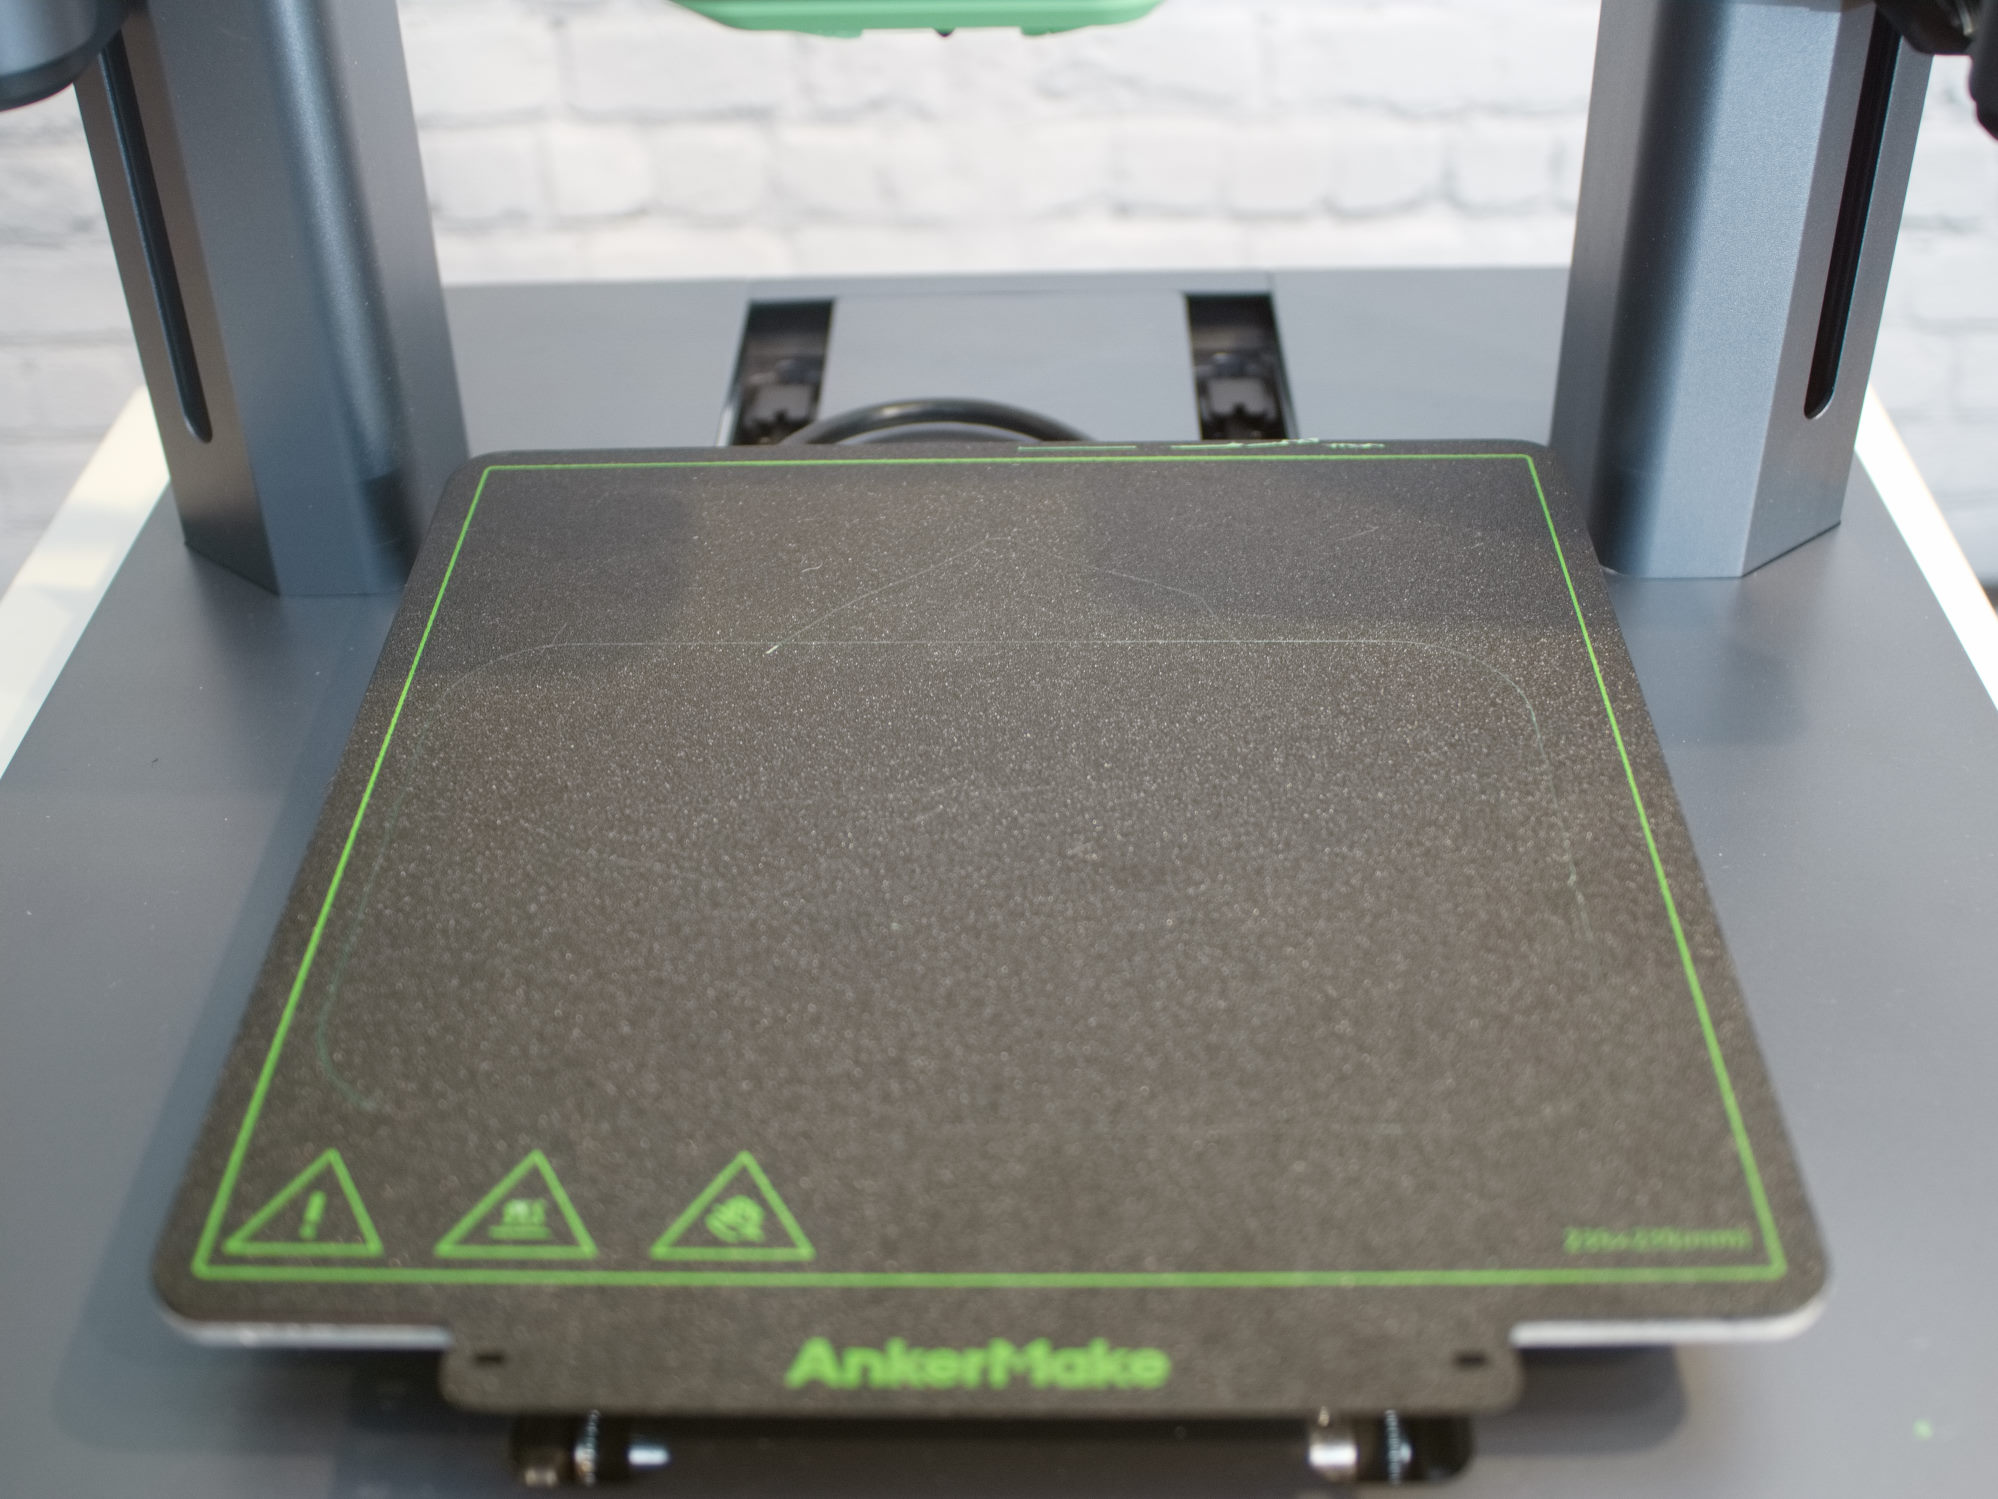
| Print bed | Magnetic spring steel print bed with PIE coating heated with 24 V power supply Mesh Bed Leveling via load cell |
| Temperatures | Hotend maximum 260 °C (500 °F) Print bed maximum 100 °C (212 °F) |
| Control board Micro controller CPU |
AnkerMake M5 Board V8111 STM32F4 Dual XBurst(1.2GHz) + XBurst 0(240MHz) |
| Review sample firmware | AnkerMake V2.0.46_2.0.40 (Linux based) |
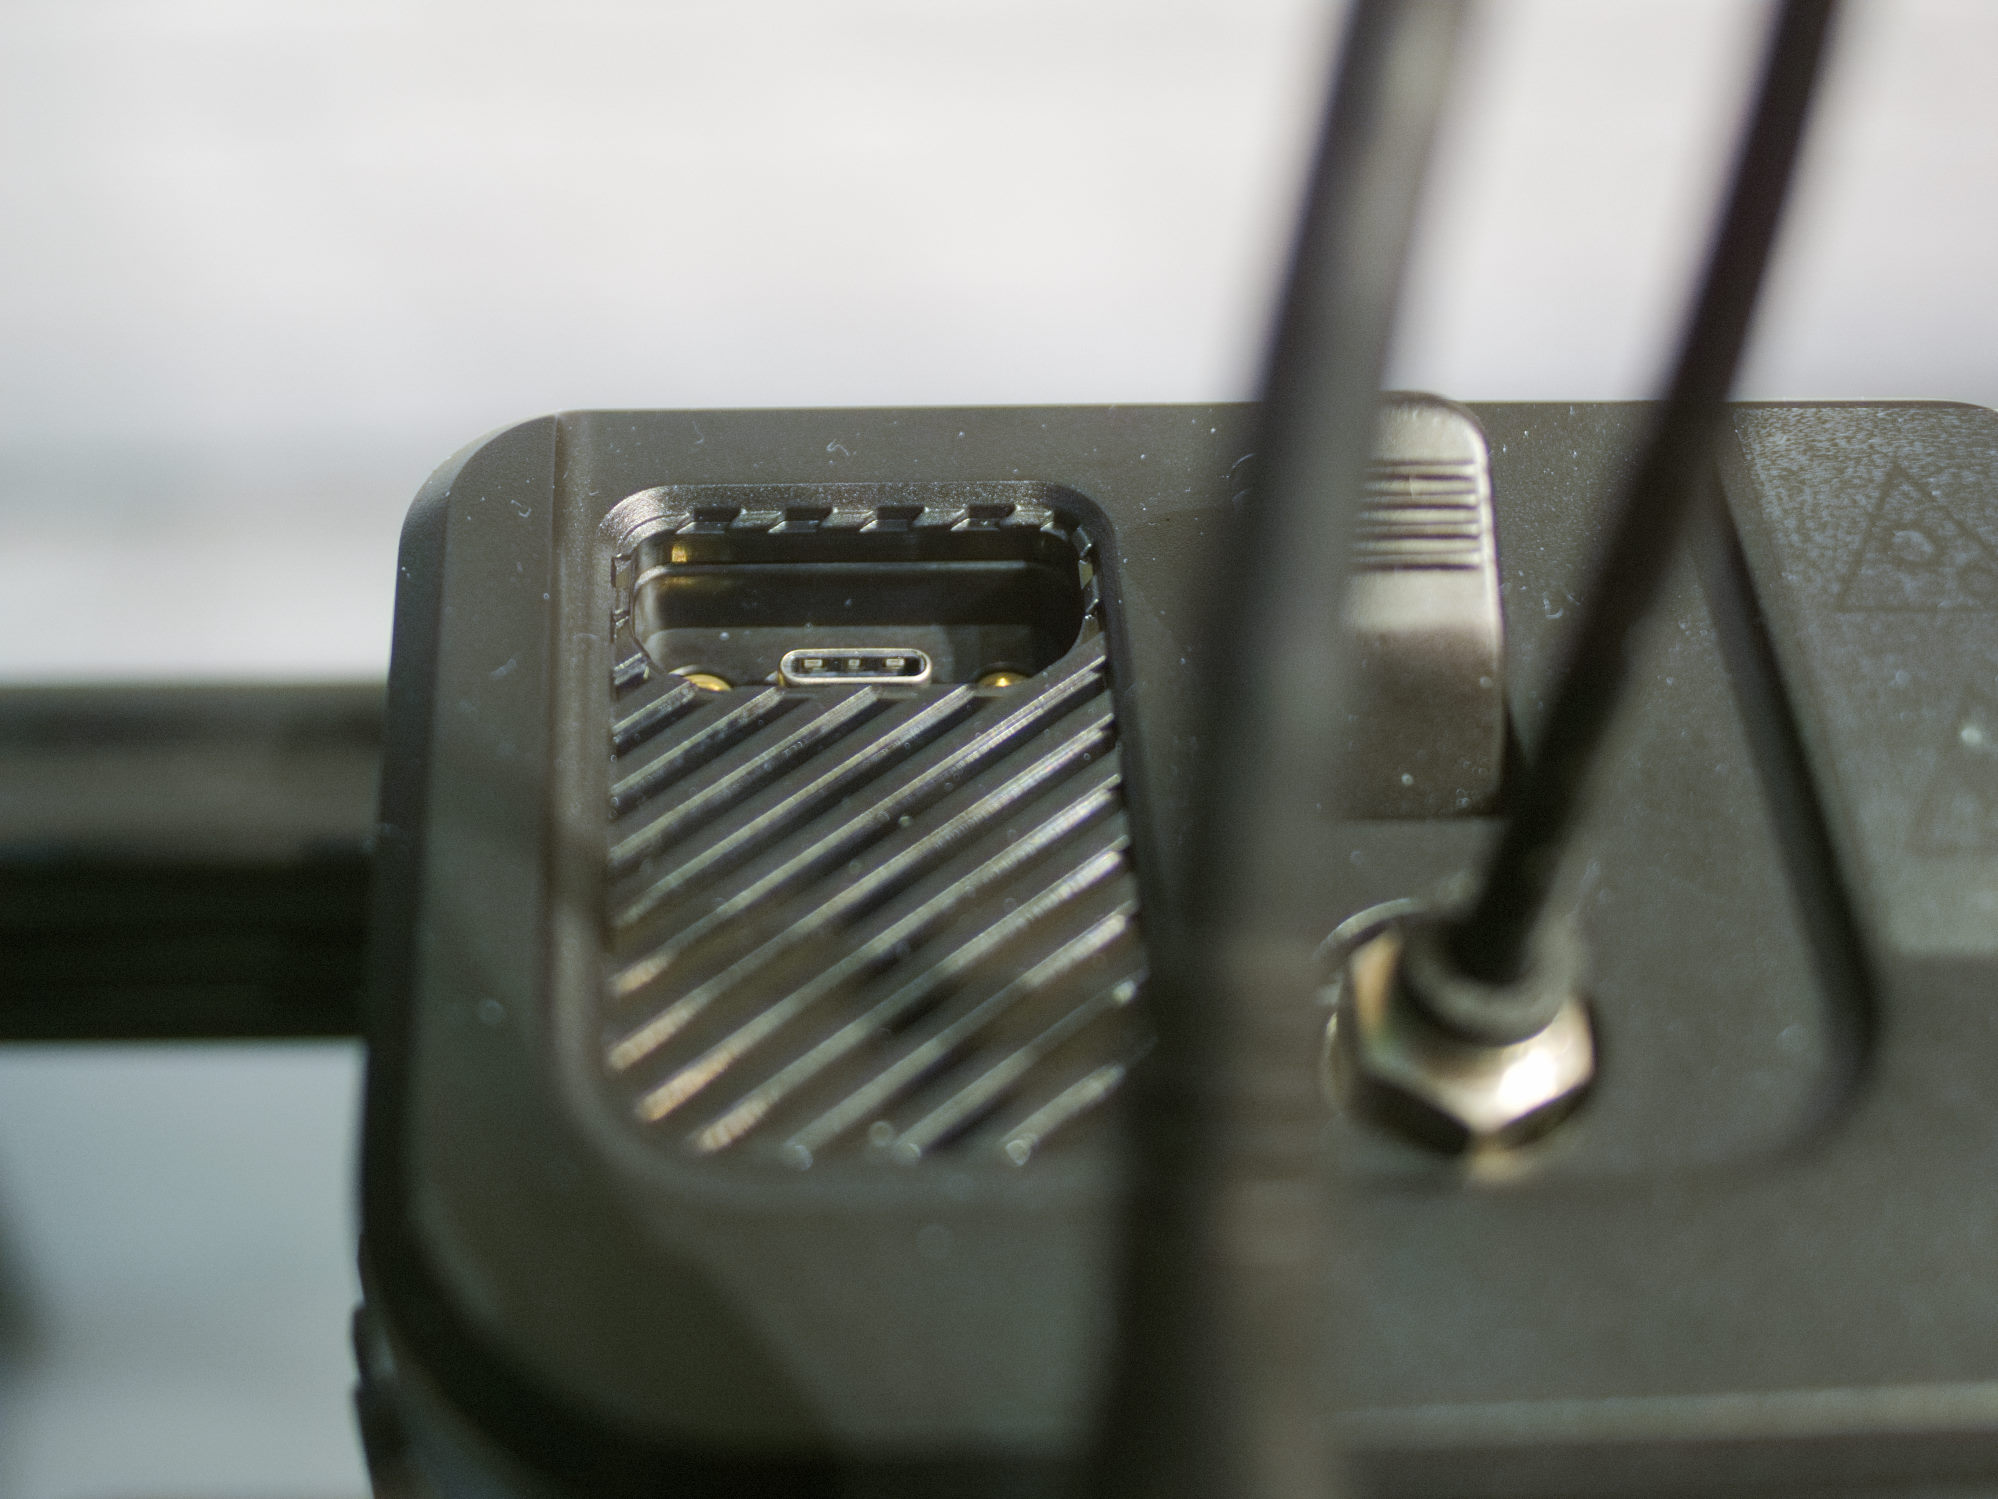
| Ports | USB-Type-C |
| Supports slicer | AnkerMake Software (Windows/macOS), Ultimaker Cura, PrusaSlicer and others the AI monitoring is only done via the AnkerMake slicer |
| Control | Touchsreen, online interface via browser or AnkerMake application (Internet connection and login required), digital voice assistants such as Apple Home Kit and Alexa |
| Special features | Camera based AI print monitoring |
| Power supply | Internal 110 V - 240 V to 24 V power supply |
| Manufacturer website | AnkerMake |
Build and cable management
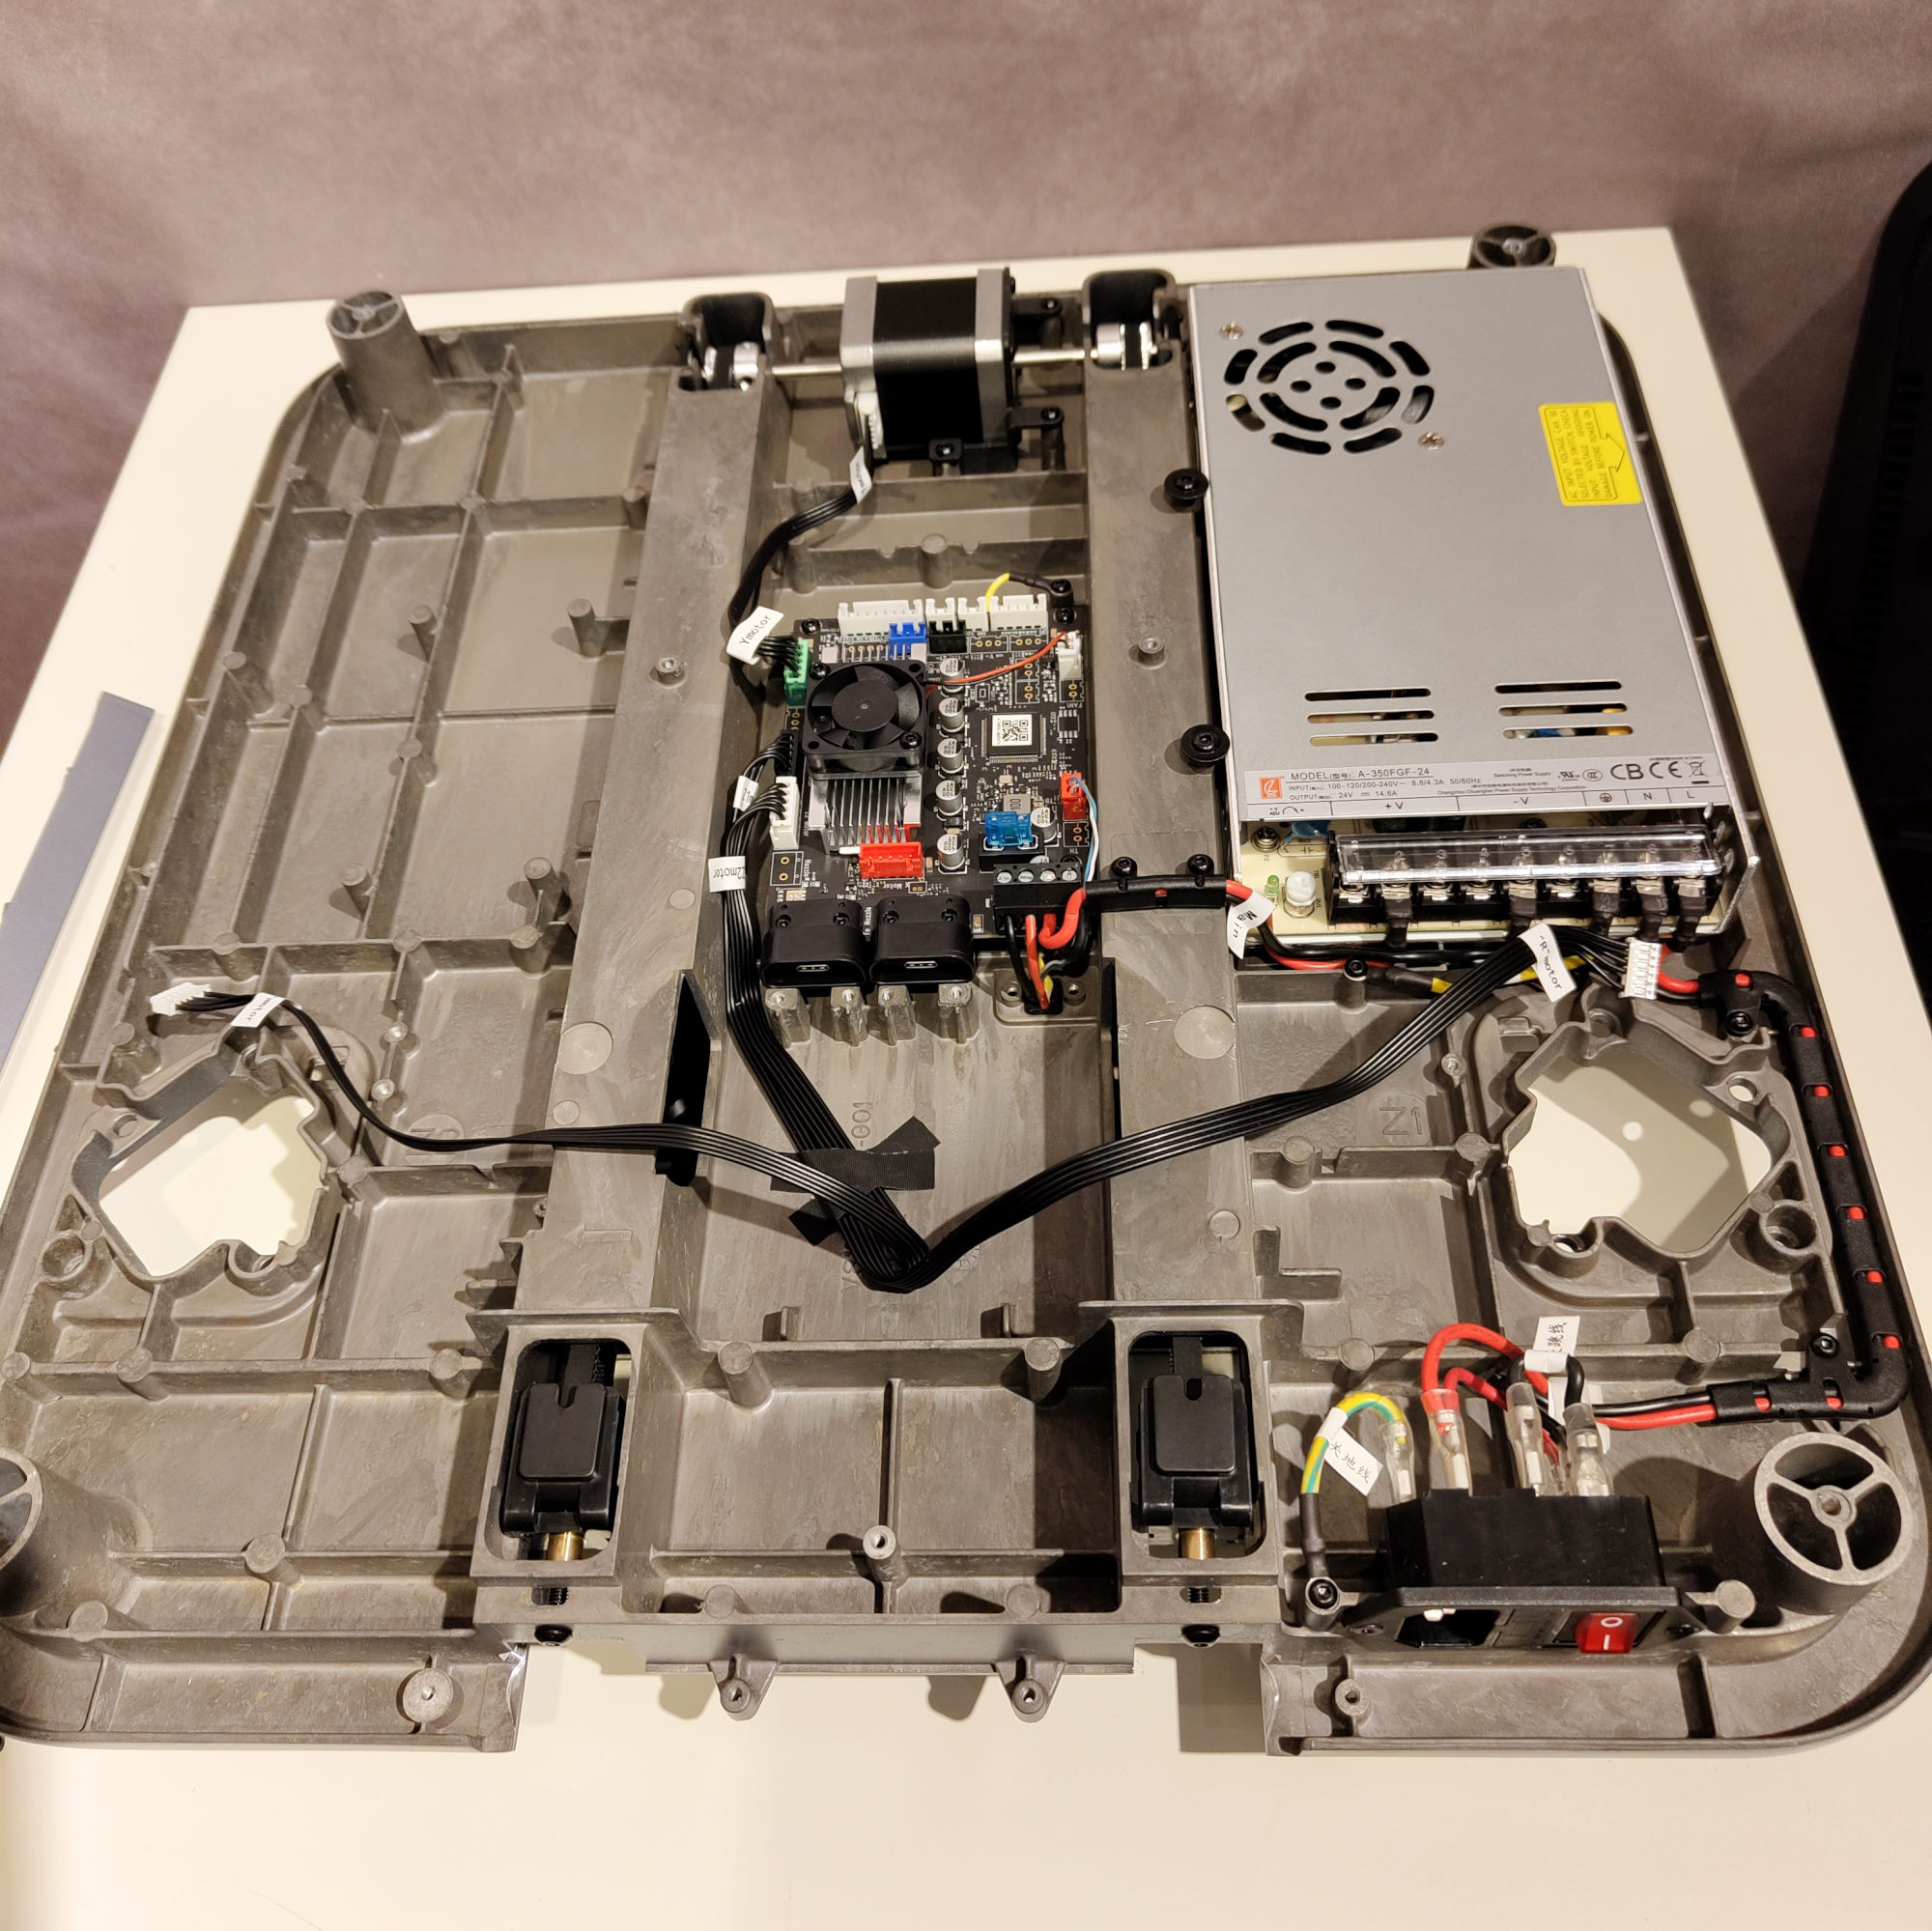
The 3D printer base consists of a cast plate with milled guides and threads onto which all the other components are mounted. This is the reason for the AnkerMake M5's hefty weight as the 3D printer tips the scales at over 10kg (22 pounds). This solid build ensures high levels of robustness and, in turn, facilitates high speeds and acceleration.
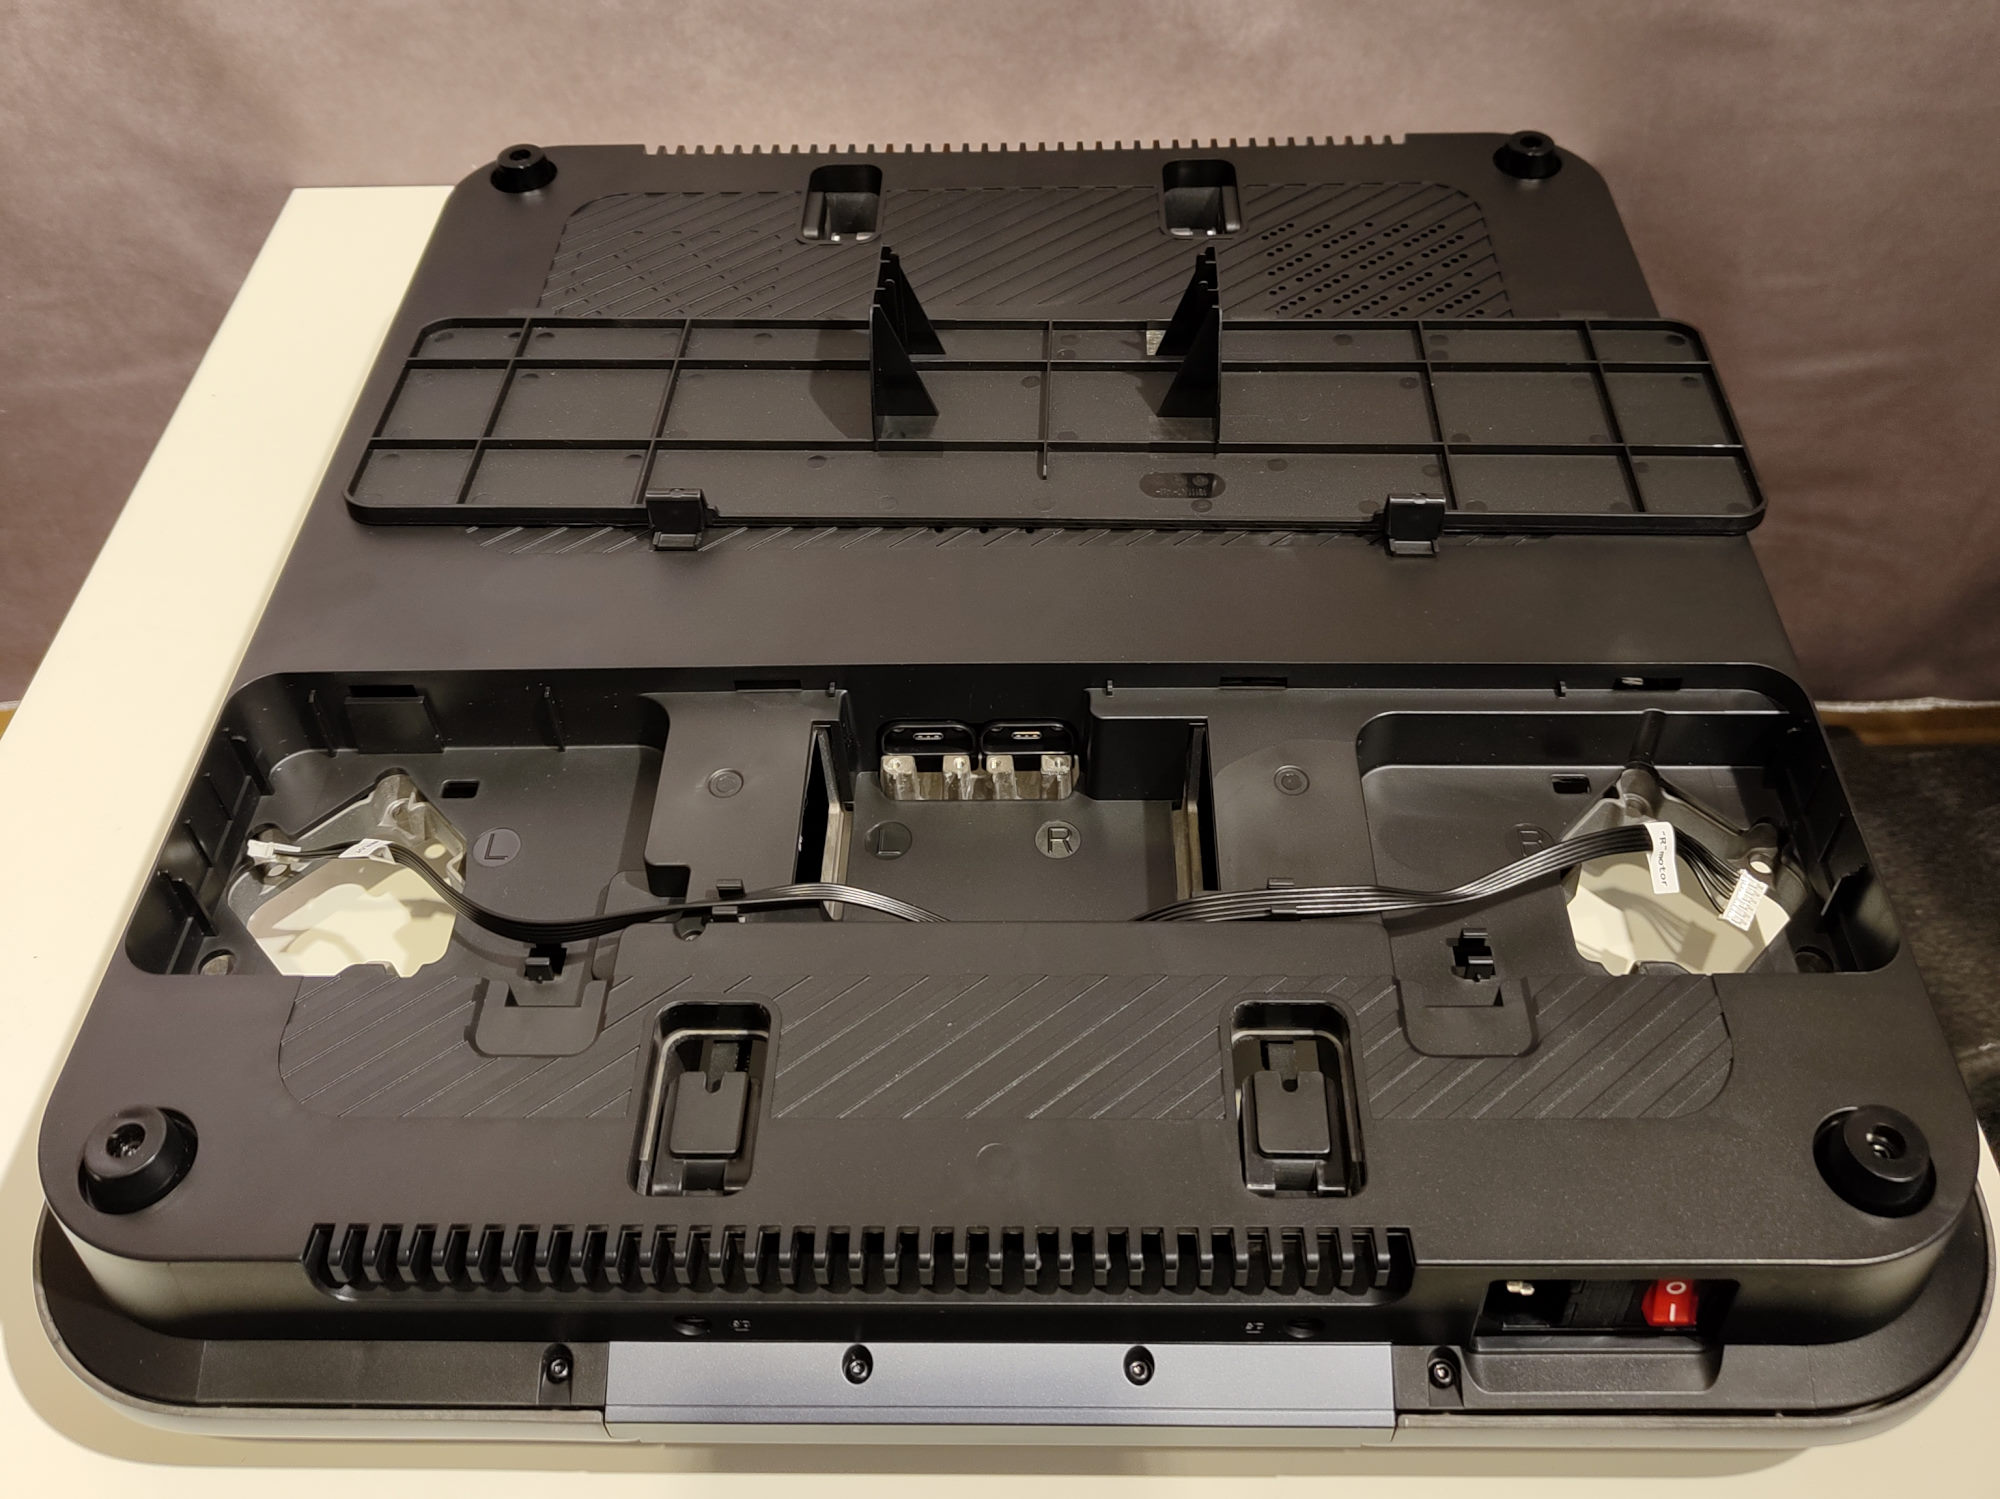
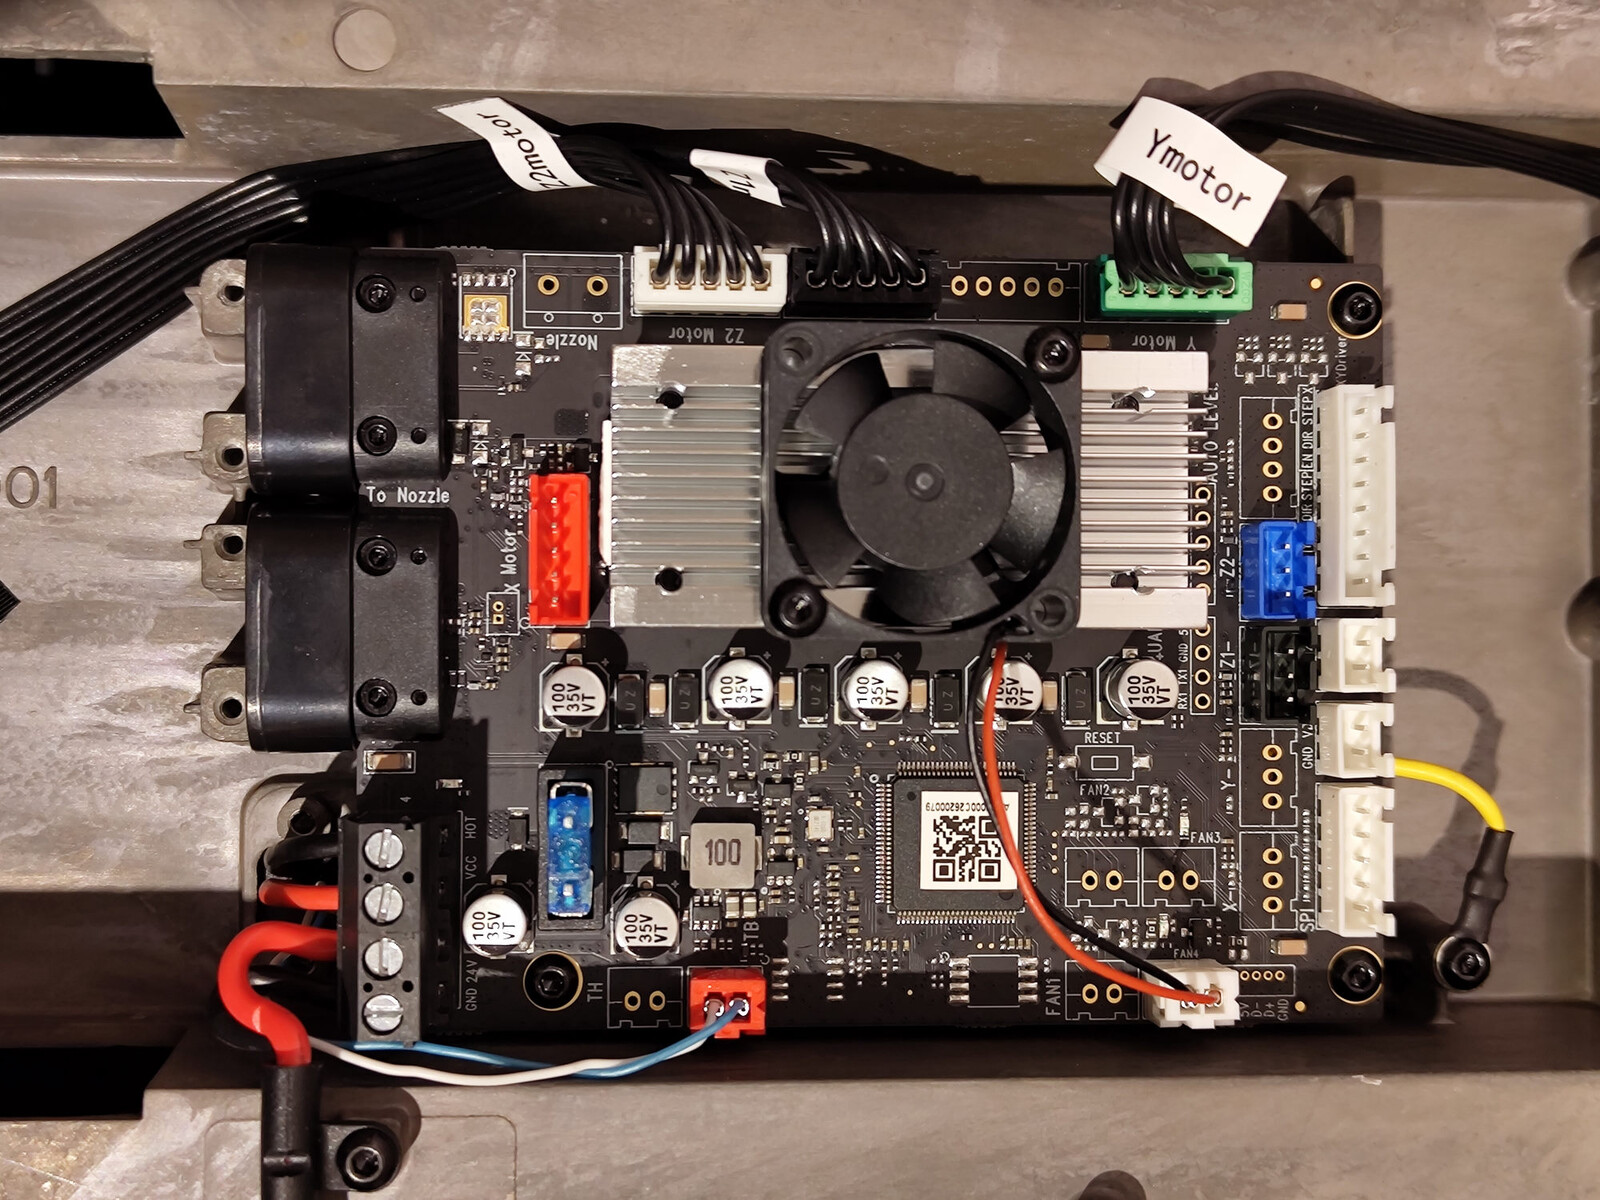
A glance under the base's large cover reveals first-rate cable management. Every component and cable has its own fixed place. Parts of the AnkerMake M5 mainboard are cooled via a small fan.
Regarding connection to the mainboard, Anker has used, amongst other things, USB-C ports and cables. This connection is known to be durable and, as such, can be considered a good choice. Other than that, hard-wearing JST connectors can be found on the board.
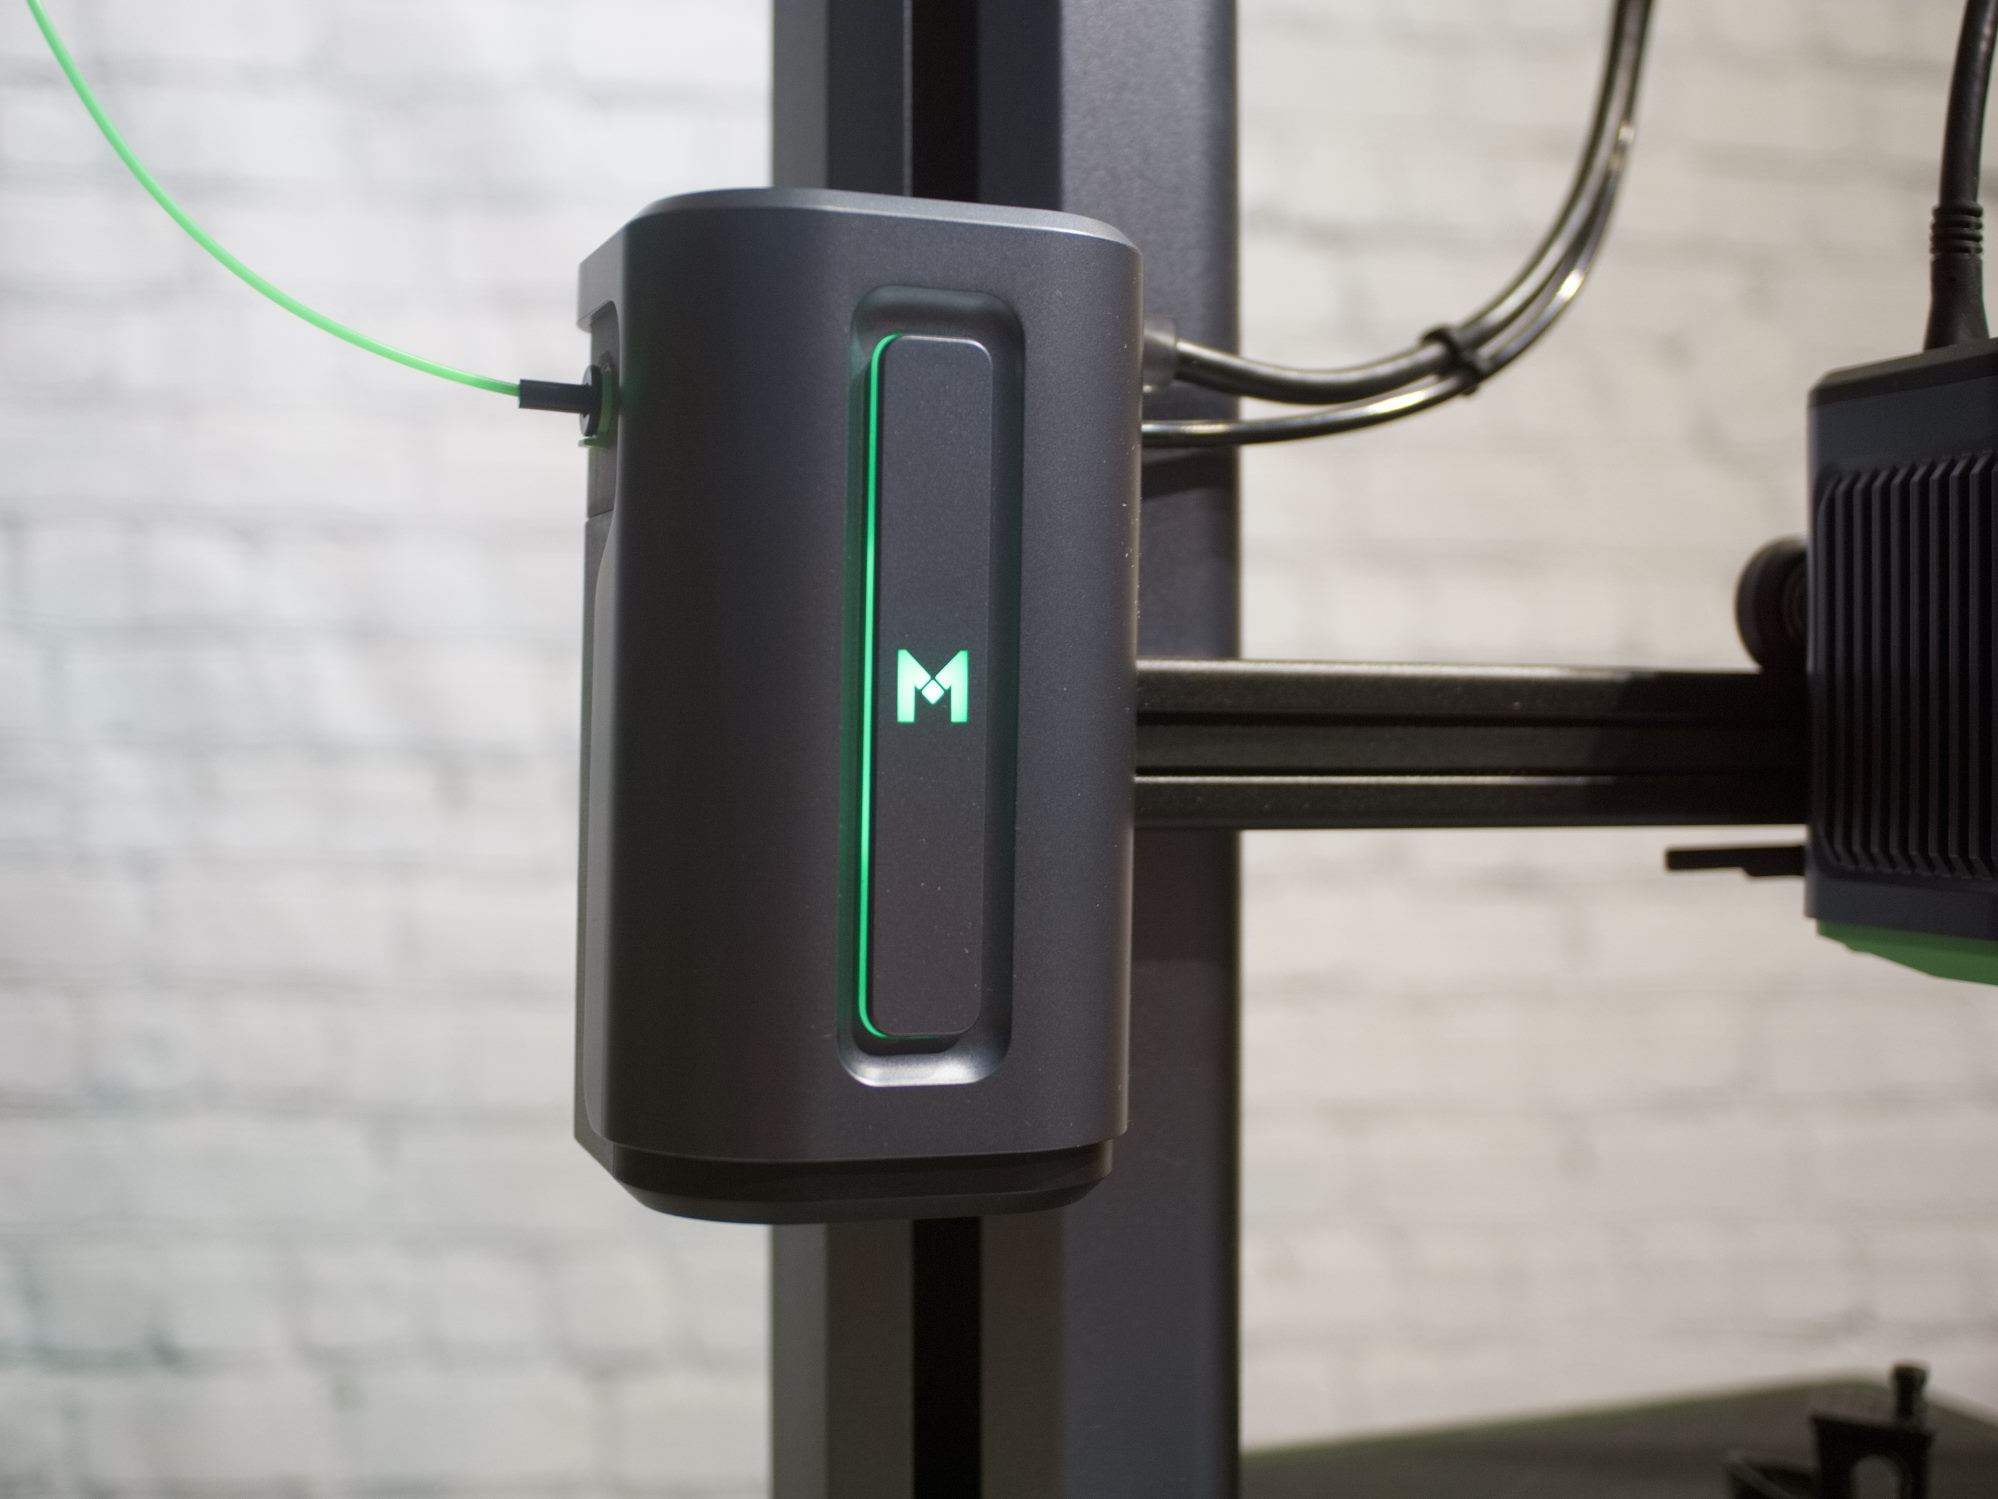
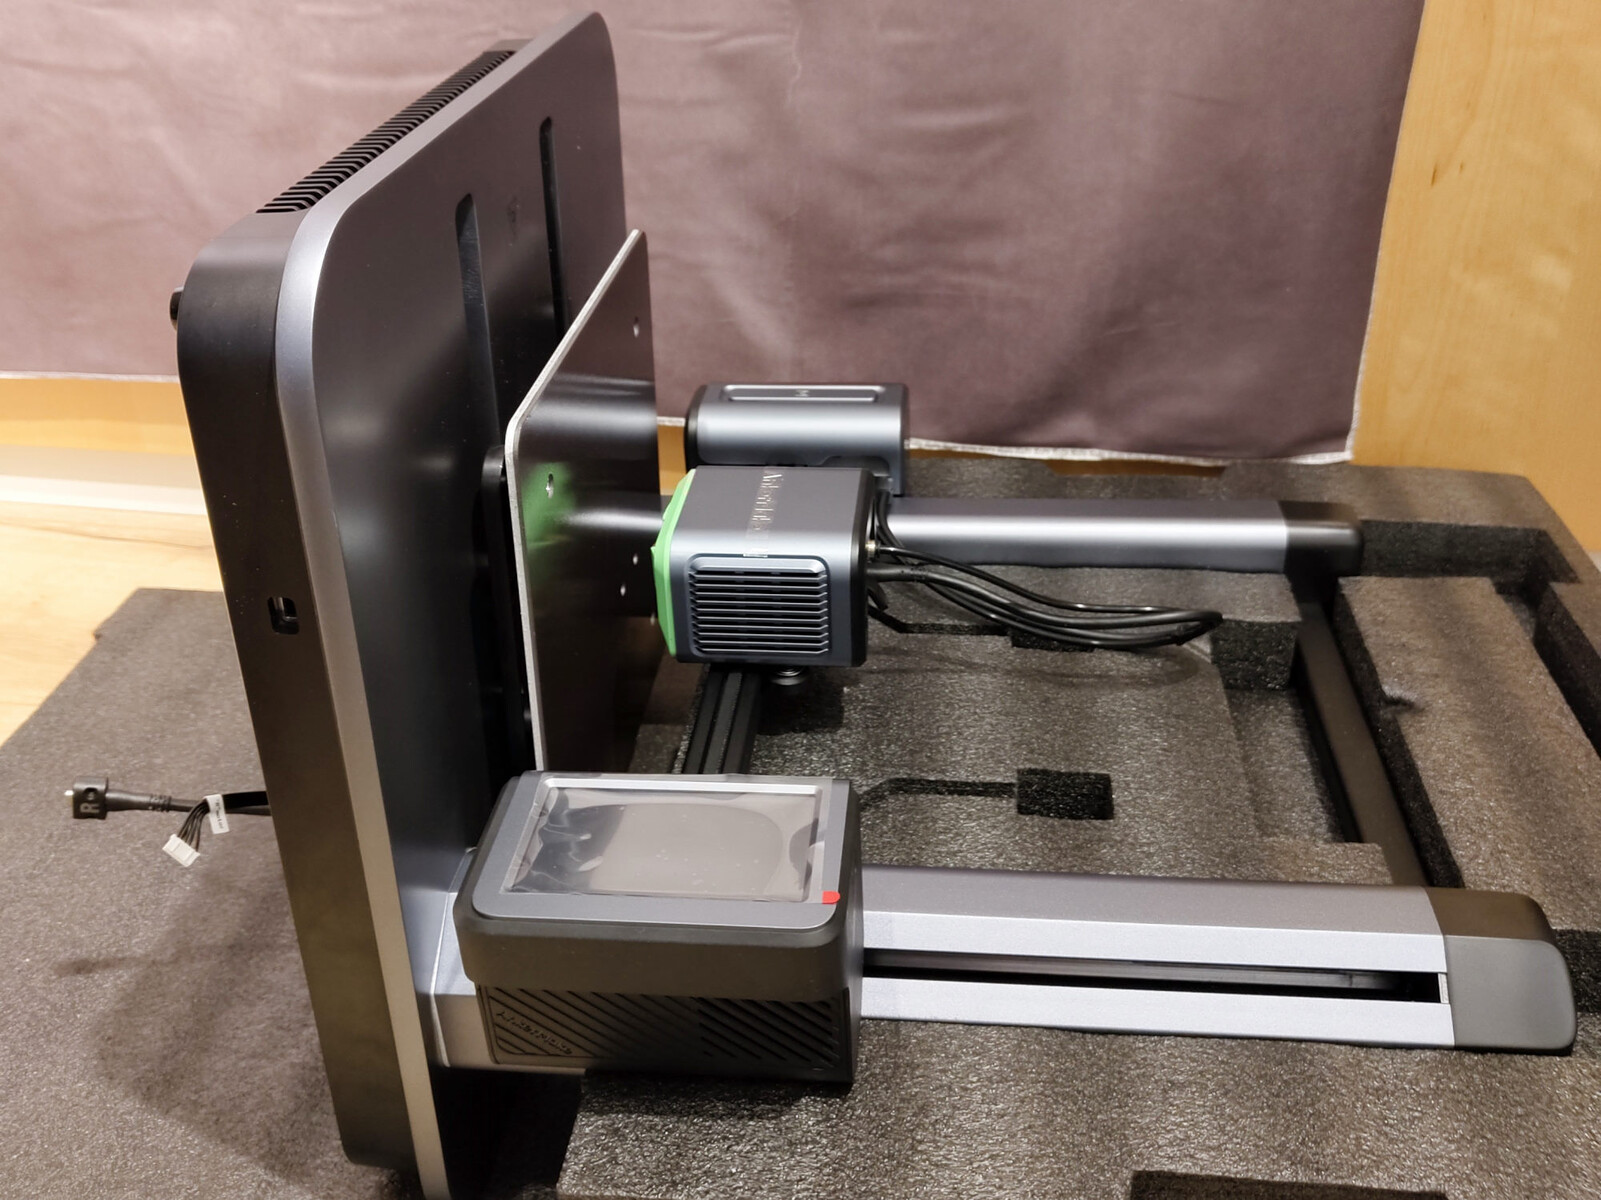
A polygonal shape helps stabilize the archway pillars through which the cable feeds to the print head and control unit, with its built-in touchscreen. On the right side of the printer, an RGB lightbar serves as a status indicator. Various light colors indicate whether the printer is currently heating up, printing or whether there is an error.
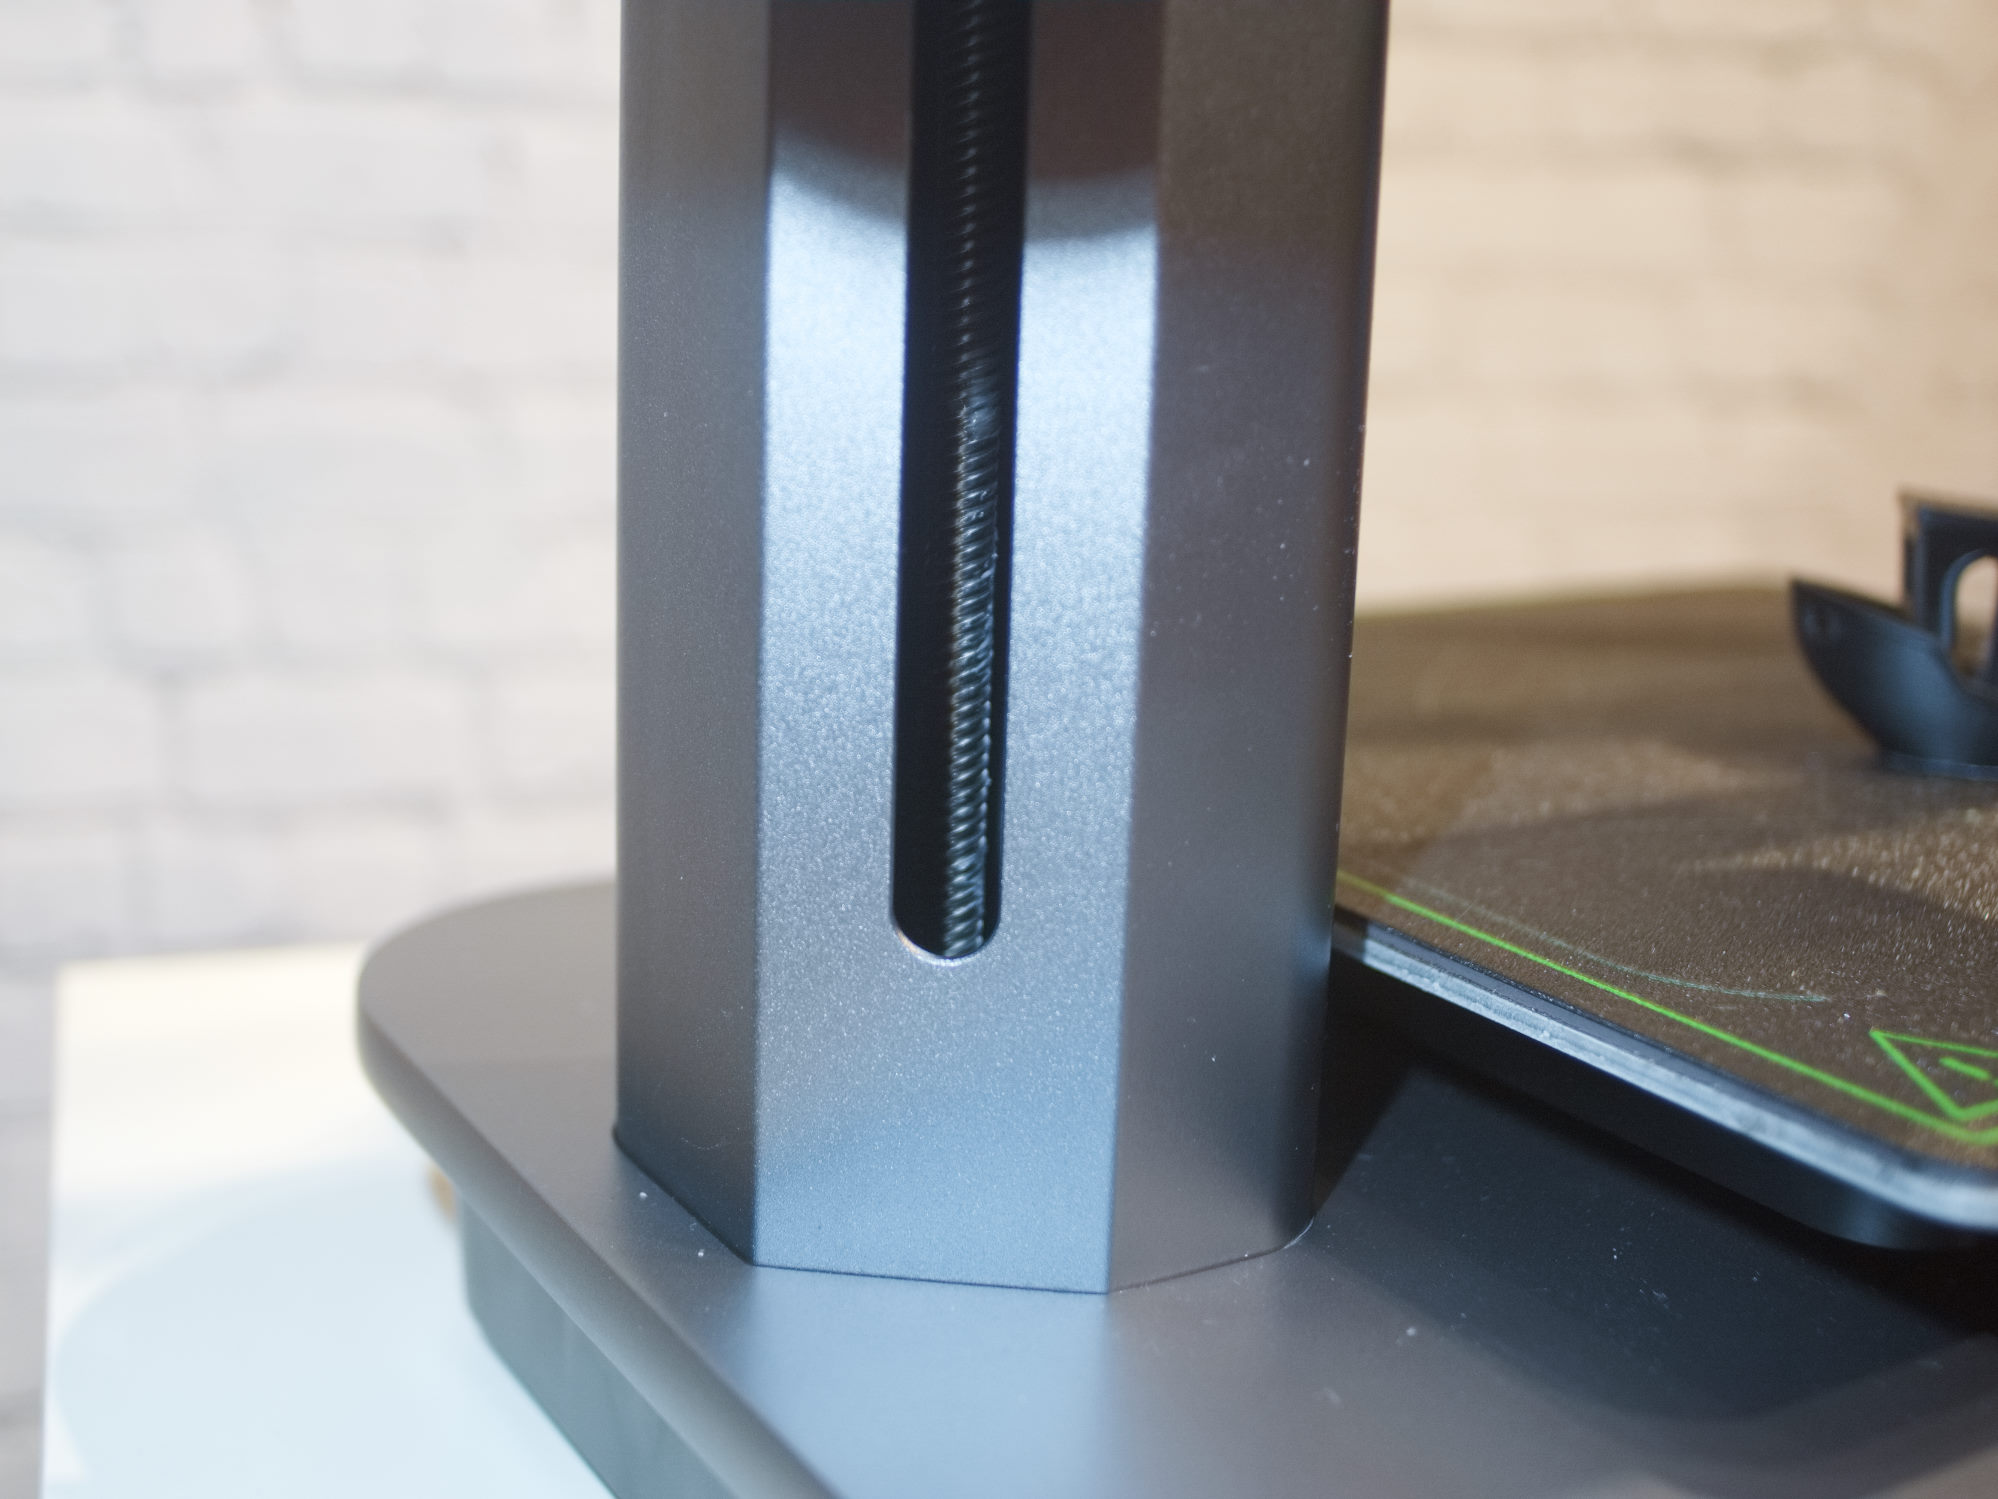
The traverse on which the AnkerMake M5 print head runs is driven by two T8 threaded spindles. They both run independently of one another and are positioned individually during the homing process.

Mainboard and control unit
The mainboard is an AnkerMake in-house construction which houses an unmarked microcontroller. An additional control unit is located inside the module with the touchscreen and the camera. According to Anker, this runs an unspecified Linux distribution.
Unfortunately, it is difficult to obtain additional firmware and settings information from the AnkerMake M5. The 3D printer cannot be connected to a PC via a USB cable. We are left to rely on the manufacturer's specifications and make do with information on GitHub from AnkerMake. An adapted version of the most commonly found firmware for 3D printers - Marlin 2.0 - runs on the mainboard and has been specially adapted to the hardware by Anker. As a consequence, we can find information regarding the configured stepper motor drivers and microcontroller in the Configuration.h file. An STM32F4 controls the hardware as well as five TMC2209 stepper motor drivers.
The 3D printer accepts Marlin style G-codes from all kinds of slicers. Even more interesting, however, are Anker's A-codes. Although these are partly based on G-code, they have a large share of information which is used for the AI monitoring. These A-codes can only be created using the AnkerMake program. The A and G-codes can be transferred to a printer via WiFi or a USB-C storage medium.

Assembly and Setup - The packaging serves as an assembly aid
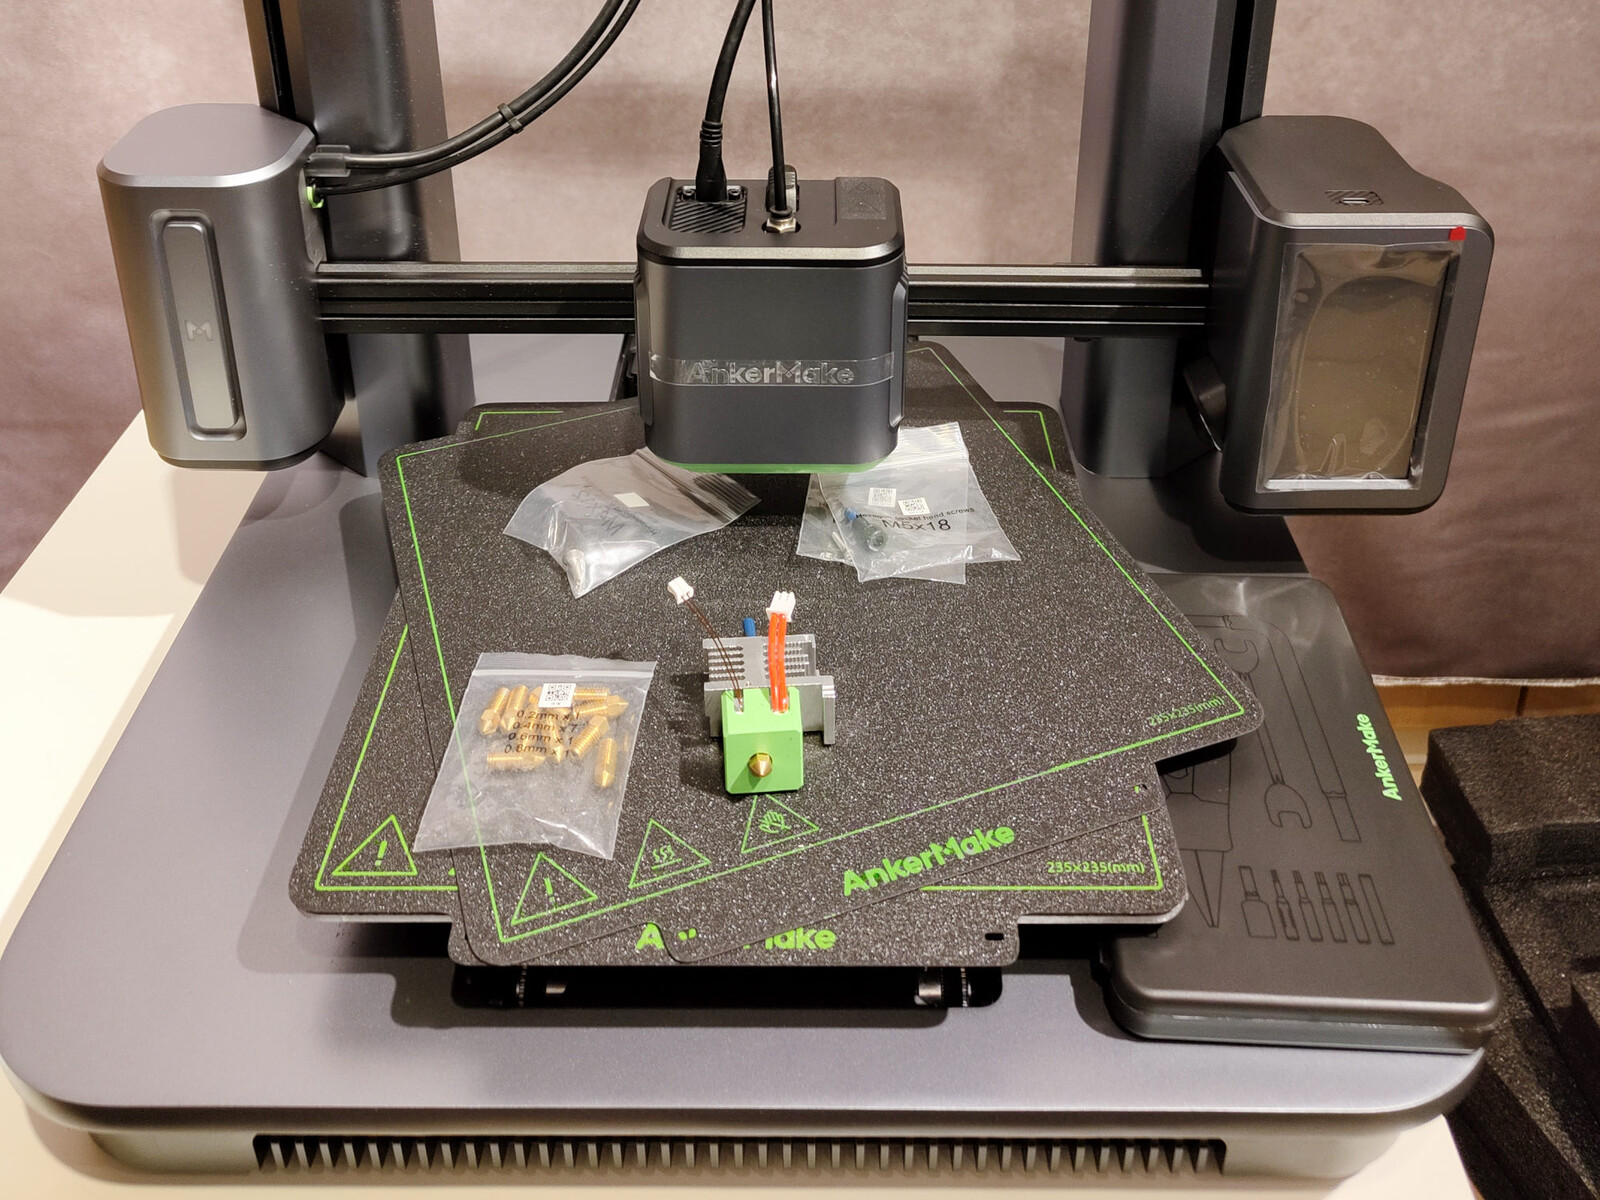
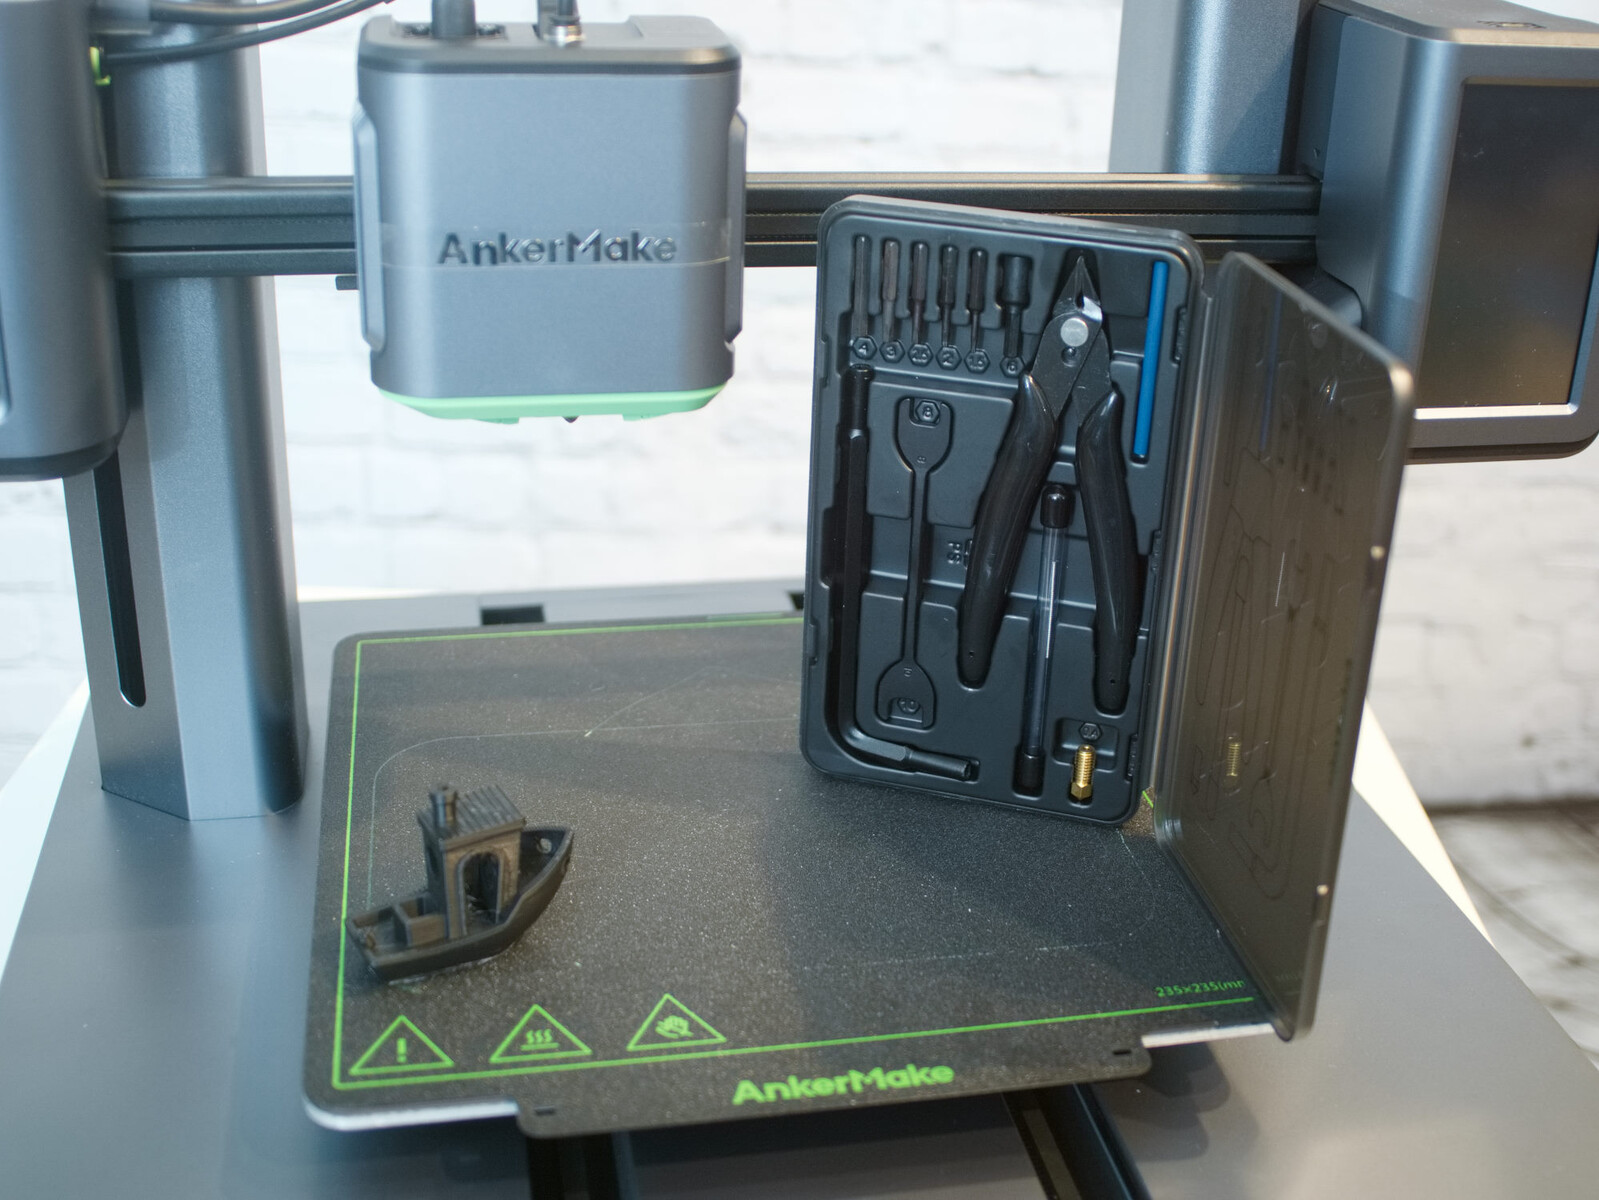
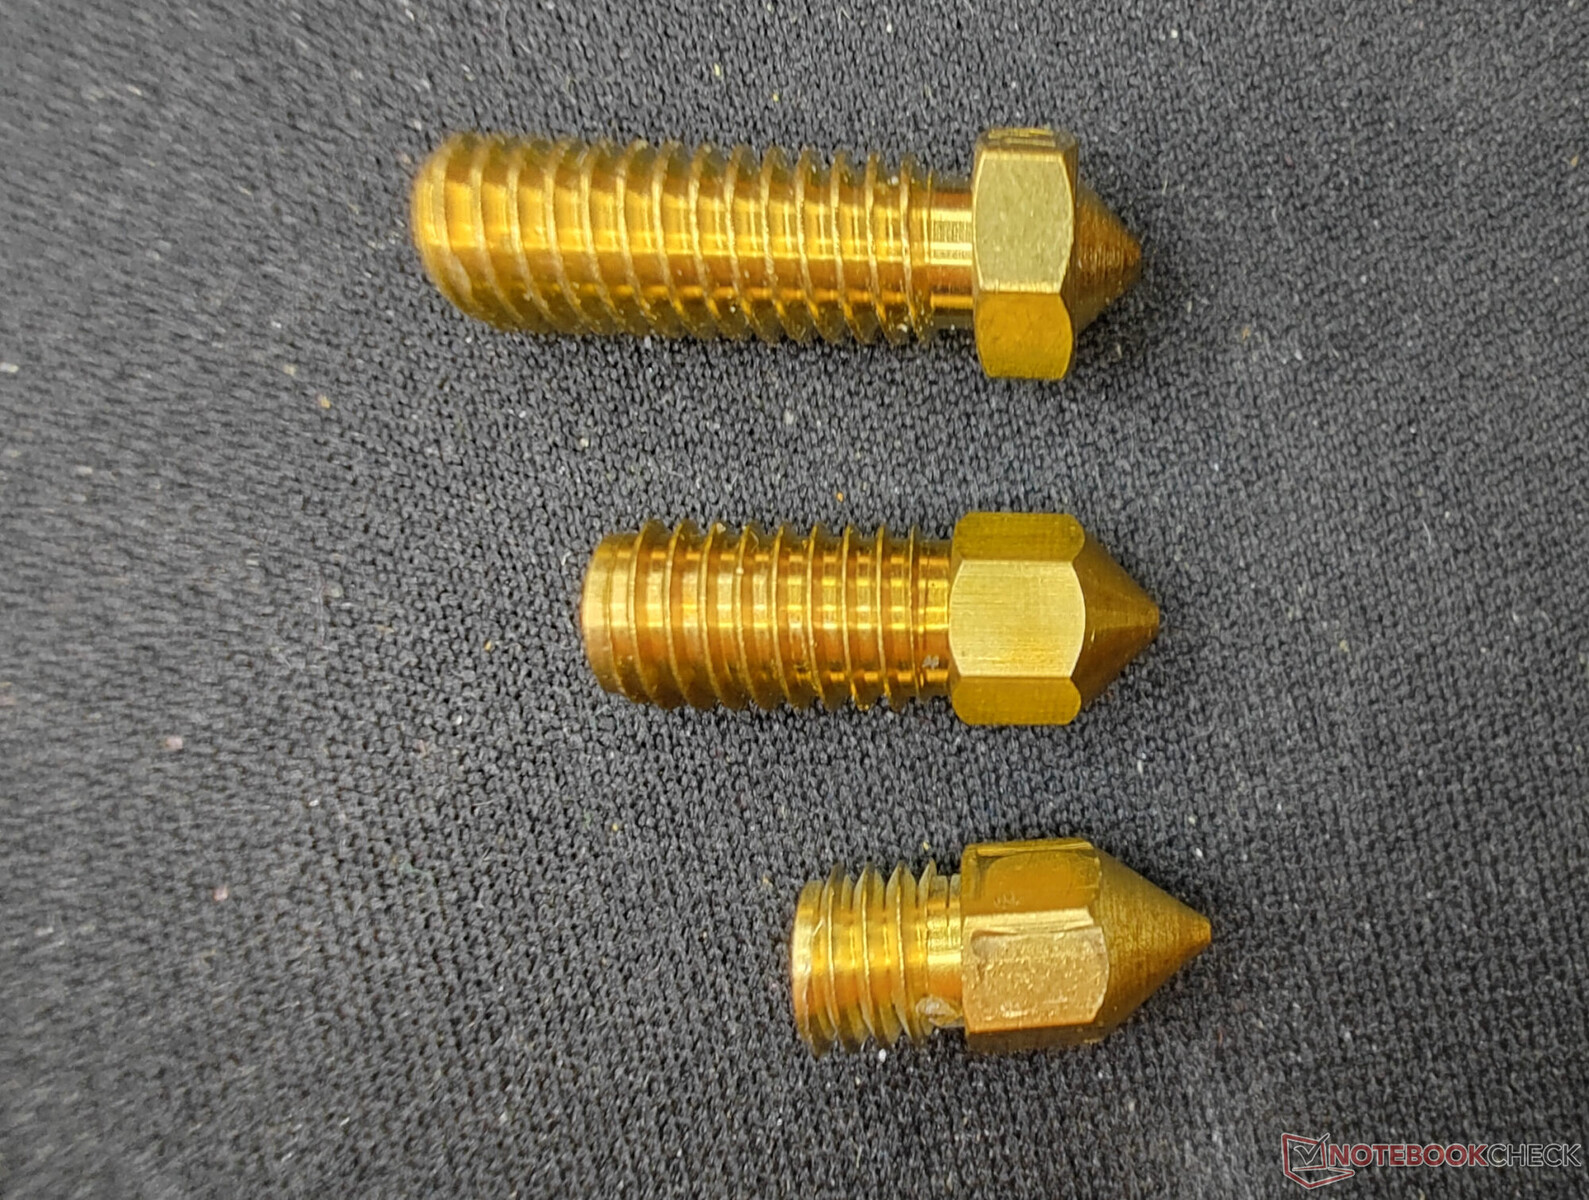
We received the same version of the AnkerMake M5 as the Kickstarter campaign backers. Consequently, the 3D printer came with another hotend and PEI coated printing plate, in addition to a high quality tool set. This was complimented with a selection of nozzles. However, this is where we have our first point of criticism. Anker promised an all metal hotend but, in our case, one with a PTFE inliner was included and another hotend of the same type was already installed in the printer. As a result, the stated maximum hotend temperature of 260 °C (500 °F) is quite high.
Assembling the 3D printer was relatively straightforward thanks to the included tool set. You should definitely have the packaged foam parts at the ready. Anker has come up with a clever way of easily managing the heavier printer parts. This can be achieved by simply inserting the archway into the foam making it easier to screw in the small numbers of screws. As a result, only four cables are connected two of which are secured with screws. The filament holder is screwed into the selected position.
Setting up the 3D printer can hardly be described as complicated. However, in order to be able to use all of the AnkerMake M5's functions, an Internet connection, the AnkerMake smartphone app, the AnkerMake slicer on the computer and registration with an email address are all necessary. Connection to a home WiFi network is only possible via the app. After this, the first firmware update from Anker is downloaded. In the course of the test time, three additional updates followed - the final version being V2.0.46. For this reason, testing was carried out using three different firmware versions. Every time the printer is switched on and finds an update, a forced upgrade is unavoidable.
After setup, the AnkerMake M5 performs mesh bed leveling. A load cell is used here as the sensor. With 49 measuring points the 3D printer is almost overly meticulous. This process takes around 10 minutes. Intelligently, the printing bed and nozzle are brought up to operating temperature. Without this, filament residues on the nozzle and a thermal expansion of the printing bed could negatively affect the results.
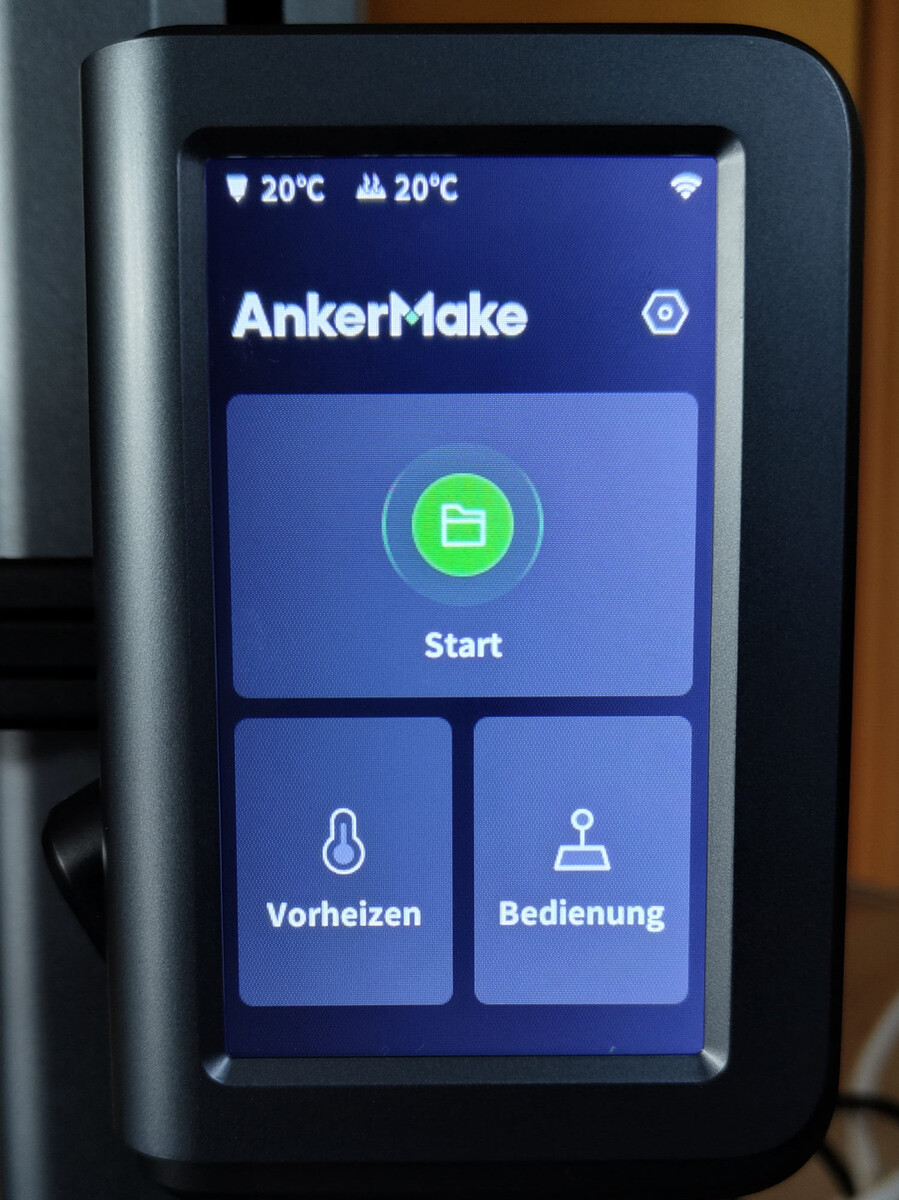
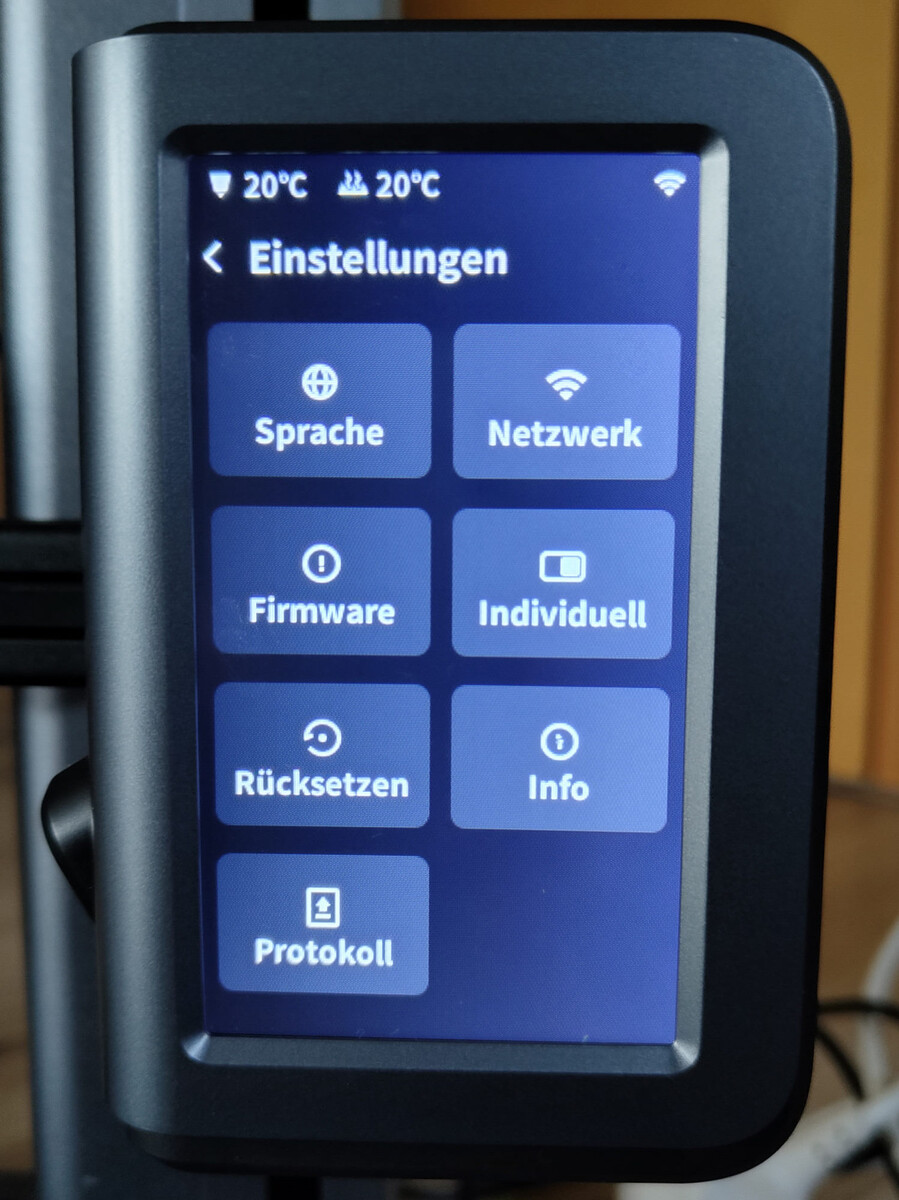
System control - AnkerMake app, slicer and touchscreen
In order to be able to operate the 3D printer, the AnkerMake app, as well as the appropriate AnkerMake slicer, is required. The app is available for Android and iOS and the slicing program for Windows and macOS.
App
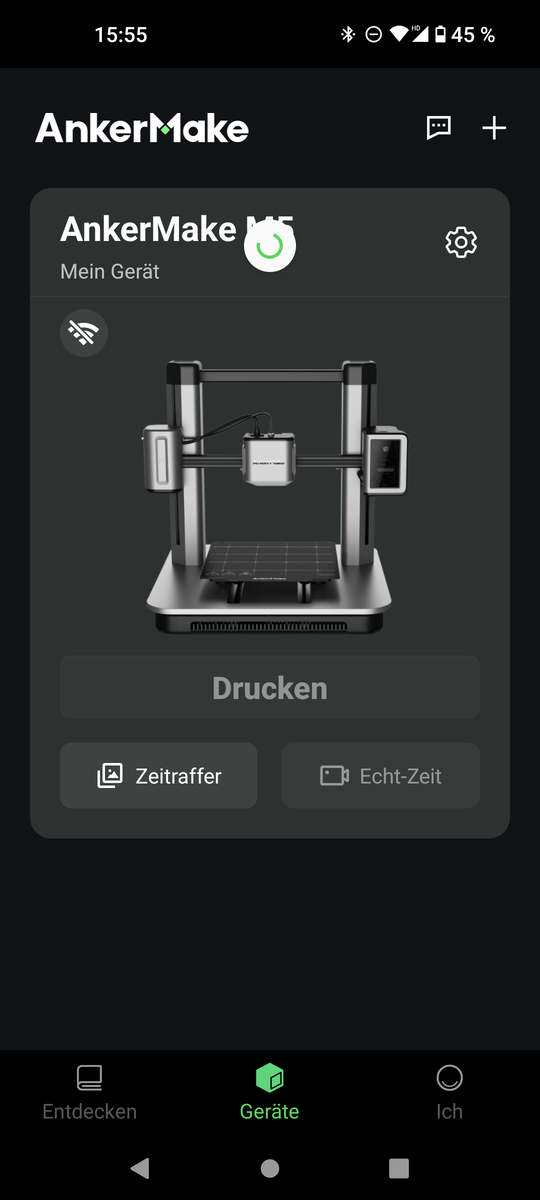
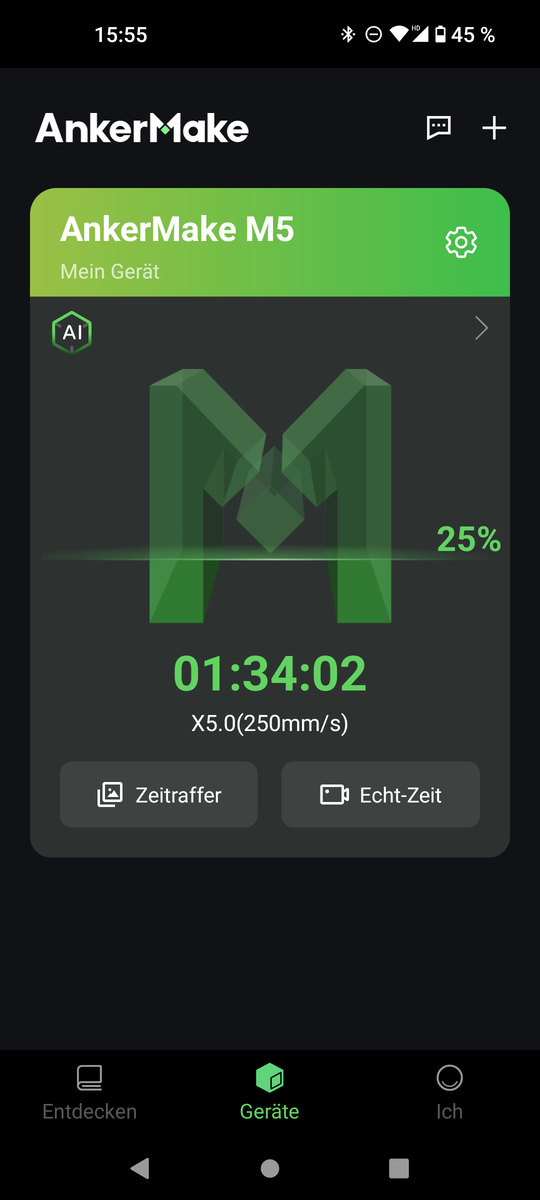
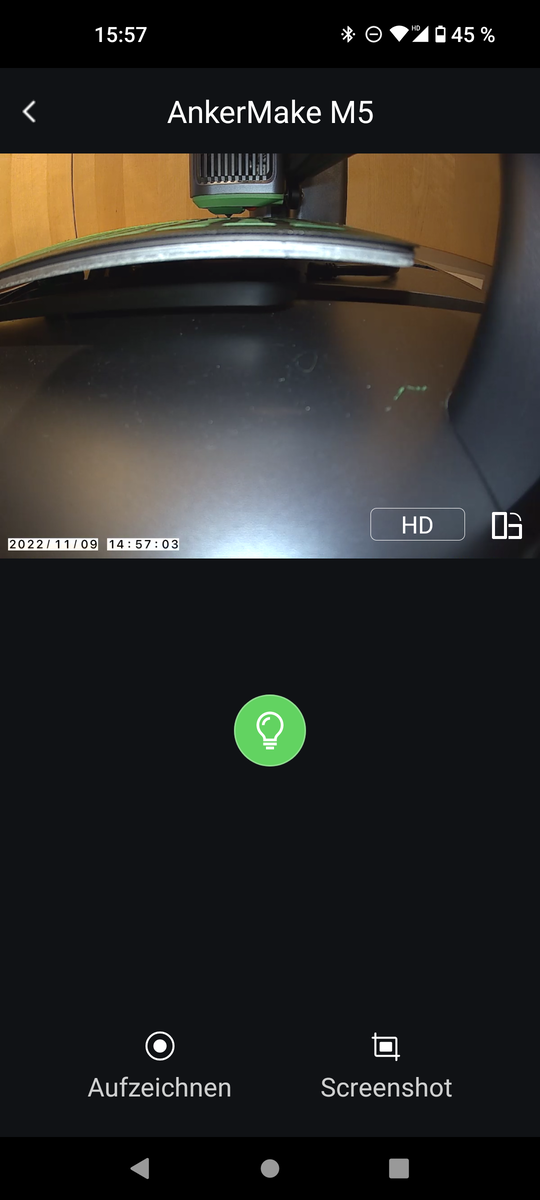
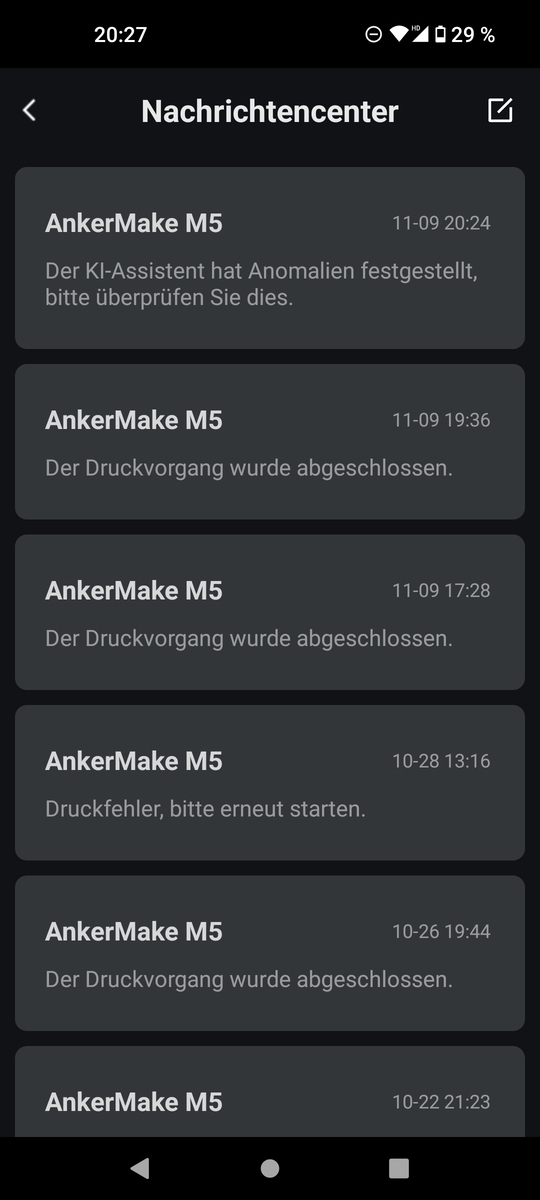
The AnkerMake app is initially required to set up the WiFi connection. It is translated into various languages and is, for the best part, easy to understand. If the M5 is connected via WiFi and linked to the AnkerMake account, the 3D printer can be operated from the app. This allows tasks to be set and a 3D print can be monitored using the built-in printer camera. 3D print time-lapse videos can also be created with the app. In the event that the AnkerMake M5 recognizes print errors, thanks to the on board AI, a push notification is sent to the app. Interestingly, the 3D printer log information can be retrieved at any time via the app. Occasionally, the device log was quite disorganized. All events are listed chronologically. Analyzing the logs, we were able to determine a few omissions. However, this is one area where improvements can be expected. Anker continues to regularly refine the software features. At the time of testing, other app features had not yet been released. Print templates and the like can be expected to follow at a later date.
Slicer
A slicer is required in order to be able to convert 3D files into printable G-code or A-code. These programs cut a 3D template into slices and convert them into instructions for the 3D printer. G-code is also not only suitable for computers, if you can deal with the various commands. The 3D printer processes the instructions line by line.
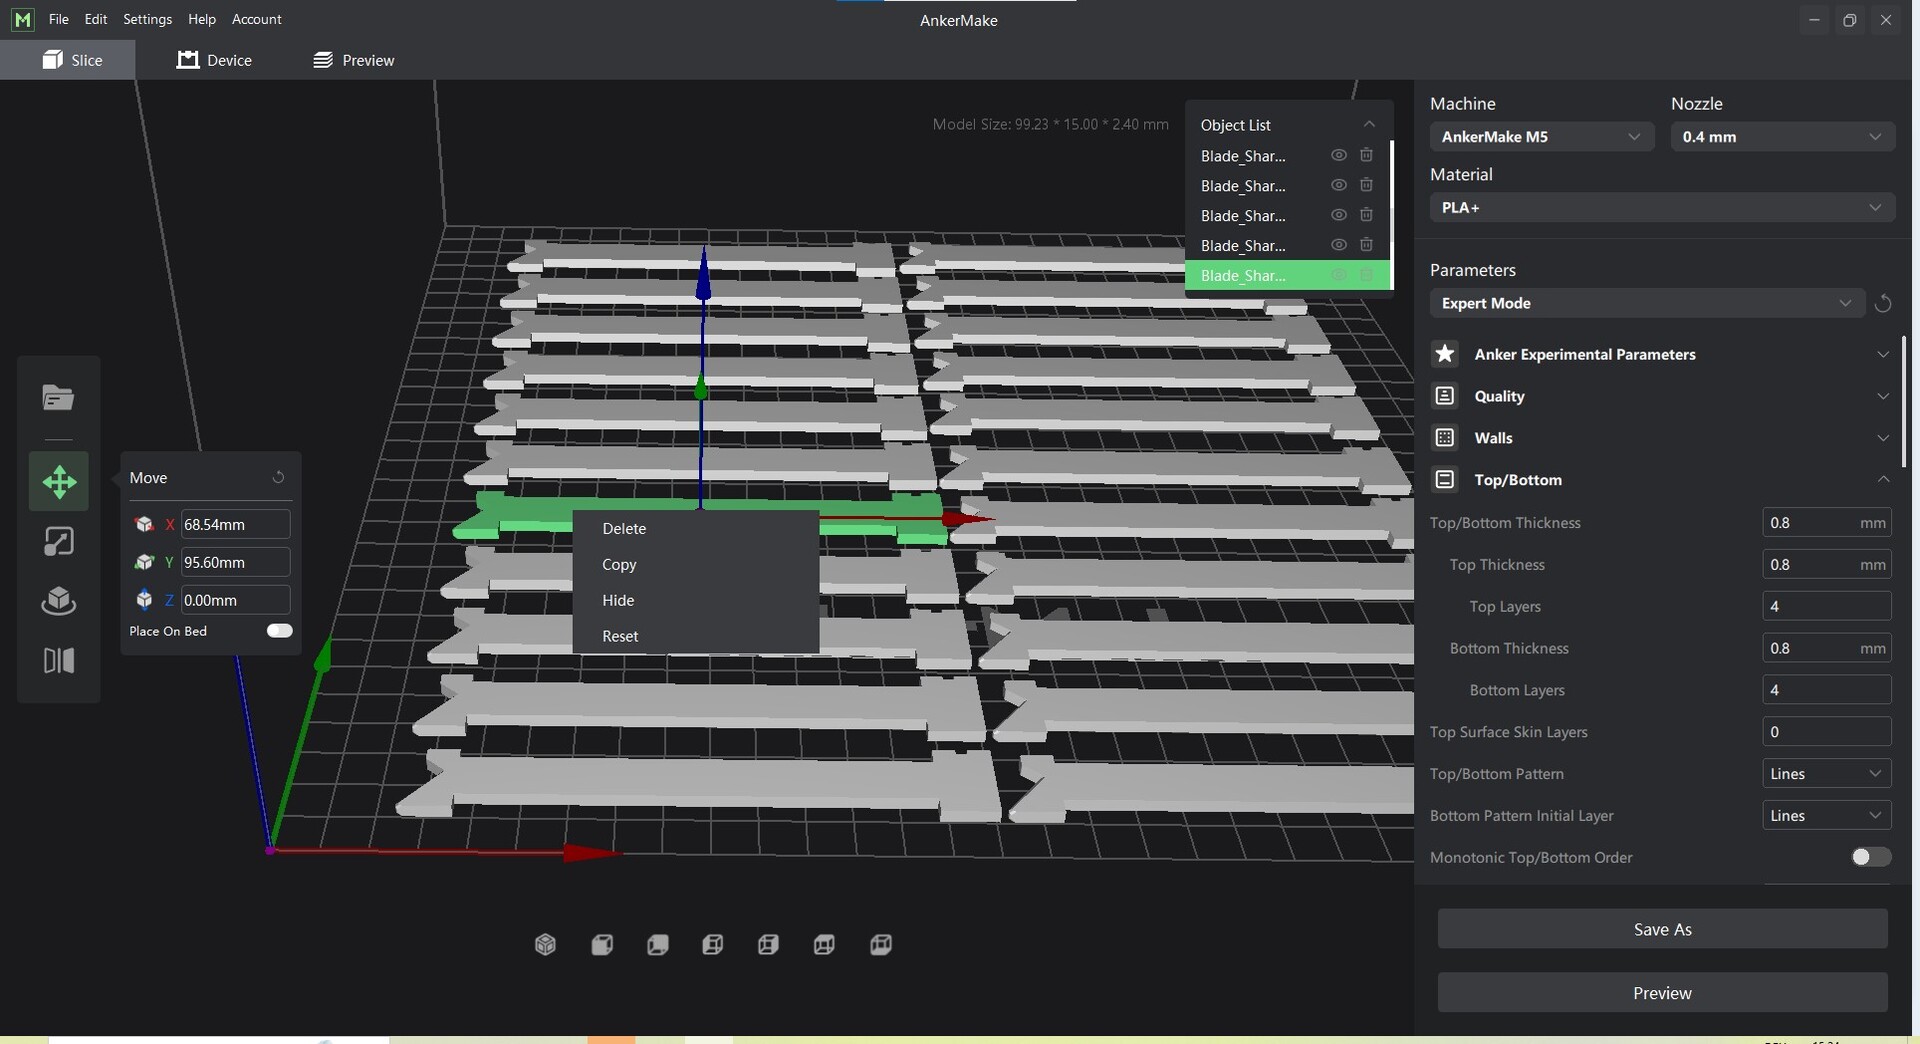
However, in order to be able to use the AnkerMake M5's monitoring ability, it is imperative that the 3D printer is supplied with a code from the AnkerMake slicer. This A-code contains the human-readable G-code and a section which provides information for the AI. Right from the beginning, the AnkerMake program looks familiar. Anyone who has already used Ultimaker Cura should feel right at home with the program's user interface - even if the choice of languages is so far limited to English and Chinese. For this reason, it comes as no surprise that the software also uses the Cura Slice Engine. Your own slicer's open source block can be used by all programmers in accordance with the license. The fact that the newer Arachne engine - which was also developed by Ultimaker - is not yet used here, has little impact on the printing speed. The newer program blocks can help contribute to considerably higher printing speeds as well as better print quality.
The current program in its beta version is flawed but the basic functions themselves are flawless. Amongst other things, controlling the camera is rather frustrating and also the data drag and drop feature doesn't work yet. Copying and pasting 3D objects in the AnkerMake slicer can only be done manually. The creation of 3D print files is very uncomplicated. After opening an stl or obj file, only five settings have to be made. 3D print experts can also access the full range of options which Ultimaker Cura offers. For beginners, we recommend focusing on the material selection, layer height and filling thickness. The first prints we made on the AnkerMake M5 were run with changed settings and we discovered that there was no need to change anything for most jobs.
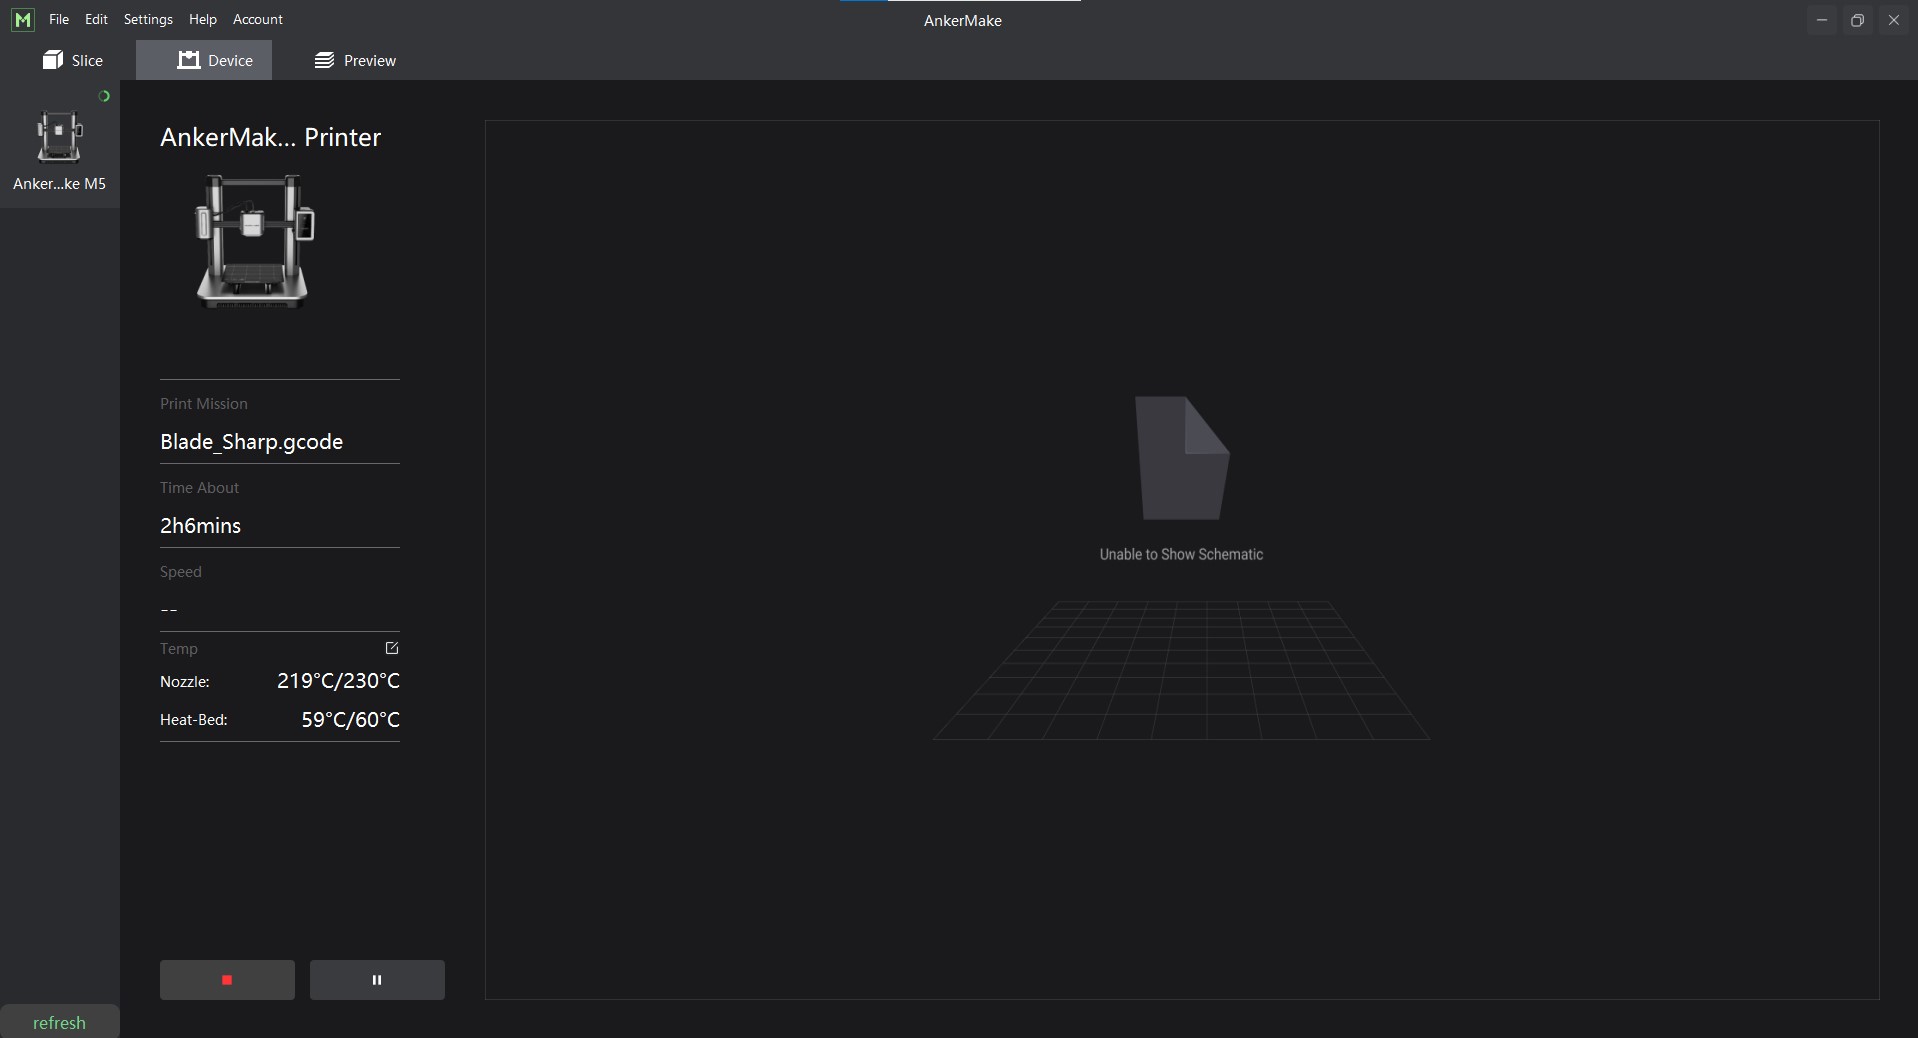
If the AnkerMake M5 is already connected to WiFi, the print files can be transferred wirelessly to the printer's internal memory. It is also possible to start printing via the program and simultaneously access some of the printer's other functions.
Touchscreen
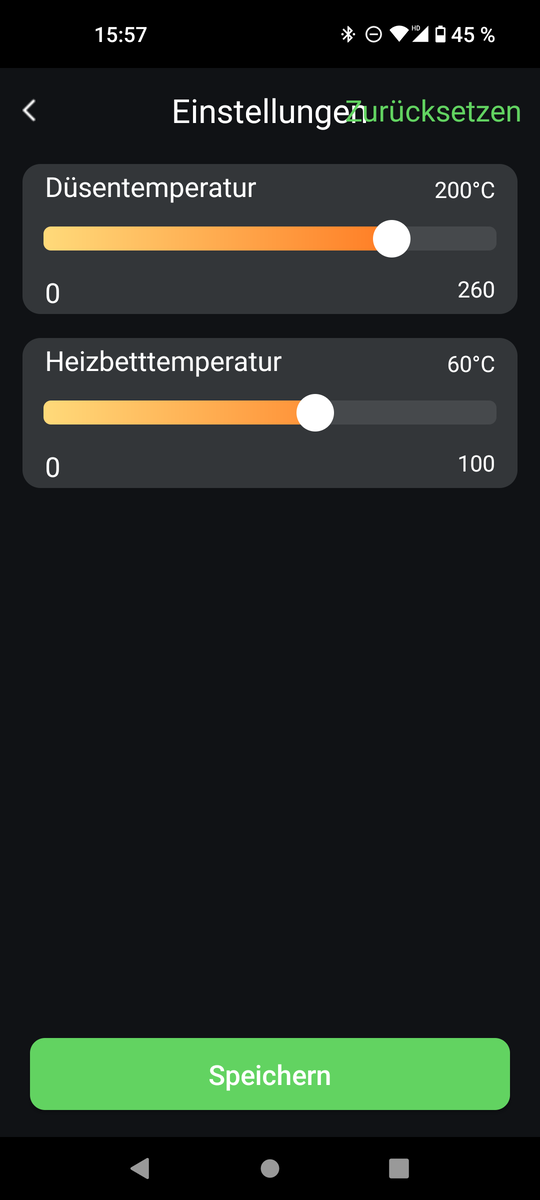
Behind the 3D printer's touchscreen hides a small computer. It monitors and controls the 3D printer. The touchscreen interface offers basic control options and is available in multiple languages. The menus are clearly structured and translated. This helps set the status LED settings as well as the notification tones. Not only mesh bed leveling can be accessed but preheating can also be initiated. The touchscreen also has basic motion control. While printing, the print speed is displayed. The only parameters which can be changed during printing are the print bed temperature and hotend. Options regarding printing speed, extrusion multiplier and fan are nowhere to be seen.

Performance - No loss in quality in spite of speed
In our review, AnkerMake M5 impressed us with its speed. Every type of 3D printer normally suffers from a loss in quality at high speeds. The AnkerMake M5 clearly shows there is another way. The 3D printer makes a convincing impression with its high quality and speed.
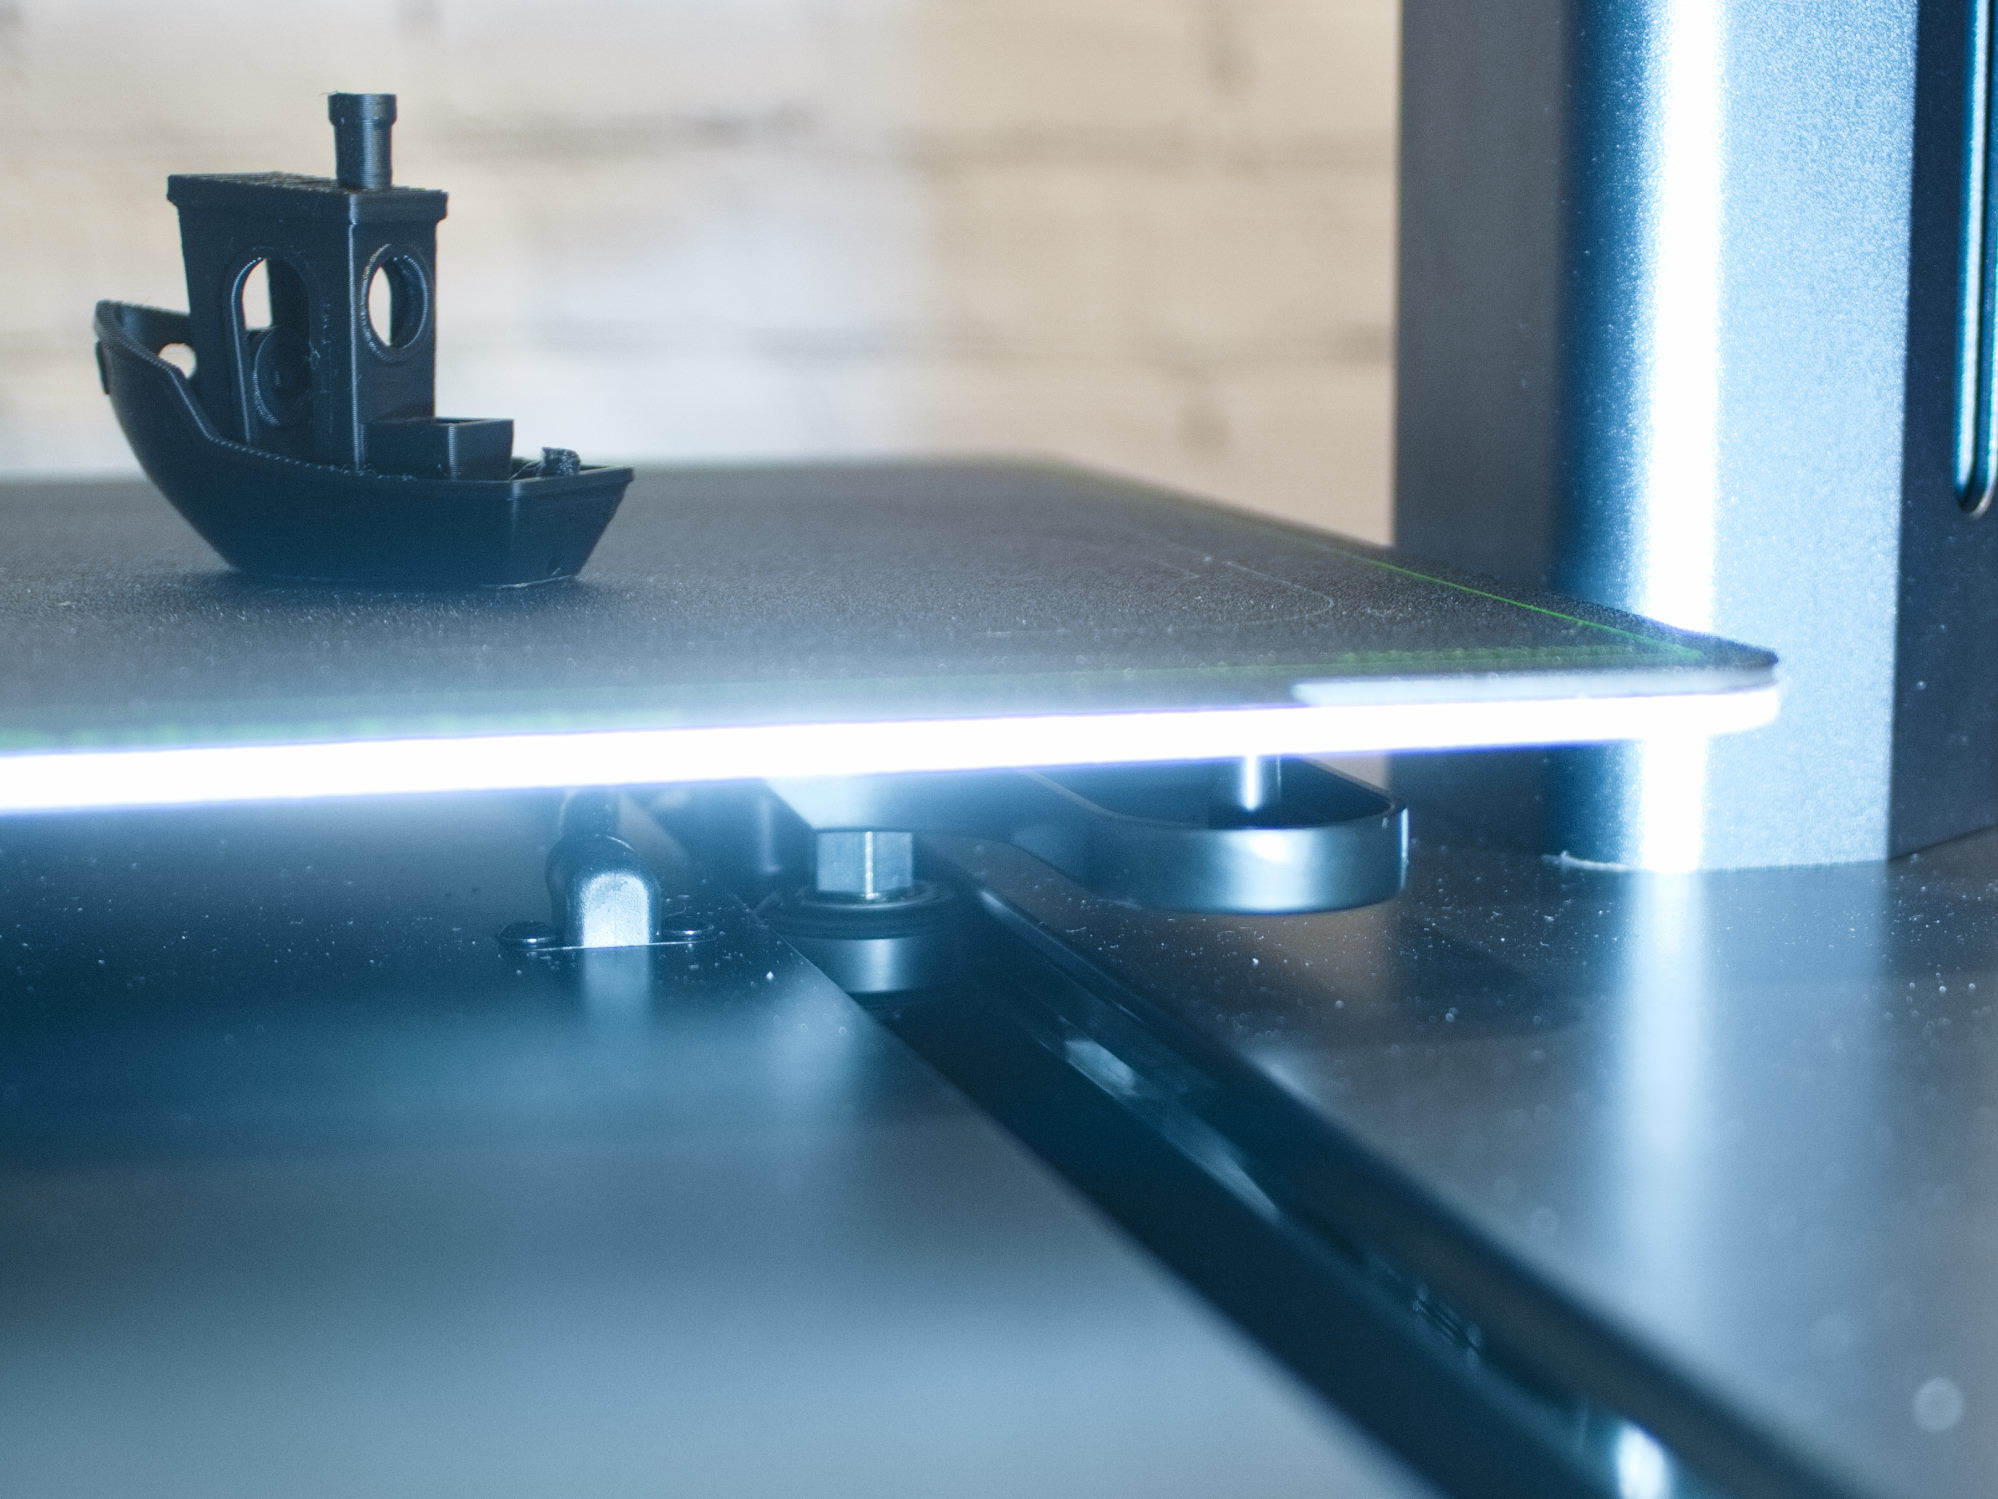
Print bed
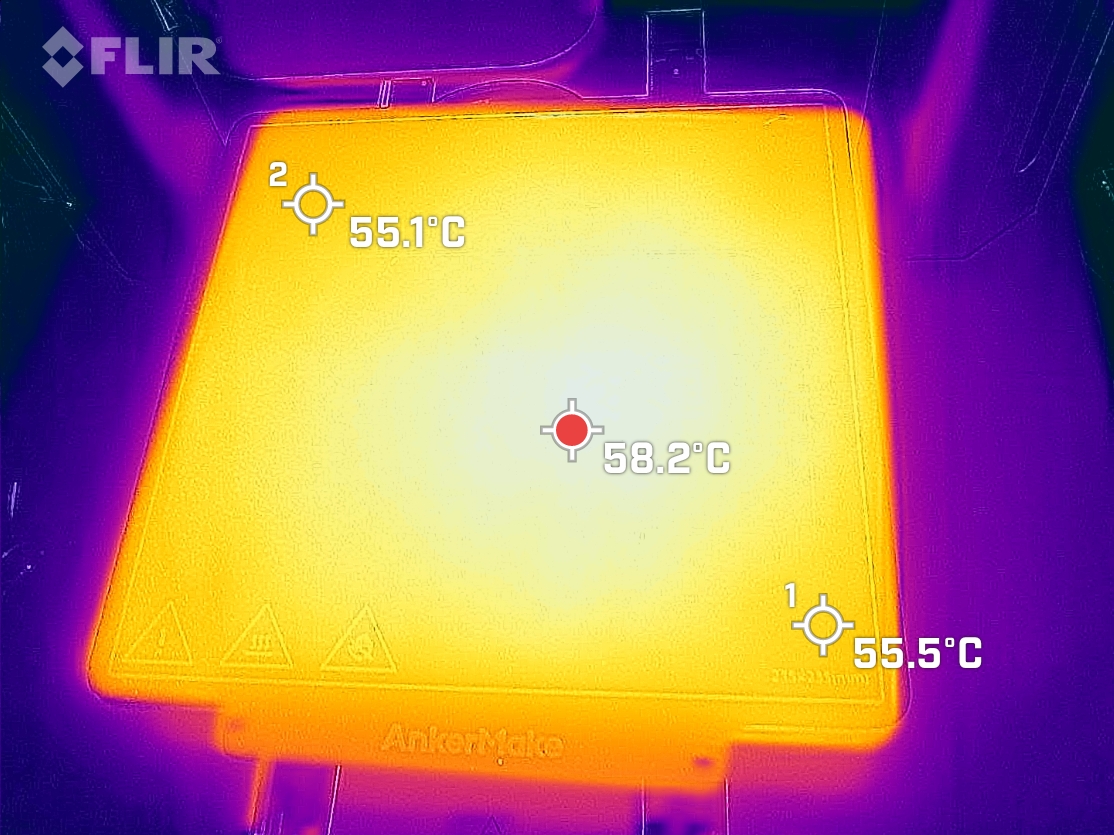
The AnkerMake M5's magnetic spring steel plate has a PEI coating on both sides. Its black surface is decidedly rough and is comparable to coarse grain sandpaper. The print bed is heated by up to 330 watts allowing it to be heated to an operational temperature of 60 °C (140 °F) - all within two and a half minutes. The print bed lacks insulation. The thermal image shows that the temperature drops noticeably towards the edges. The temperature difference from the middle of the print bed to the edge is three Kelvin at a temperature setting of 60 °C.
Print bed adhesion was successful irrespective of the type of tested materials. PLA, PETG, TPU and ASA stick excellently as long as the print bed is warm and can be removed easily after it has cooled down. On observing the print speed default settings in the slicer, it becomes clear that also AnkerMake has a high opinion of the print bed adhesion. With a printing speed of 125 mm/s, it is normally impossible to achieve good print bed adhesion in the first layer. Additionally, the wonderfully functioning mesh bed leveling plays a big part here. It's worth the effort, even if this takes roughly 10 minutes longer.
Hotend and Extruder
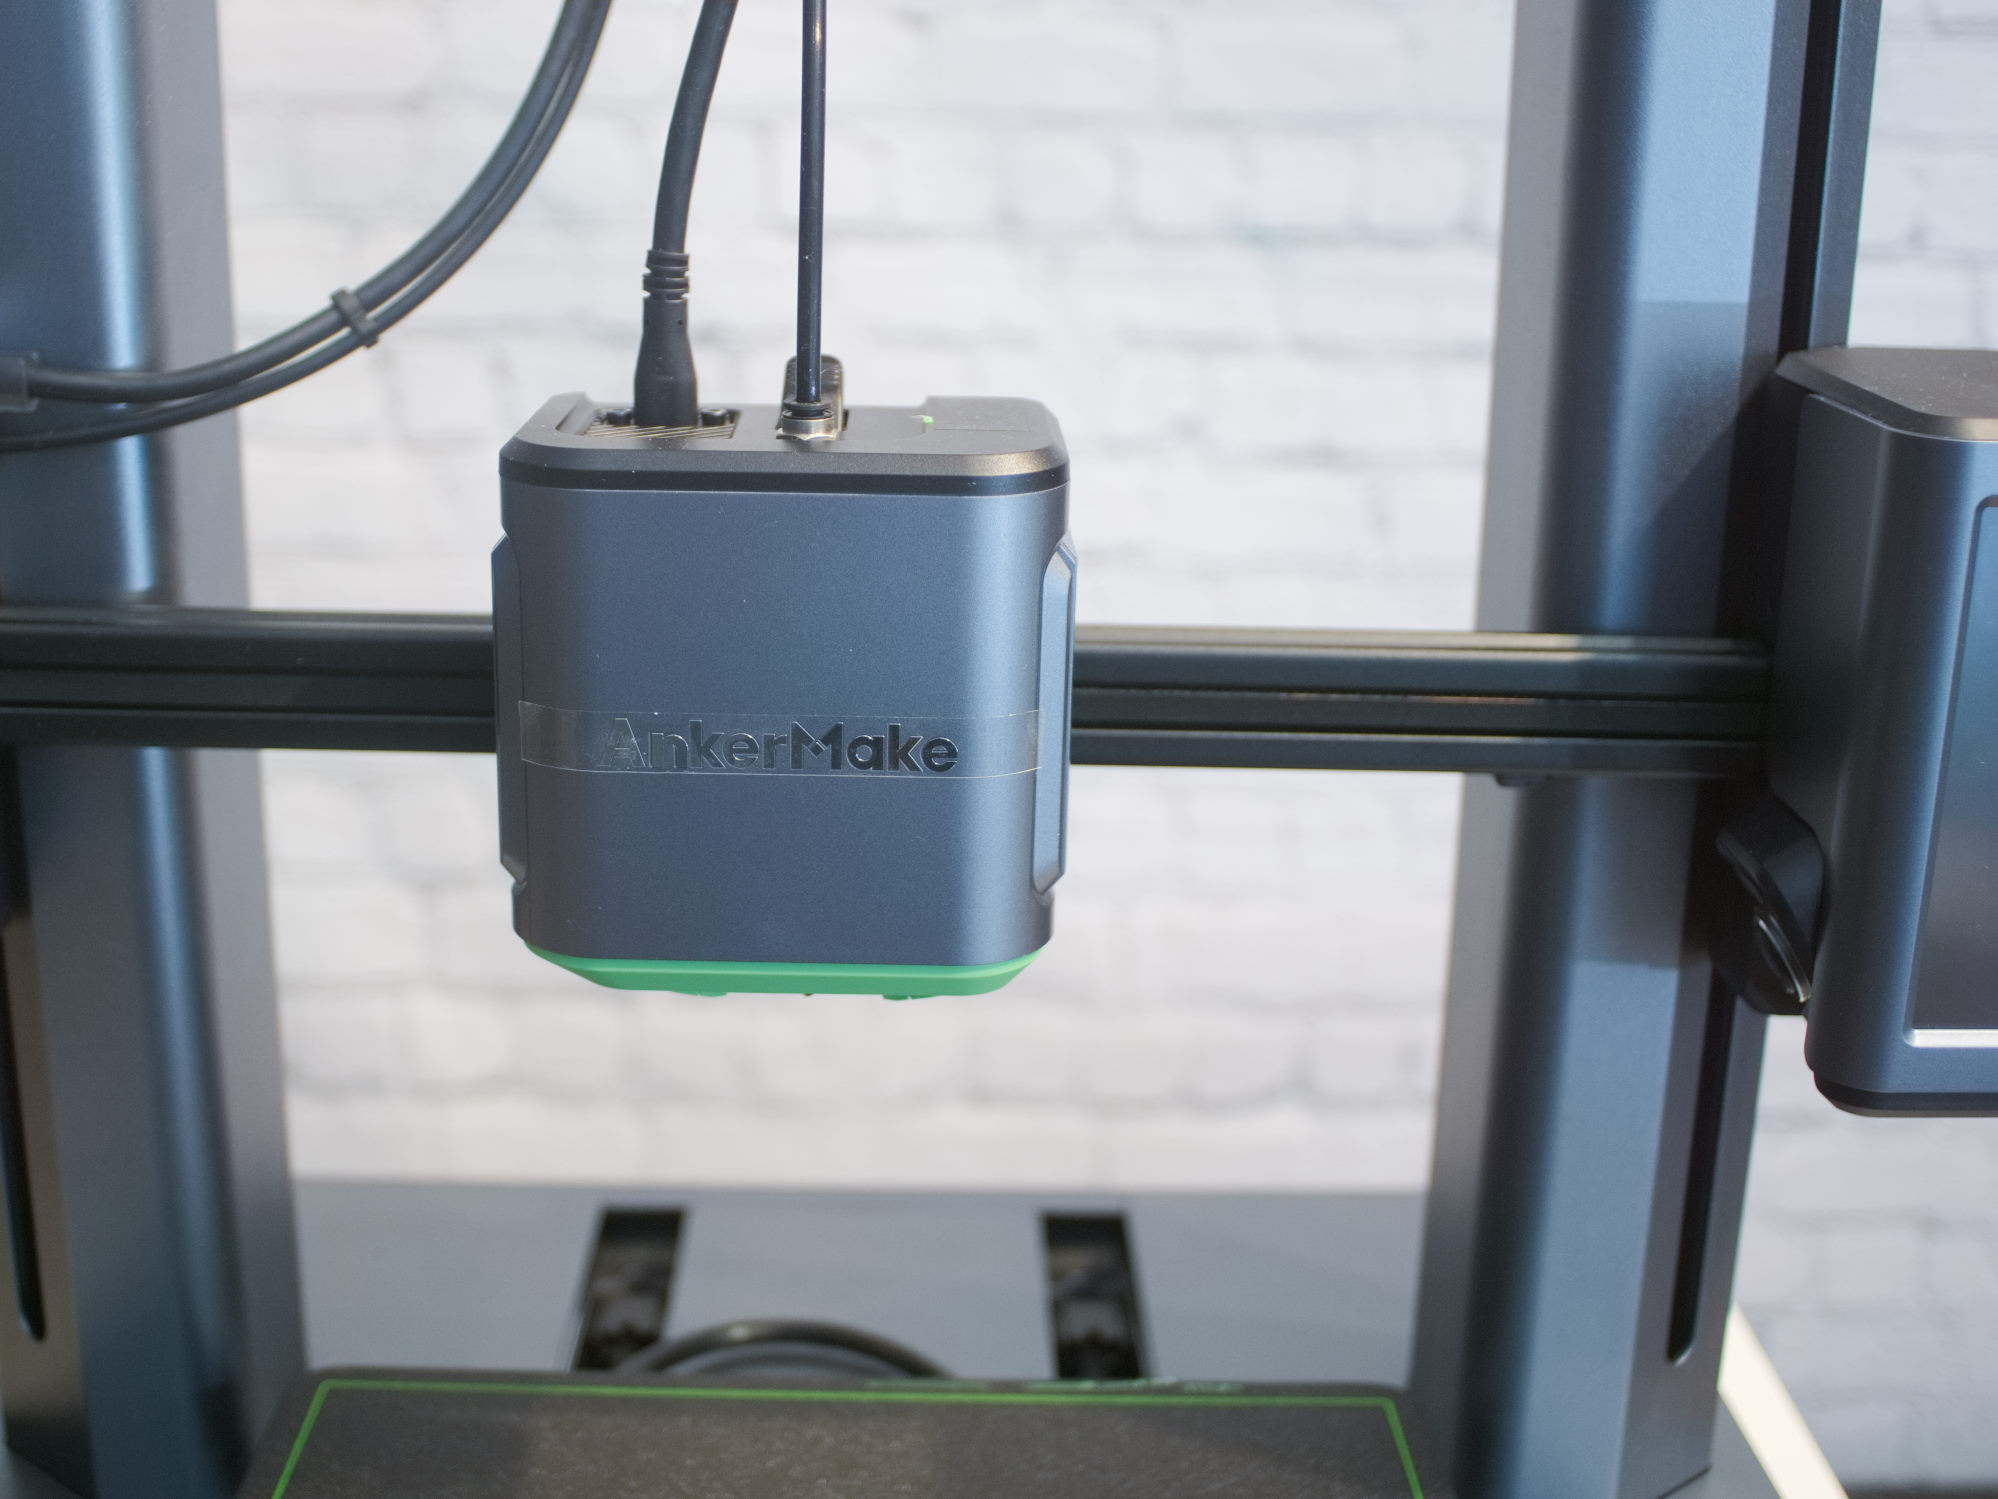
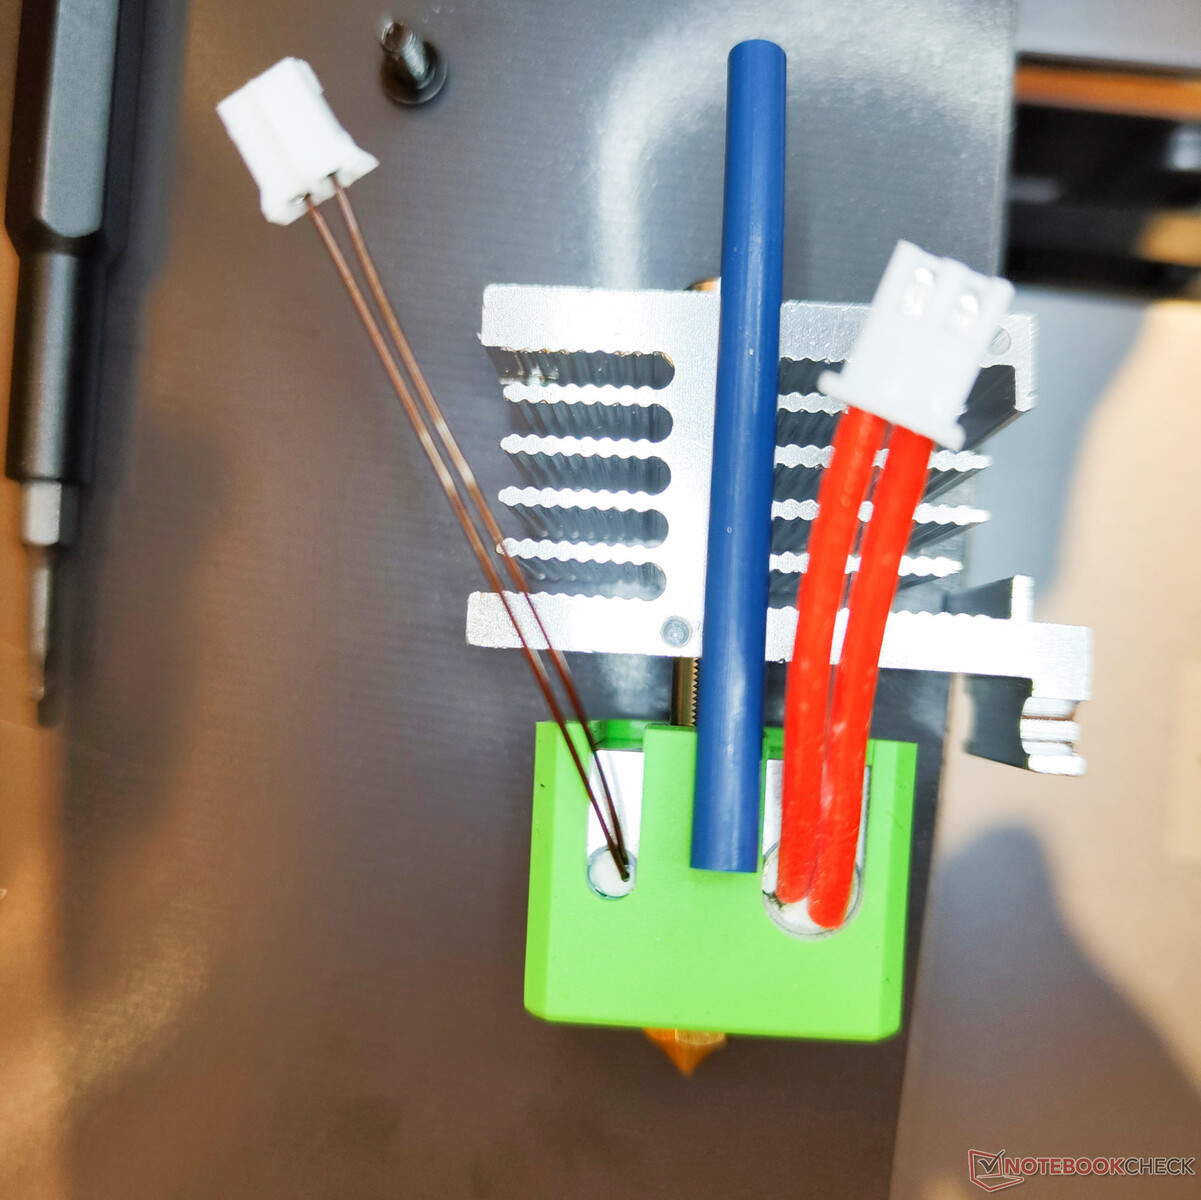
The AnkerMake M5 hotend hardly uses any standard parts. At one centimeter in size, the nozzle thread length lies between MK8 and the volcano nozzle. Also, the heating block doesn't possess standard dimensions. At least the cartridge heater and thermistor conform to 3D printer standards. With a heating capacity of 60 W, the heating cartridge is sufficiently dimensioned for the types of high speeds the AnkerMake M5 ought to be able to achieve. The cooling fan pushes air out to the back of the print head. Therefore, when printing ASA or ABS the printer doesn't generate a draft along the printing plate.
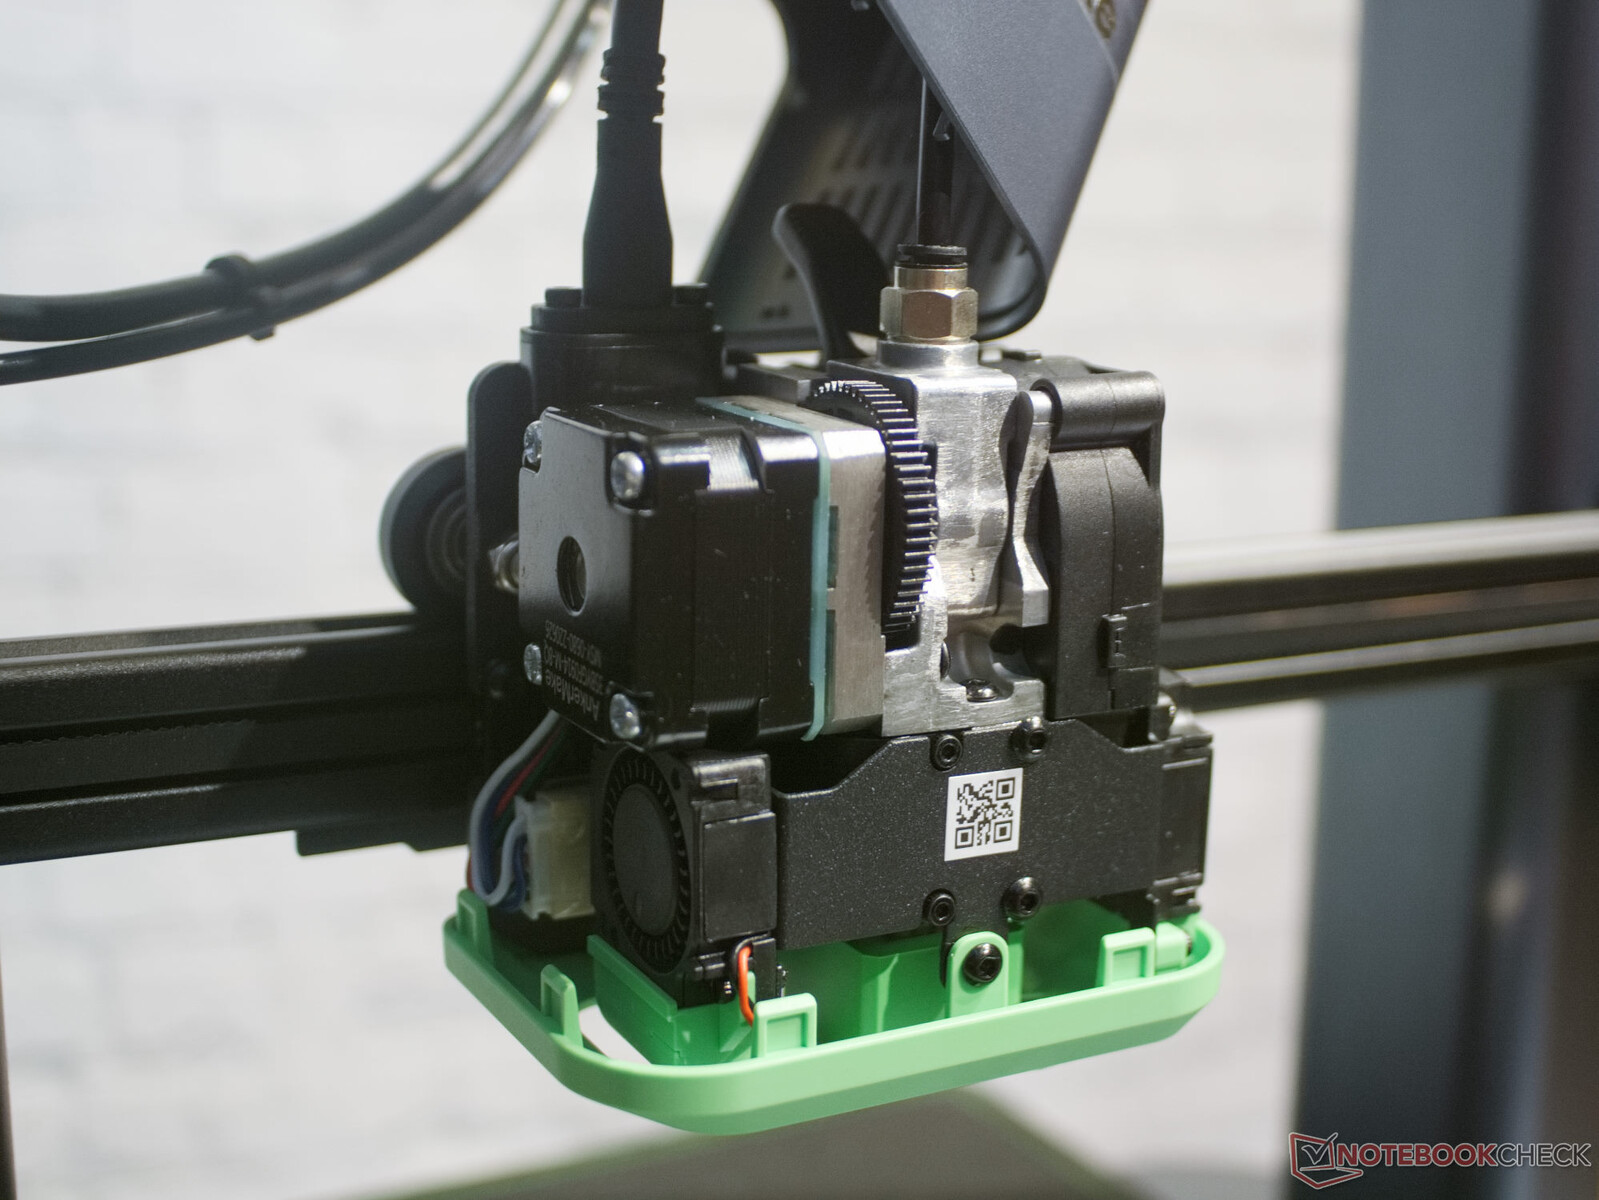
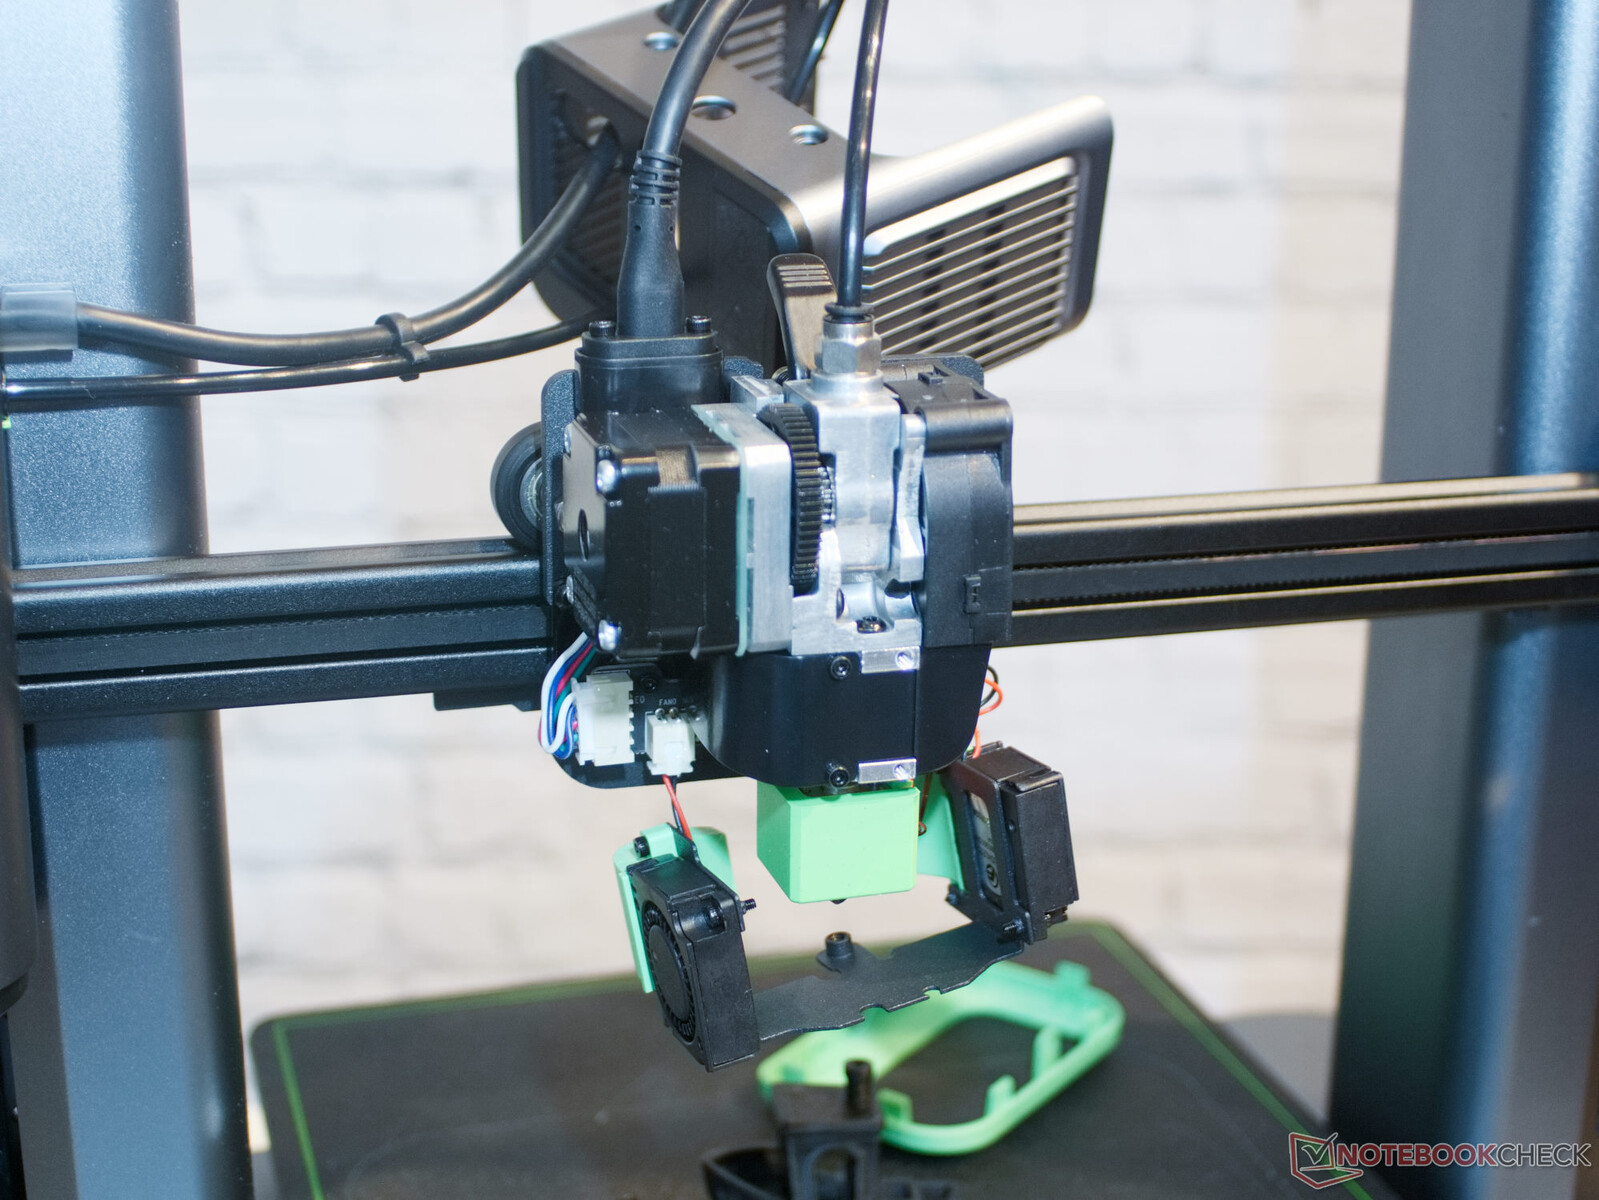
The extruder motor is integrated directly in the print head. A multi-stage gear ensures a powerful feed. The filament gear is driven on one side. A tool is required in order to set the transport wheel contact pressure. As with the belt tensioner, this is set with a hexagon socket screw. In practical testing the 3D printer proved that it can maintain the promised high printing speeds without issue. Here the 3D printer prints loops and increases the printing speed in 5 mm (~0.2 in) gaps. However, over 270 mm/s our test is no longer conclusive. In the configuration file, the maximum filament feed and the maximum speed of movement was so limited that the printer could no longer maintain higher required values. It seems these values cannot be overridden.
Print quality
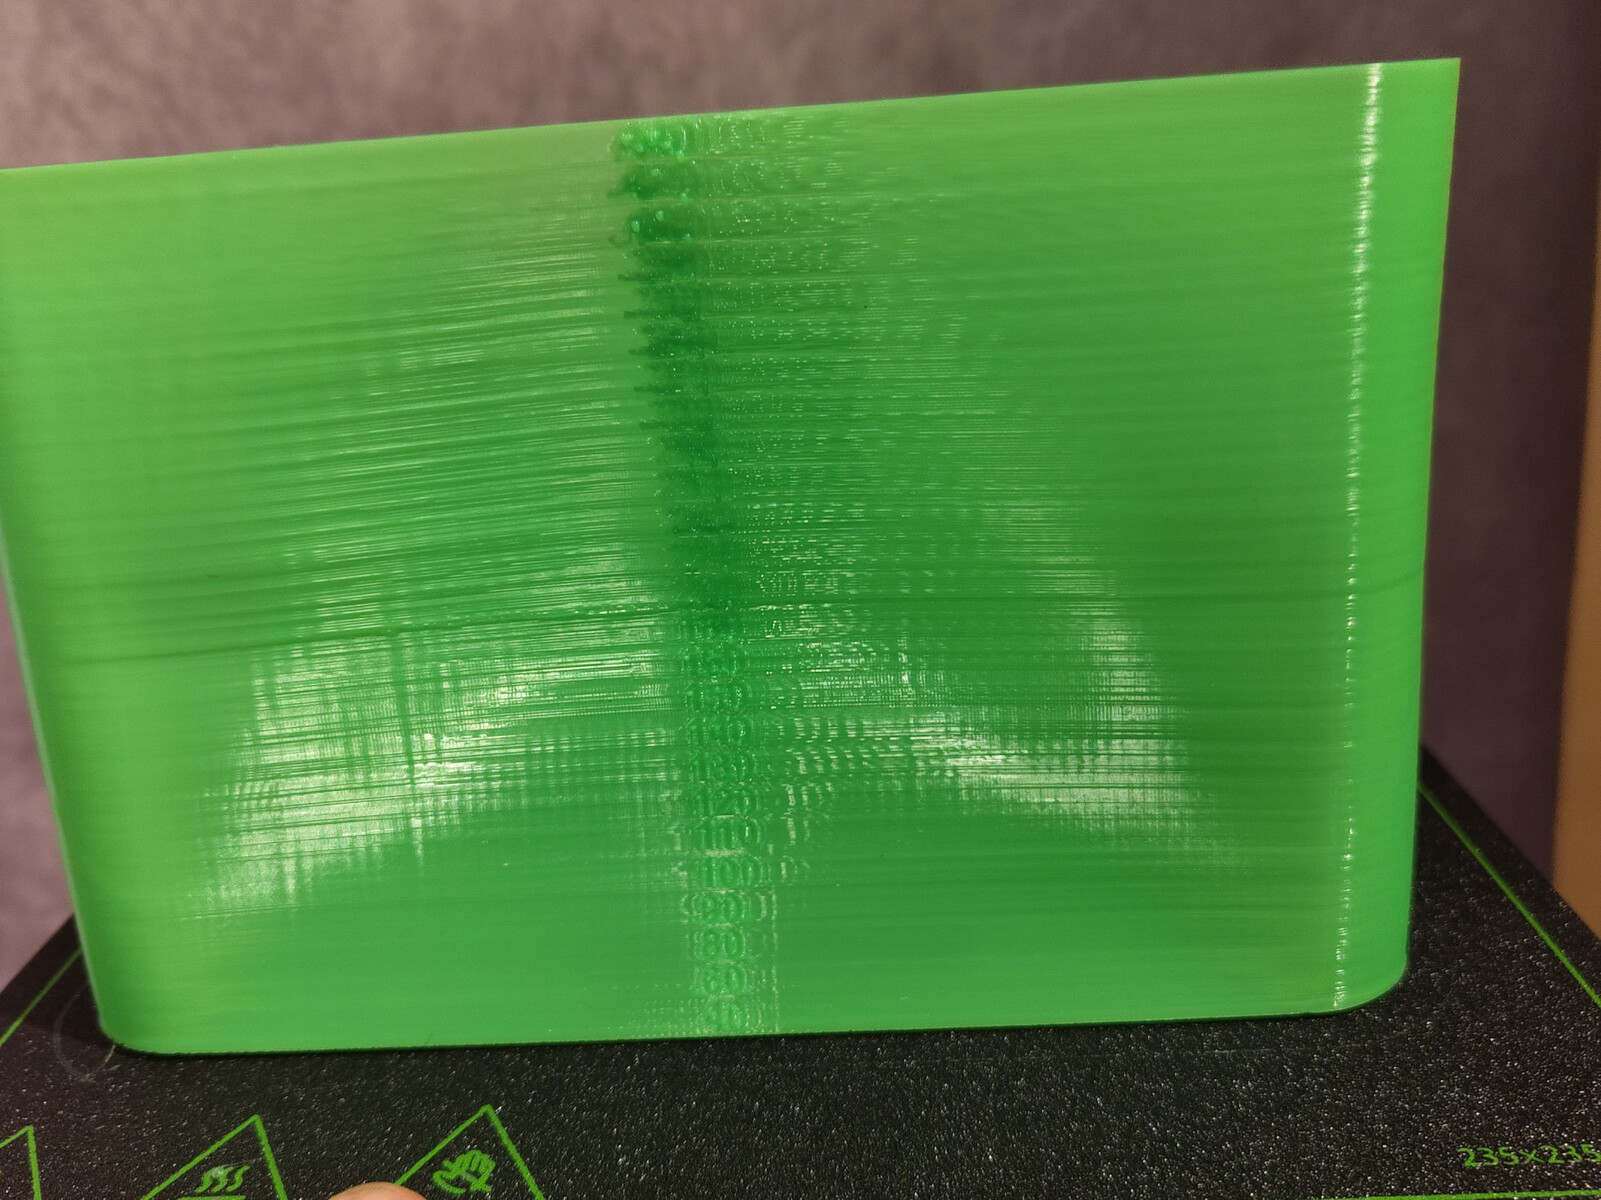
On the surface, everything the AnkerMake 5 produces looks wonderful. There's no getting away from it. Only on closer inspection were we able to spot small problem areas due to the high speeds. With many printers it is possible to detect a slight under extrusion. As no changes to the extrusion multiplicator can take place while printing on this device, it is necessary to enter the appropriate values into the slicer before printing.
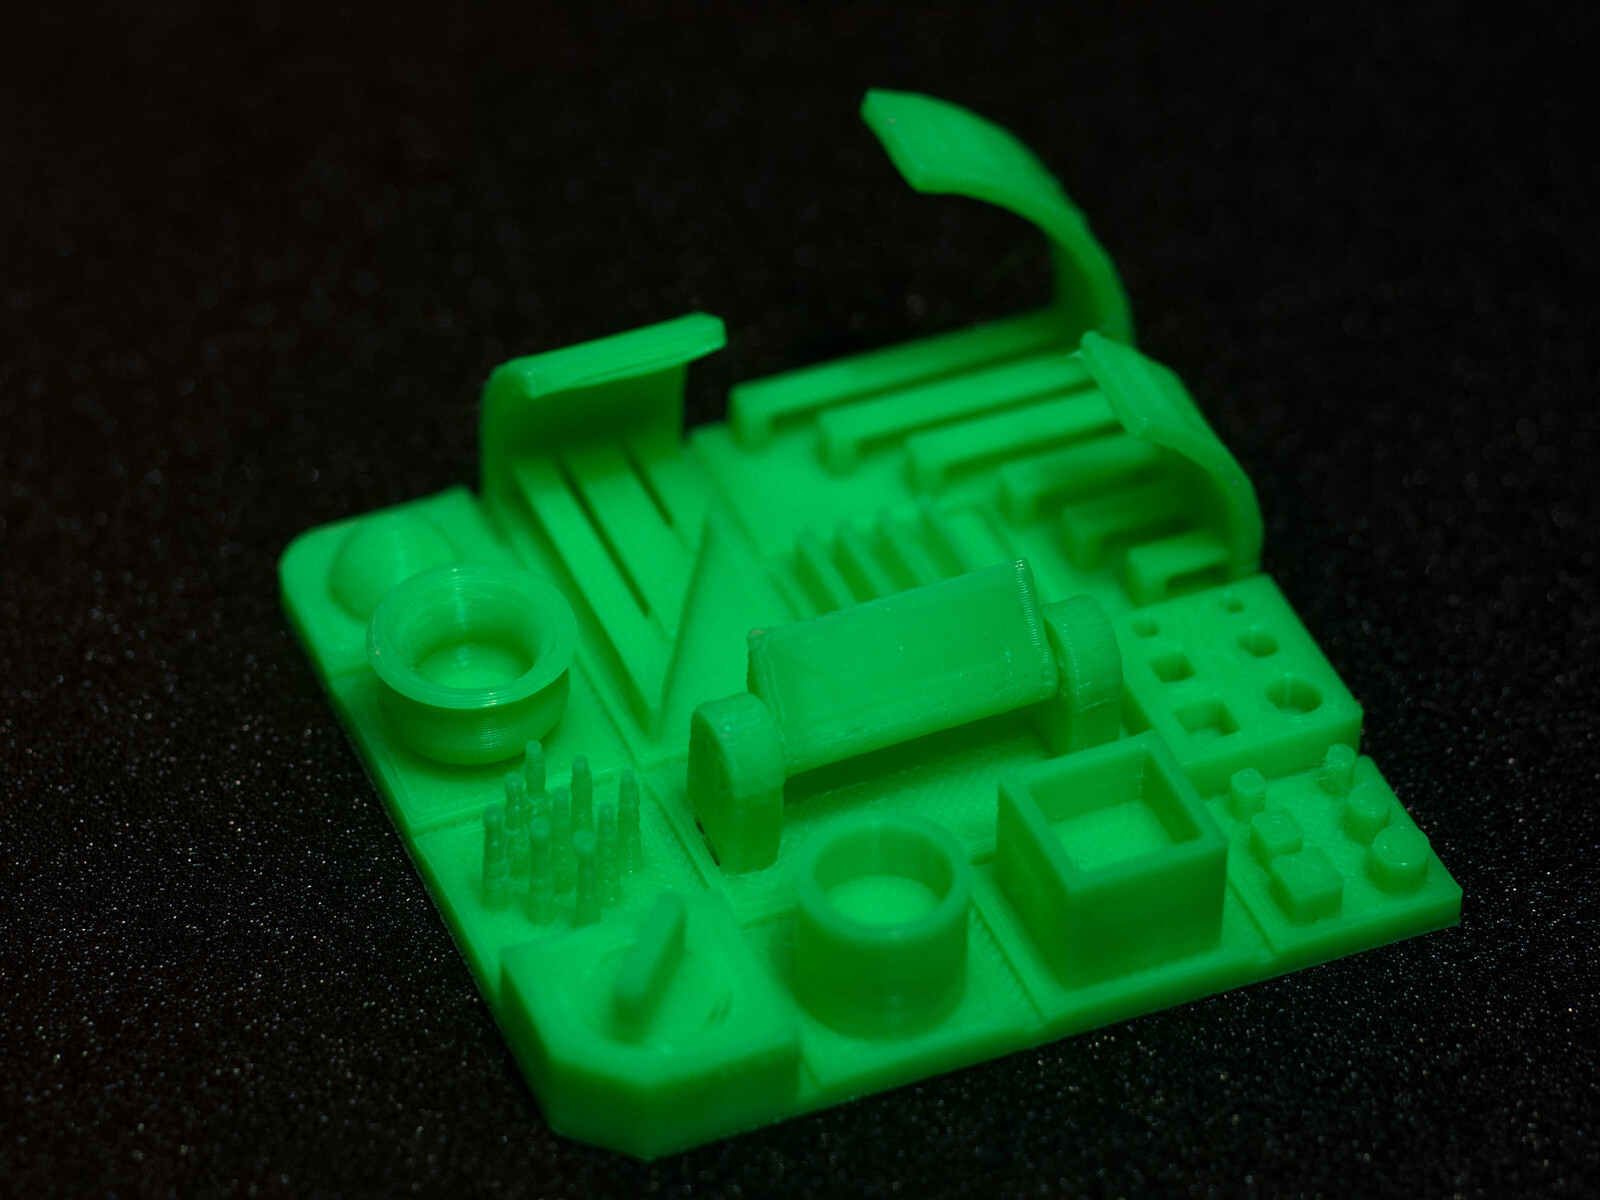
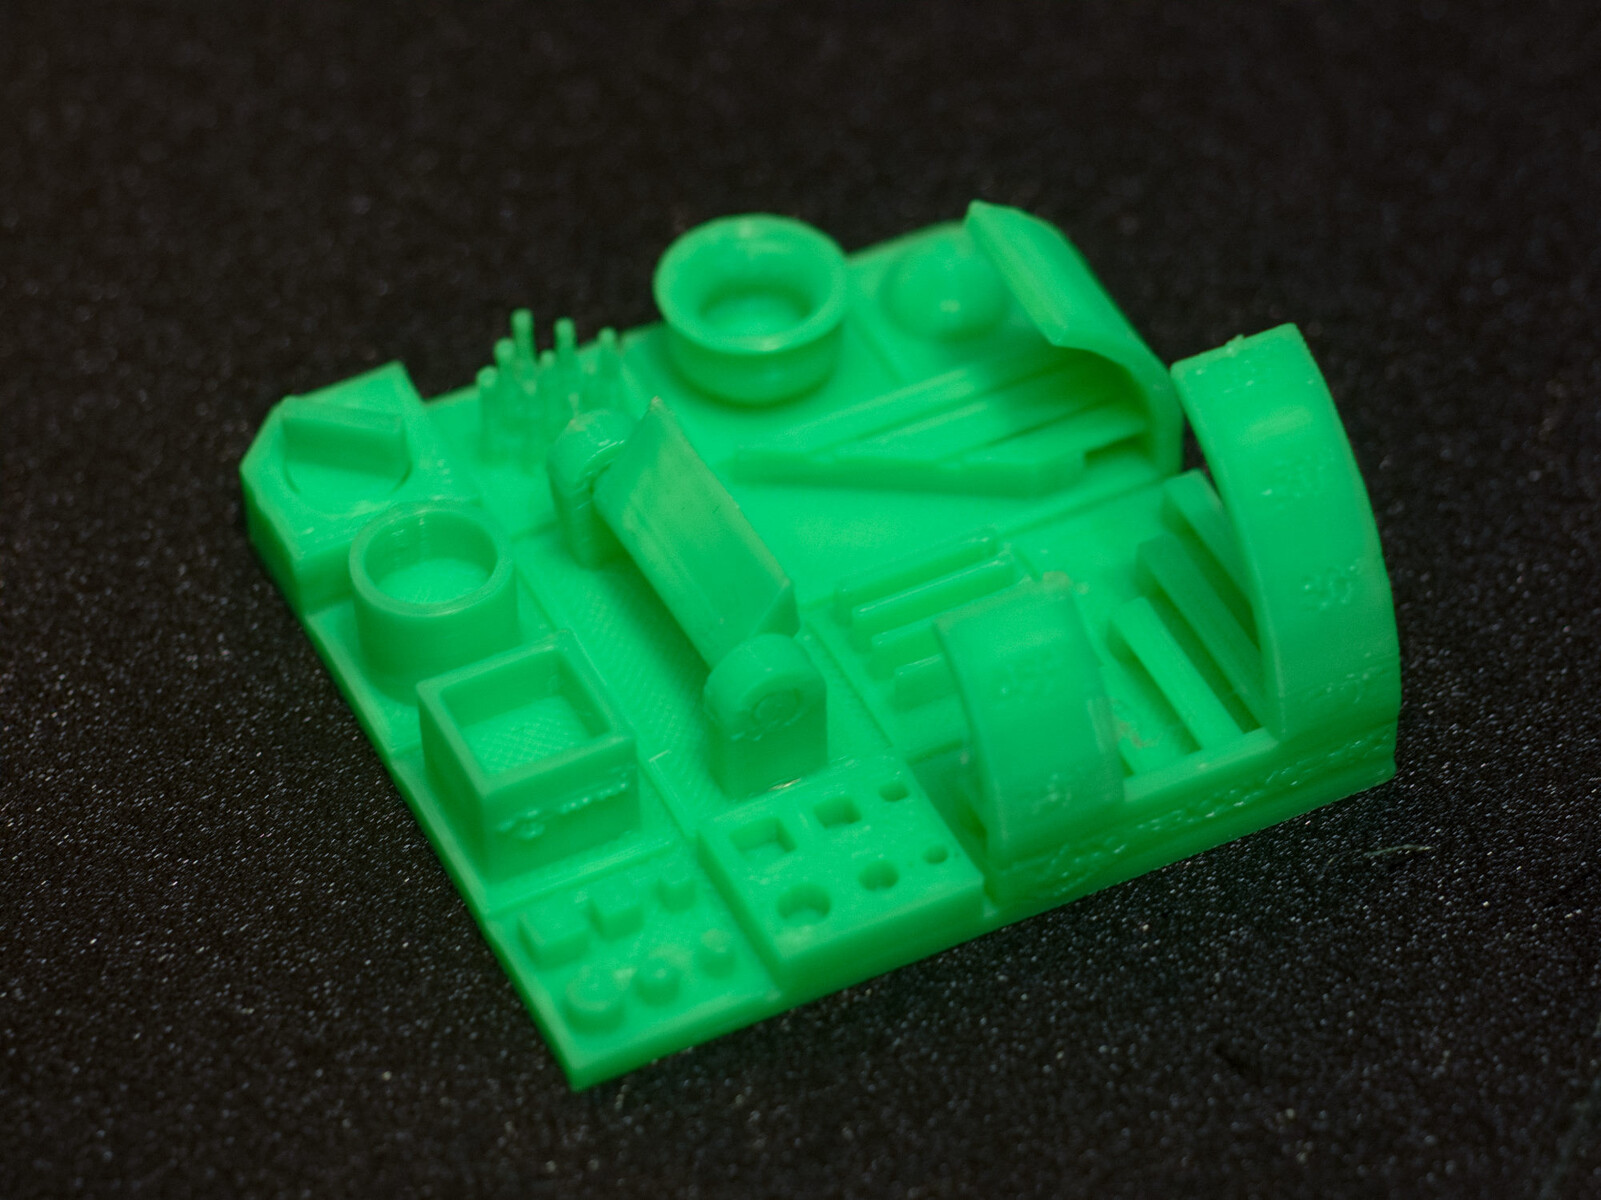
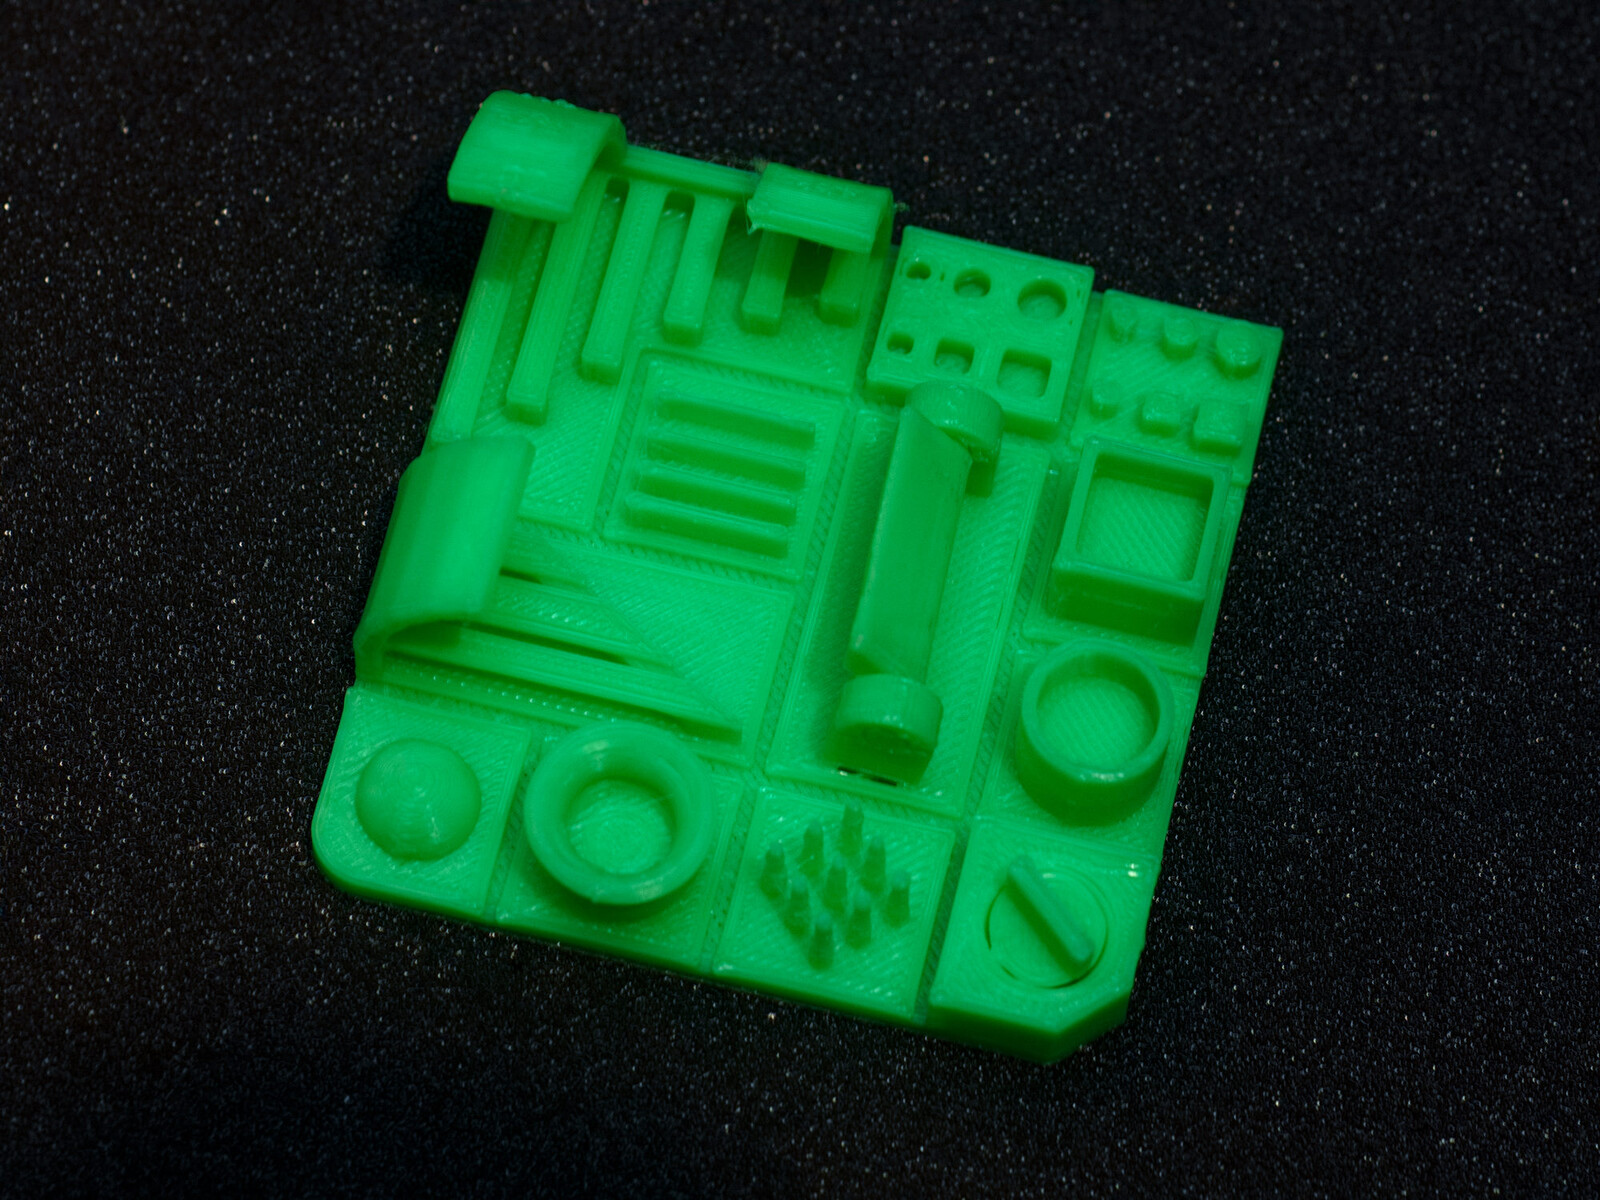
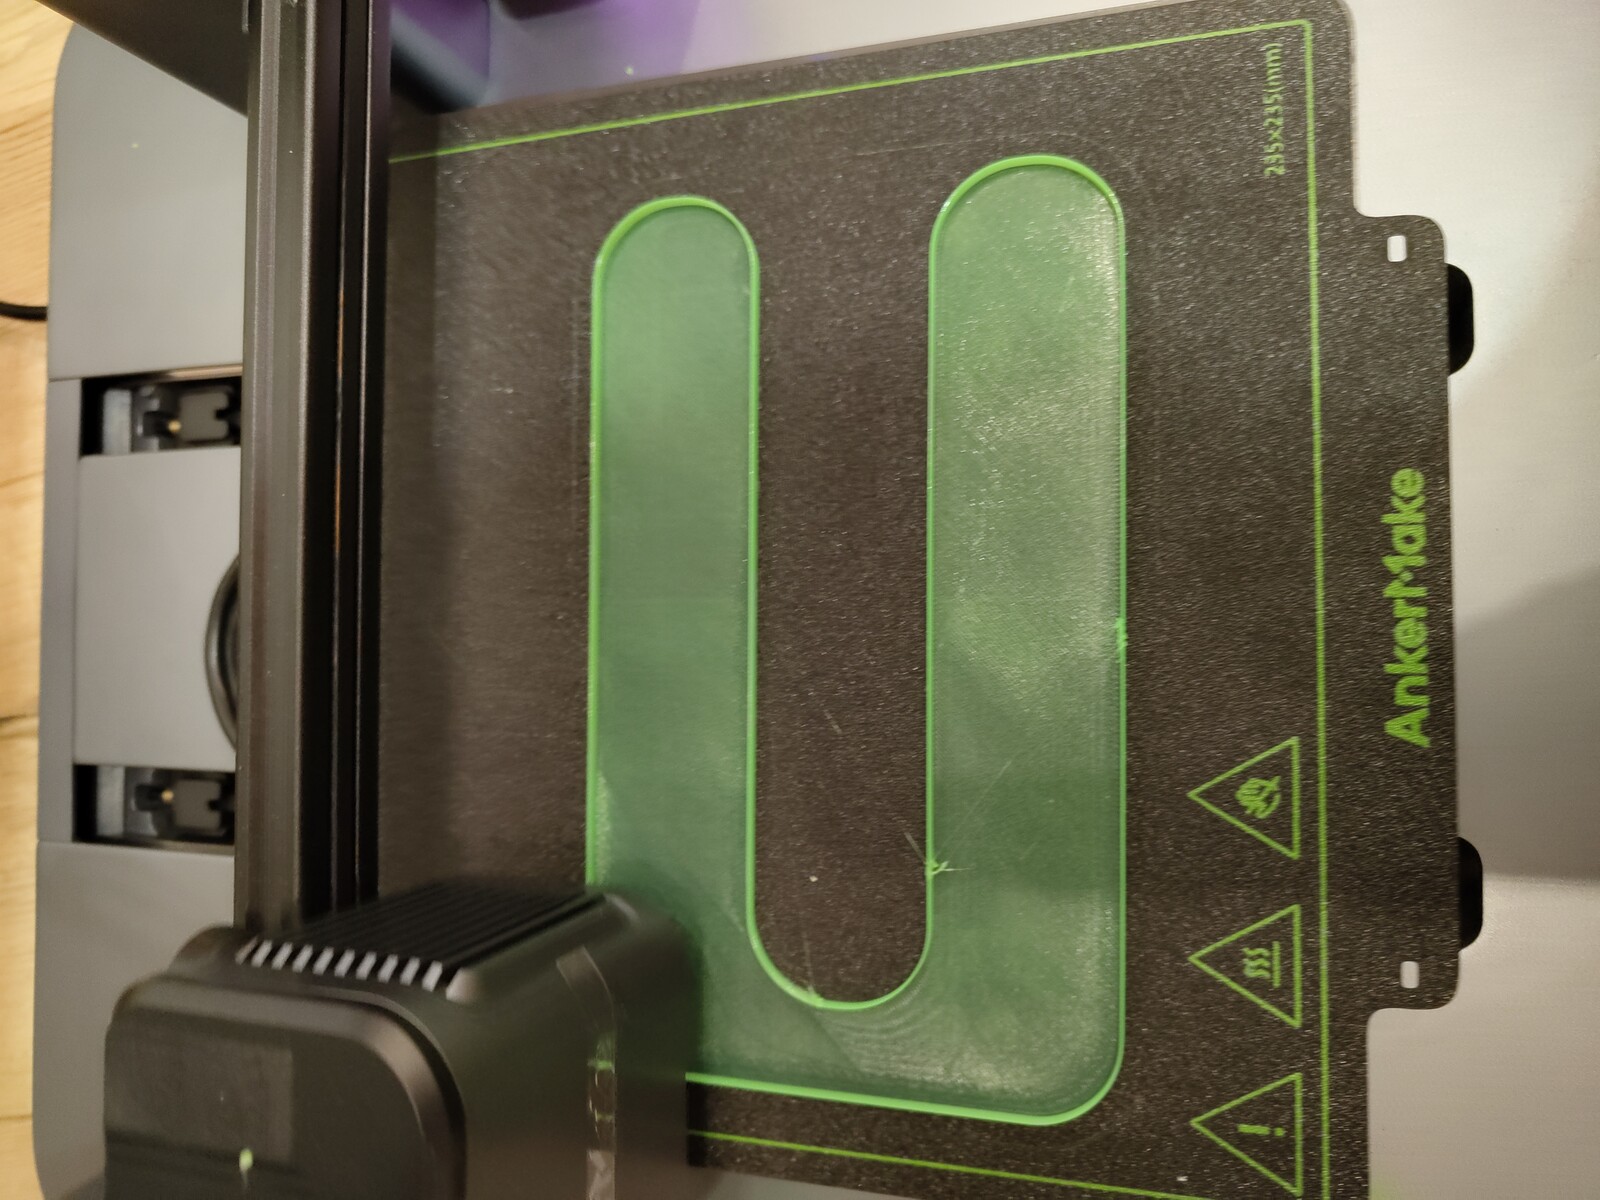
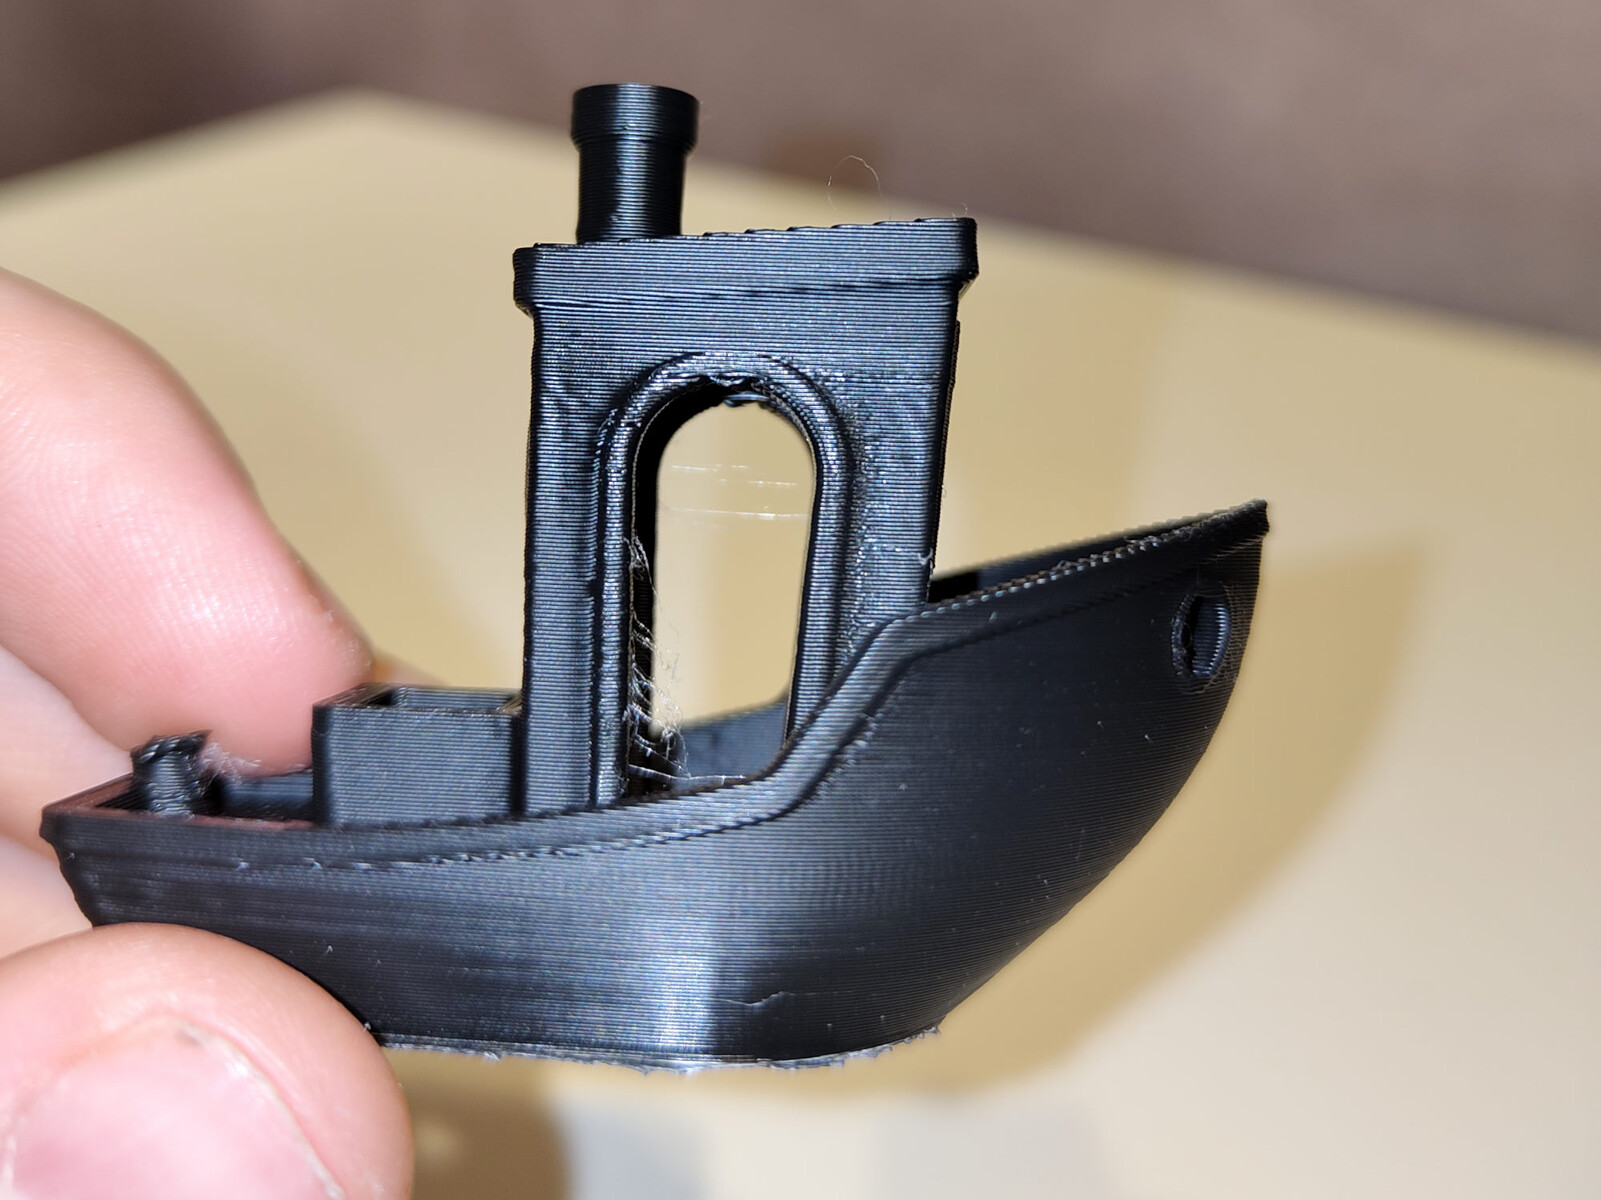
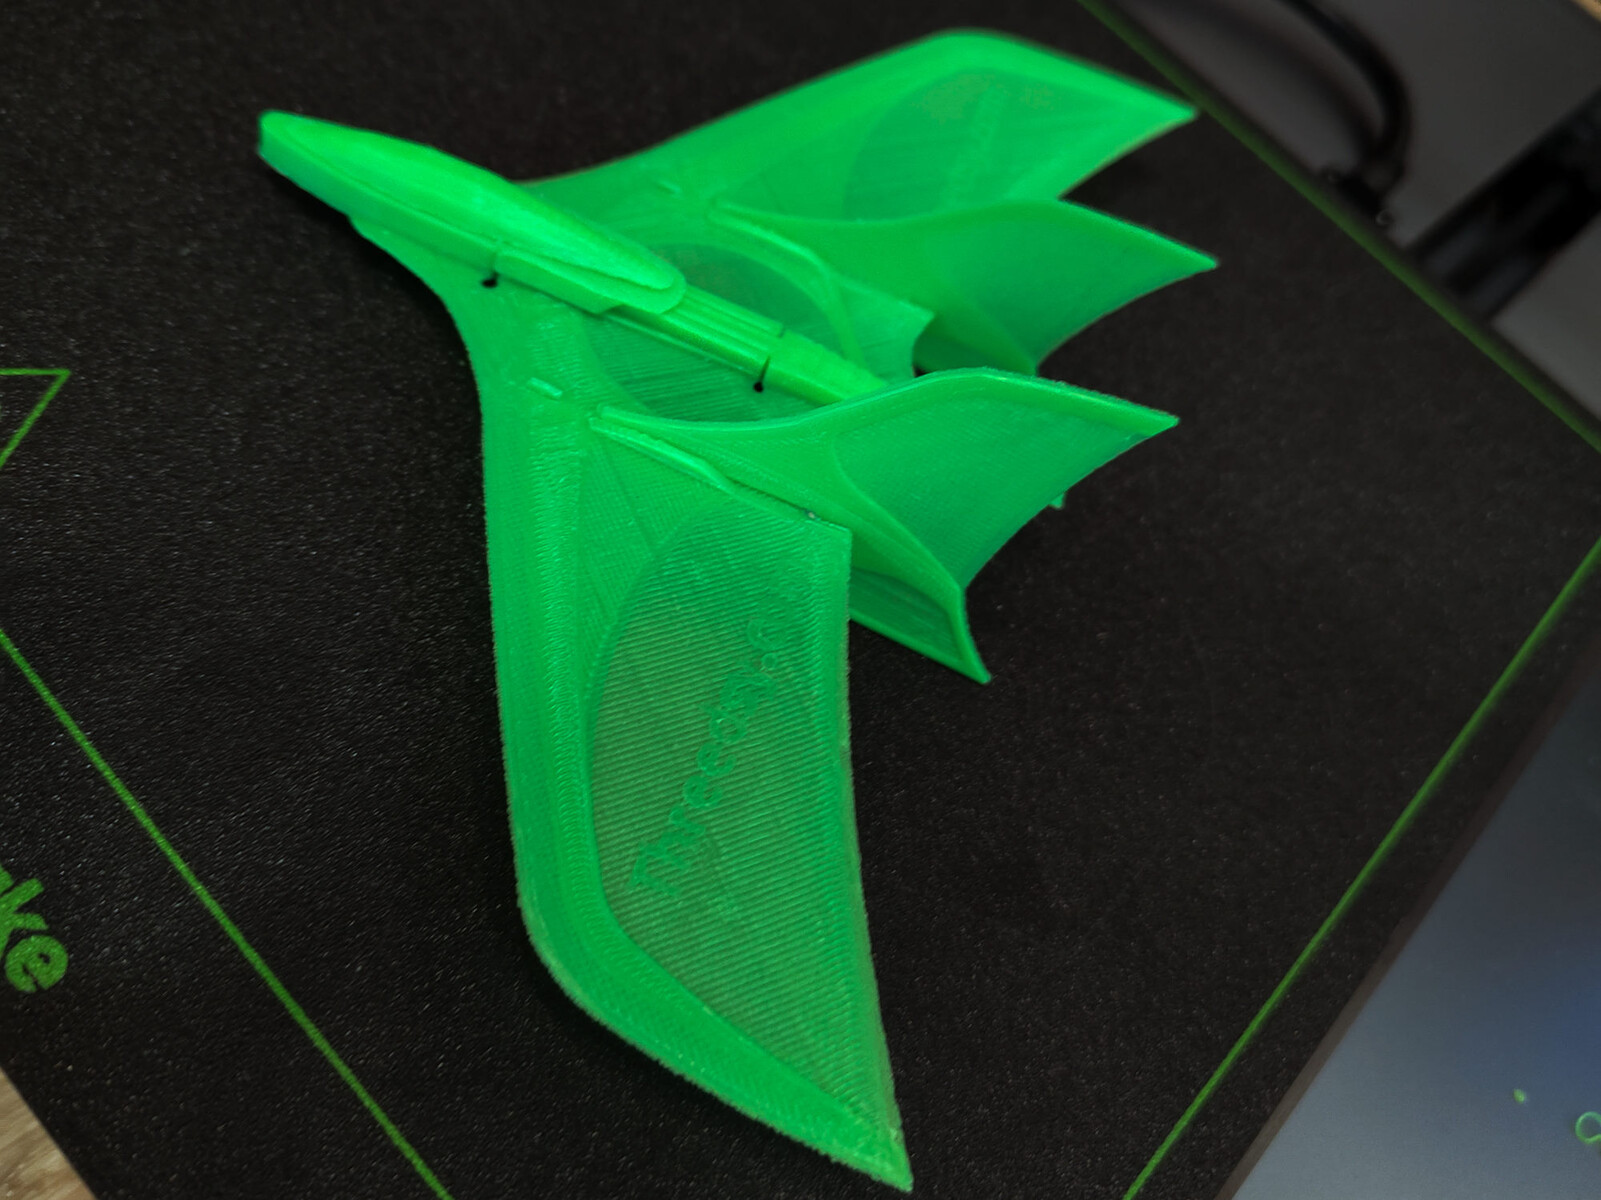
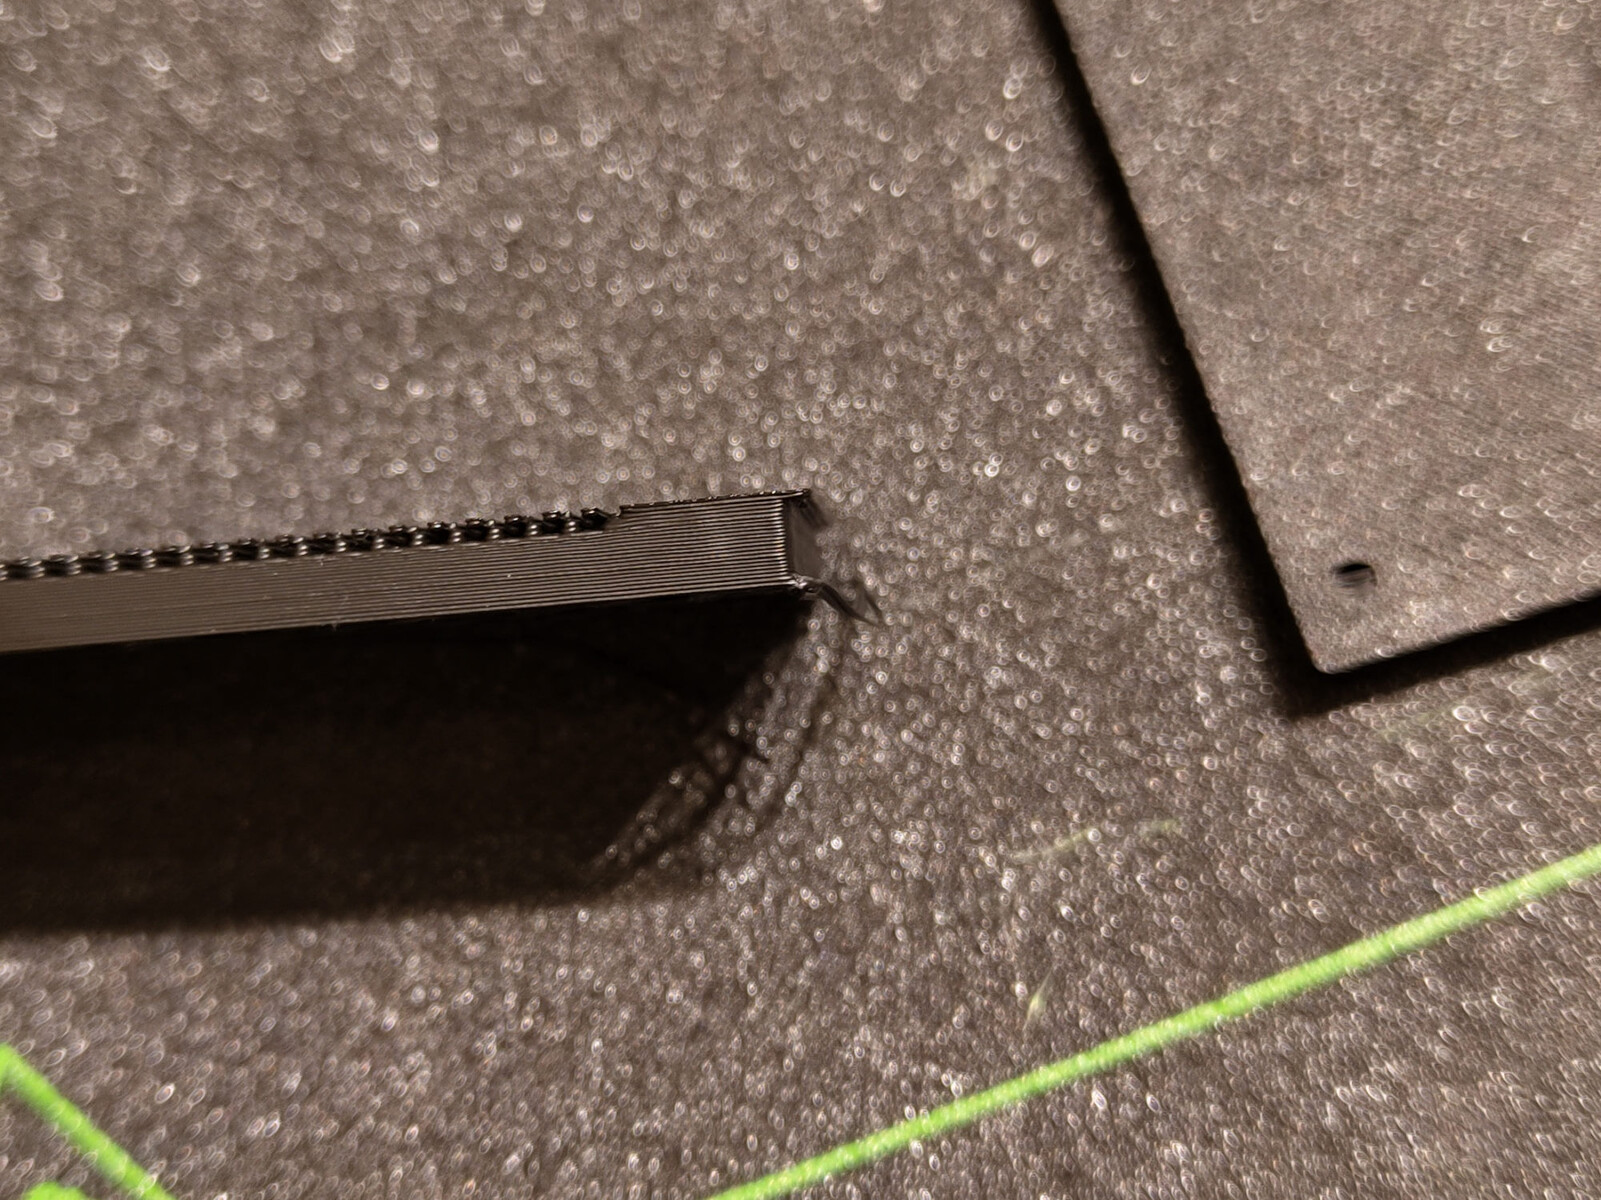
Our test file did not pose any problems for the AnkerMake M5 as all areas of the print were created true to size. Depending on the direction, overhangs of up to 60° posed no problems for the 3D printer. It proved to be difficult to detach parts in the print-in-place parts which is strange considering they ought to be movable. When trying to loosen the door, a small part snapped off.

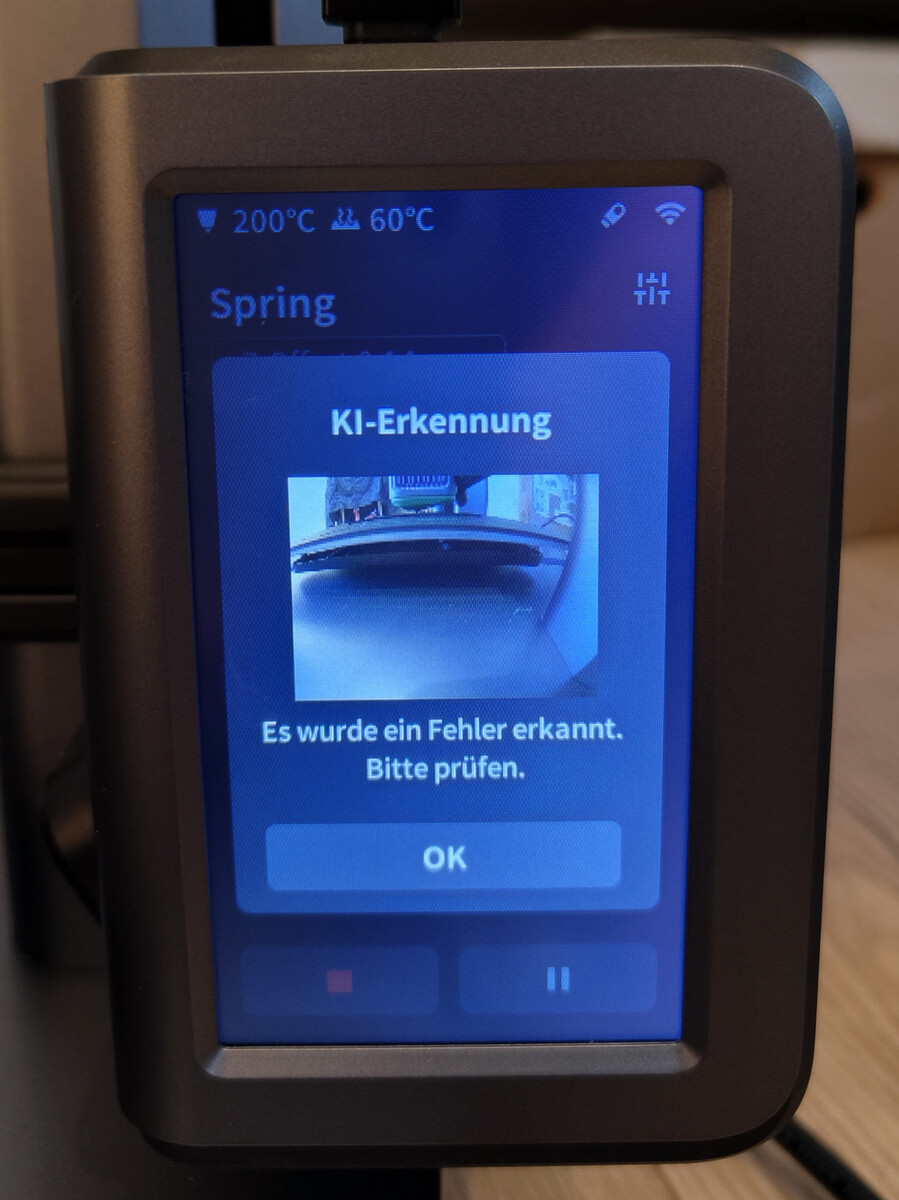
AI monitoring
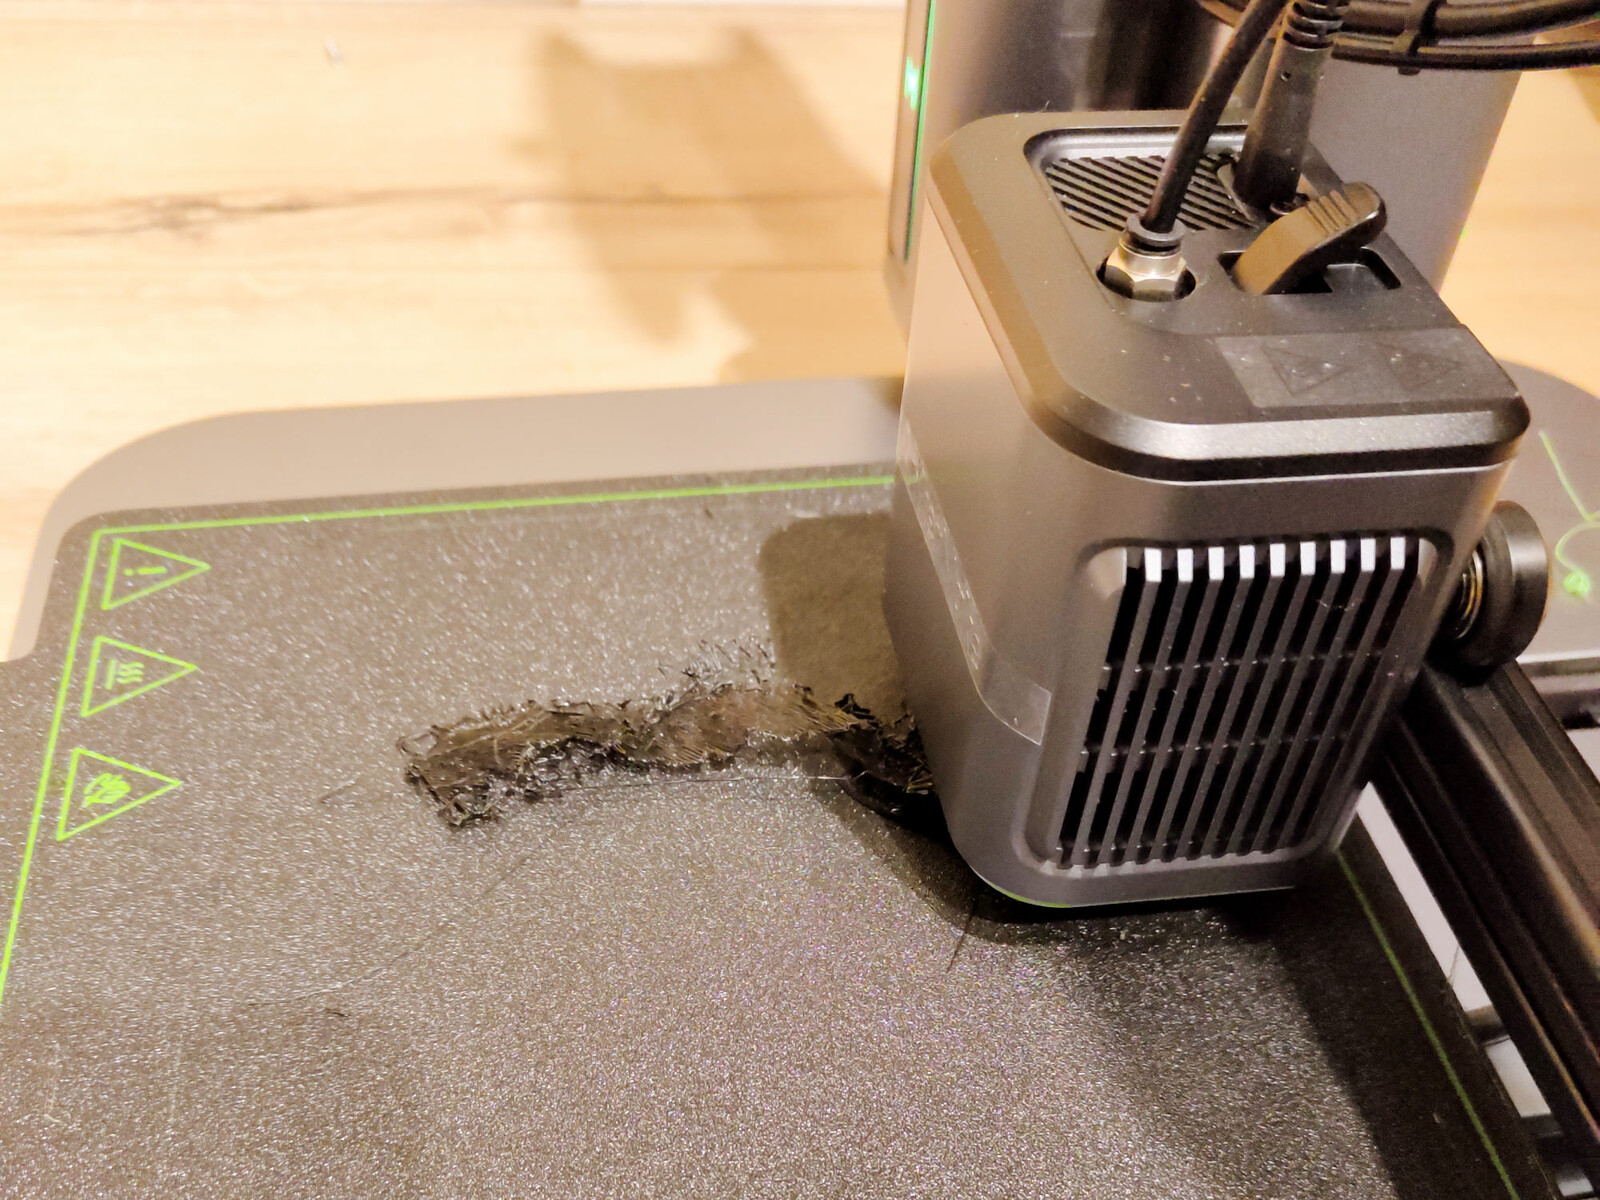
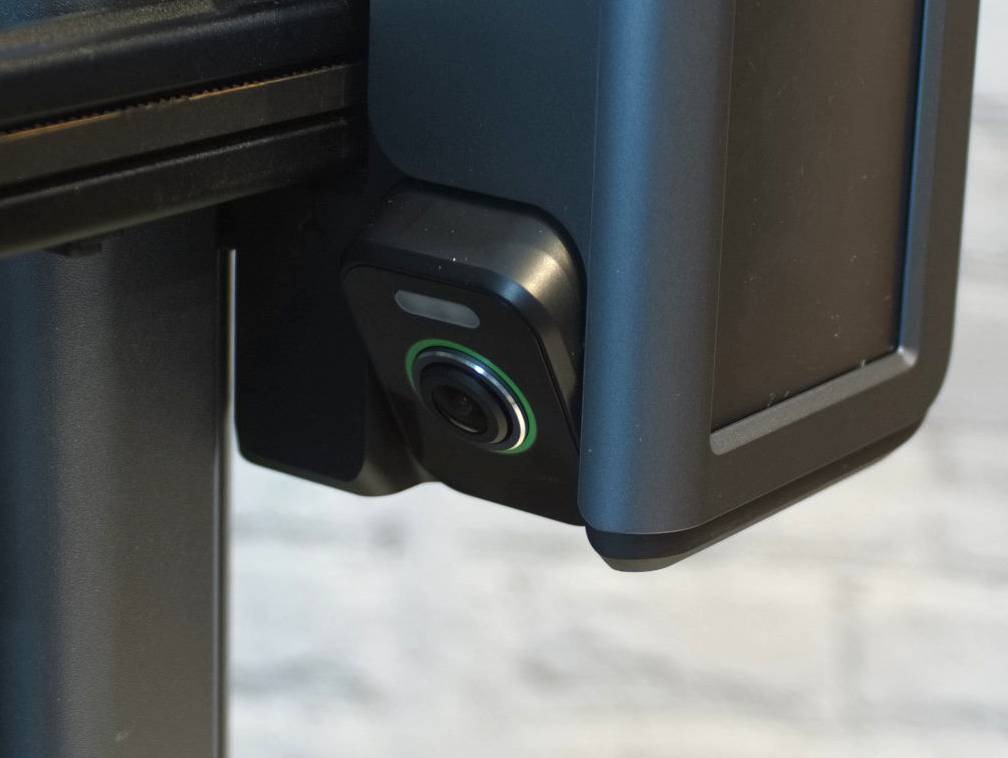
Regarding the AI print assistant, we're undecided about the 3D printer's results. With the help of an infrared camera it monitors whether the printer is producing objects in accordance with the requirements - even in darkened rooms. Above all, the AnkerMake M5's AI has difficulties with black filament. In this area the AI was very unreliable. In the best case, the AI immediately recognized a provoked layer shift and automatically began homing the 3D printer, thus eliminating the error. In the negative case, the AI only recognized a manageable offset after the second layer, some 28 minutes later. Also here the printing continued after automatic homing and was consequently unusable. Even after 12 minutes, the AI was not able to recognize that the print had come loose from the print bed surface. In order to avoid risking damage to the device, printing was terminated manually. In testing, the poor print bed adhesion was forced by us by setting the z-offset incorrectly.
Black filament is an additional problem for the AnkerMake M5's AI, meaning you should choose the printer's installation location carefully. As soon as the camera sees the background is mostly uniform, the recognition improves. Colored or white filament simplifies the AI's work. It seems the AI is still a nice gimmick. An additional problem we noticed while testing the AnkerMake M5's AI is its low error rate. All mistakes recognized or missed by the AI were caused by us on purpose. During normal operation, many print errors took place and on only one occasion the AI reported a false alarm.
Safety - maximum PTFE temperature is not observed
We took a closer look at the configurations file which AnkerMake provides on Github. All possible settings for the 3D printer's Marlin based firmware were made with the "Configuration.h" file. The AnkerMake M5's temperature protection switches were all activated. We simulated all types of errors and at no time did the 3D printer's behavior give cause for concern.
We would regard the hotend's choice of maximum temperature to be unfavorable as this is equipped with a PTFE tube for the filament feed, extending into the heating zone. We consider a maximum adjustable temperature of 260 °C (500 °F) to be too high for the hotend. The firmware even allows up to 275 °C (527 °F) for a short time before a temperature error forces the 3D printer into a safety shutdown. PTFE, better known by the brand name Teflon, starts to emit toxic vapors at 260 °C. As the hotend temperature can always fluctuate a few degrees, this point is probably exceeded when printing at the maximum temperature setting.
Emissions - quick means loud
During operation, the AnkerMake M5 is anything but quiet. We measured up to 65 dB(A) with the Voltcraft SL 10 sound level meter at a distance of one meter (~3.3 feet) from the device. Both powerful hotend fans were responsible for most of the noise. This high frequency emission means the 3D printer is not ideal for use in rooms where the operator is continually present. If the fans are deactivated during operation, the recorded noise level was 50 dB(A).
As with all open design 3D printers, the AnkerMake M5 also releases potentially dangerous vapors from the material used. Depending on the filament, good ventilation is advised. One additional point is the PTFE in the hotend itself, which could outgas at possible high temperatures.
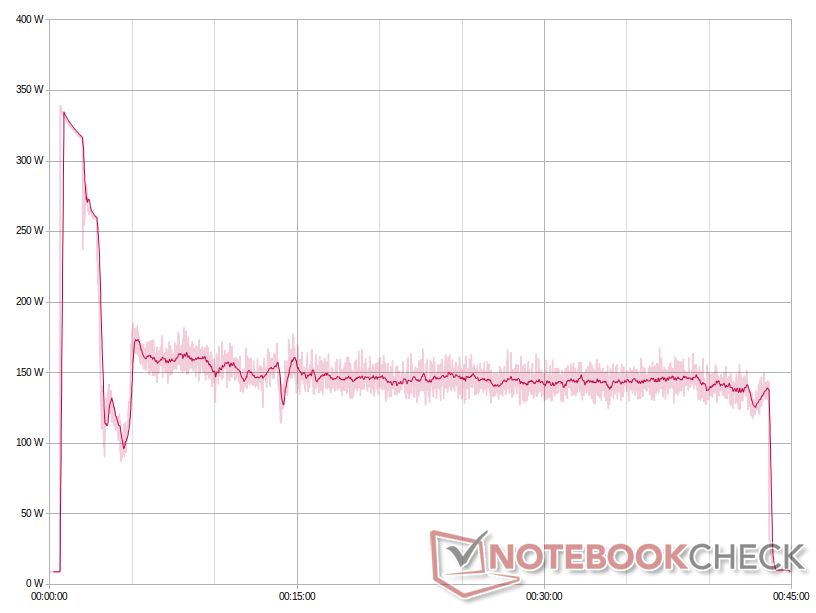
Energy consumption - lower consumption thanks to more speed
To measure a 3D printer's energy consumption we allow it to print a 3DBenchy using standard settings provided by the manufacturer. The work process can be divided into approximately three areas. Firstly, we see the heating up phase with a peak power of 340 watts. Within the first two and a half minutes the hotend and extruder are brought up to operational temperature. While printing the first layer the object fans are not switched on causing the energy consumption to drop briefly to around 110 watts. From the second layer on, the fans are activated and blow a lot of air from the print bed into the room. On average the 3D printer then requires 145 watts.
The AnkerMake M5's power consumption is around 30 watts higher than other similarly sized printers we tested. As the 3D printer from Anker is considerably faster than the Anycubic Kobra, the overall energy consumption of both printers is evenly matched. For a 3DBenchy both printers required roughly 130 watt hours. When it comes to larger objects, the AnkerMake M5 should have its nose in front.
Verdict - the software is lacking
We have before us the first 3D printer from AnkerMake. Despite any criticisms of the device, it's important not to forget one thing: Anker is actually trying to create an entire ecosystem rather than just a printer. This presents us with certain challenges because the AnkerMake M5 hardware is of a very high quality. Only the 3D printer's high noise level remains a critical topic. Otherwise, the AnkerMake M5 is stabile, well-made, good-looking and innovative. Unfortunately, any of the related software doesn't live up to its potential. The AnkerMake slicer is still cumbersome to use and works with an outdated engine. Additionally, the app still offers little in the way of added value. Still too few settings can be performed on the touchscreen. But, since the AnkerMake M5 reached us, Anker has been continually delivering software and firmware improvements in short succession. If Anker also manages to pay attention to its customers' wishes, the 3D printer, as a complete package, ought to improve considerably before it hits the market. So far, only the ordered Kickstarter devices have been shipped.
Providing AnkerMake makes big improvements to the software, the AnkerMake M5 could turn out to be a great 3D printer.
At the moment, evaluating the 3D printer feels like either testing a half-finished product or one where market analysts missed the needs of many hobbyists. In this case, we hope for the former. If Anker had brought experienced developers on board to develop the AnkerMake brand, the software in particular would have included greater in-depth control features. Maybe they should have explained to the Anker developers what is meant by all metal hotend. Speed and AI print monitoring alone can't be the only AnkerMake M5 purchasing criteria for experienced users.
The situation is somewhat different for ambitious newcomers to the 3D print scene. Anyone wanting to use additive manufacturing as part of another hobby will find a capable companion in the form of the AnkerMake M5 because the 3D printer offers excellent printing speed and quality without the need for experimentation. We are pleasantly surprised how much performance can be extracted from the typical Prusa Mendel motion system. The AnkerMake M5's high speed was something that could previously only be expected from CoreXY or LinearDelta 3D printers.
Prices and availability
The AnkerMake M5 can be preordered on the AnkerMake website. The 3D printer can be had for 849 Euros (~$878).
Sources
STL files
Thingiverse - Lockable Contour Gauge
Thingiverse - Notebookcheck test file
Filaments
Sunlo Masterspool Filament PLA in green
Sunlo Masterspool Filament PLA+ in black
Sunlo Masterspool Filament PETG
Text sources
AnkerMake on Github

