1. Choose the right image format, ISO, and white balance
Instead of choosing the JPEG format, use the RAW standard. Although RAW may use more storage space than the compressed JPEG format, it allows for more adjustments during post-processing and results in better image quality.
For the ISO setting, adjust the light sensitivity as low as possible, around 100-400. Most DSLR cameras tend to produce significant noise at higher ISO levels.
For white balance adjustments, you can start with the automatic mode. However, you should also begin to understand specific settings like Cloudy or Tungsten to better control your camera.
2. Select the appropriate exposure mode
DSLR cameras offer a range of exposure modes, from fully automatic options like point-and-shoot cameras to fully manual modes. Pay attention to Aperture Priority and Shutter Priority modes, which allow for more creativity.
The Aperture Priority mode lets you choose the desired aperture, thus selecting your preferred focal point. The camera will automatically select the appropriate shutter speed for the best exposure.
Meanwhile, the Shutter Priority mode allows you to select the appropriate shutter speed depending on the scene or subject. The camera will automatically adjust the aperture accordingly.
3. Adjust the metering mode
Metering settings vary between cameras and brands, but the three basic modes on DSLR cameras are Multi-zone, Centre-weighted, and Spot.
The Multi-zone mode divides the image into various zones and reads the entire scene to set the appropriate exposure. In most cases, the automatic exposure of this mode is fairly accurate.
Centre-weighted mode focuses mainly on the center of the frame (60-70%), which is helpful for portrait photography.
Spot mode allows for detailed area metering, providing the most accurate measurements, although it requires careful operation. When using automatic exposure modes like Aperture Priority, Spot metering is often used in combination with the AEL button to lock the exposure level, allowing you to change the frame without affecting the exposure level.
4. Choose aperture and shutter speed
Aperture determines the depth of field in an image. If you want a shallow depth of field to highlight the subject and blur the background, choose a wide aperture like f/2.8. Conversely, for a deep field focusing on the background, choose a narrow aperture, such as f/22.
Shutter speed determines whether moving subjects appear blurred or sharp. A slower speed will result in more blur, and vice versa.
5. Set AF and drive modes
To ensure image sharpness, DSLR cameras offer various focus modes. The two main options are single-shot for stationary subjects and servo for moving subjects.
Drive mode offers several other options like single shooting, continuous shooting, self-timer, and macro photography for close-ups.
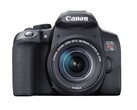
To put these tips into action with a suitable camera, check out the Canon EOS Rebel T8i (available on Amazon), ideal for beginners.
Source(s)
Photo by William Bayreuther on Unsplash
Photo by Ben Griffiths on Unsplash


