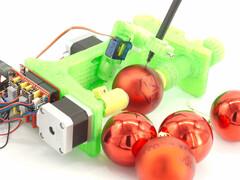
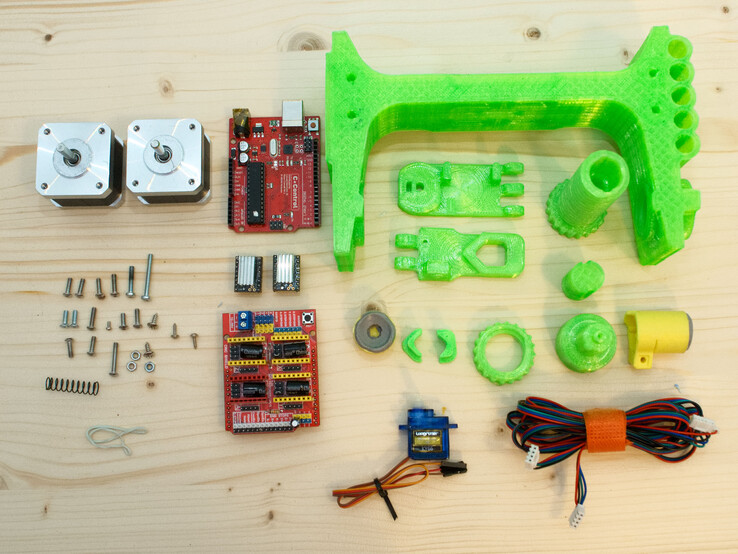
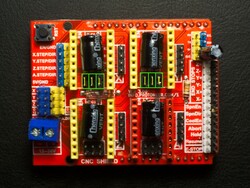
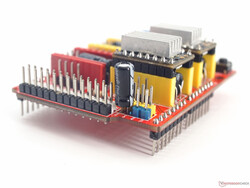
A Spherebot or Eggbot draws patterns from a PC on whatever is round. Via thingiverse.com and instructables.com one can find several tutorials and templates for the little robots, which could also be called sphere plotters. The material list is quite similar for most of the Spherebots. Two Nema 17 motors, a small servo, an Arduino Uno, a CNC shield and stepper motor drivers are needed. In addition, it requires a power supply, screws, cables, balls and matching markers. On Amazon, the complete material list has a price tag of something around $50. If you have a 3D printer, you can probably borrow its expensive Nema 17 motors and stepper motor drivers for the project.

Instructions and build manuals
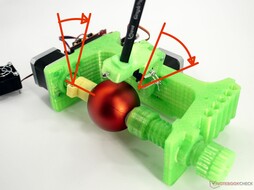
There are many more or less simple instructions for an Eggbot on various DIY pages like instructables and thingiverse. Most of them can be made with a 3D printer. At least 20 of those Eggbots can be found by various names via thingiverse.com. I have put together a small selection in a collection here. Resourceful hobbyists can probably do without a 3D printer for some designs and only work with plywood, screws, ball bearings and some brackets. I chose the design by Herbert Schützeneder, which, I think, is very clever. Most of the parts from his Eggbot are 3D-printed. Basically, the shopping list is very similar for most Eggbots. This is also because the original by Evil Mad Scientist has been available as an open-source project for several years. Thus, for the most part, only adjustments are necessary to adapt the replicas to different manufacturing methods.
BOM for the Eggduino by Herbert_b1:
2 × Nema 17 stepper motor
1 × CNC-Kit with Arduino Uno clone
1 × Servo motor SG90 or KY66
1 × M3-screws
1 × 608 ball bearing
1 × capacitor with 10 µF to 100 µF
1 × AC/DC converter delivering a voltage between 12 V and 24 V
some (permanent) markers
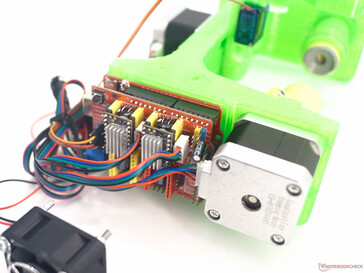
In my case, the stepper motors and the TMC2100 stepper motor drivers come from a 3D printer that is no longer in use. As power supply I use an old laptop brick with 19 V. The higher voltage is more of an advantage for the CNC-Shield since the Arduino Uno clone is powered by USB. With the higher voltage, the motors can be driven with less current. This results in less heat dissipation at the motors and electronics. I also didn't have to buy a ball bearing, since the 608 ball bearings are the same as those in skateboards and inline skates.
Software - Download, installation and modification
The Arduino Uno (clone) is programmable using the Arduino IDE. The application can be downloaded from www.arduino.cc/en/software or acquired from various sources. On Windows, the app is also available for installation via the Microsoft Store.
To create the images and patterns for the Christmas tree ball, the open source application Inkscape with an EggBot extension is required. The latest version 1.1 can be downloaded via the release page.
A ready-to-use firmware for the Arduino Uno (clone) is available on Github in the Eggbot repository by Plex3r. Here you can start the download as a zip file by clicking on the green code element. Plex3r's instructions for modifying the Eggbot extension unfortunately don't work with the newer software versions.
The latest EggBot version 2.81 is downloaded from Evil Mad Scientist's repository and modified instead. You will need the two archives eggbot-inkv1r2.zip and EggBotExamples_v281.zip from the release folder.
Programming the Arduino Uno
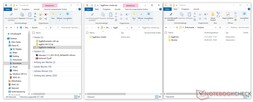
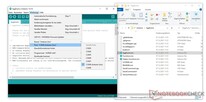
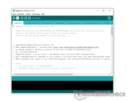
After the installation of the Arduino IDE, open the EggDuino-master.zip file and unpack it in the user folder Documents/Arduino. In order for the IDE to be able to work with the folder's contents, it must be renamed to EggDuino. Double click on EggDuino.ino in the renamed EggDuino folder to open the file. Now you can connect the Arduino Uno (clone) to the computer via USB cable. Select the board with Tools>Port. Then you upload the program as it is. Later, everything is connected in a way that the programmed pinout matches.
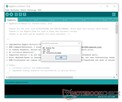
The hardware ID of the developer board is needed to adapt the EggBot extension for Inkscape to the EggDuino in the next step. This ID can be retrieved with the Arduino IDE via Tools>Get Board Information. VID and PID can be copied by CTRL+C and then pasted into a text file.
EggBot extension installation and modification
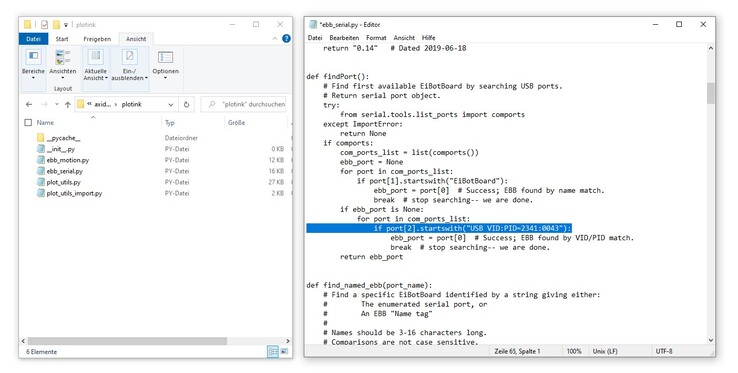
The zip file eggbot-inkv1r2.zip contains the complete EggBot extension for Inkscape. Nevertheless, this extension has to be adapted to the EggDuino before it can be integrated into Inkscape. First unzip the archive at an arbitrary place. In the unpacked folder, search for the file ebb_serial.py. This is located under eggbot-inkv1r2\axidraw_deps\plotink. Opened with the editor, the Python script can be edited. In line 65 [ if port[2].startswith("USB VID:PID=04D8:FD92"): ] the hardware ID of the original EggBot is searched by the script. This must be changed to the Eggduino with the previously determined values for VID and PID.
So in my case the new line is: [ if port[2].startswith("USB VID:PID=2341:0043"): ]
Since not every Arduino Uno and its clones have the same hardware-ID simply copying my change may not lead to success.
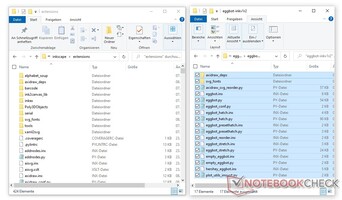
After saving the modification, the complete contents from the eggbot-inkv1r2 folder will be transferred to the extensions folder of Inkscape 1.1. If the default installation directory has not been changed during the installation, it is located at:
C:\Program Files\Inkscape\share\inkscape\extensions
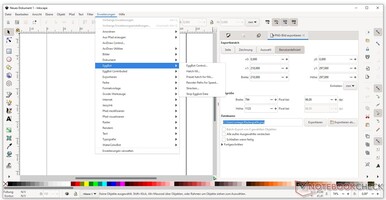
If you now open Inkscape, you should be able to find Eggbot under Extensions.
Assembly
General assembly of the components should be straightforward, but dealing with the wiring can be a little tricky. Since the Arduino Uno is very forgiving, mistakes are, in general, not a big deal.
stepper motor drivers
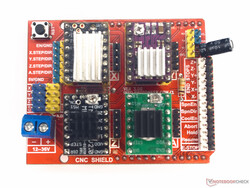
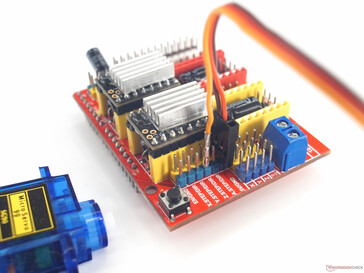
First, the jumpers should be set to adjust the micro stepping. Depending on the stepper motor driver, the jumpers have to be set differently. The idea is to achieve 1/16 micro stepping. With the A4988-drivers included in CNC Kit from the link above, all three jumpers must be set. In the picture on the right, the corresponding places are marked green and the connections yellow. M0, M1 and M2 have to be connected. For the Eggbot only X- and Y-motor are necessary.
In the next step, the heat sinks are glued onto the stepper motor drivers and the drivers are plugged into the slots for X and Y. Here you have to pay attention to the alignment. Normally, the EN pin is marked on all Pololu compatible stepper motor drivers. This must be connected to the EN-socket on the CNC-shield, only then the alignment is correct.
Please refer to the data sheet of the respective manufacturer for information about voltages and settings for the micro stepping and current.
Deactivating the auto reset of the Arduino Uno
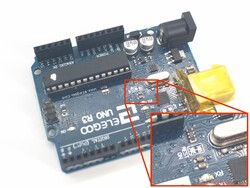
For a proper connection with Inkscape, it is necessary to disable the auto-reset on the Arduino. The first possibility is to disconnect a contact on the Arduino UNO. On the boards there is always a jumper contact, which is marked as REST-EN or REST-ON. After the board is programmed, this contact can be disconnected with a knife. If you need the auto-reset again, you can set a solder bridge.
It is also possible to disable the auto-reset with a capacitor between the reset pin and the GND pin on the CNC-shield. The capacitor must have a capacity of at least 10 µF. An electrolytic capacitor is soldered with its negative pin on the GND pin of the CNC-Shield. Ceramic and foil capacitors have no polarity. The dielectric strength of the capacitor should be at least 1.5 times the voltage of the selected power supply.
Wiring
All Eggbots use two stepper motors and one servo. The stepper motor that turns the ball or egg is connected to the contacts of the X-driver, the stepper motor for the pen arm is connected to the contacts next to the Y-driver. The way the two connectors are connected only changes the direction of rotation. This can be reversed later in Inkscape.
The three wires of the servo motor are connected to the 5V, GND and Z.STEP pins of the CNC-Shield. The black cable to GND, the red one to 5V and the yellow one to Z.STEP.
Software setup and plotting
Once everything is assembled, the Arduino can be connected to the PC and the CNC-Shield to the power supply. In Inkscape you now call the control panel of the Eggbot, and here you still have to set the settings for the servo motor and the direction of rotation for the stepper motors. To find the right settings you have to carry out some experiments.
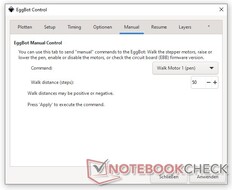
In the Manual tab, you can first determine the direction of rotation of the pen arm. Select Walk Motor 1 (Pen) from the drop-down menu and enter a positive value below and click Apply. The pen should now move towards the tip of the bauble with the ornament hook. So, depending on which way around you want to clamp the balls, this is to the left or to the right. Repeat the same process with the selected menu item, Walk Motor 2 (Egg). The ball should rotate clockwise when viewed from the point of suspension.
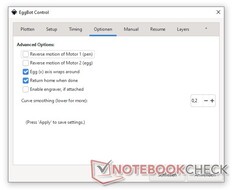
If the directions of rotation do not match, the Reverse motion of Motor checkbox must be set or deleted for the corresponding motor in the Options tab.
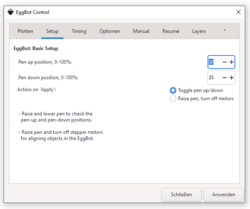
The values of the servo motor must also be adjusted. Here it depends on whether you have a servo motor with positive or negative direction of rotation. In my case, the value to be set in Eggbot Control Setup for the pen-up position is smaller than the pen-down position. You might have to try a couple of values to find the right ones.
Plotting
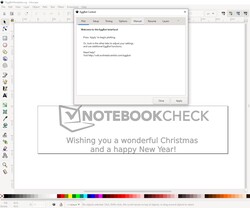
Once everything is assembled, installed and set up, you can finally start drawing. In the EggBotExamples_v281.zip archive are some templates for different occasions. These can be loaded, modified and drawn like of your desire. The file EggBotTemplate.svg serves as a template for your designs. When opening some templates, Inkscape will probably ask if anything should be changed in the files, since they were created with an older version of Inkscape. The new Eggbot extension has been adapted to Inkscape 1.1 in a way that you have to select “This file is intended for on-screen display[...]” here, otherwise the output on the Eggbot will be distorted.
With the finished design, you don't need to do anything else but plot it via the Eggbot Control Center. Just click on "Apply" in the Plot tab.


