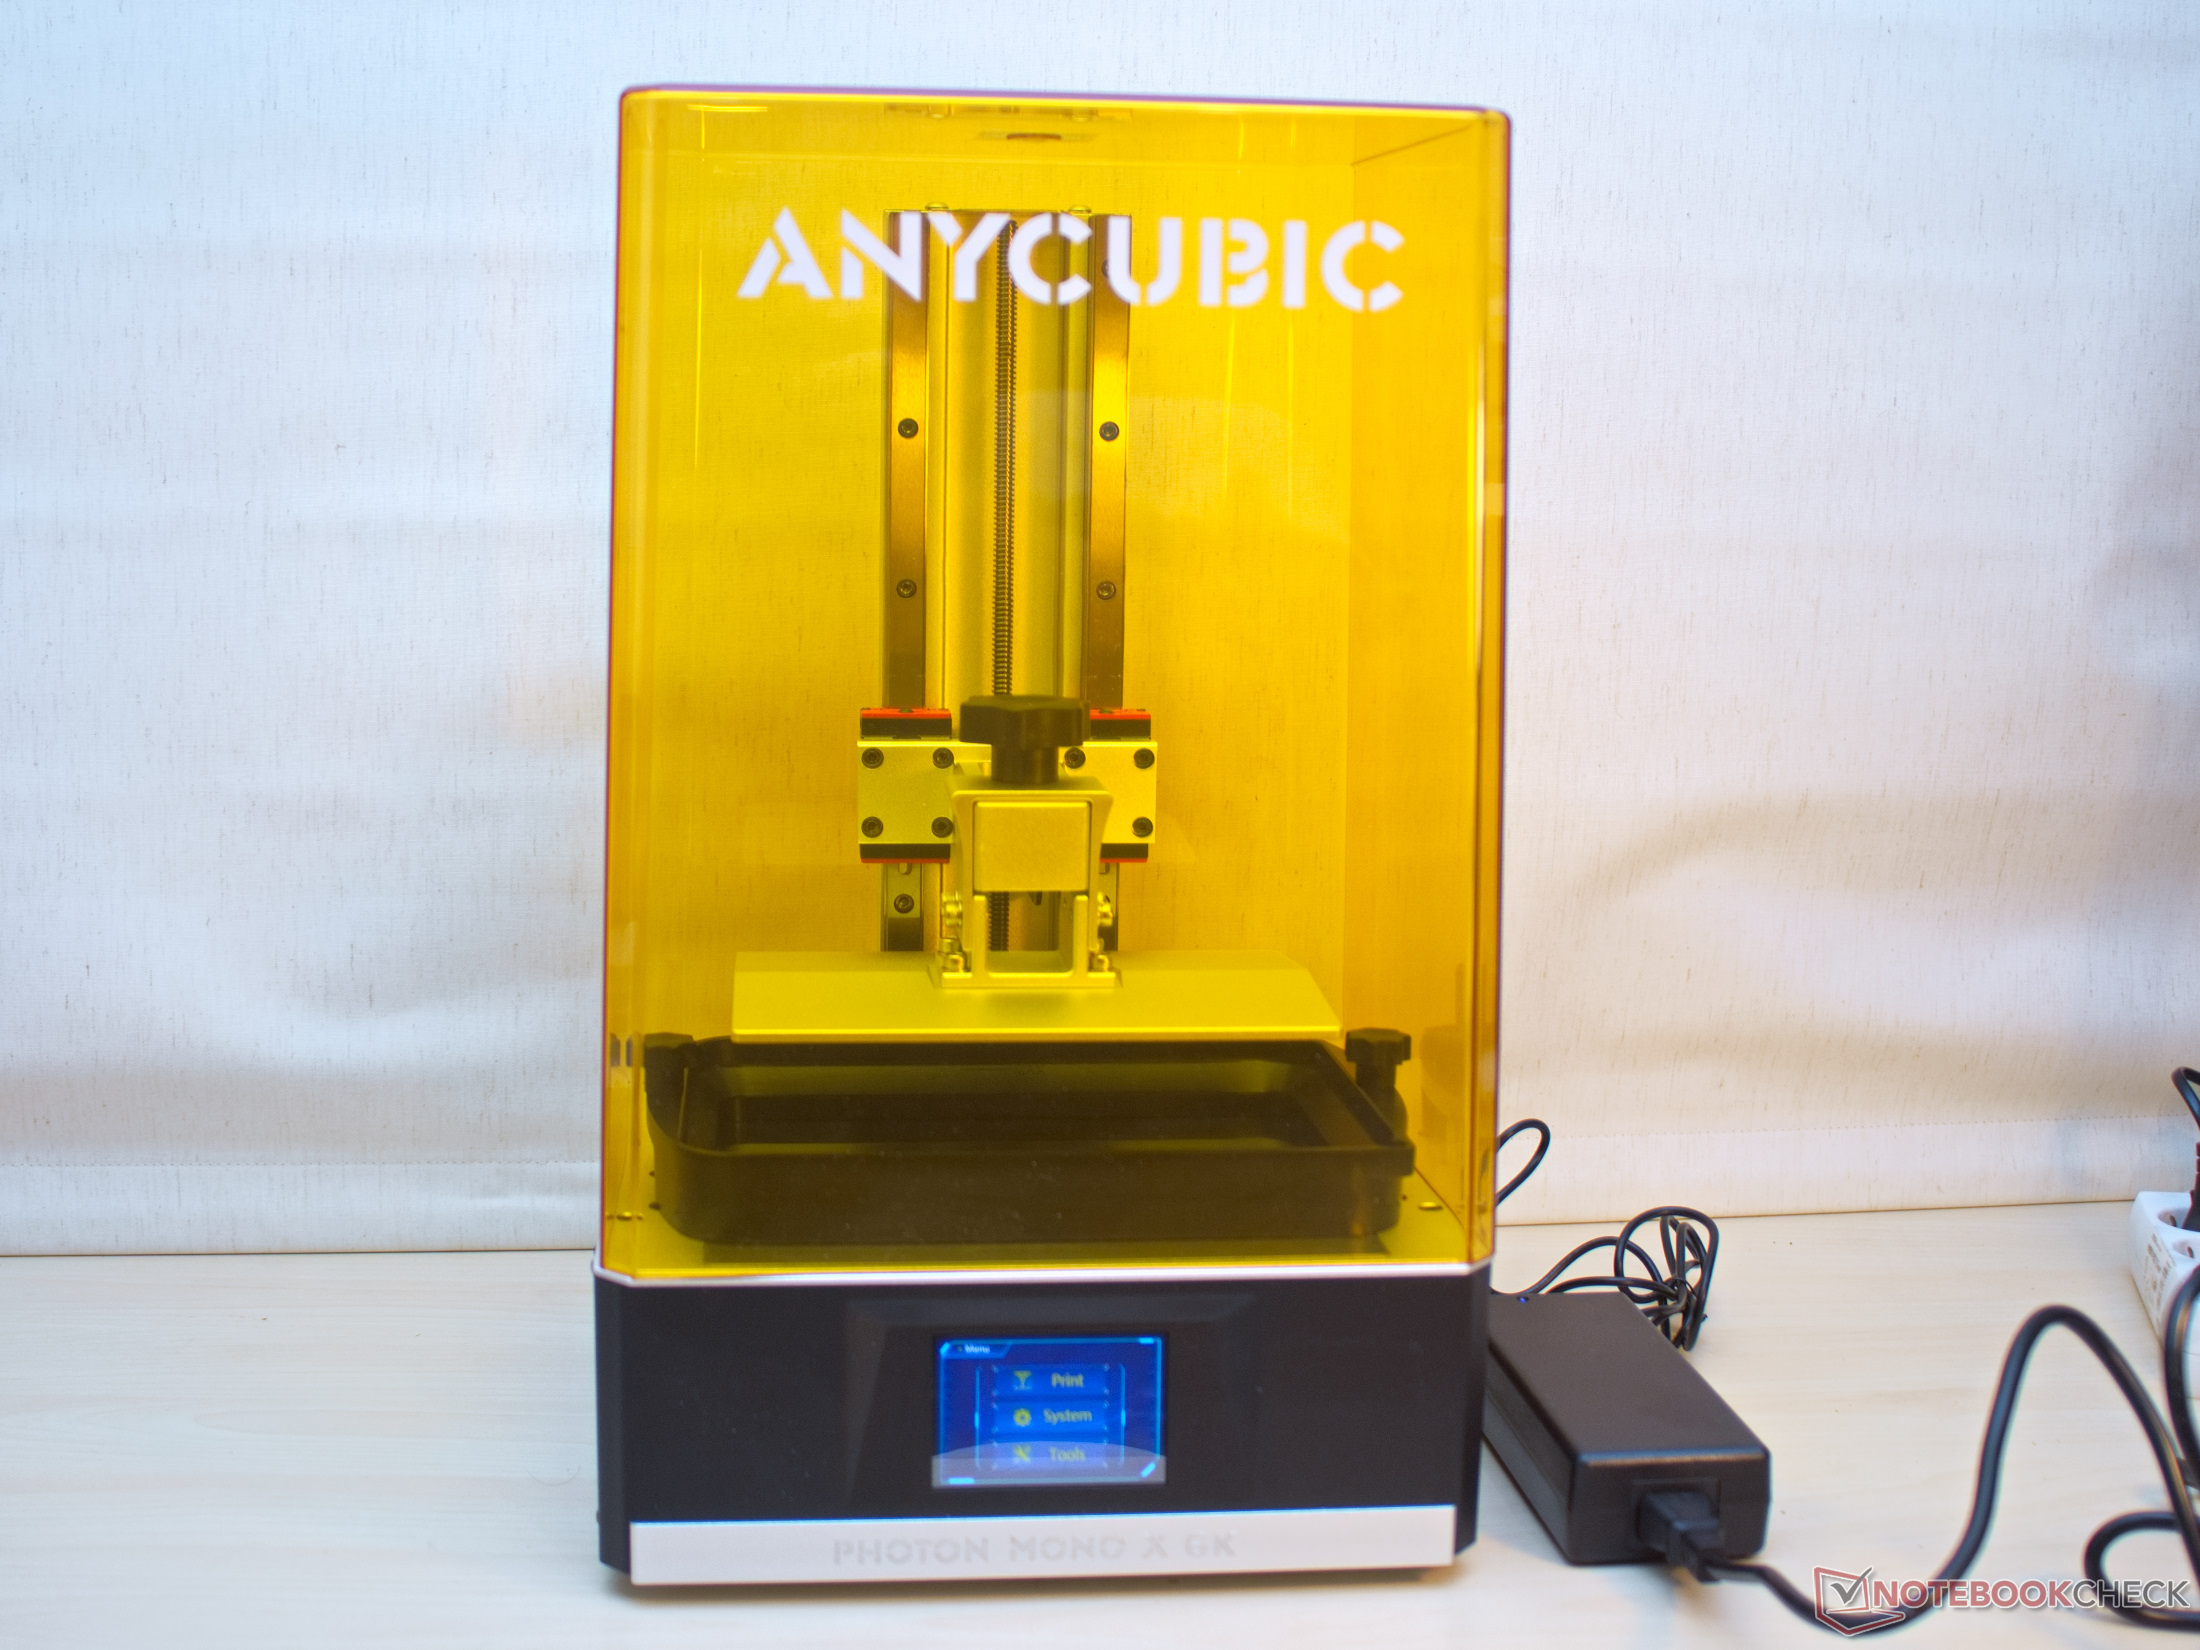
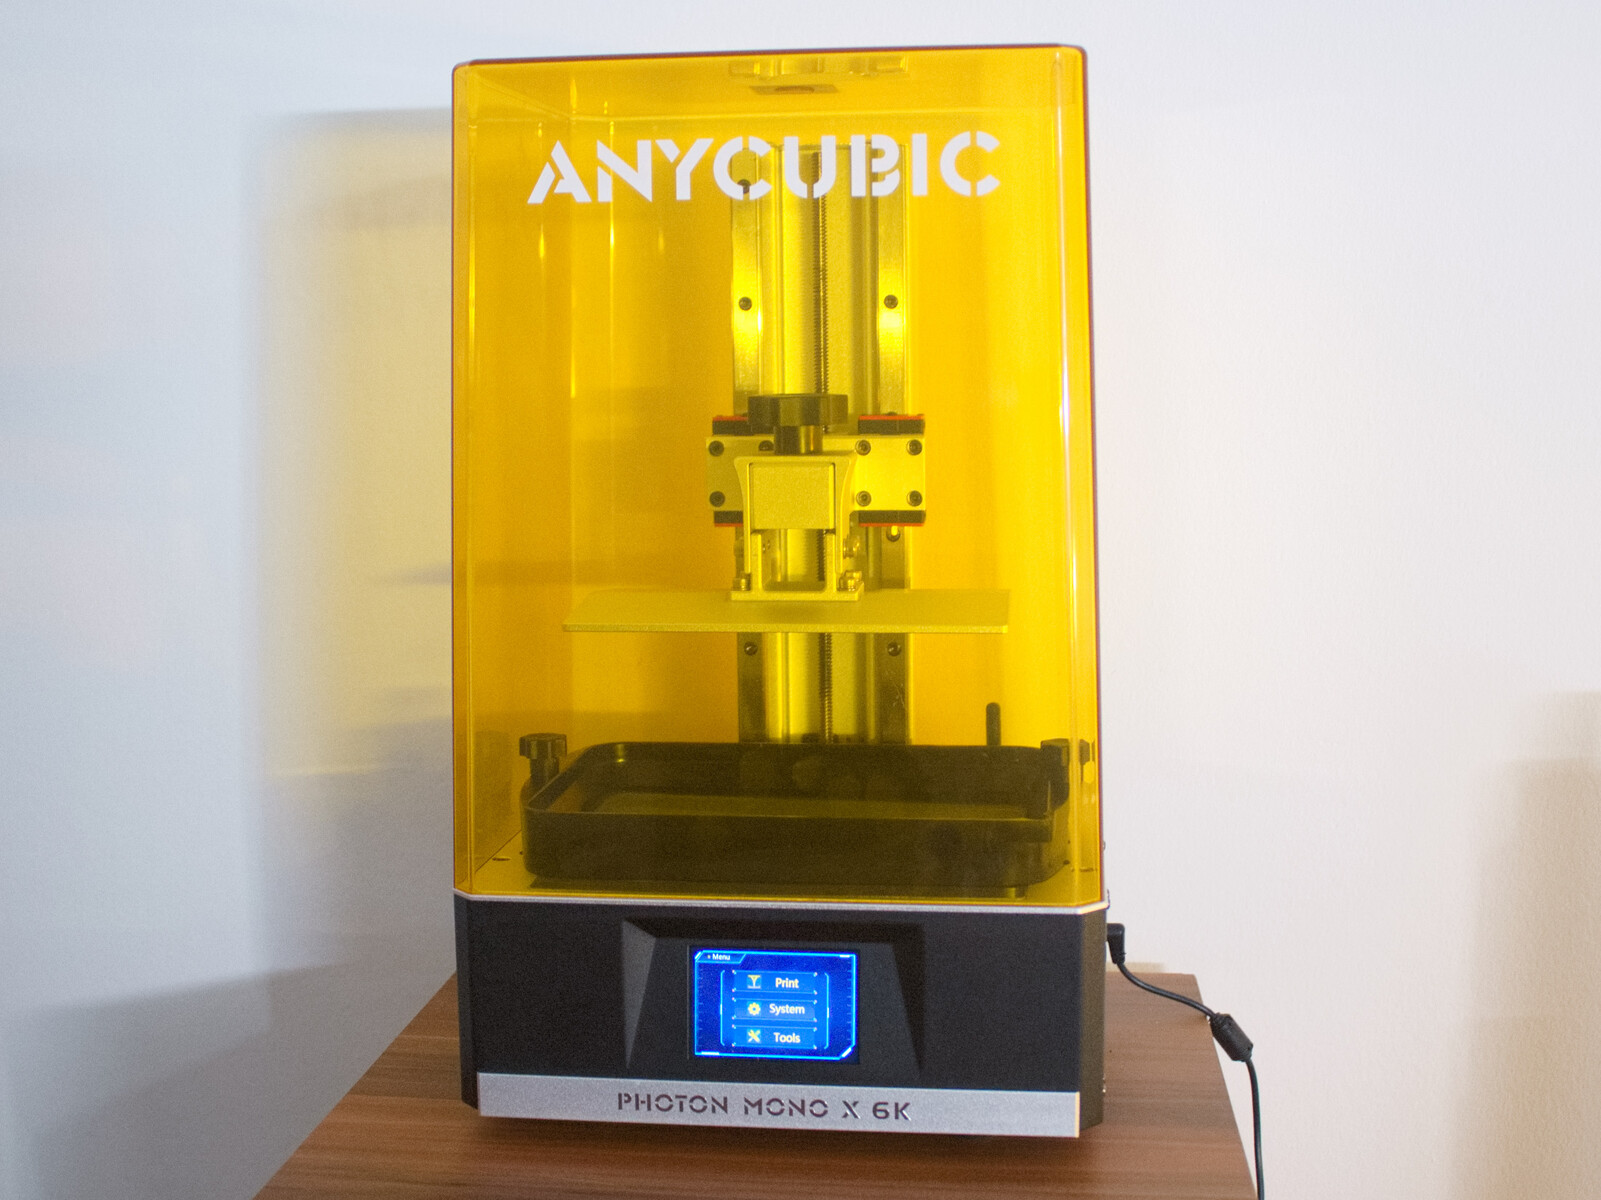
Anycubic Photon Mono X 6K Resin 3D Printer review: does the printer deliver what Anycubic promises?

Anycubic is one of the best known players in the 3D printing business. The Chinese company, based in the Shenzhen technology metropolis, sells printers that address all demand levels, from DIY enthusiast to professional designer. The Photon Mono X 6K is Anycubic's latest generation of resin-based 3D printers.
The printer uses the mSLA technology. This uses light-cured resin. It is filled into a clear bottom resin vat. The desired object is created by illuminating selected areas from below with UV light (wavelength ≈ 405 nm). In this way, the printed object is lifted out of the vat layer by layer as it sticks to the print platform. The finished object is therefore hanging upside down, in the 3D Printer. In contrast to FDM printers, mSLA printers always produce a complete layer at a time.
The Anycubic Photon Mono X 6K is supposed to be extremely fast. To achieve this, the printer has a very high-contrast LCD panel that only allows UV radiation to pass through in the selected areas and a strong UV light source. The LCD panel measures 19.7 × 12.2 cm with a 6K resolution of 5,760 × 3600 pixels. This results in a detail accuracy in the X-Y plane of about 0.034 mm. Along the Z axis, i.e. the height, a resolution of about 0.01 mm is achievable.
Technical Specification
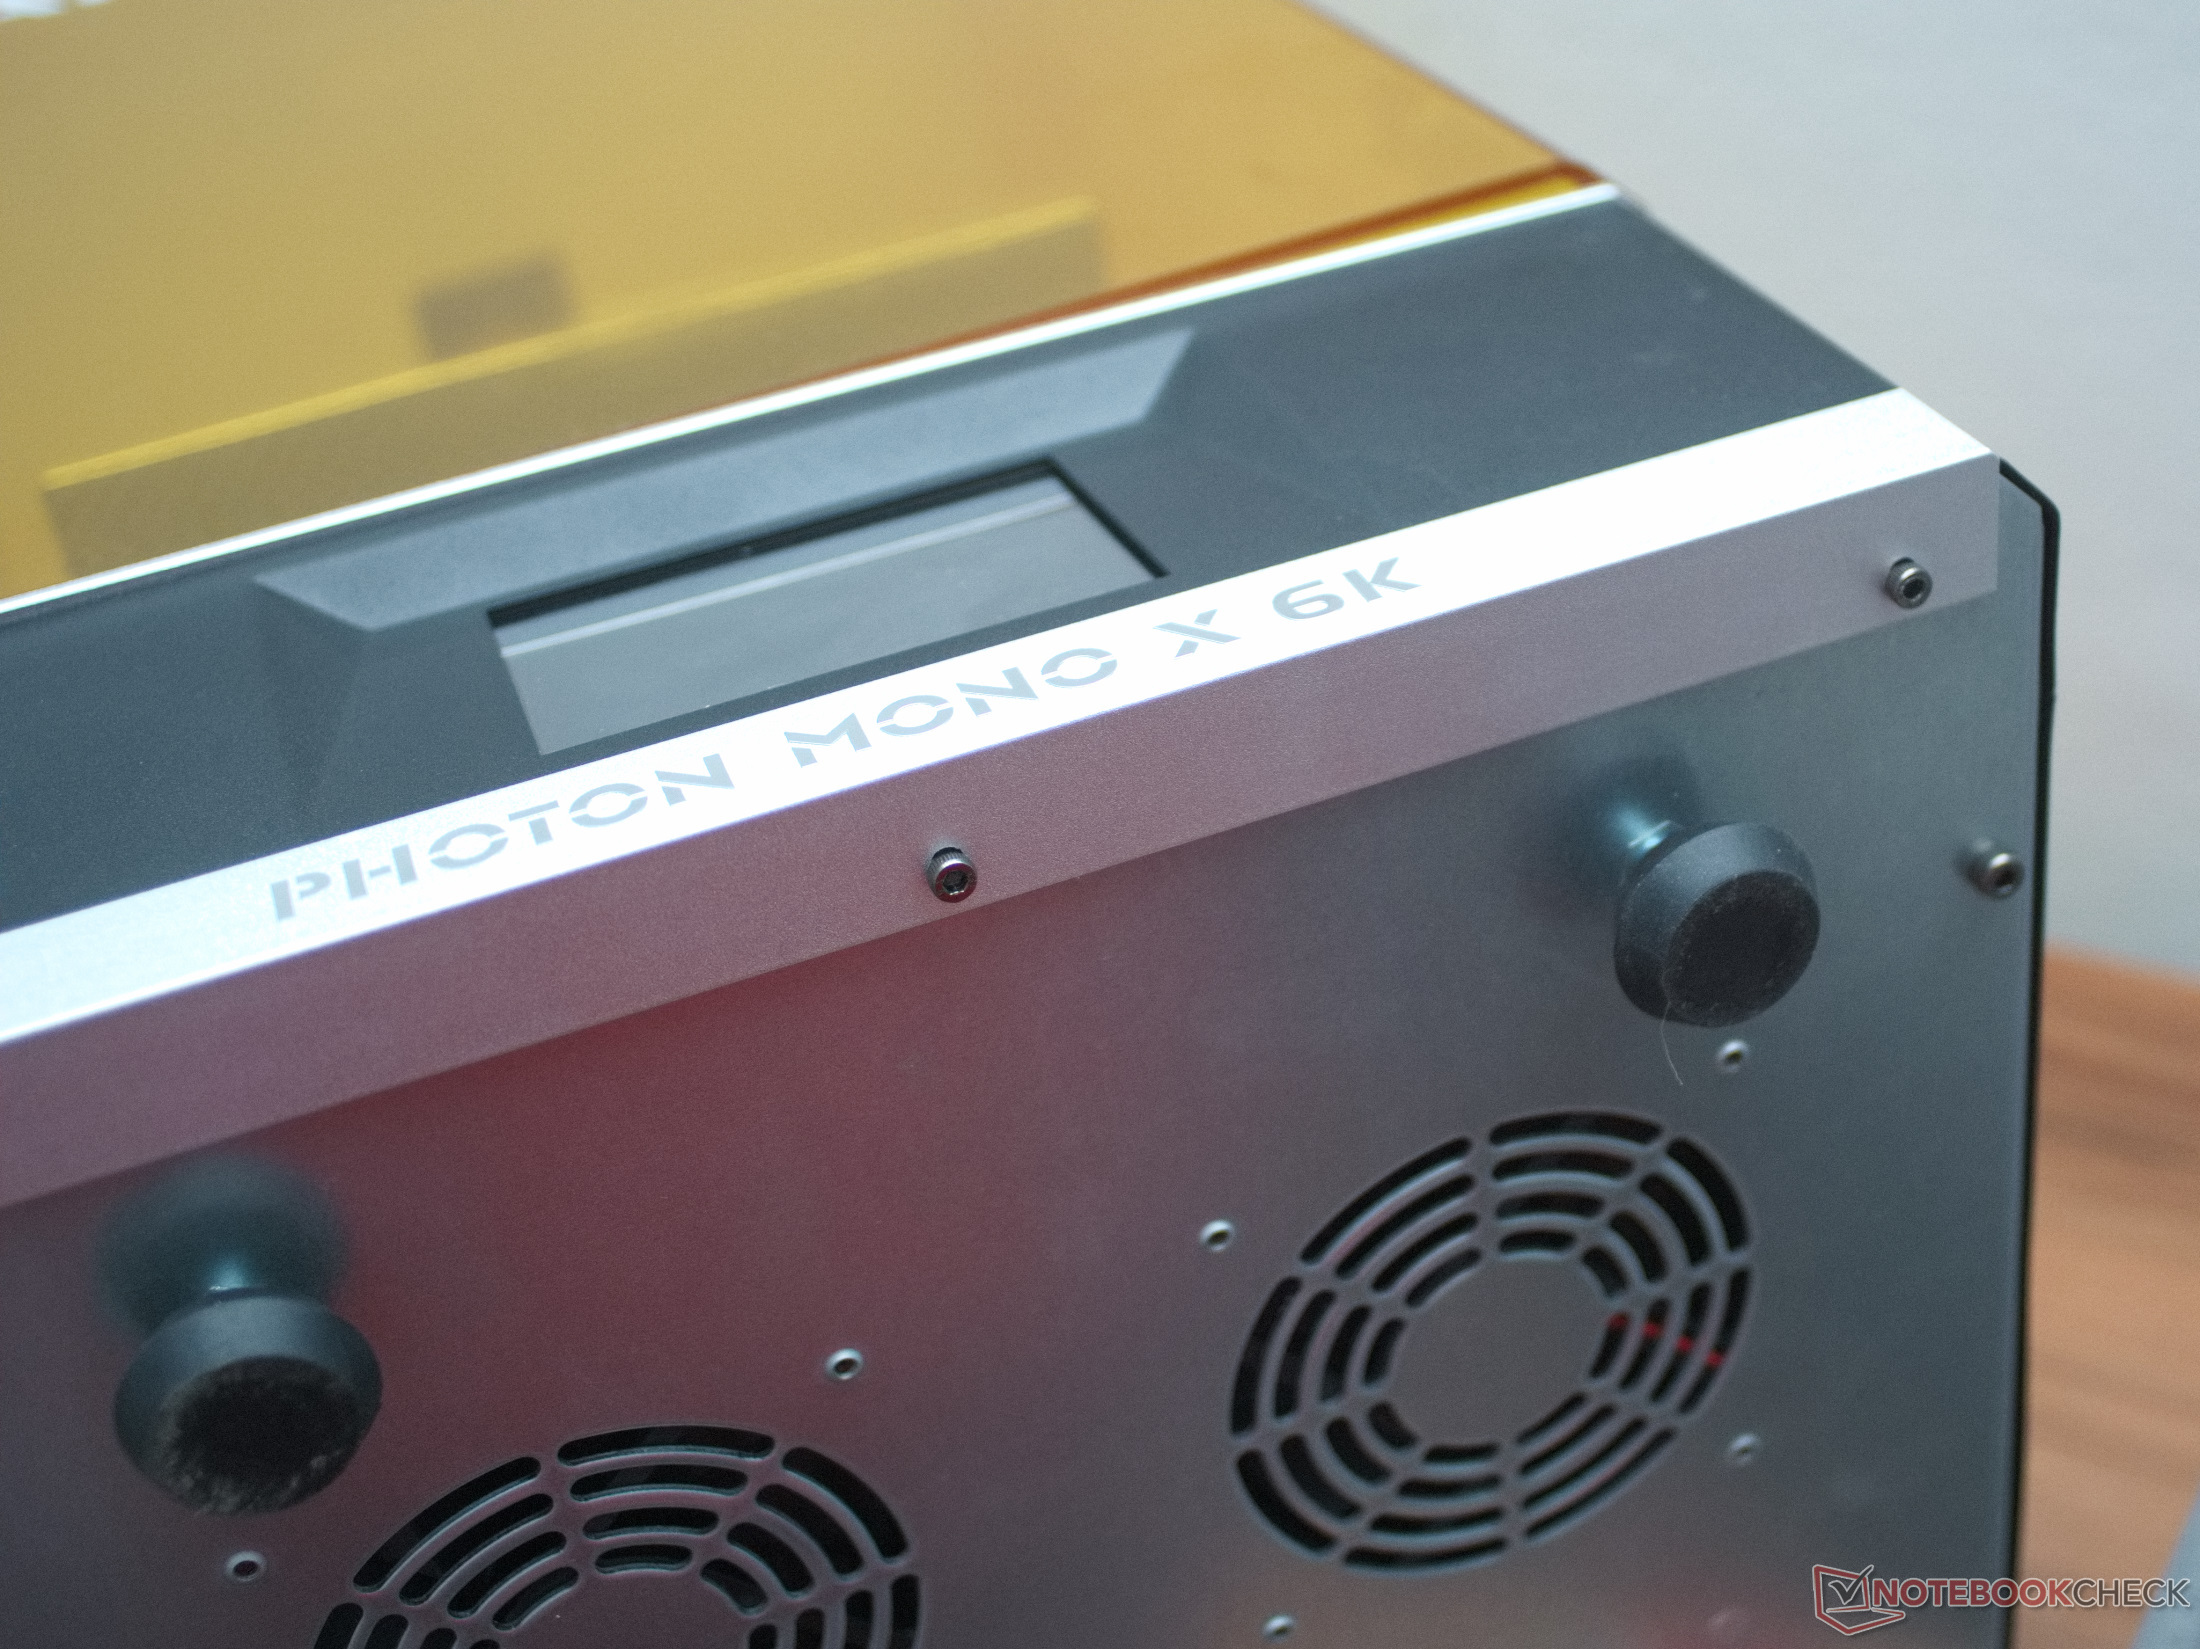
From the outside, the new Mono X 6K has not changed much compared to its predecessor. Inside, however, there is now an even stronger UV light source and the monochrome LCD is not only of higher resolution, but also somewhat larger.
| System | Anycubic Photon Mono X 6K |
|---|---|
| Technique | mSLA, LCD shadow masking 3D-Printer |
| Print volume | 24.5 × 19.7 × 12.2 cm = 5,88 L 9.6 x 7.8 x 4.8 inch = 199.1 oz 1.6 gal |
| Machine dimensions | 47.5 × 29 × 27 cm 18.7 x 11.4 x 10.6 in |
| Light source | 405 nm parallel matrix LED (40) up to 6,500 µW/cm² |
| Shadow masking | LCD panel 5760 * 3600 pixels Light transmittance 6% Contrast ratio 350:1 |
| Resolution | ≈ 34 µm |
| Print speed | suggested: 60 mm/h max 80 mm/h - 3.15 in/h |
| Power rating | AC 110 V - 240 V to DC 24 V 144 W |
| Connectivity | USB-A 2.0 & WiFi |
| Interface | 3.5 inch Touchsceen Android- or iOS-App |
| Manufacturer's suggested retail price | 659 USD |
| Links: | www.anycubic.com Anycubic Photon Mono X 6K |
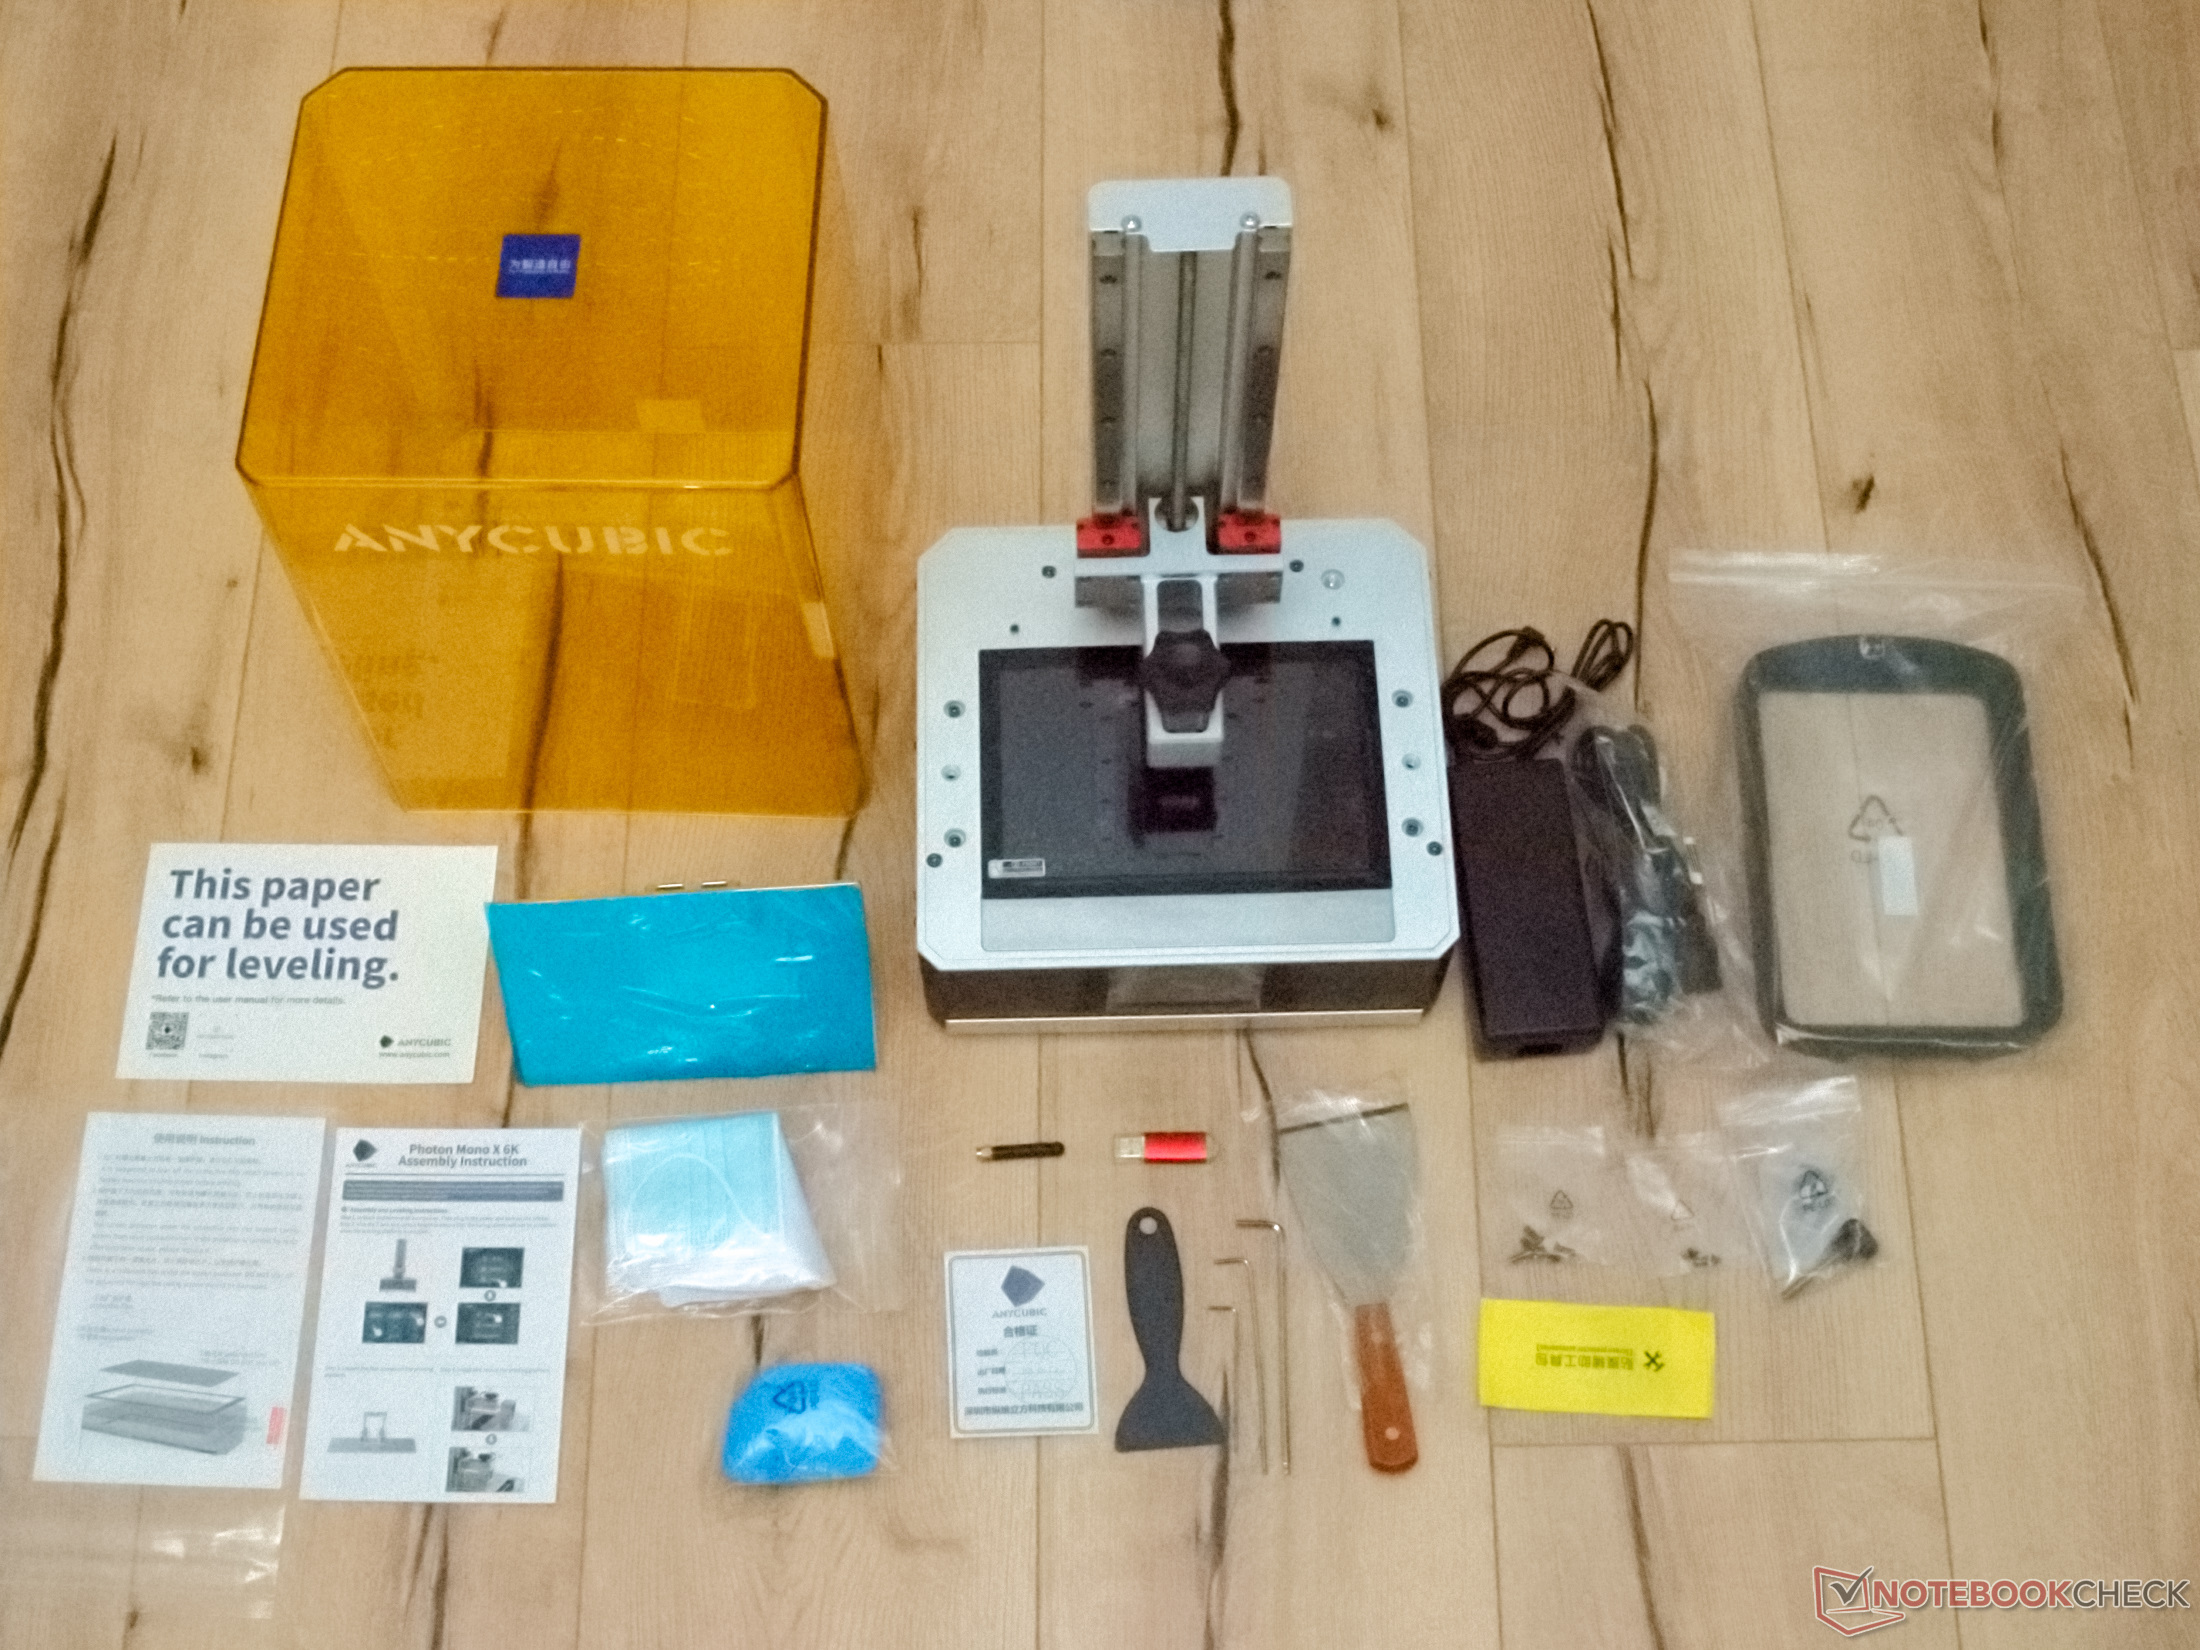
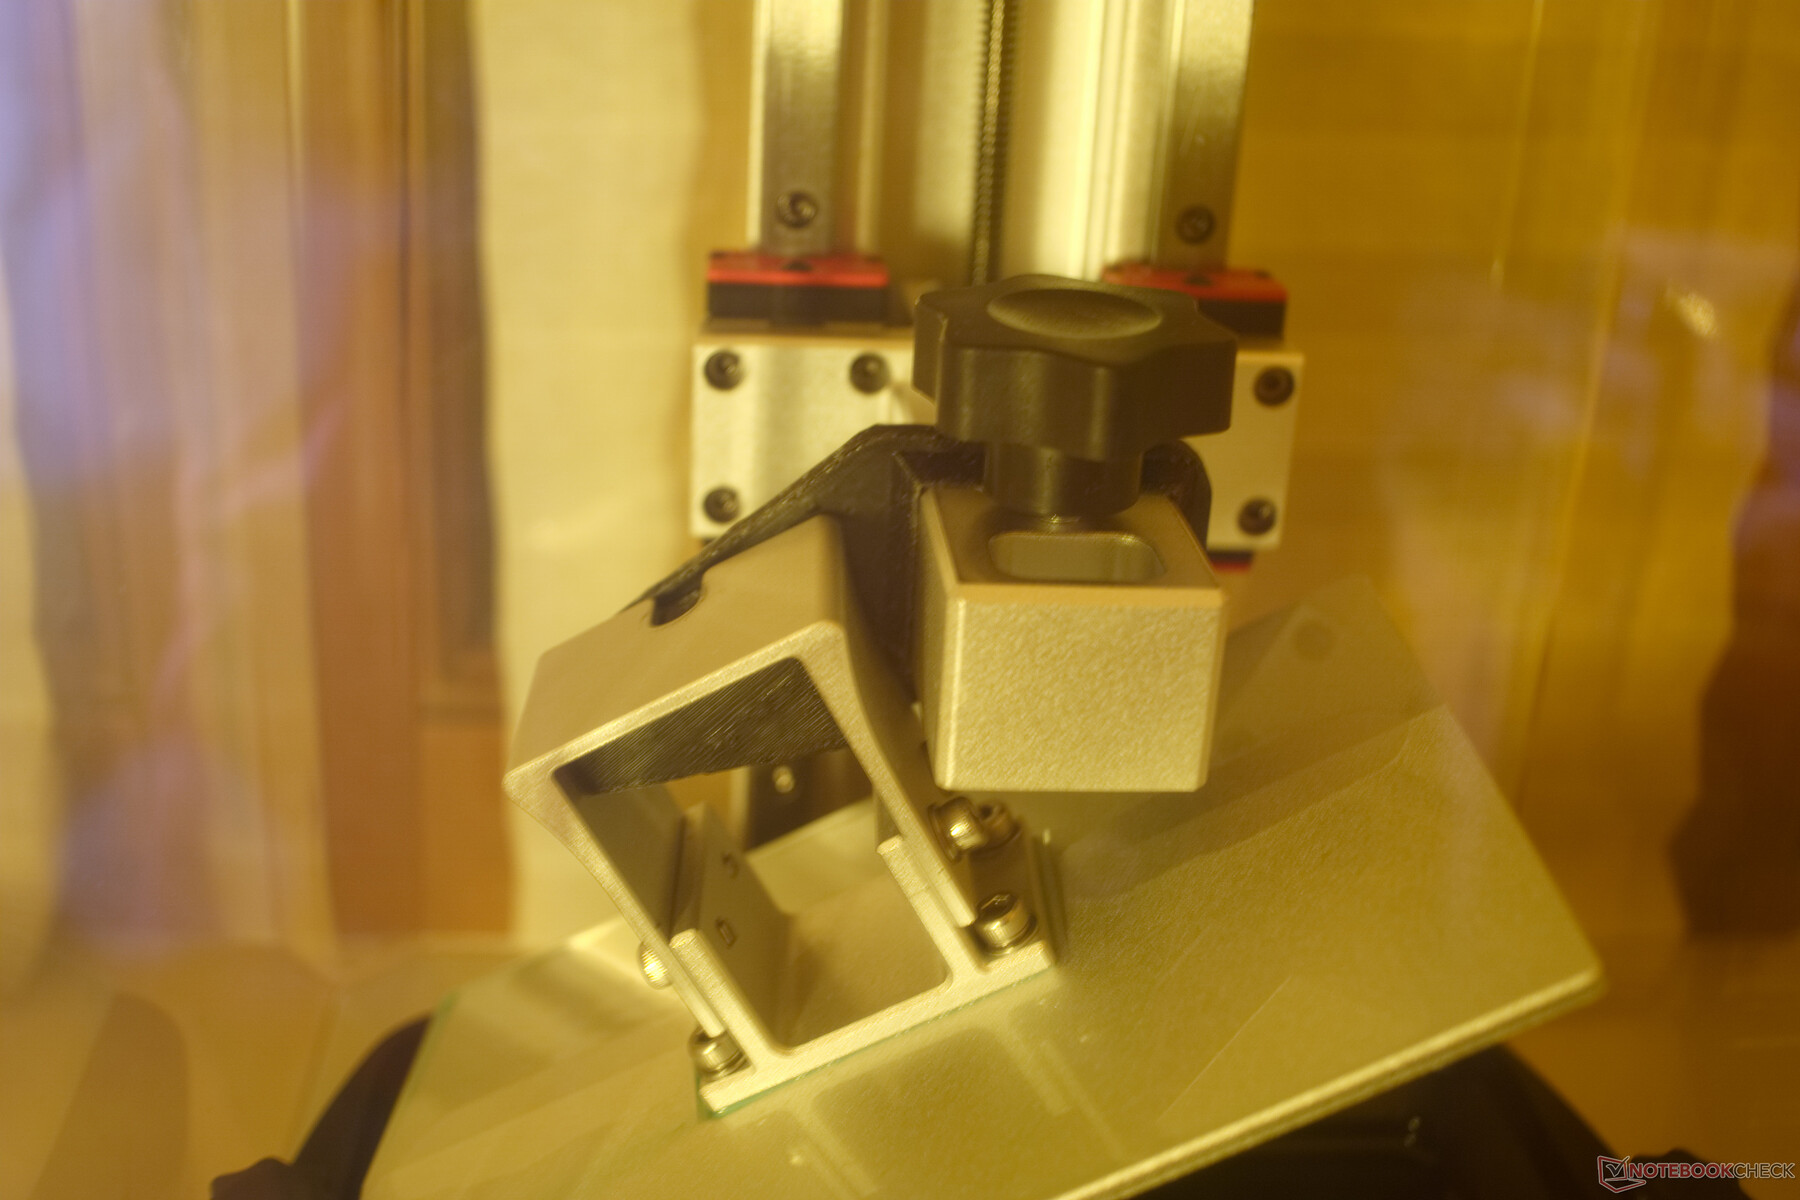
Setup - The printer is almost ready to use out of the box
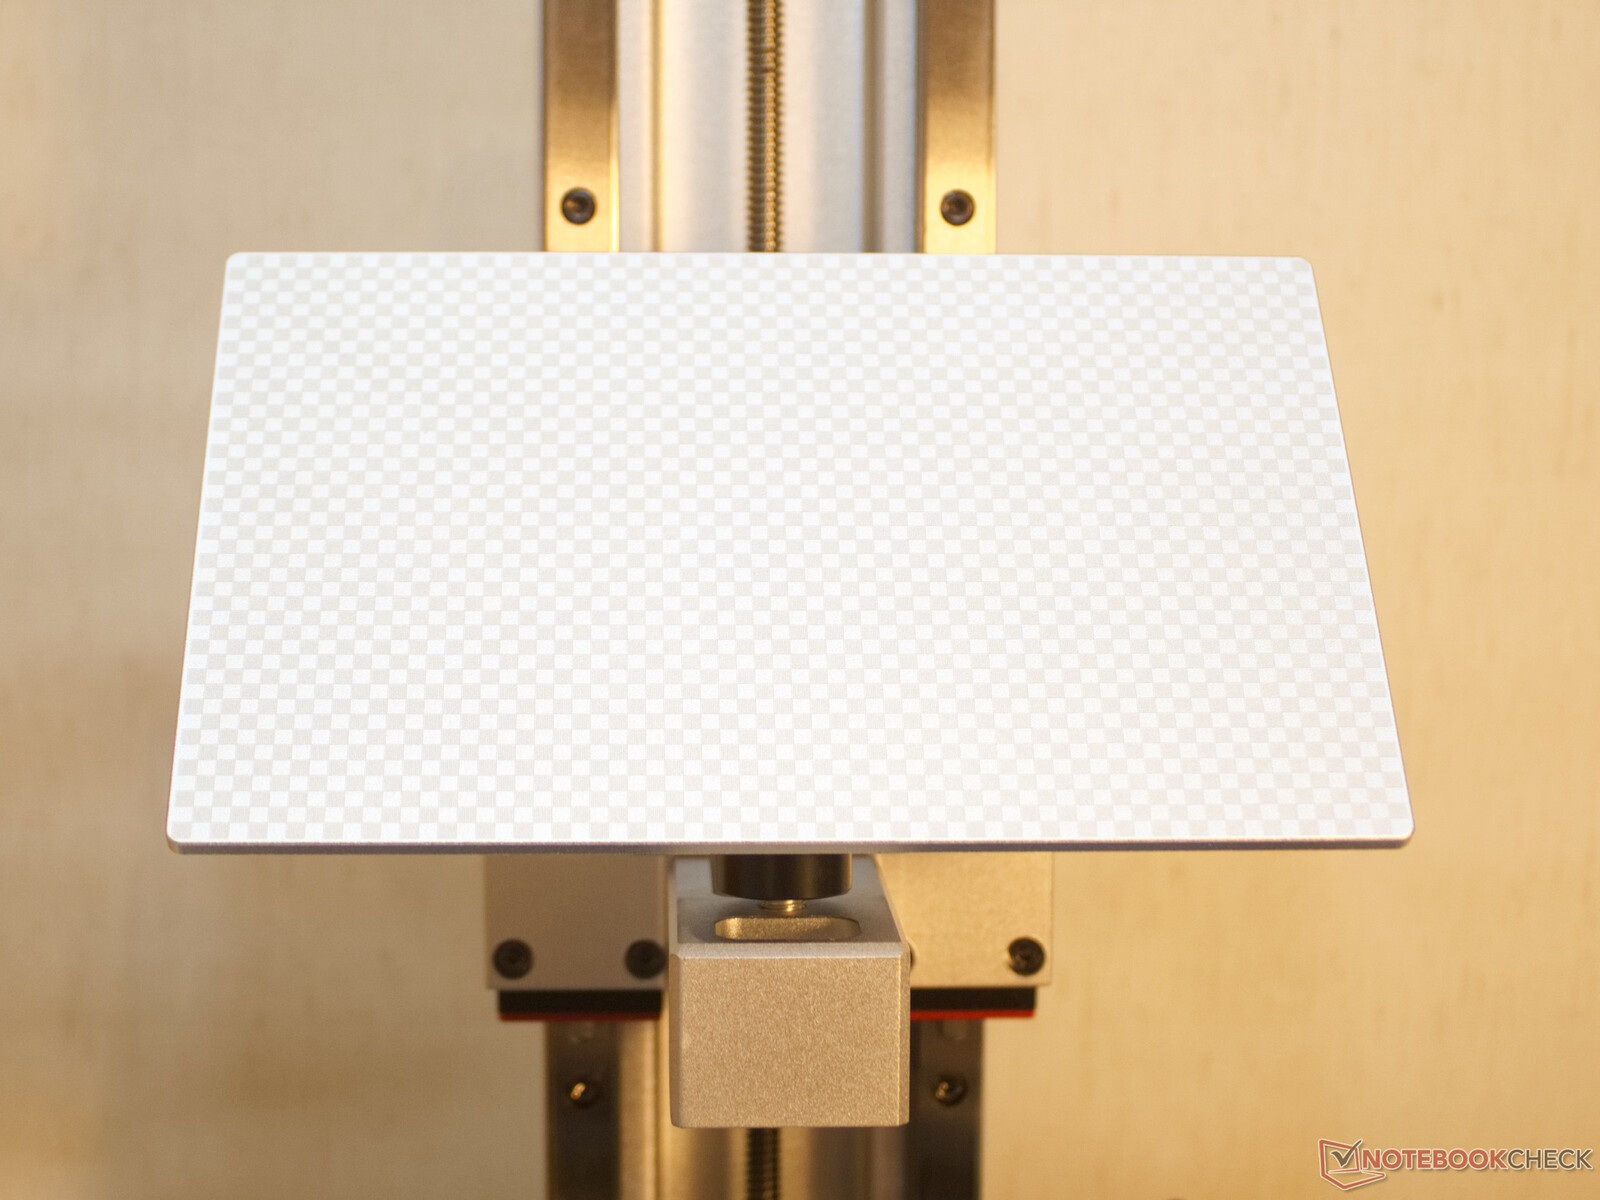
Except for a matching resin, everything needed to get started with resin 3D printing is included in the package. After peeling various protective films and simply mounting the print platform, it is almost ready to go. First, however, the printer should be levelled using the four adjustable feet to ensure an even distribution of the resin in the vat. The build plate is then aligned with the screen. While the supplied thick paper serves as a spacer, the four fastening screws are loosened, and the plate is lowered to zero via the printer's menu. With light pressure on the large aluminum plate, the four screws are now fastened again. After the resin var has been installed and filled, it's time to print.

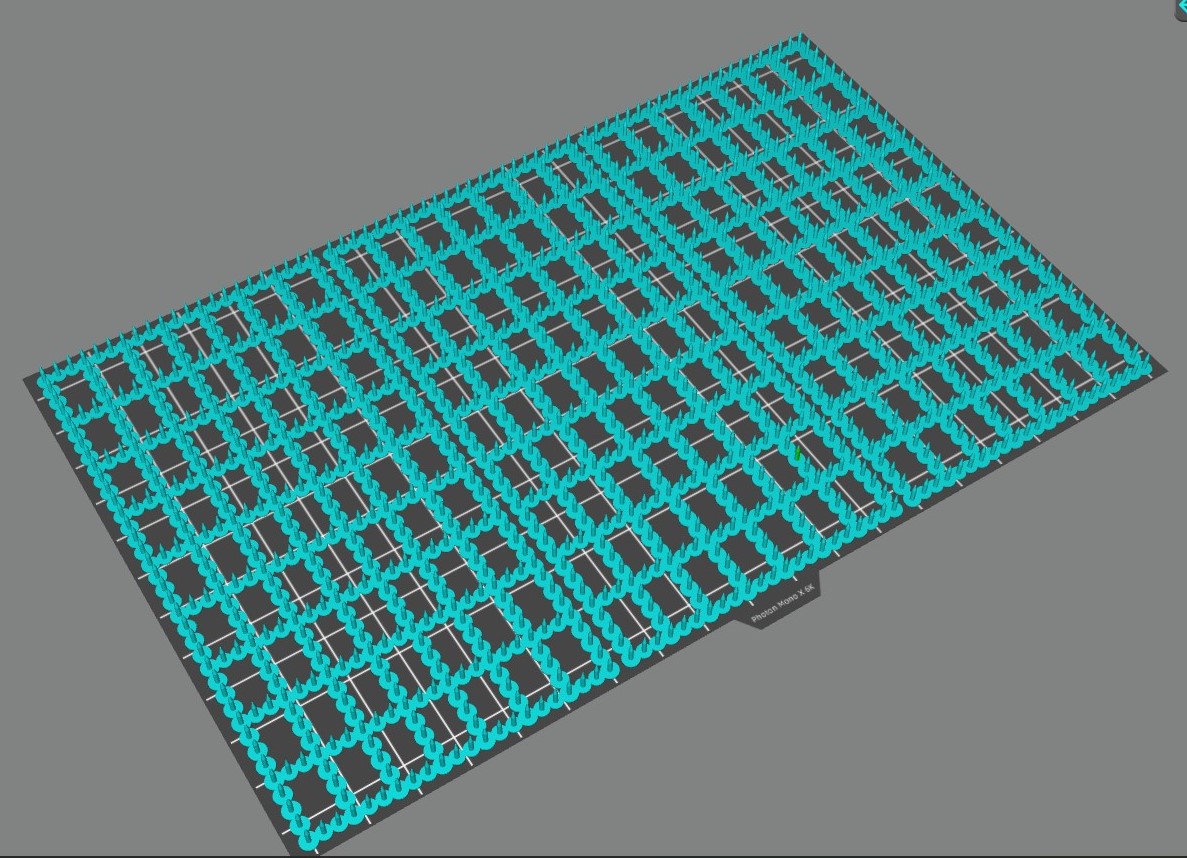
Preparation: Anycubic has a custom build slicing software
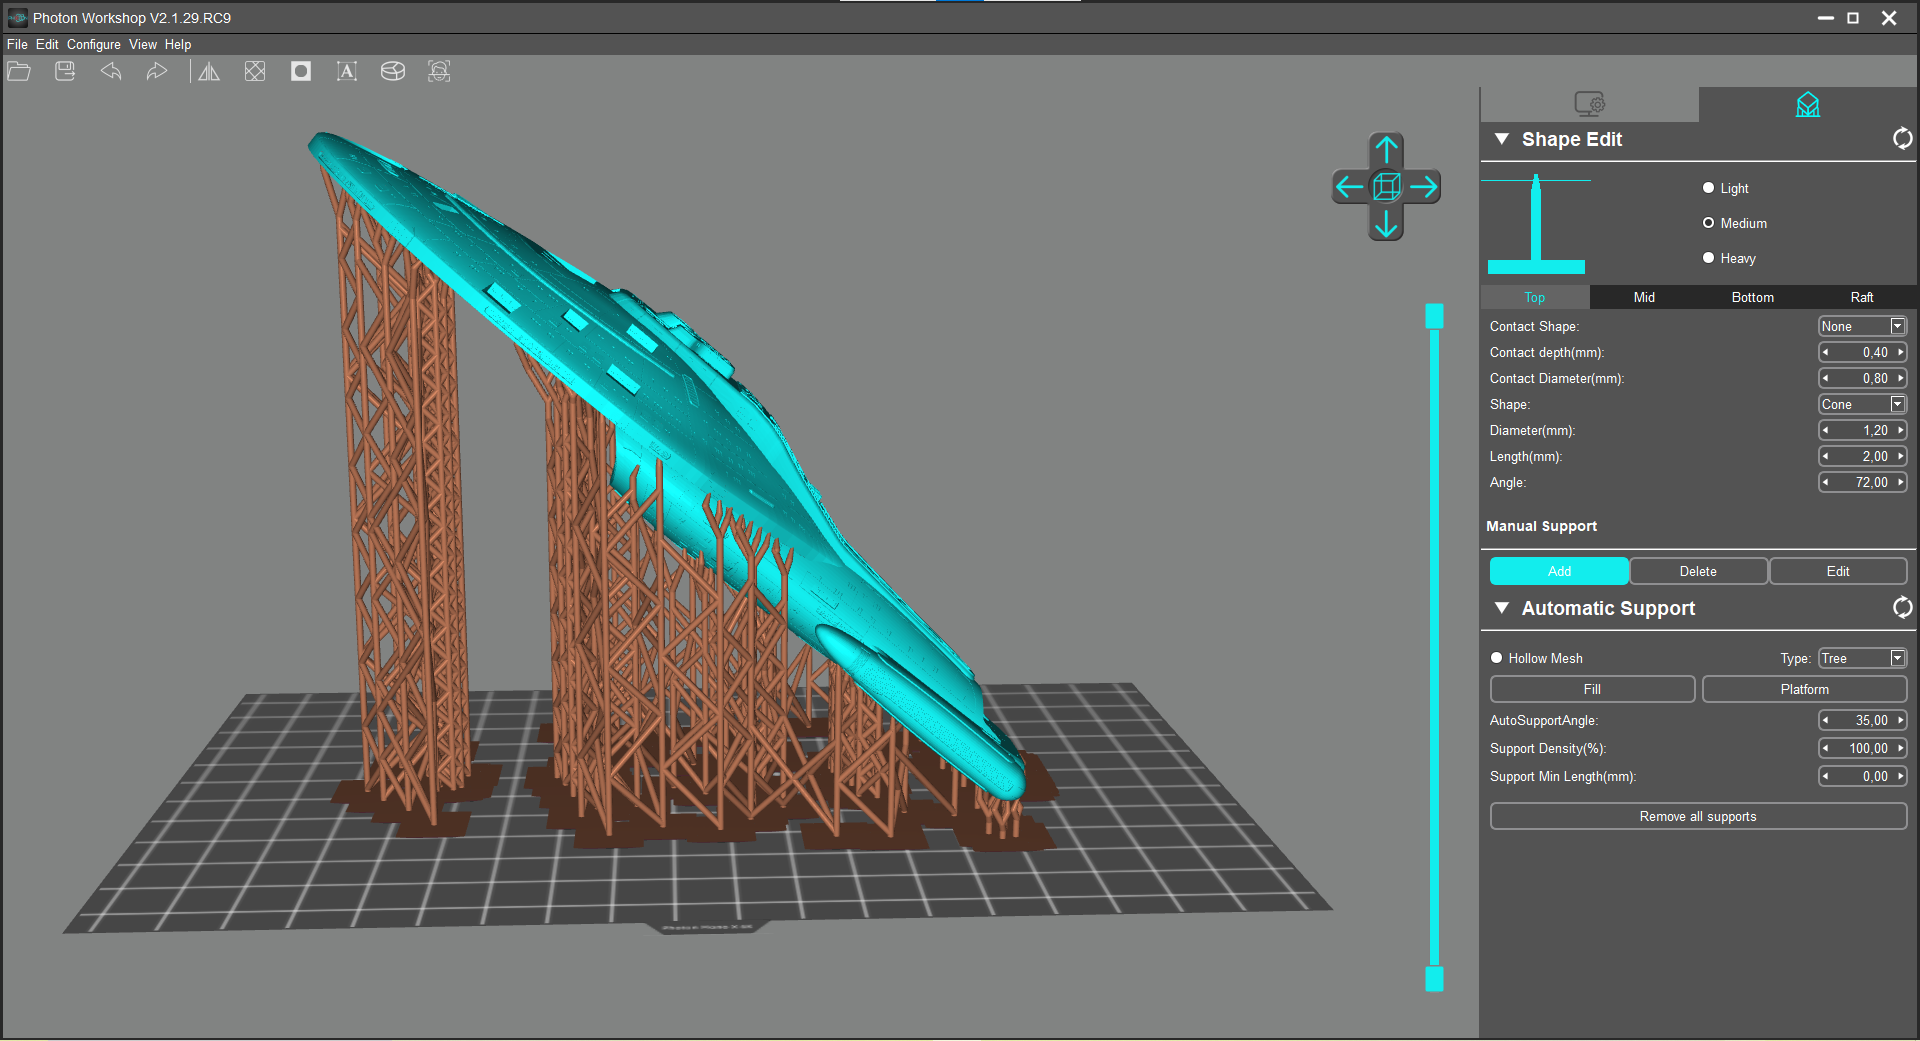
The printer package includes a small red USB stick. This contains detailed instructions, a test print and (in our case) the Photon Workshop in version 2.1.29.RC9. Anycubic's slicing program can perform all the necessary tasks. Automatically generated support structures are sufficiently dimensioned with the default settings, the hollowing of objects works flawlessly, and the program offers hardly any other points of criticism. The simple slicing program meets the basic requirements without concerns, only the calculations of some work steps could be a bit faster because the program uses in that cases just a single thread. However, the user can definitely avoid paying for alternatives.
After the STL-model is sliced and saved to the USB drive, it plugs directly into the printer's USB port. By selecting it from the printer's menu, the print is started.
Print quality: The 6K LCD panel provides ultra-fine details
The fine details that resin printers can produce are outstanding. A thin human hair on the head is between 0.02 and 0.04 mm thick. A pixel of the LCD panel in the Anycubic Photon Mono X 6K has an edge length of about 0.034 mm, and remarkably, the individual pixels can be seen in the finished 3D-printed object when examined closely.
Detail of the LCD panel:
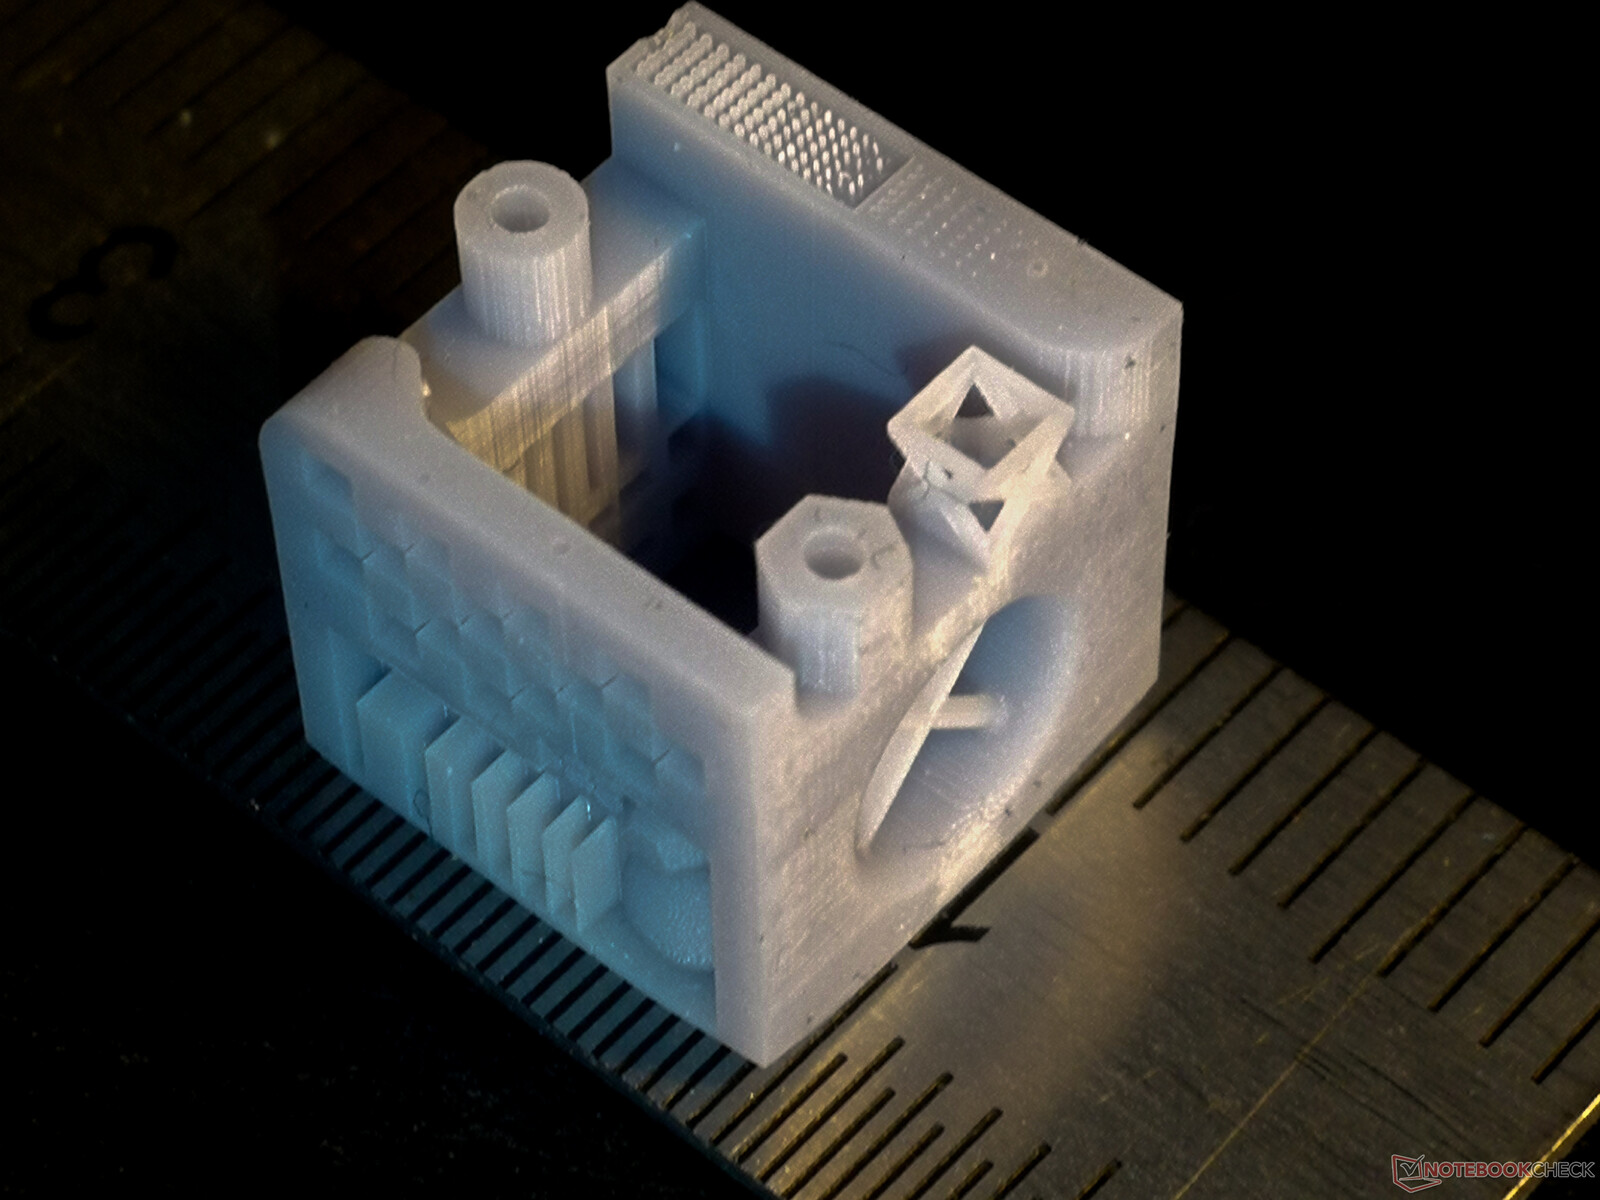
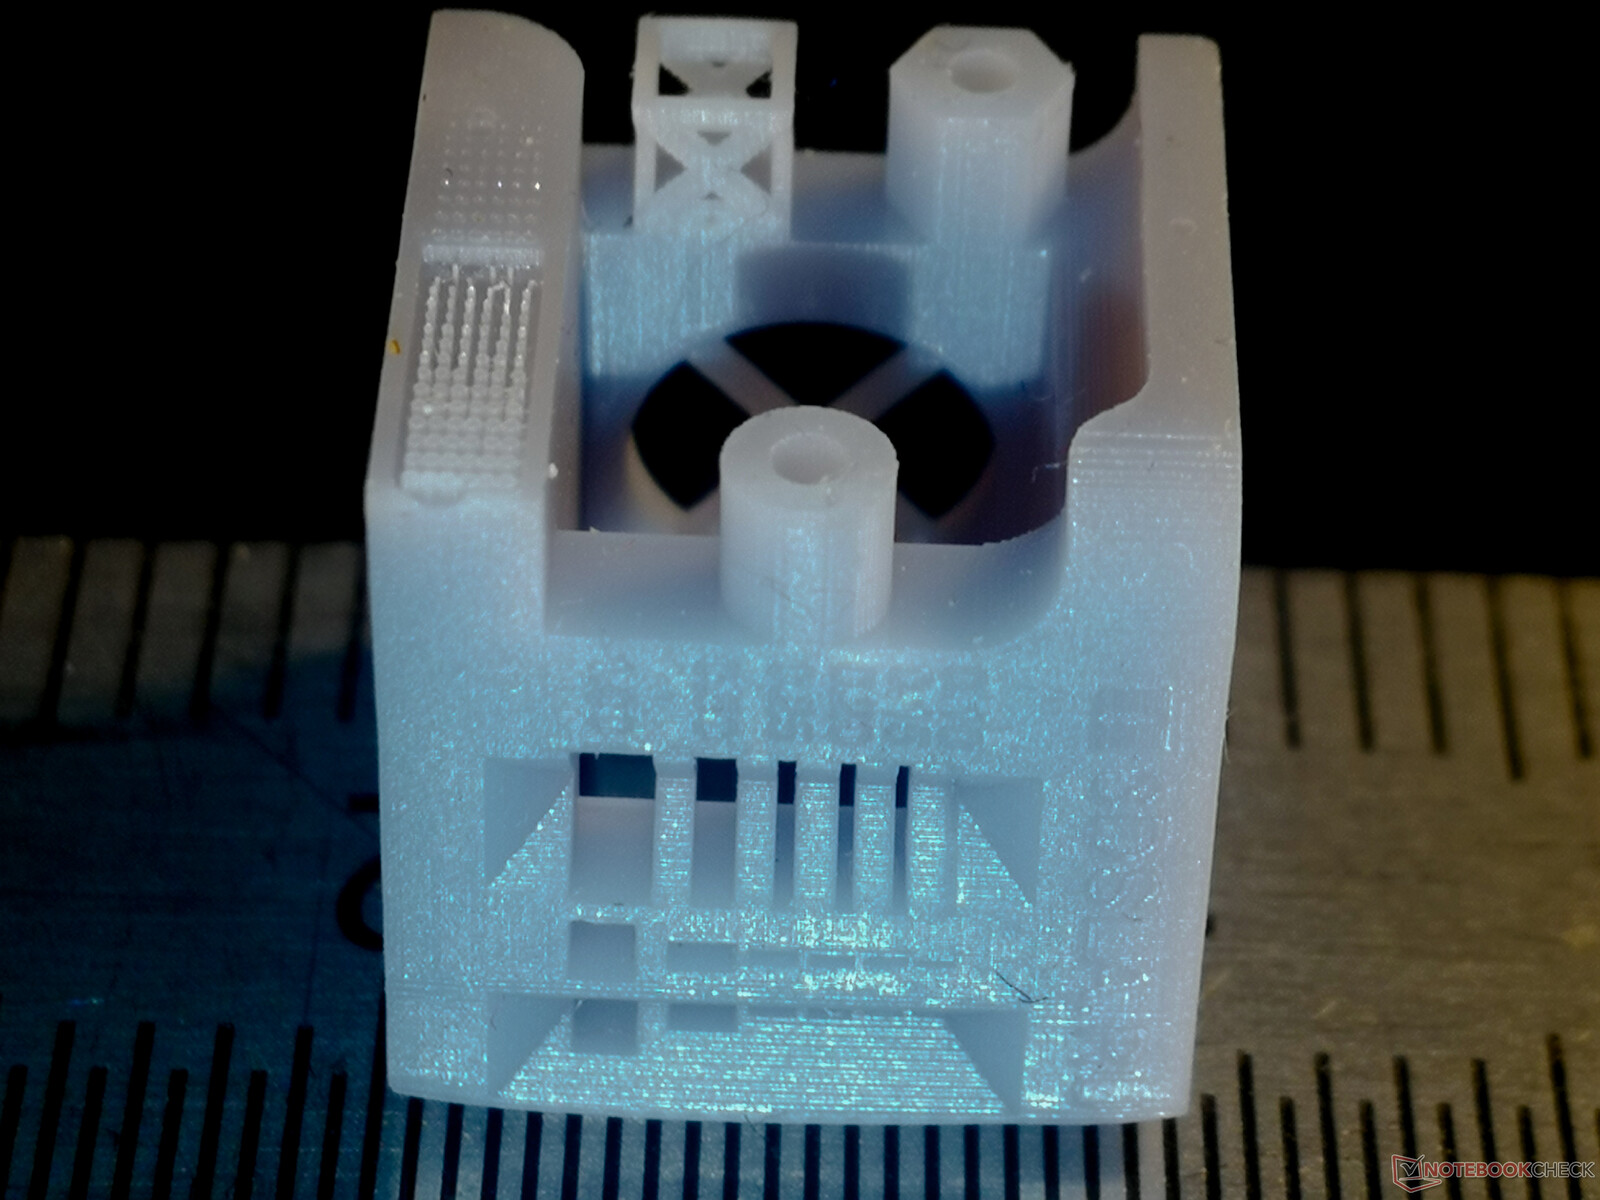
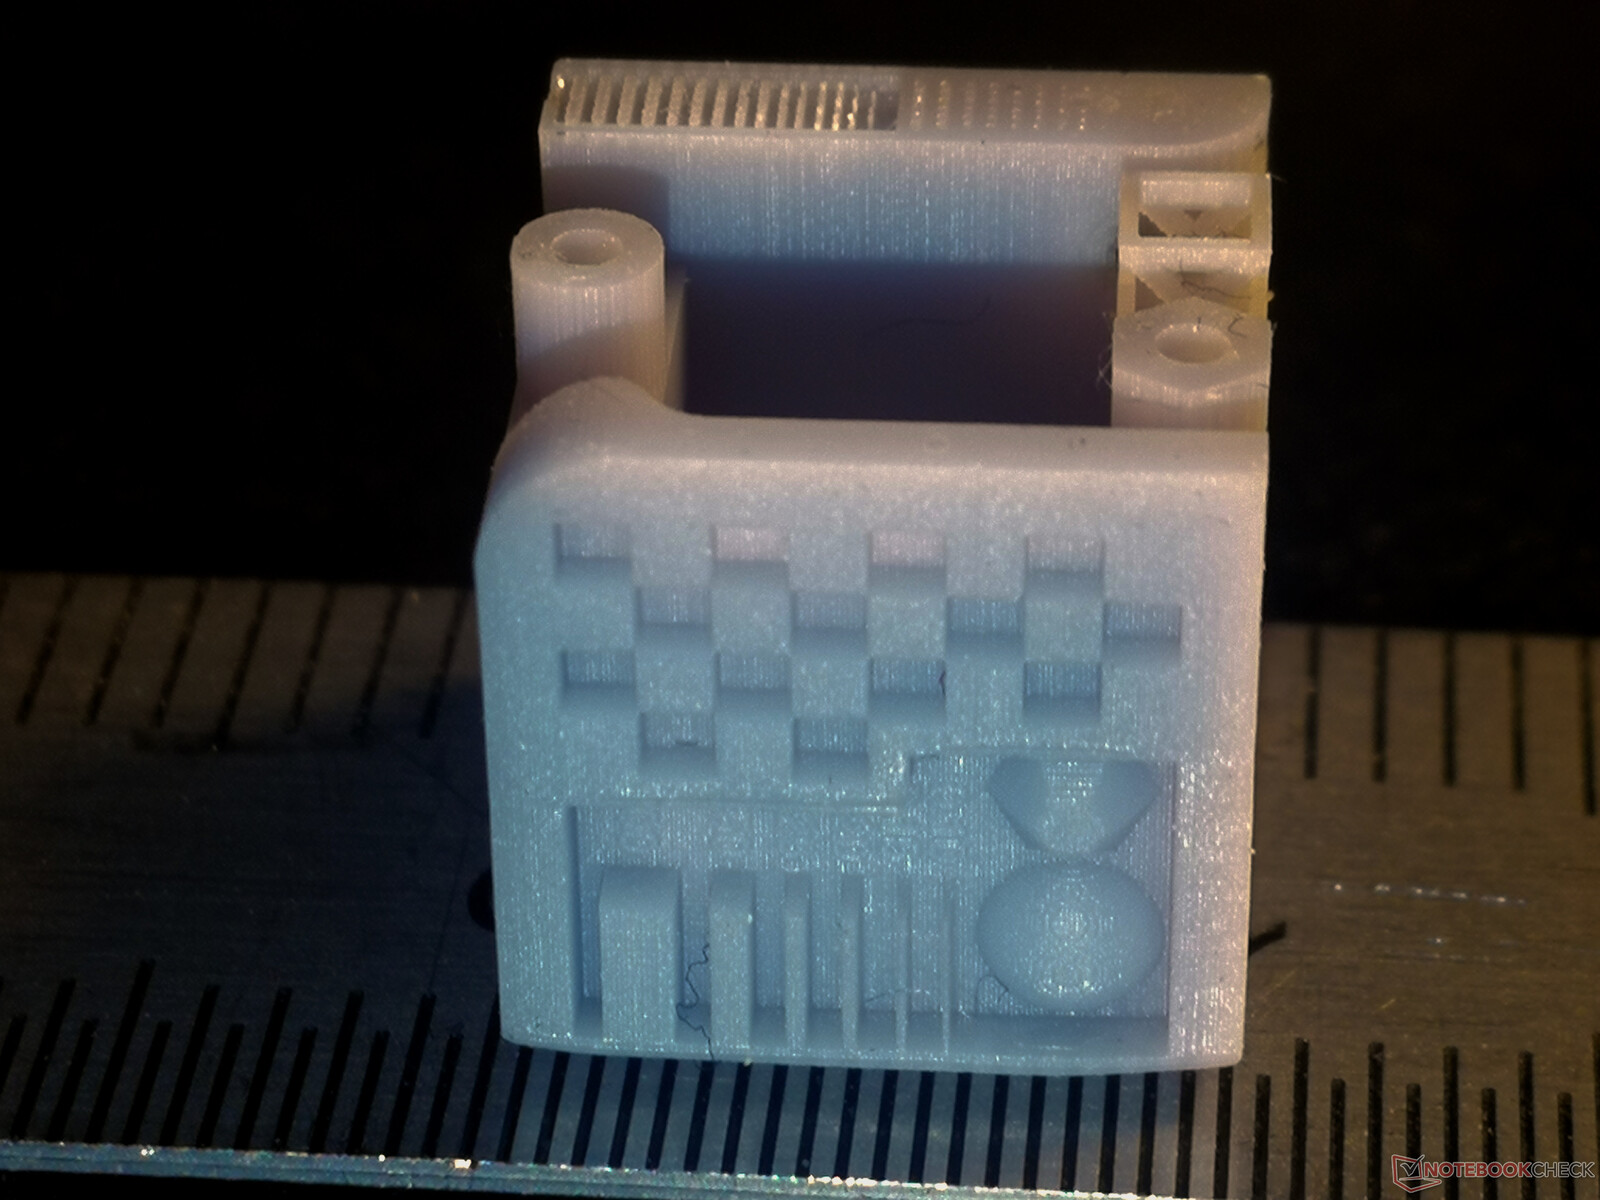
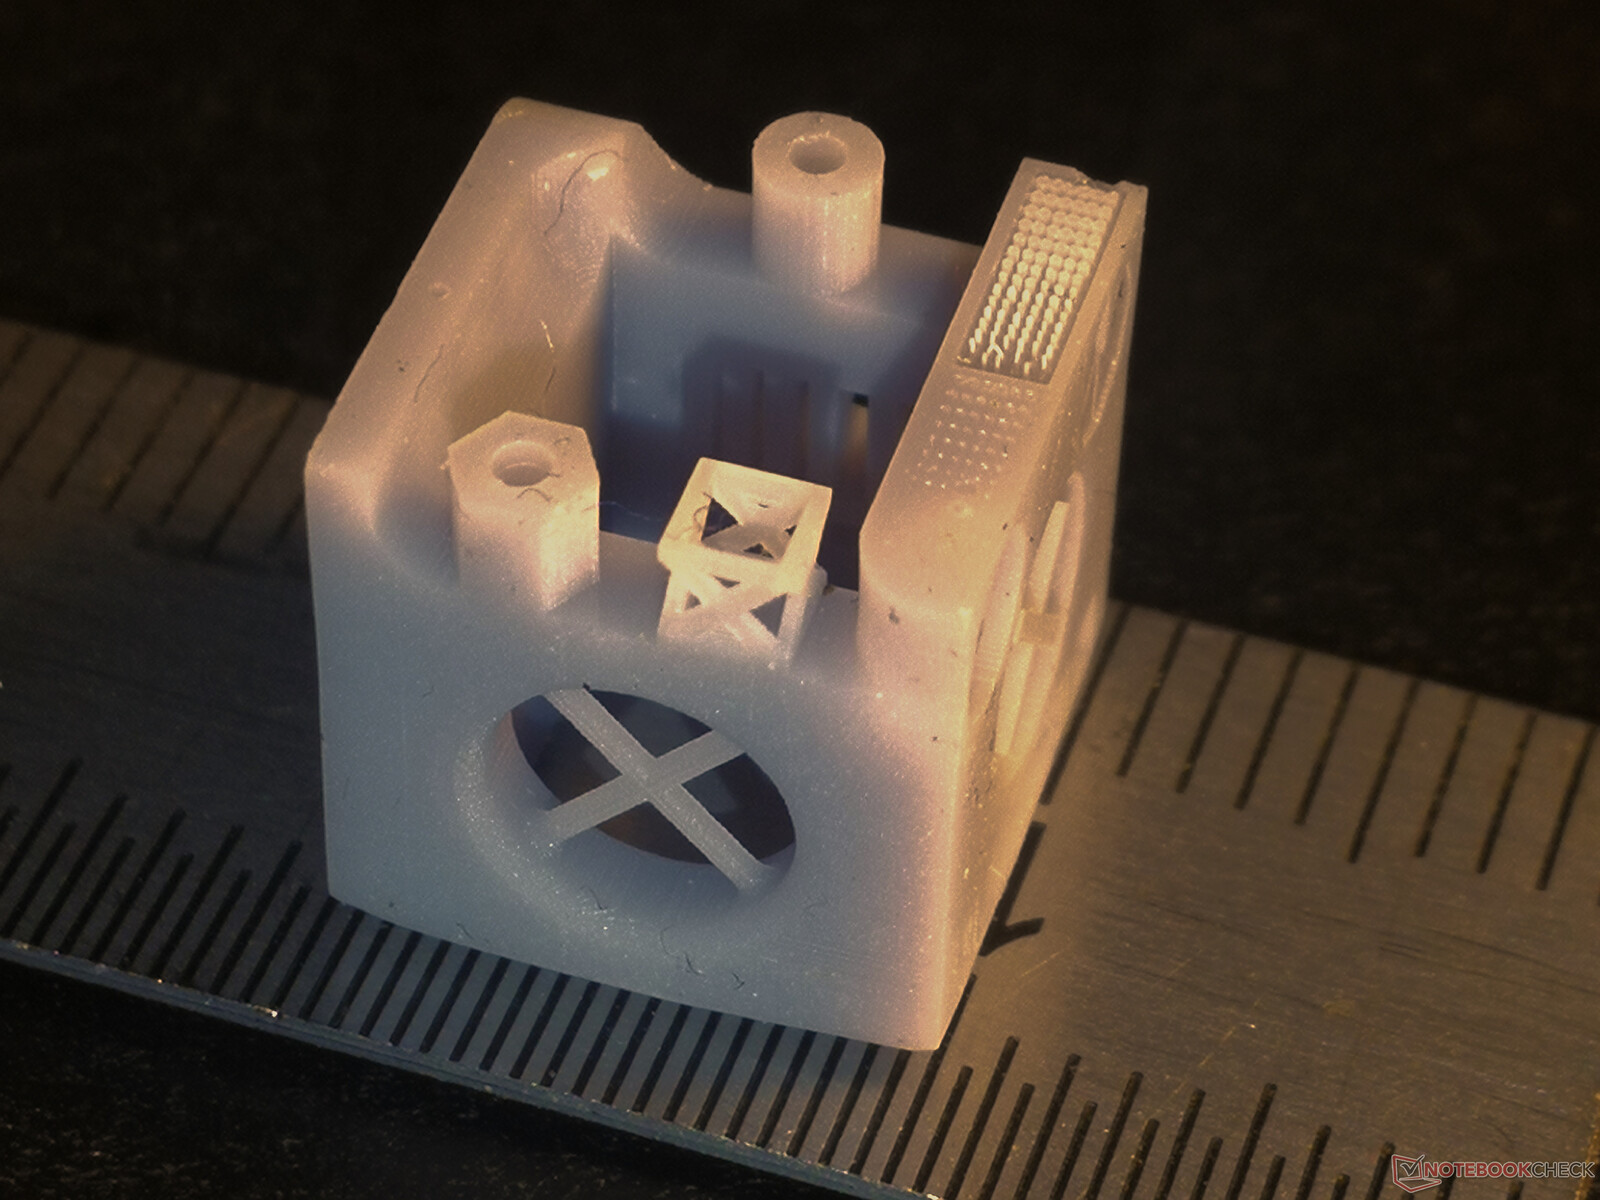
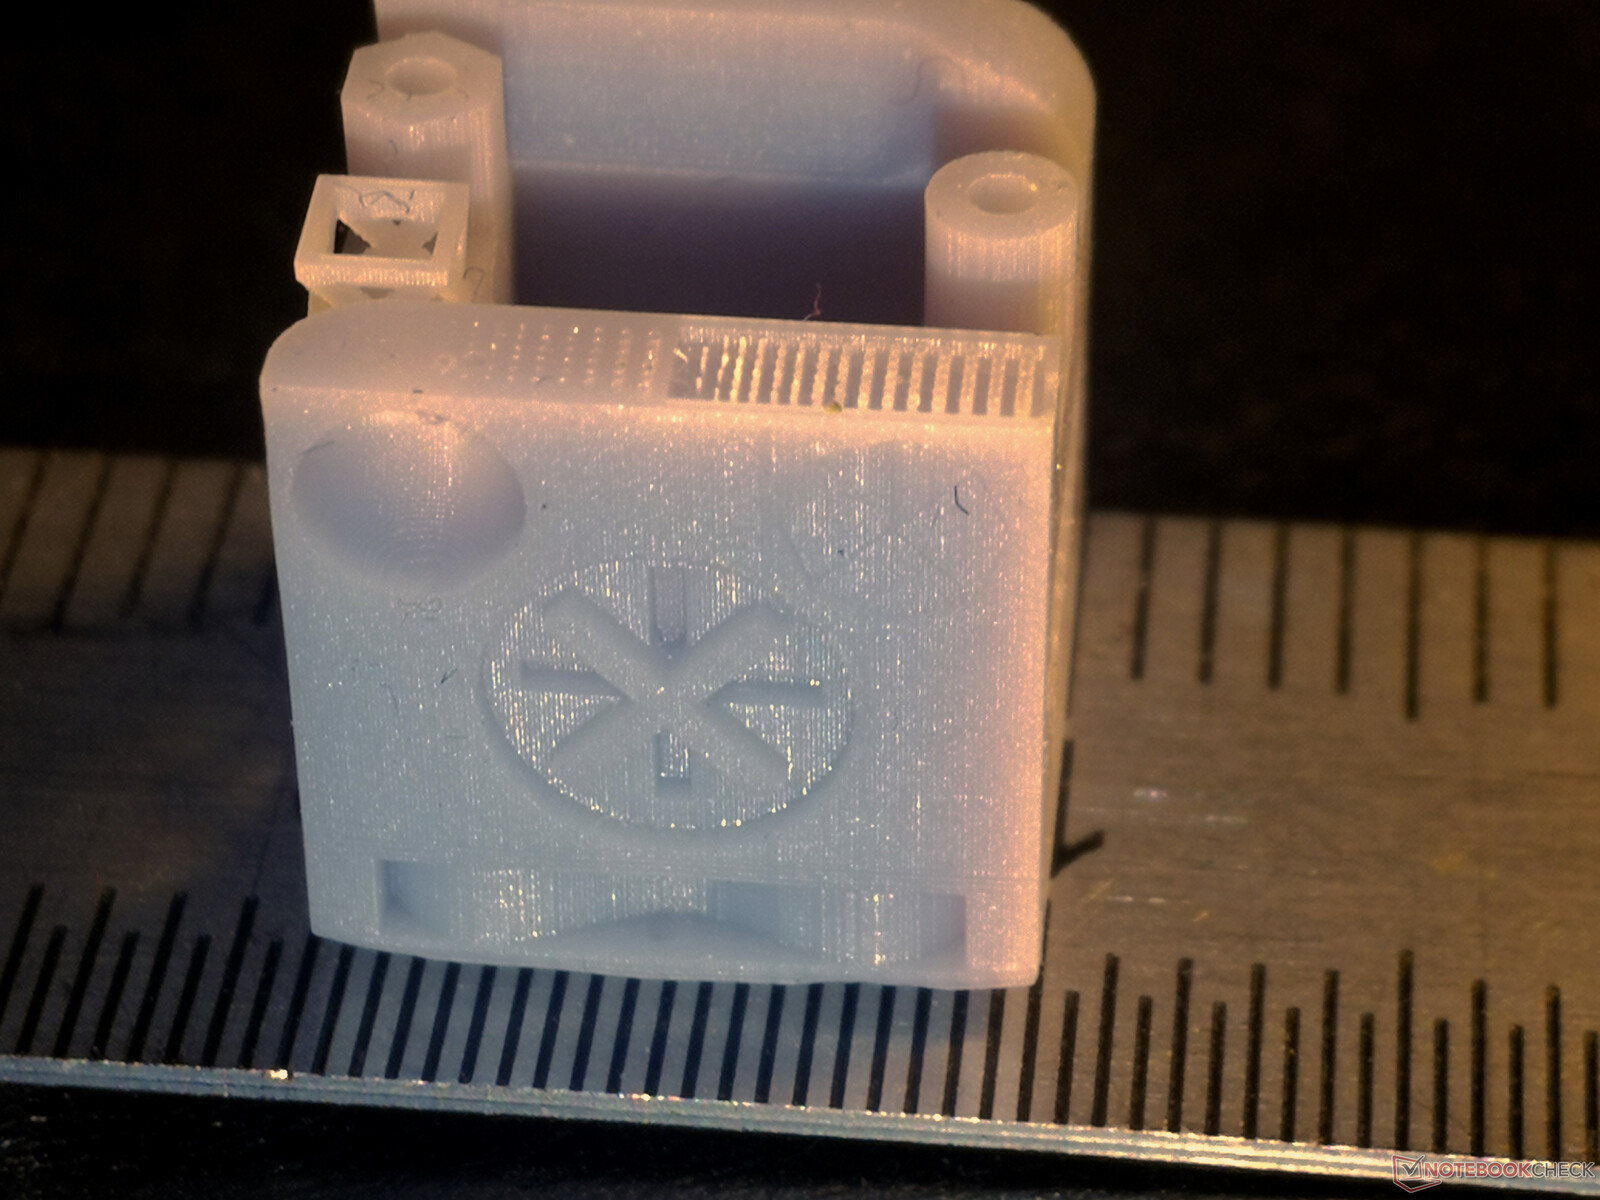
To better evaluate the accuracy of the printer, a test cube with an edge length of only one centimeter was printed first without anti-aliasing. The exposure time per layer was 1.5 seconds at 100% light intensity. The layer height is 0.034 mm.
In the following pictures, the individual voxels of the printed object were visually separated from each other utilizing a pointed light source and image post-processing. Only the first image shows roughly how the human eye would see the surface.
The finest structures, which the Anycubic Photon Mono X 6K can reproduce without issues, are around 0.1 mm with the Anycubic Basic Resin used. The crispness of edges in the object is particularly noteworthy. But also the hemispheres and other difficulties from the 3DSLA test cube are almost perfectly produced.

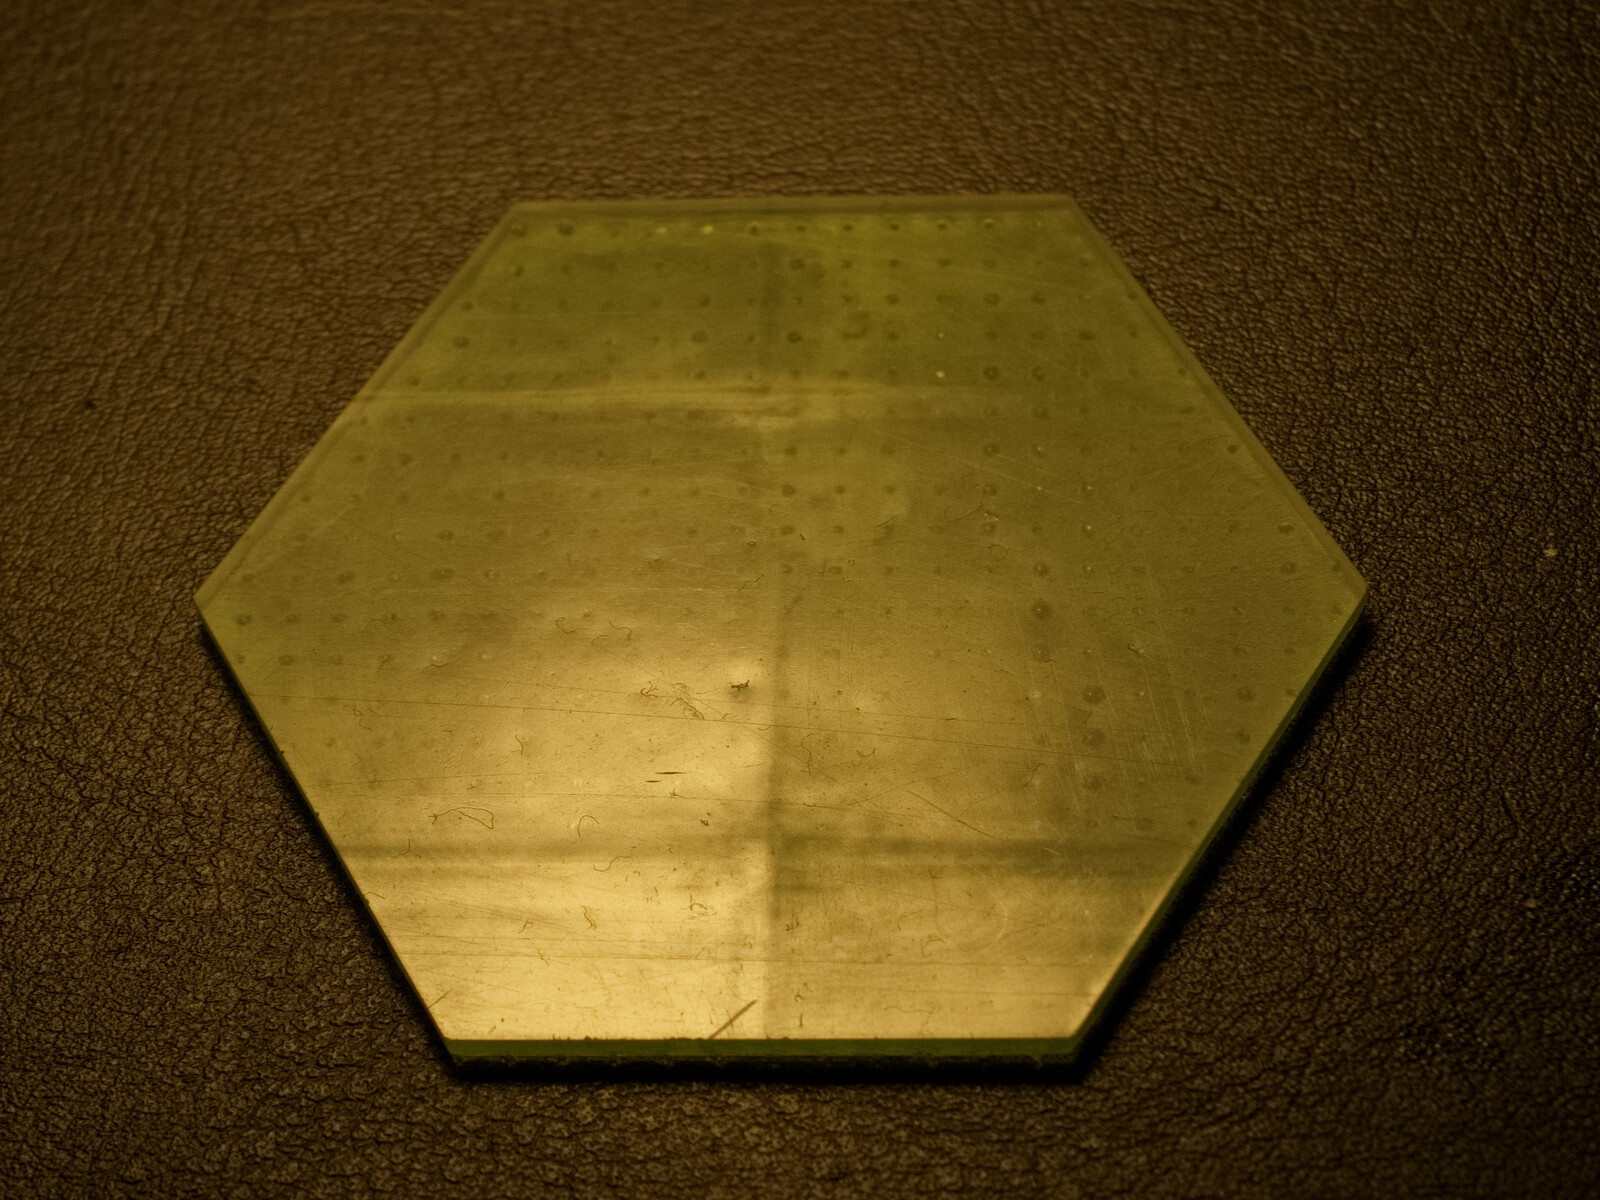
Light distribution
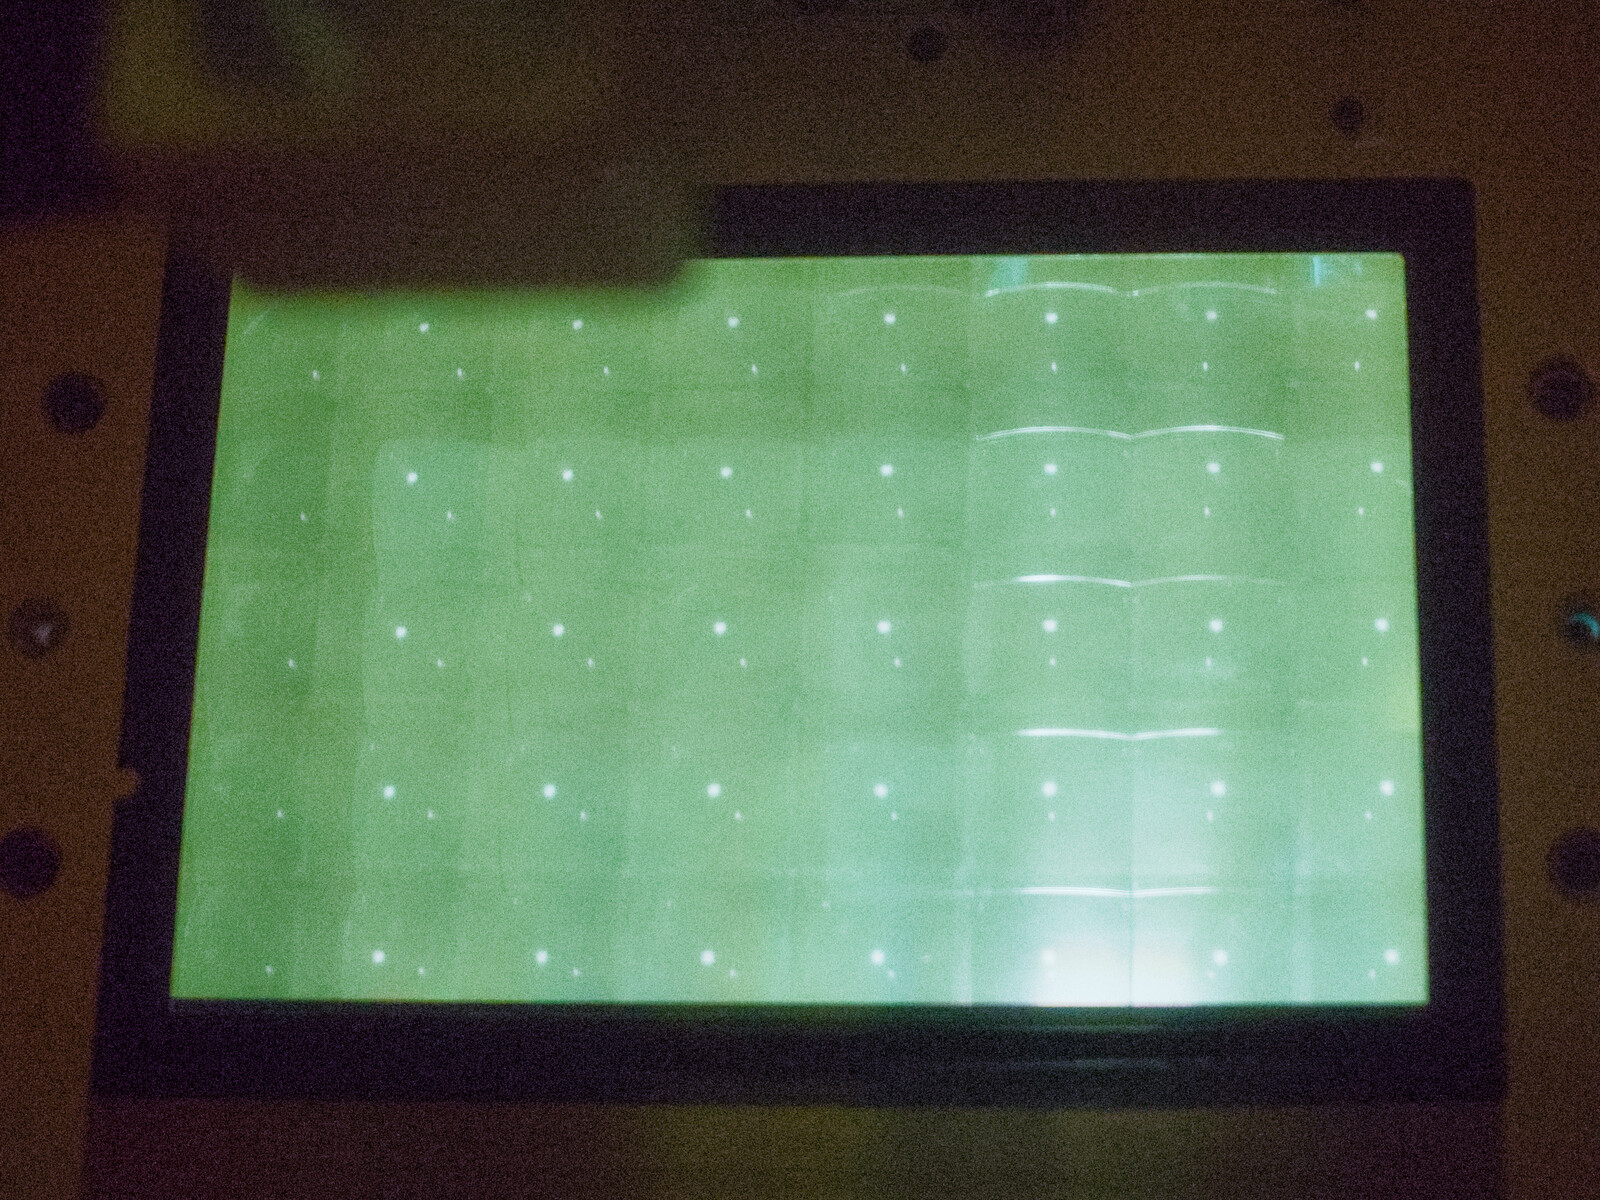
For an optimal print outcome, mSLA printers should feature very uniform illumination. This is the only option for producing small details with a high degree of accuracy anywhere on the build plate. Inside the Anycubic Photon Mono X 6K, 40 lenses distribute the light from the UV LEDs located behind them.
A plate printed from translucent Elegoo water-washable Resin in green revealed the first small weakness of the 3D printer. Structures can appear in the printed product along the edges of the individual lenses under certain conditions. In the small hexagon, two horizontal and one vertical line can be recognized distinctly. Apparently, the light intensity along the edges of the lenses is different from that in the center. The line effect is a result of a non-uniform polymerization of the resin. There is no change in the dimensions of the printed object, rather the resin refracts the transmitted light more inconsistently at these regions. The points on the back are a result oft support structures.
The bed of nails test according to Frank Collingwood also shows small discontinuities in the exposure. To create very thin objects, the exposure time of the object has to be increased slightly. Testing here was also done with the Anycubic Basic Resin. A perfect result would produce each of the small nails. The test print was done twice with different exposure times. In the first trial, the exposure time was set at just 1.2 seconds. Even though only a few nails remained here, the experiment still shows that it is possible to set such short exposure times with the Anycubic Photon X 6K, depending on the model. The second test had an exposure time of 1.8 seconds, which resulted in a much better result with only some lost nails.
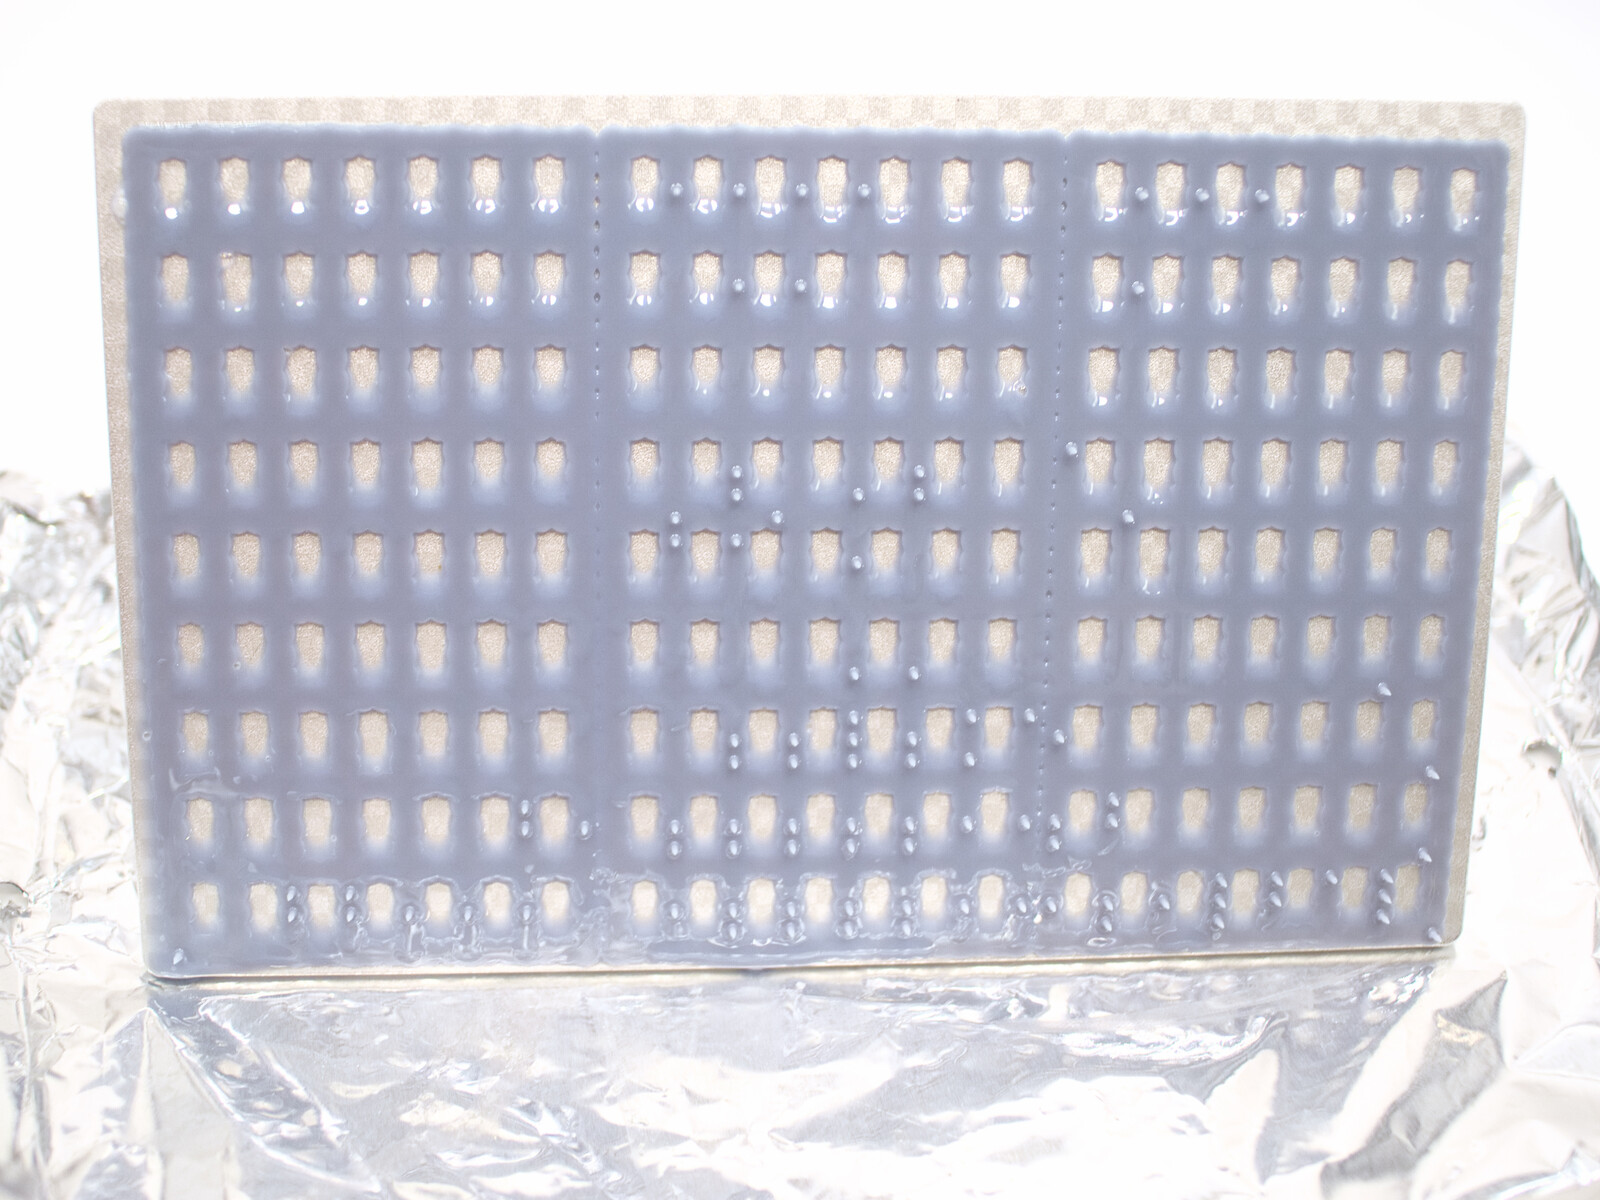
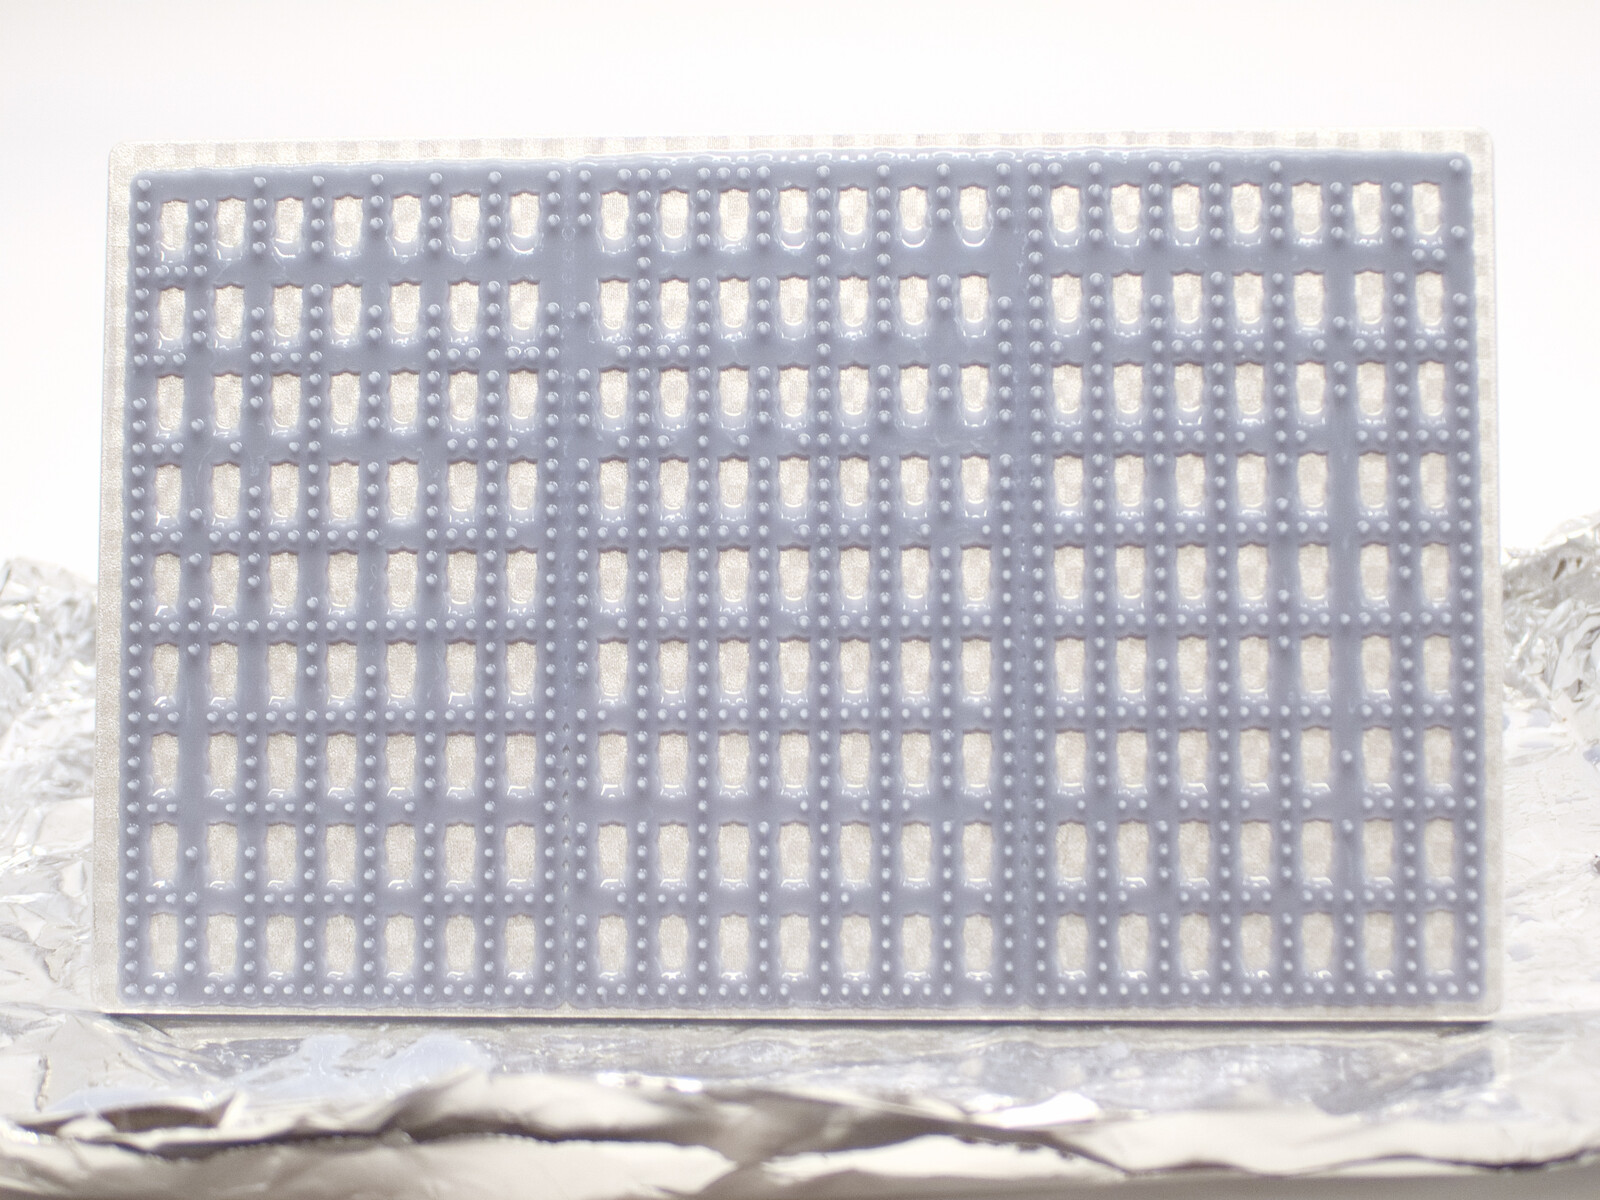
The results of the exposure tests show that filigree details require a slightly longer exposure time to be reproduced accurately in all areas of the printing plate. However, the resulting minor problems can be managed well. Small adjustments in exposure time or layer height have a big impact here. In summary, the light output of the printer is good, but not perfect.
Build plate adhesion
During the entire review of the Anycubic Photon Mono X 6K, only one out of more than 20 test objects did not adhere to the build plate. For that test, the exposure of the first layers was set to a very low value of only 15 seconds. The exposure time of all other test prints was 28 seconds for the first four layers.
The build plate, with its engraved checkerboard pattern, showed good adhesion with all resins tested. Even rather difficult-to-print resins such as the Elegoo ABS-Like Resin did not cause any trouble to the 3D printer.
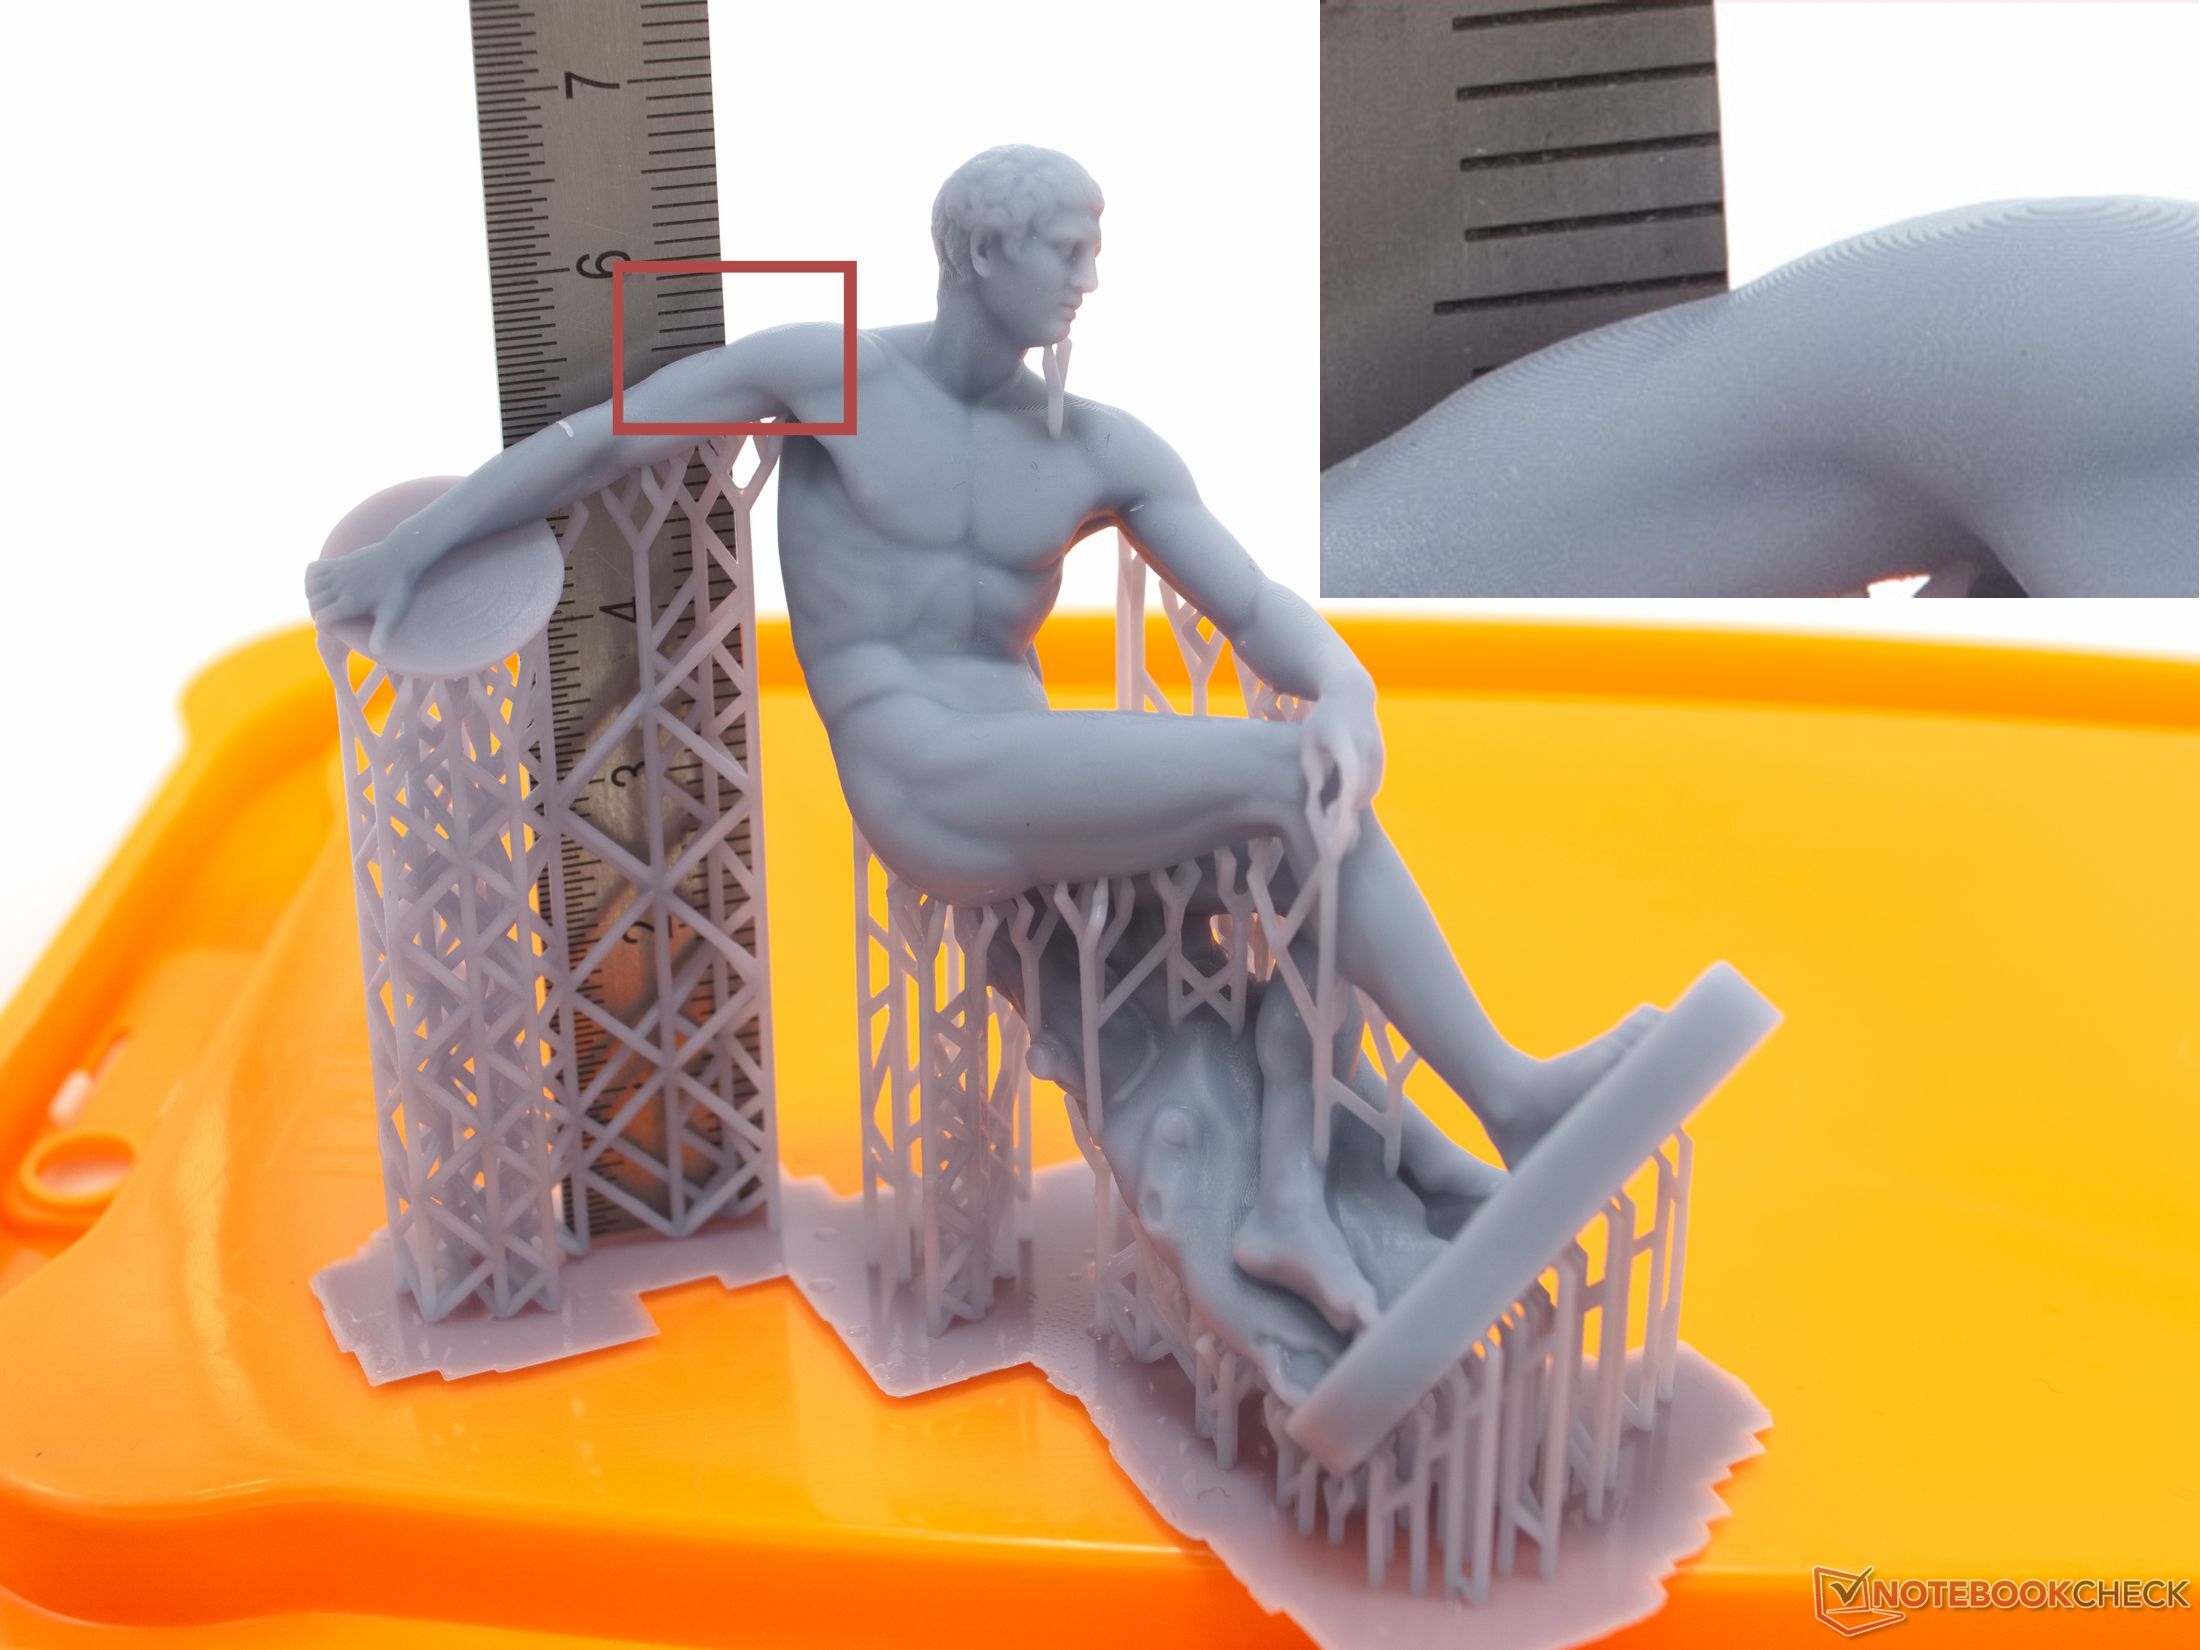
Print quality in a practical application
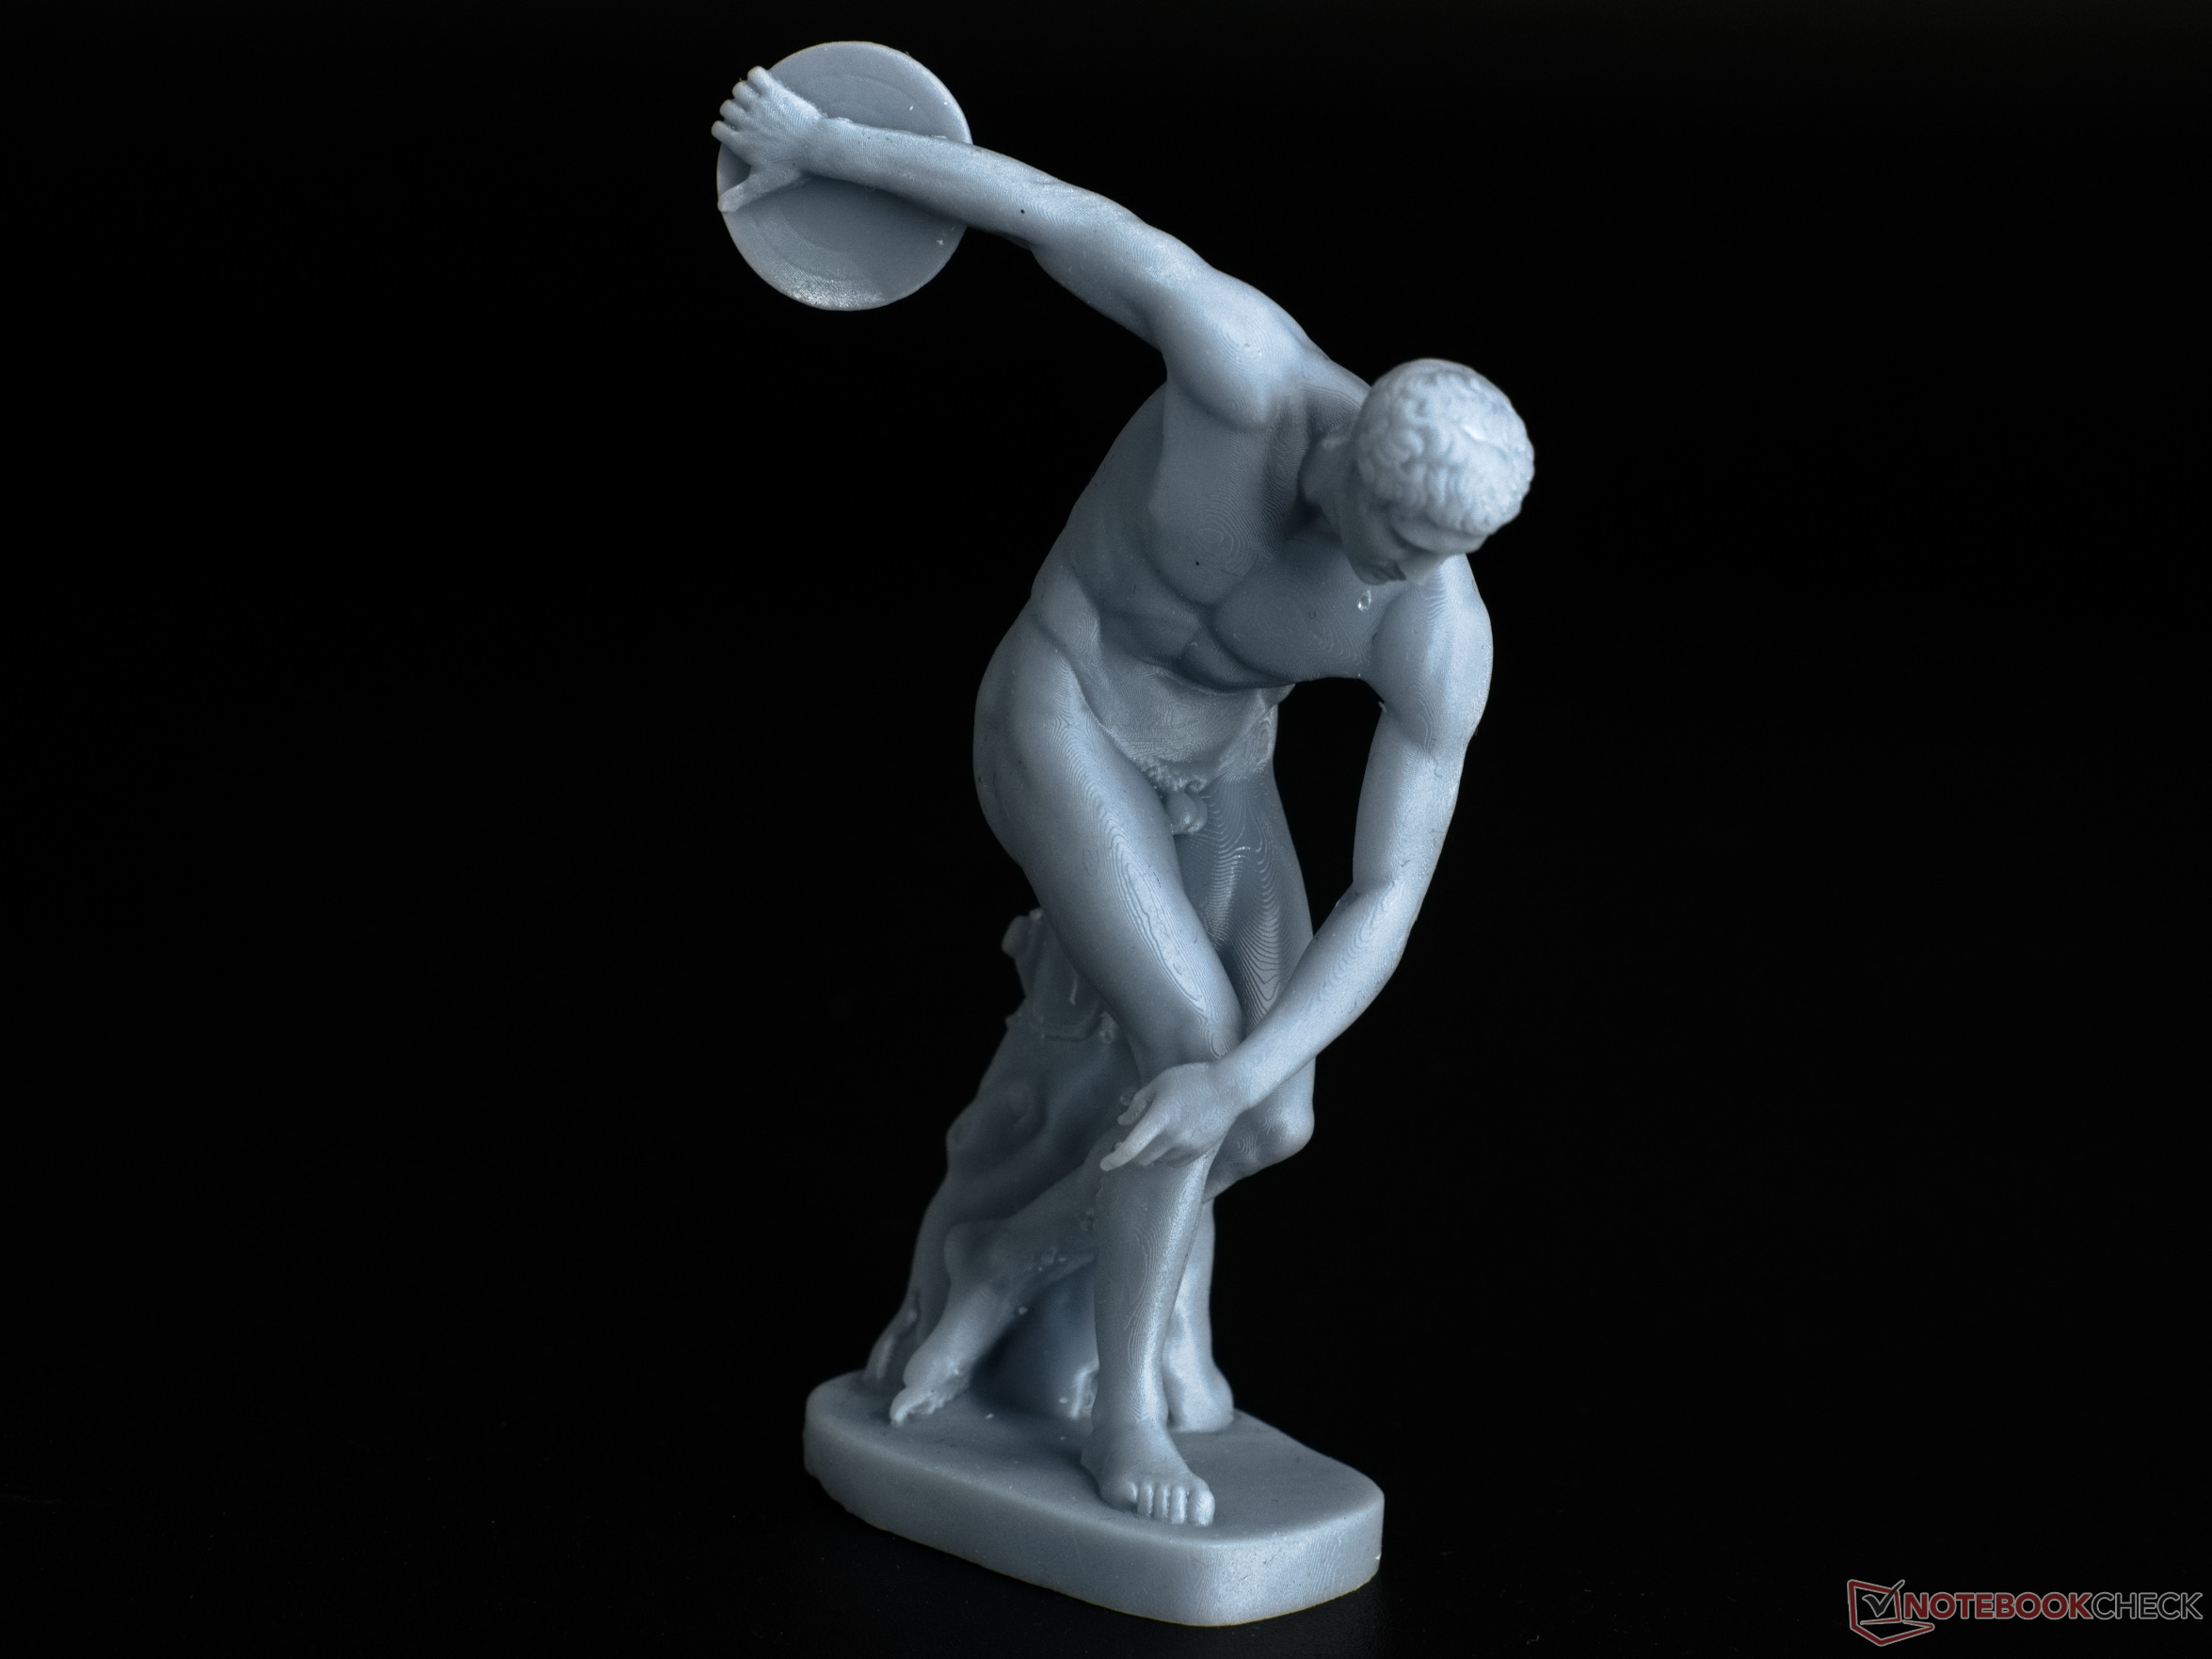
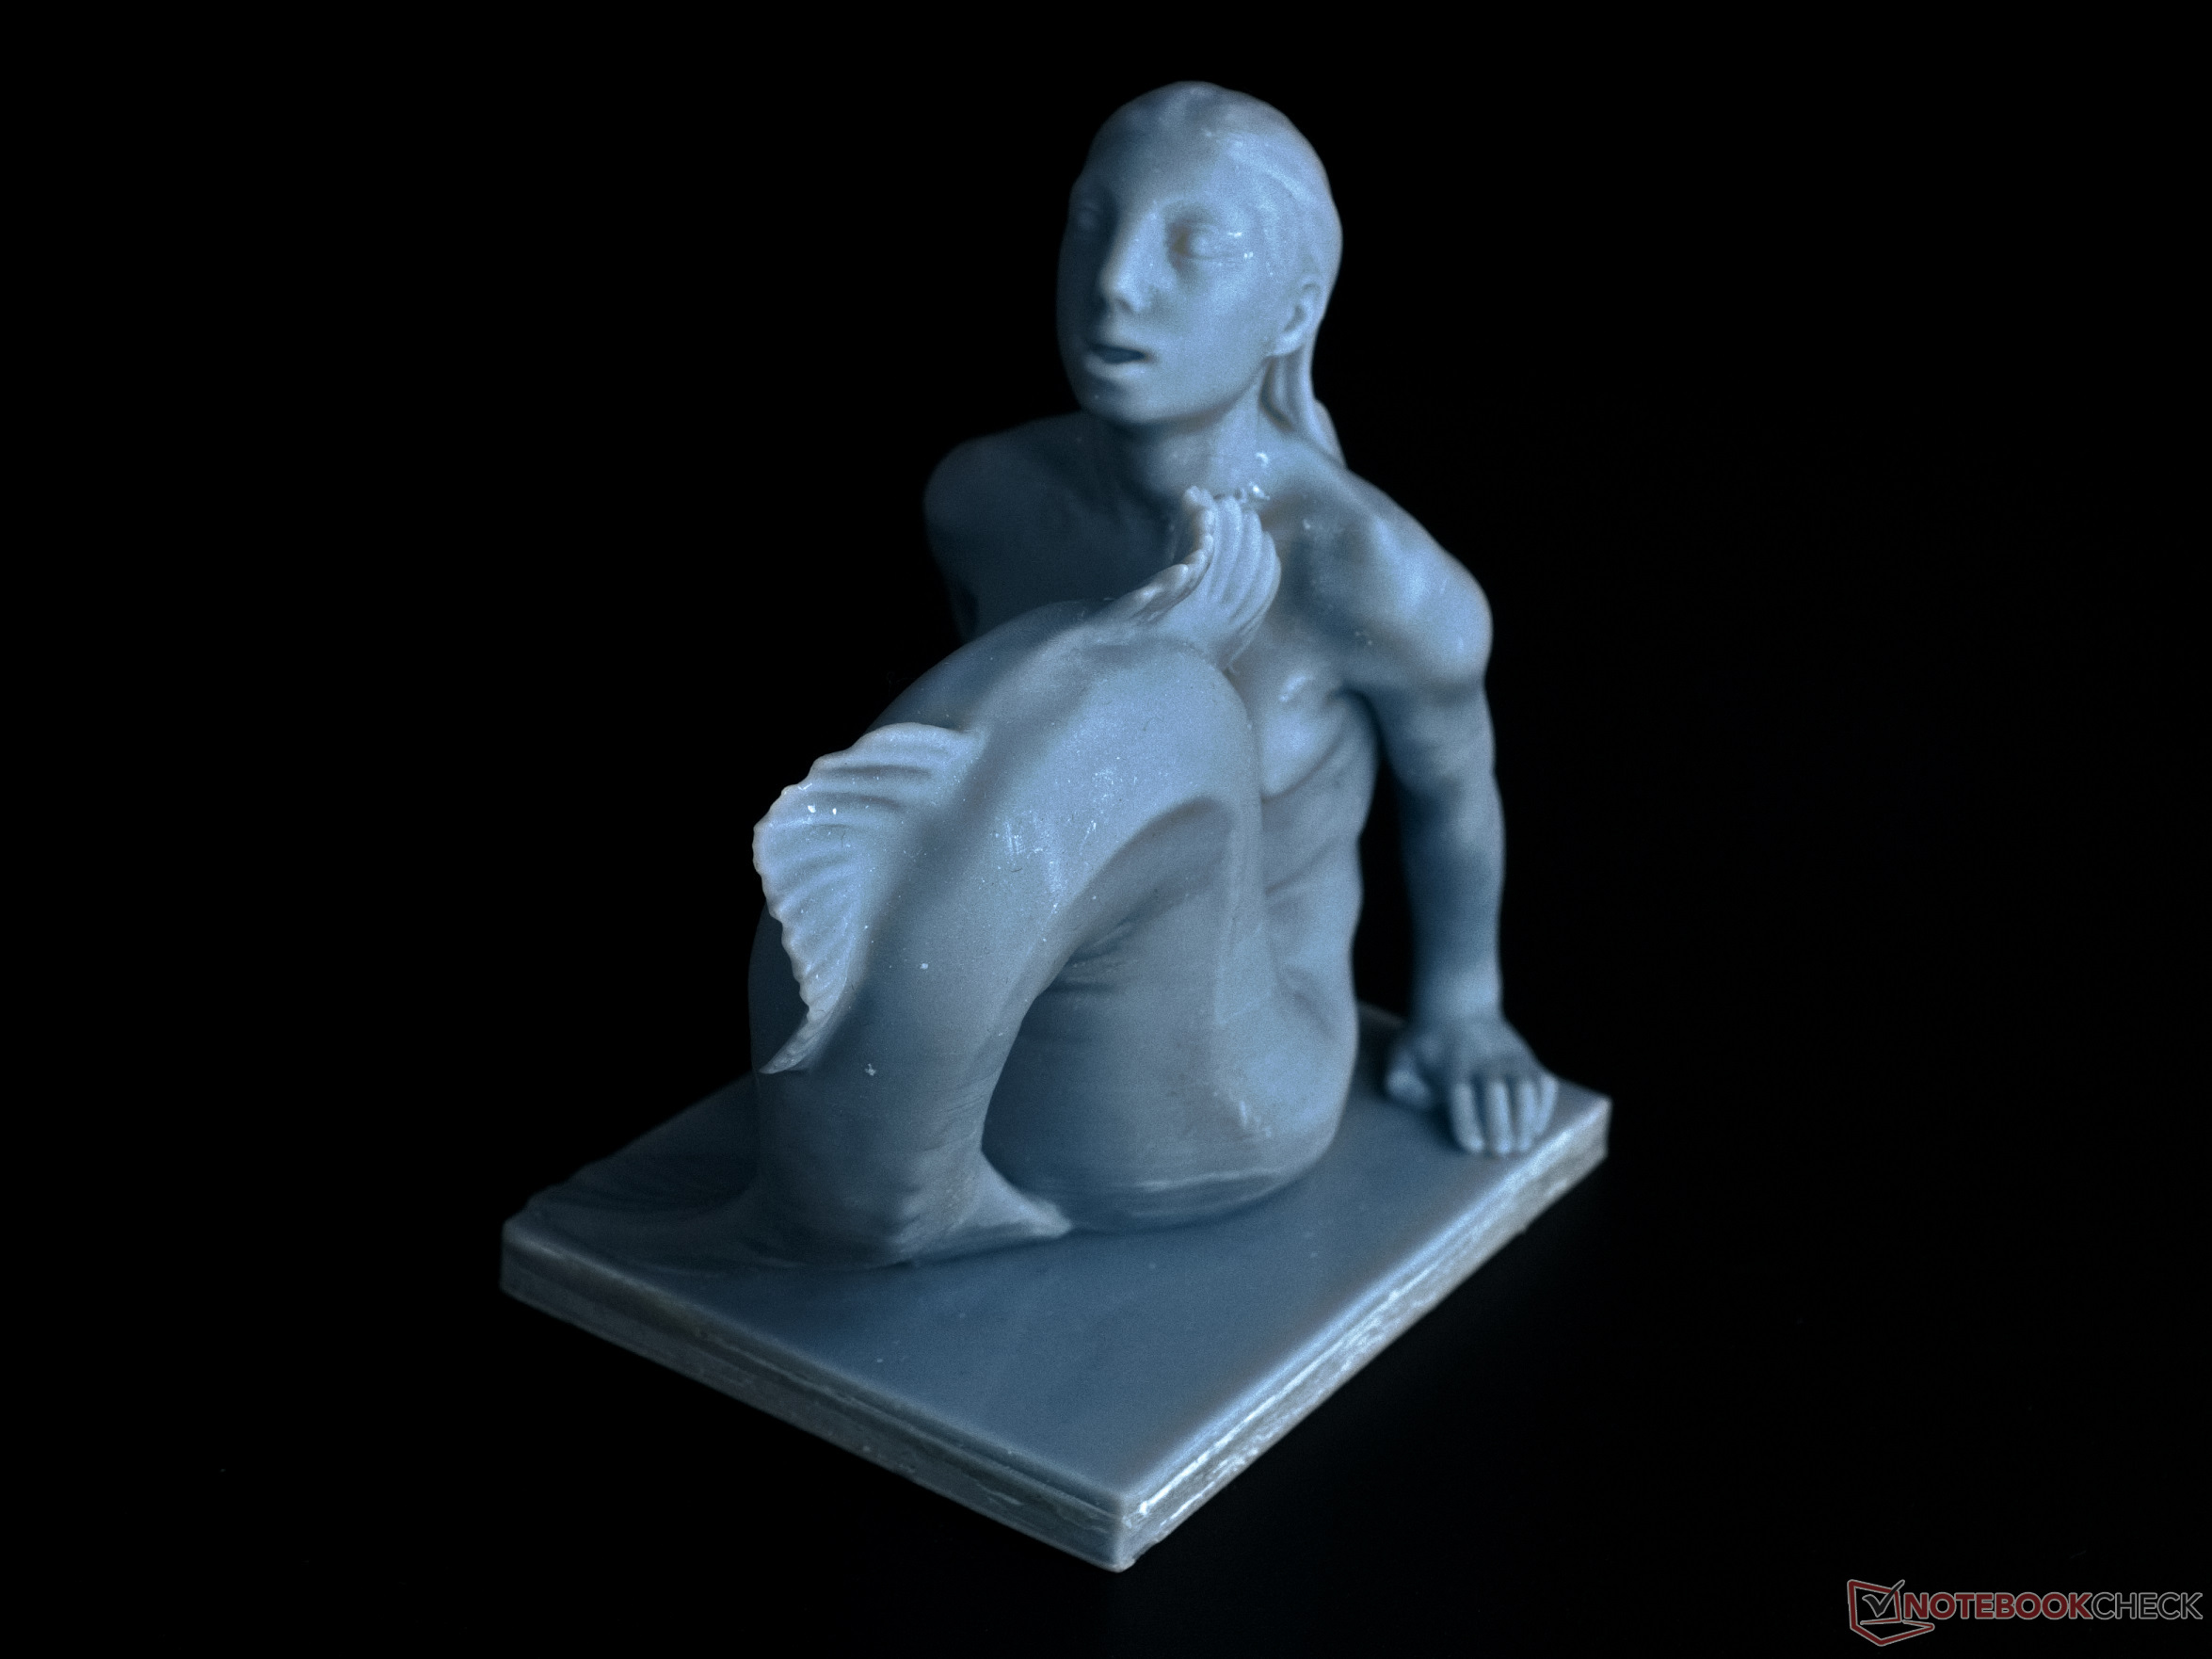
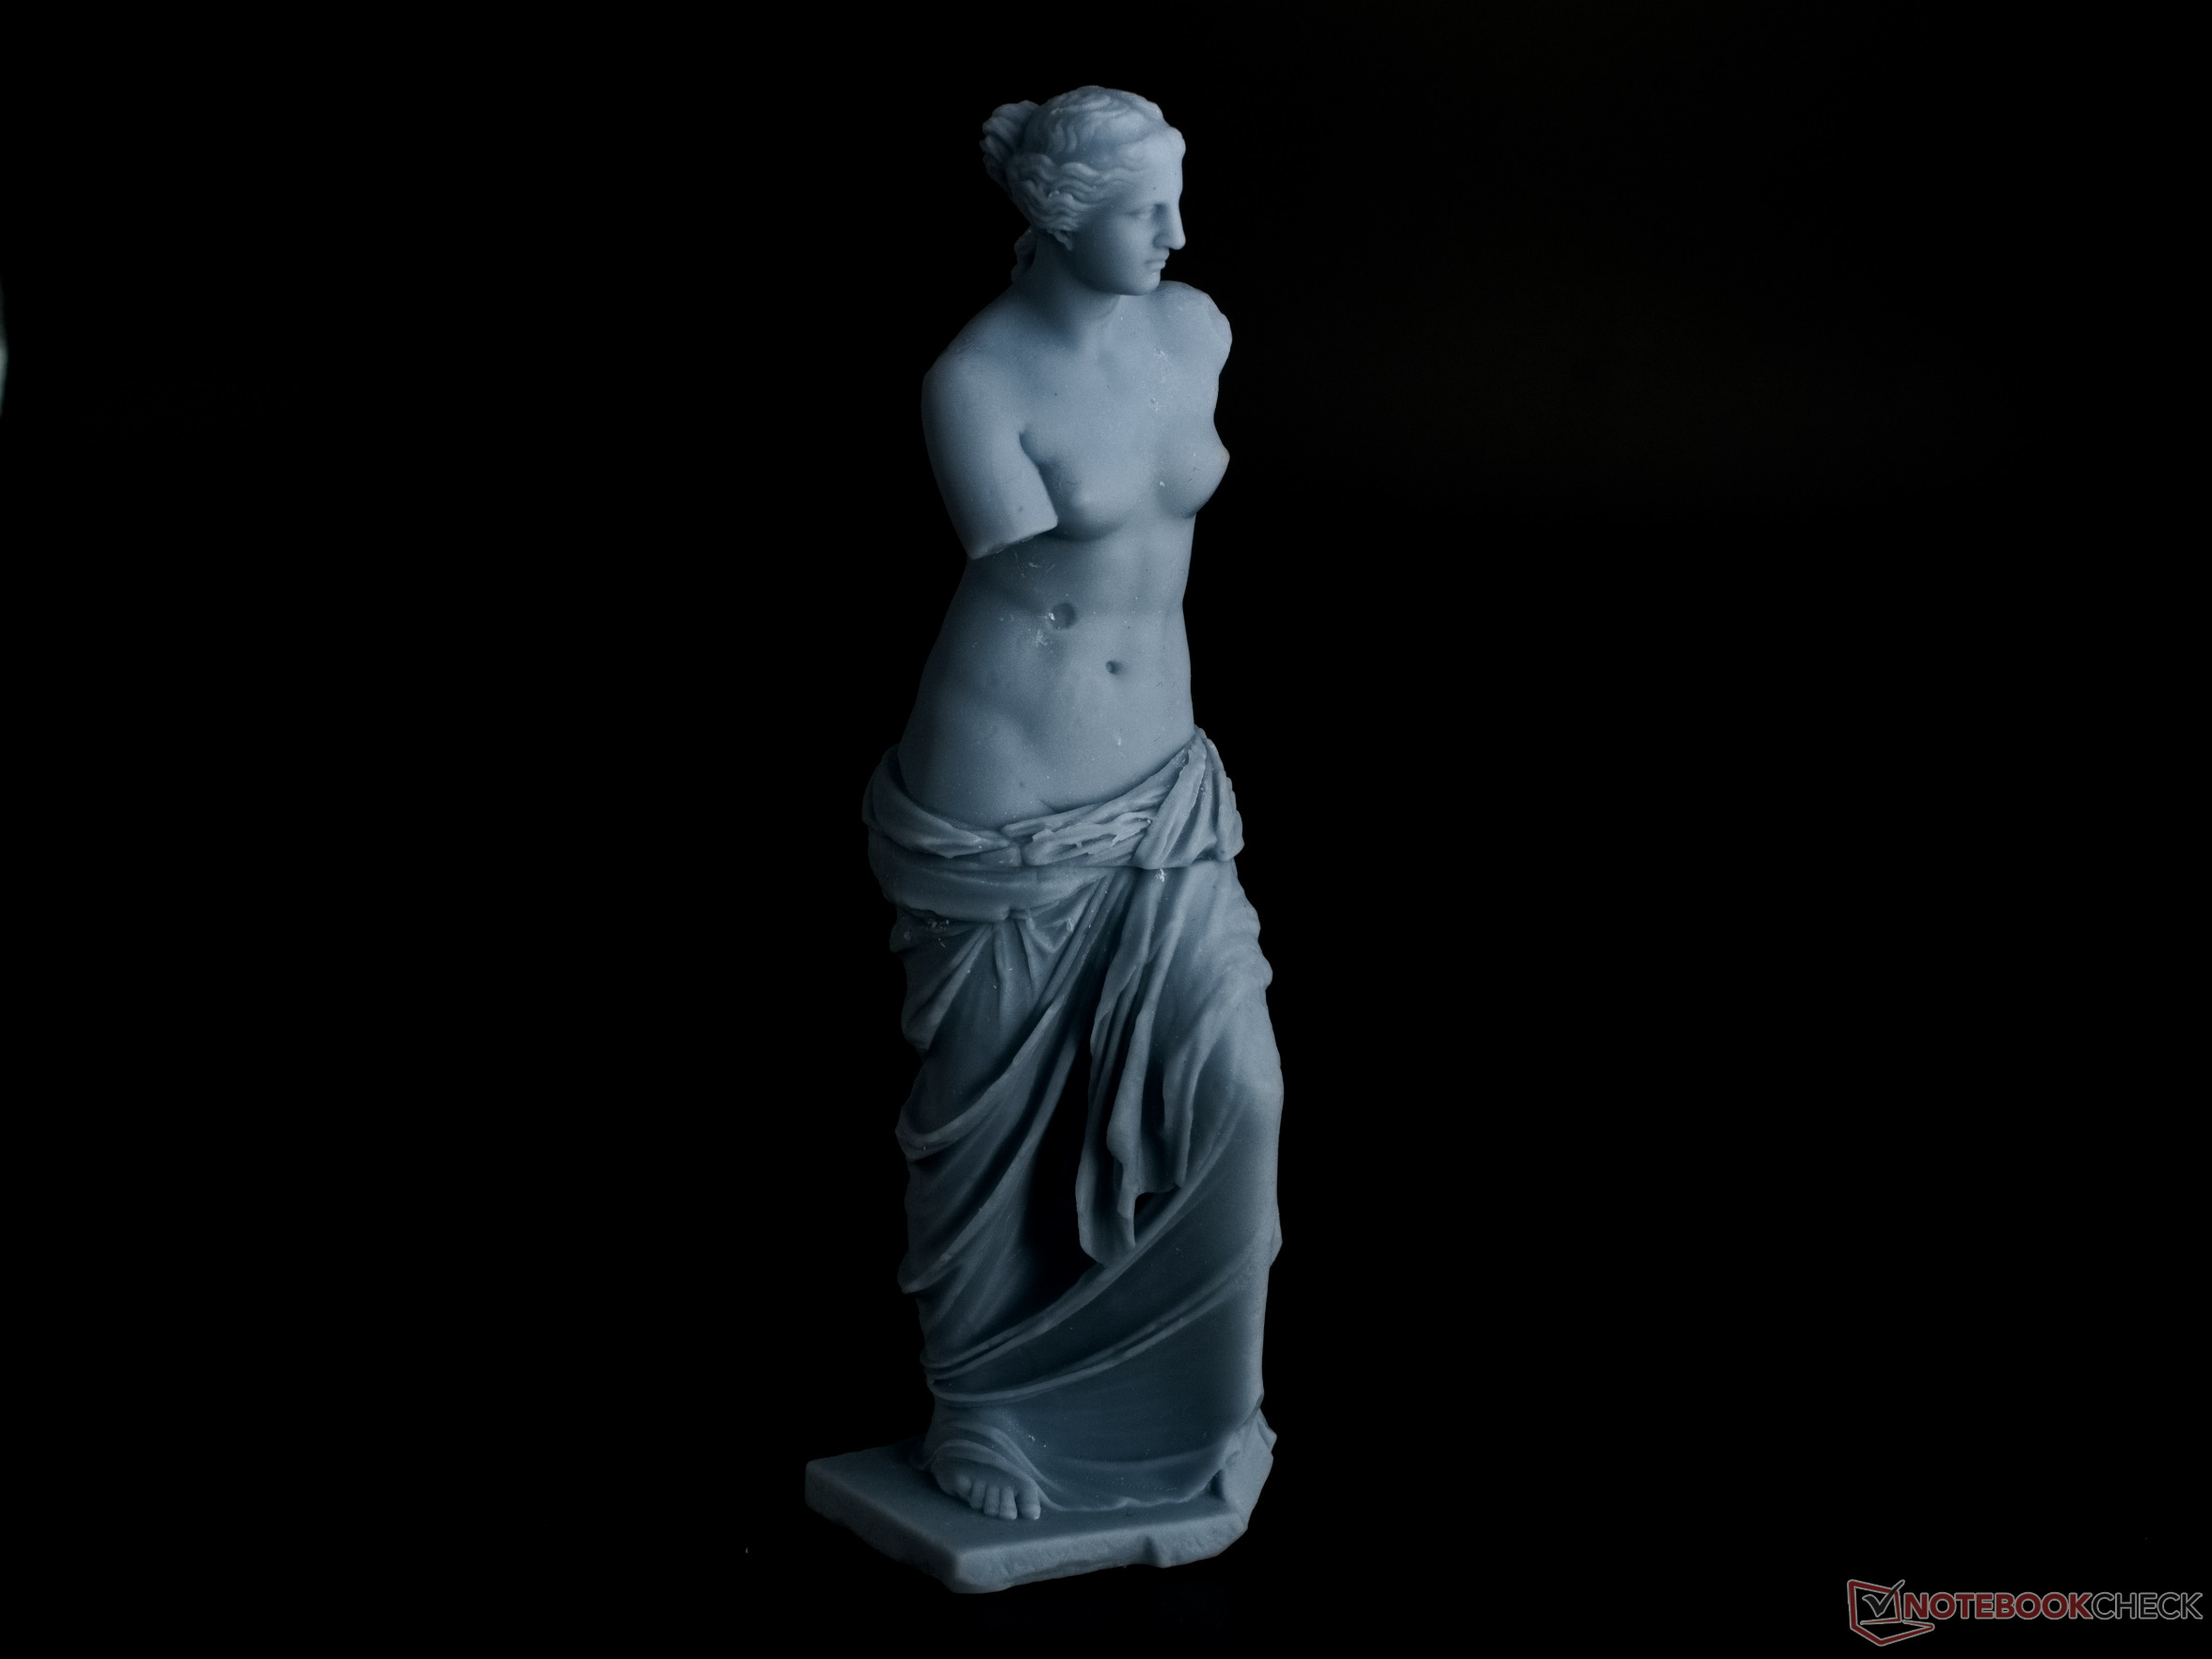
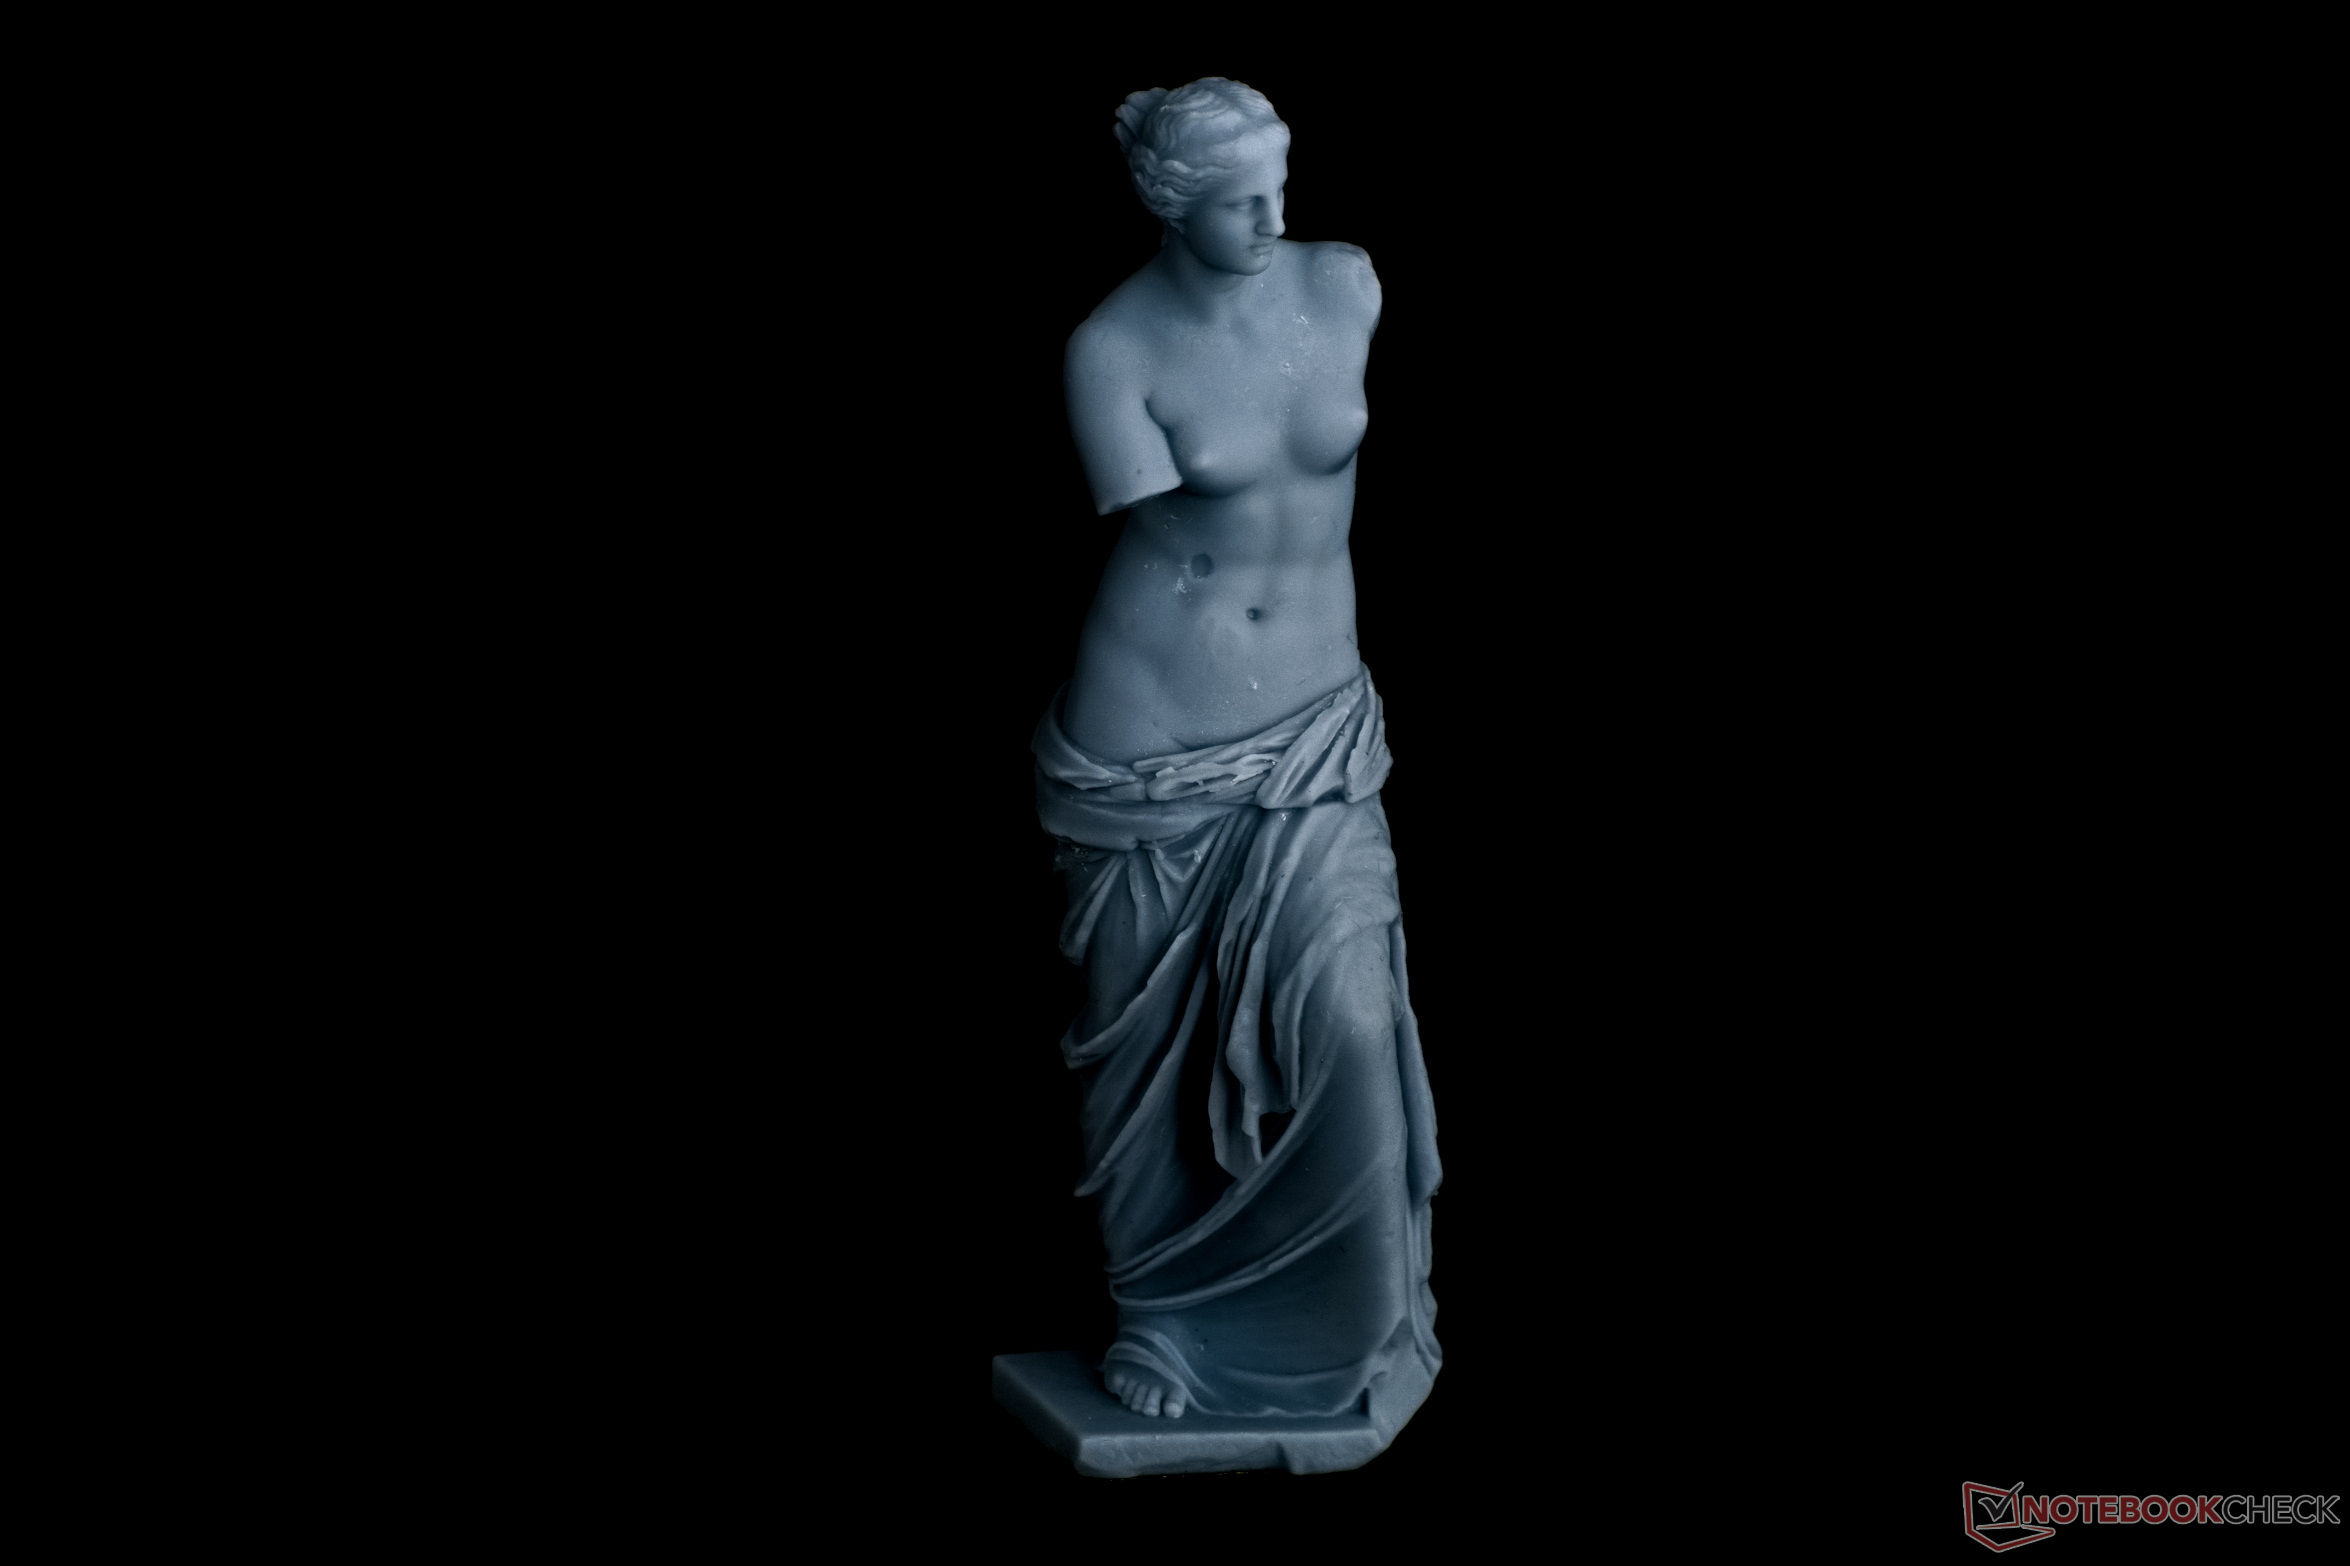
The SMK (Statens Museum for Kunst) is the national gallery of Denmark. Via myminifactory.com, the museum shares numerous high-resolution 3D scans of classic statues with the public. The Discus Thrower, the Venus de Milo and the Little Mermaid or Danish Havfrue are among the most famous sculptures of that digital collection.
We replicated all three sculptures with the Anycubic Photon Mono X 6K. The detail of the results are marvelous. The 3D printer really performed very well here. With anti-aliasing activated at the highest level, hardly any traces of manufacturing can be seen on the Venus de Milo and the Little Mermaid. The Discus Thrower, on the other hand, was printed without anti-aliasing. However, the individual layers and pixels are difficult to recognize with the naked eye here as well.
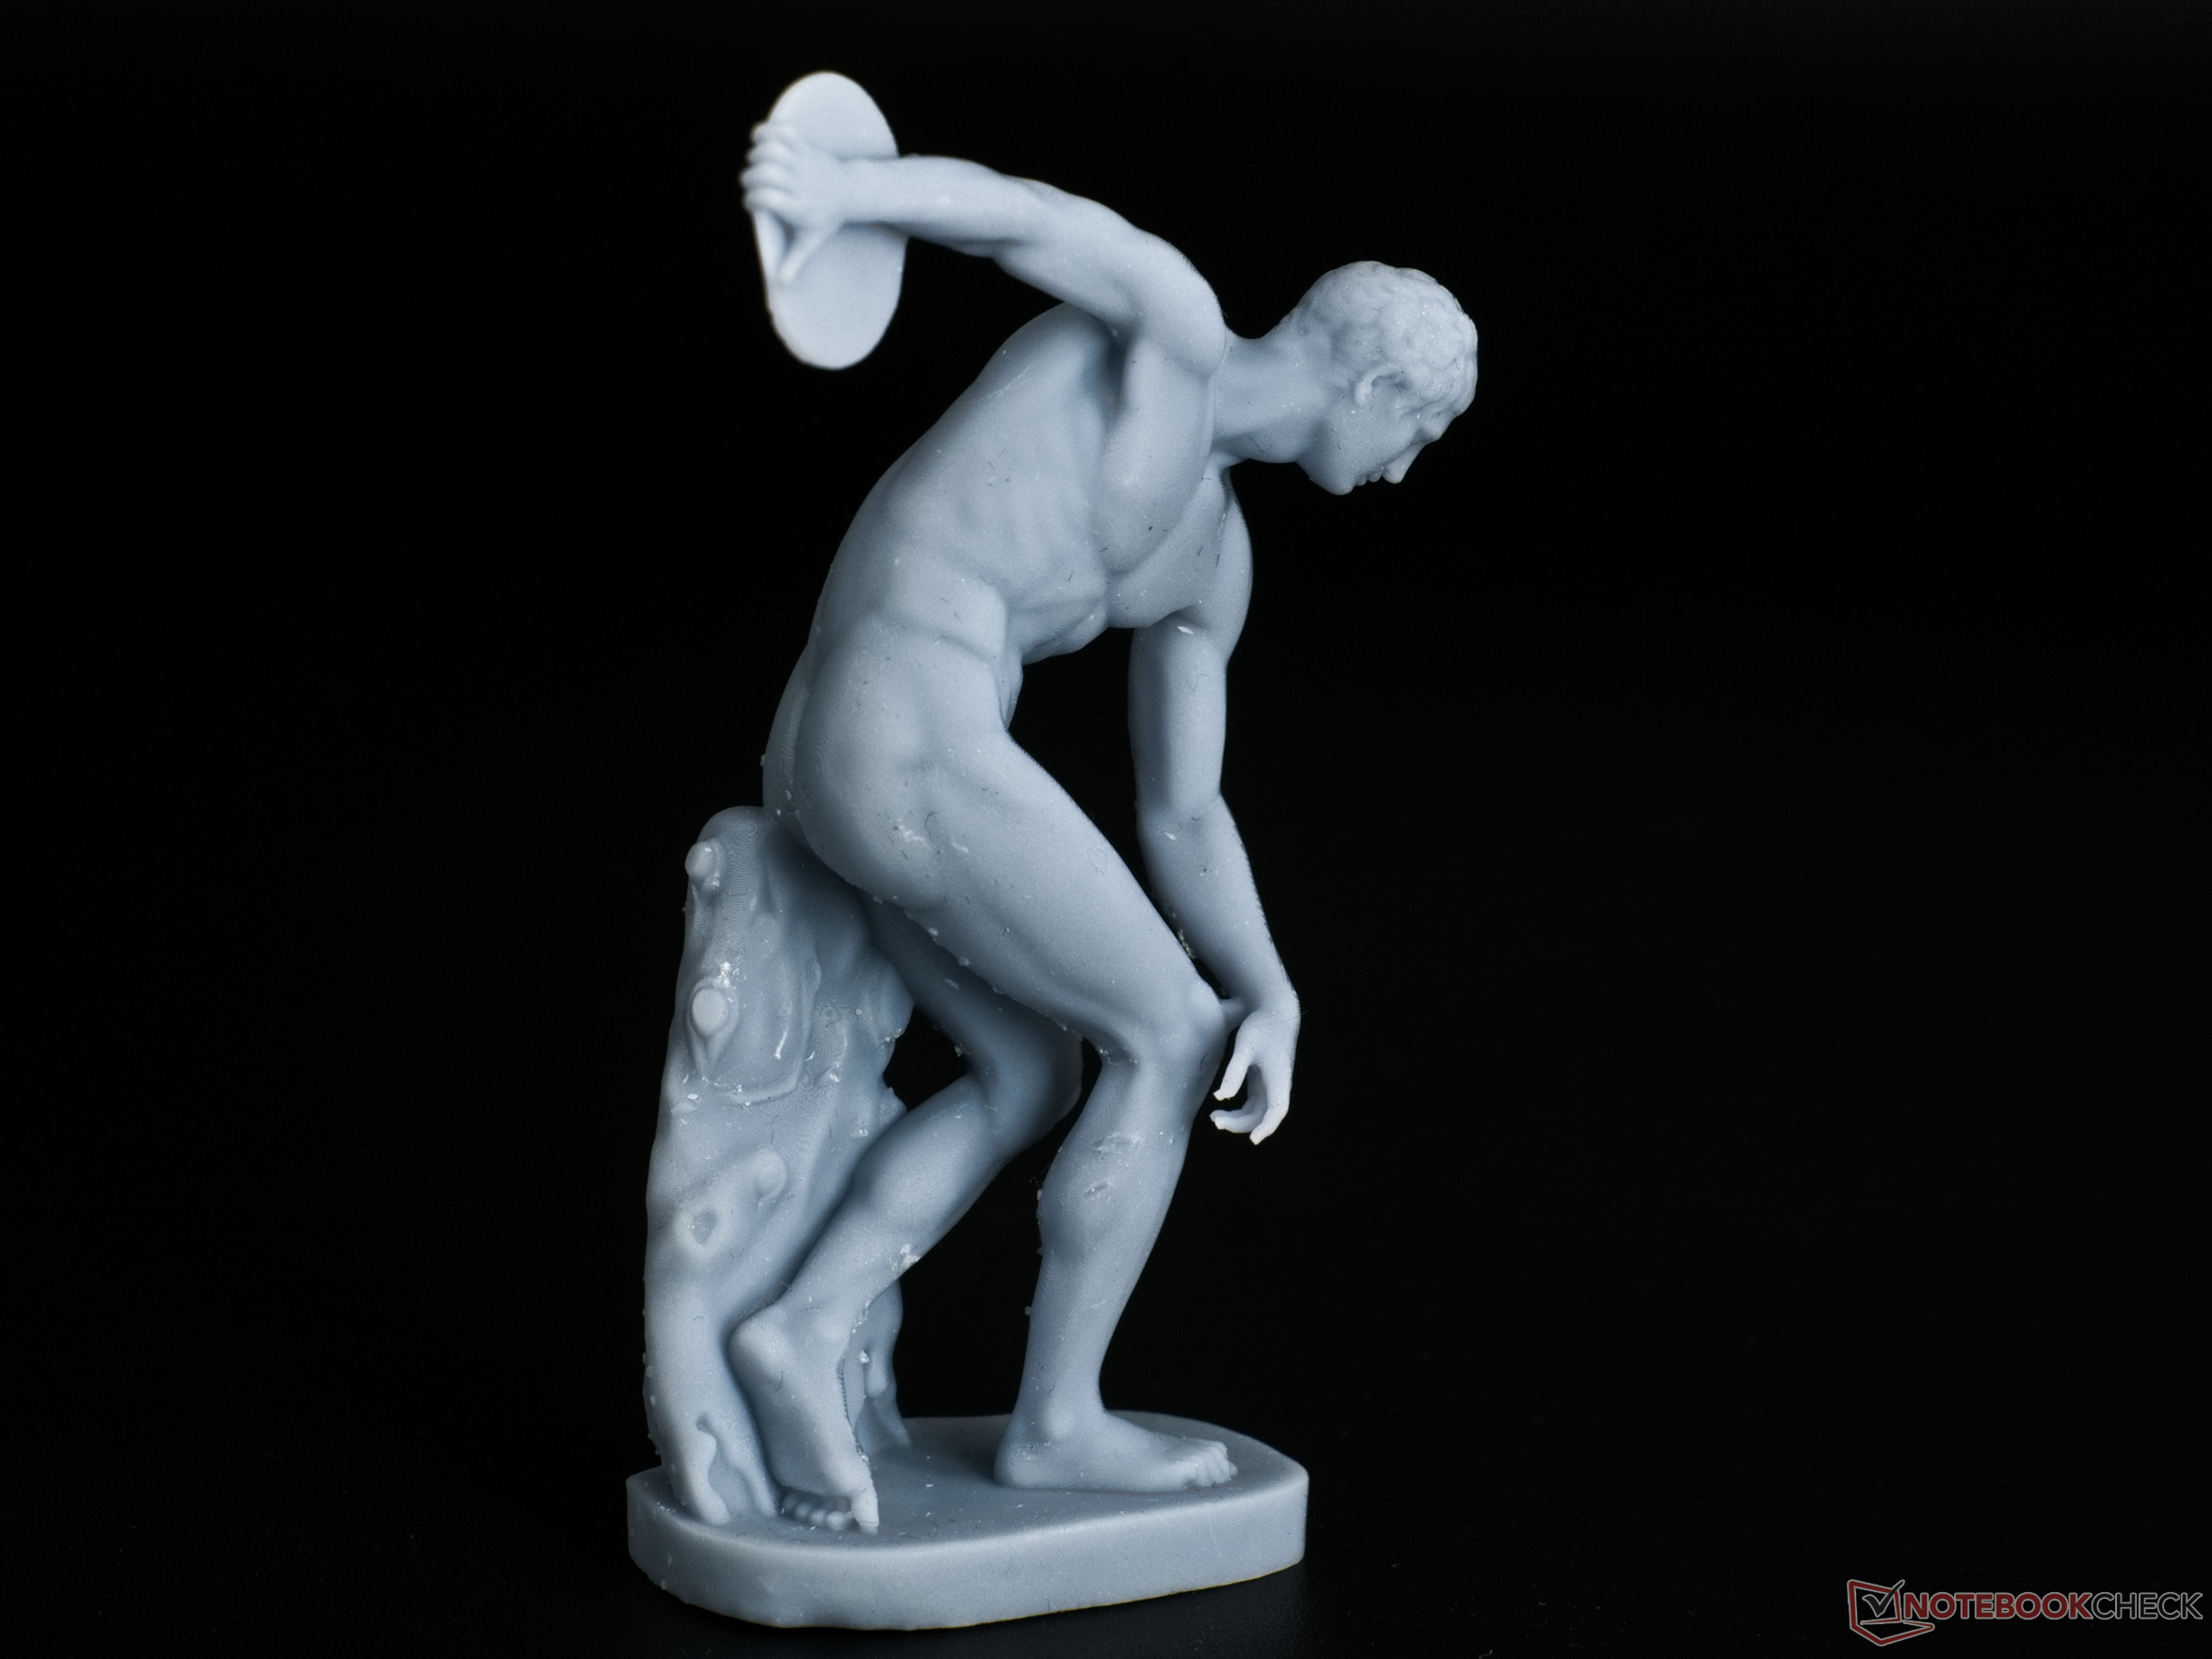

Printing speed: 80 mm/h is achievable
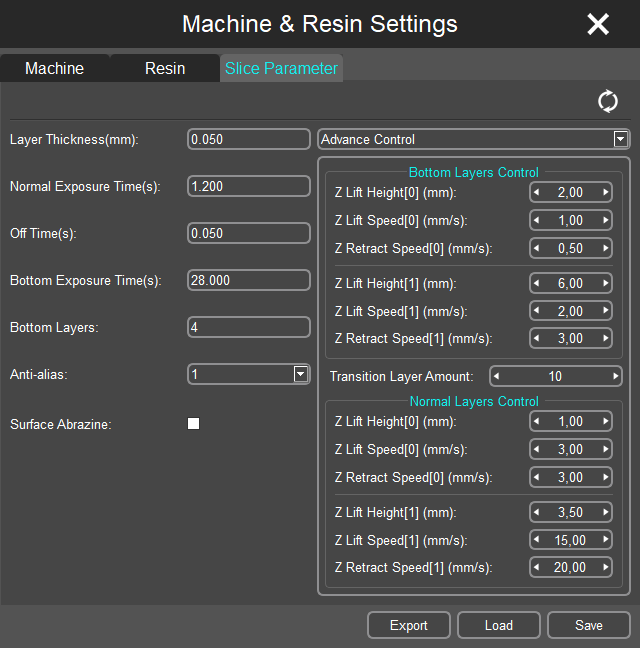
With the preset values for layer height, exposure time and Z-lift in Photon Workshop V2.1.19, the printing speed is slightly over 40 mm/hr. While testing, it quickly became apparent that the preset values are very conservative. With the appropriate settings, a lot of time can be saved.
The discus thrower shown above has a height of 68 mm above the printing plate. With a layer height of 0.05 mm, an exposure time of only 1.2 seconds, and a Z-lift of 4.5 mm, it took 55 minutes to print the statue. If we subtract the time of the first slow layers, the result is about 79 mm/h. With a few more small adjustments, even more than 80 mm/h seems well within the range of possibility.
After print service
A major criticism of 3D printers that work with synthetic resin is always the high material usage. Alcohol, methylated spirits or isopropanol are needed to remove excess resin from the finished print product and the printer components. Since the synthetic resin can be harmful to health, skin contact should also be avoided. It is advised to wear disposable gloves. Household or workshop paper soaked in alcohol is used to clean the printer components. Unused resin is also poured to the storage bottle through a fine paint strainer.
Depending on how much time and effort is put into finishing, more or less material is used here. Kitchen paper and paint strainer are only needed, if the resin needs to be changed, the printer is not to be used for a long period of time, or a print did not adhere to the printing plate and so the FEP film of the resin vat needs to be cleaned or replaced. Some cleaning steps are not necessary after each print.
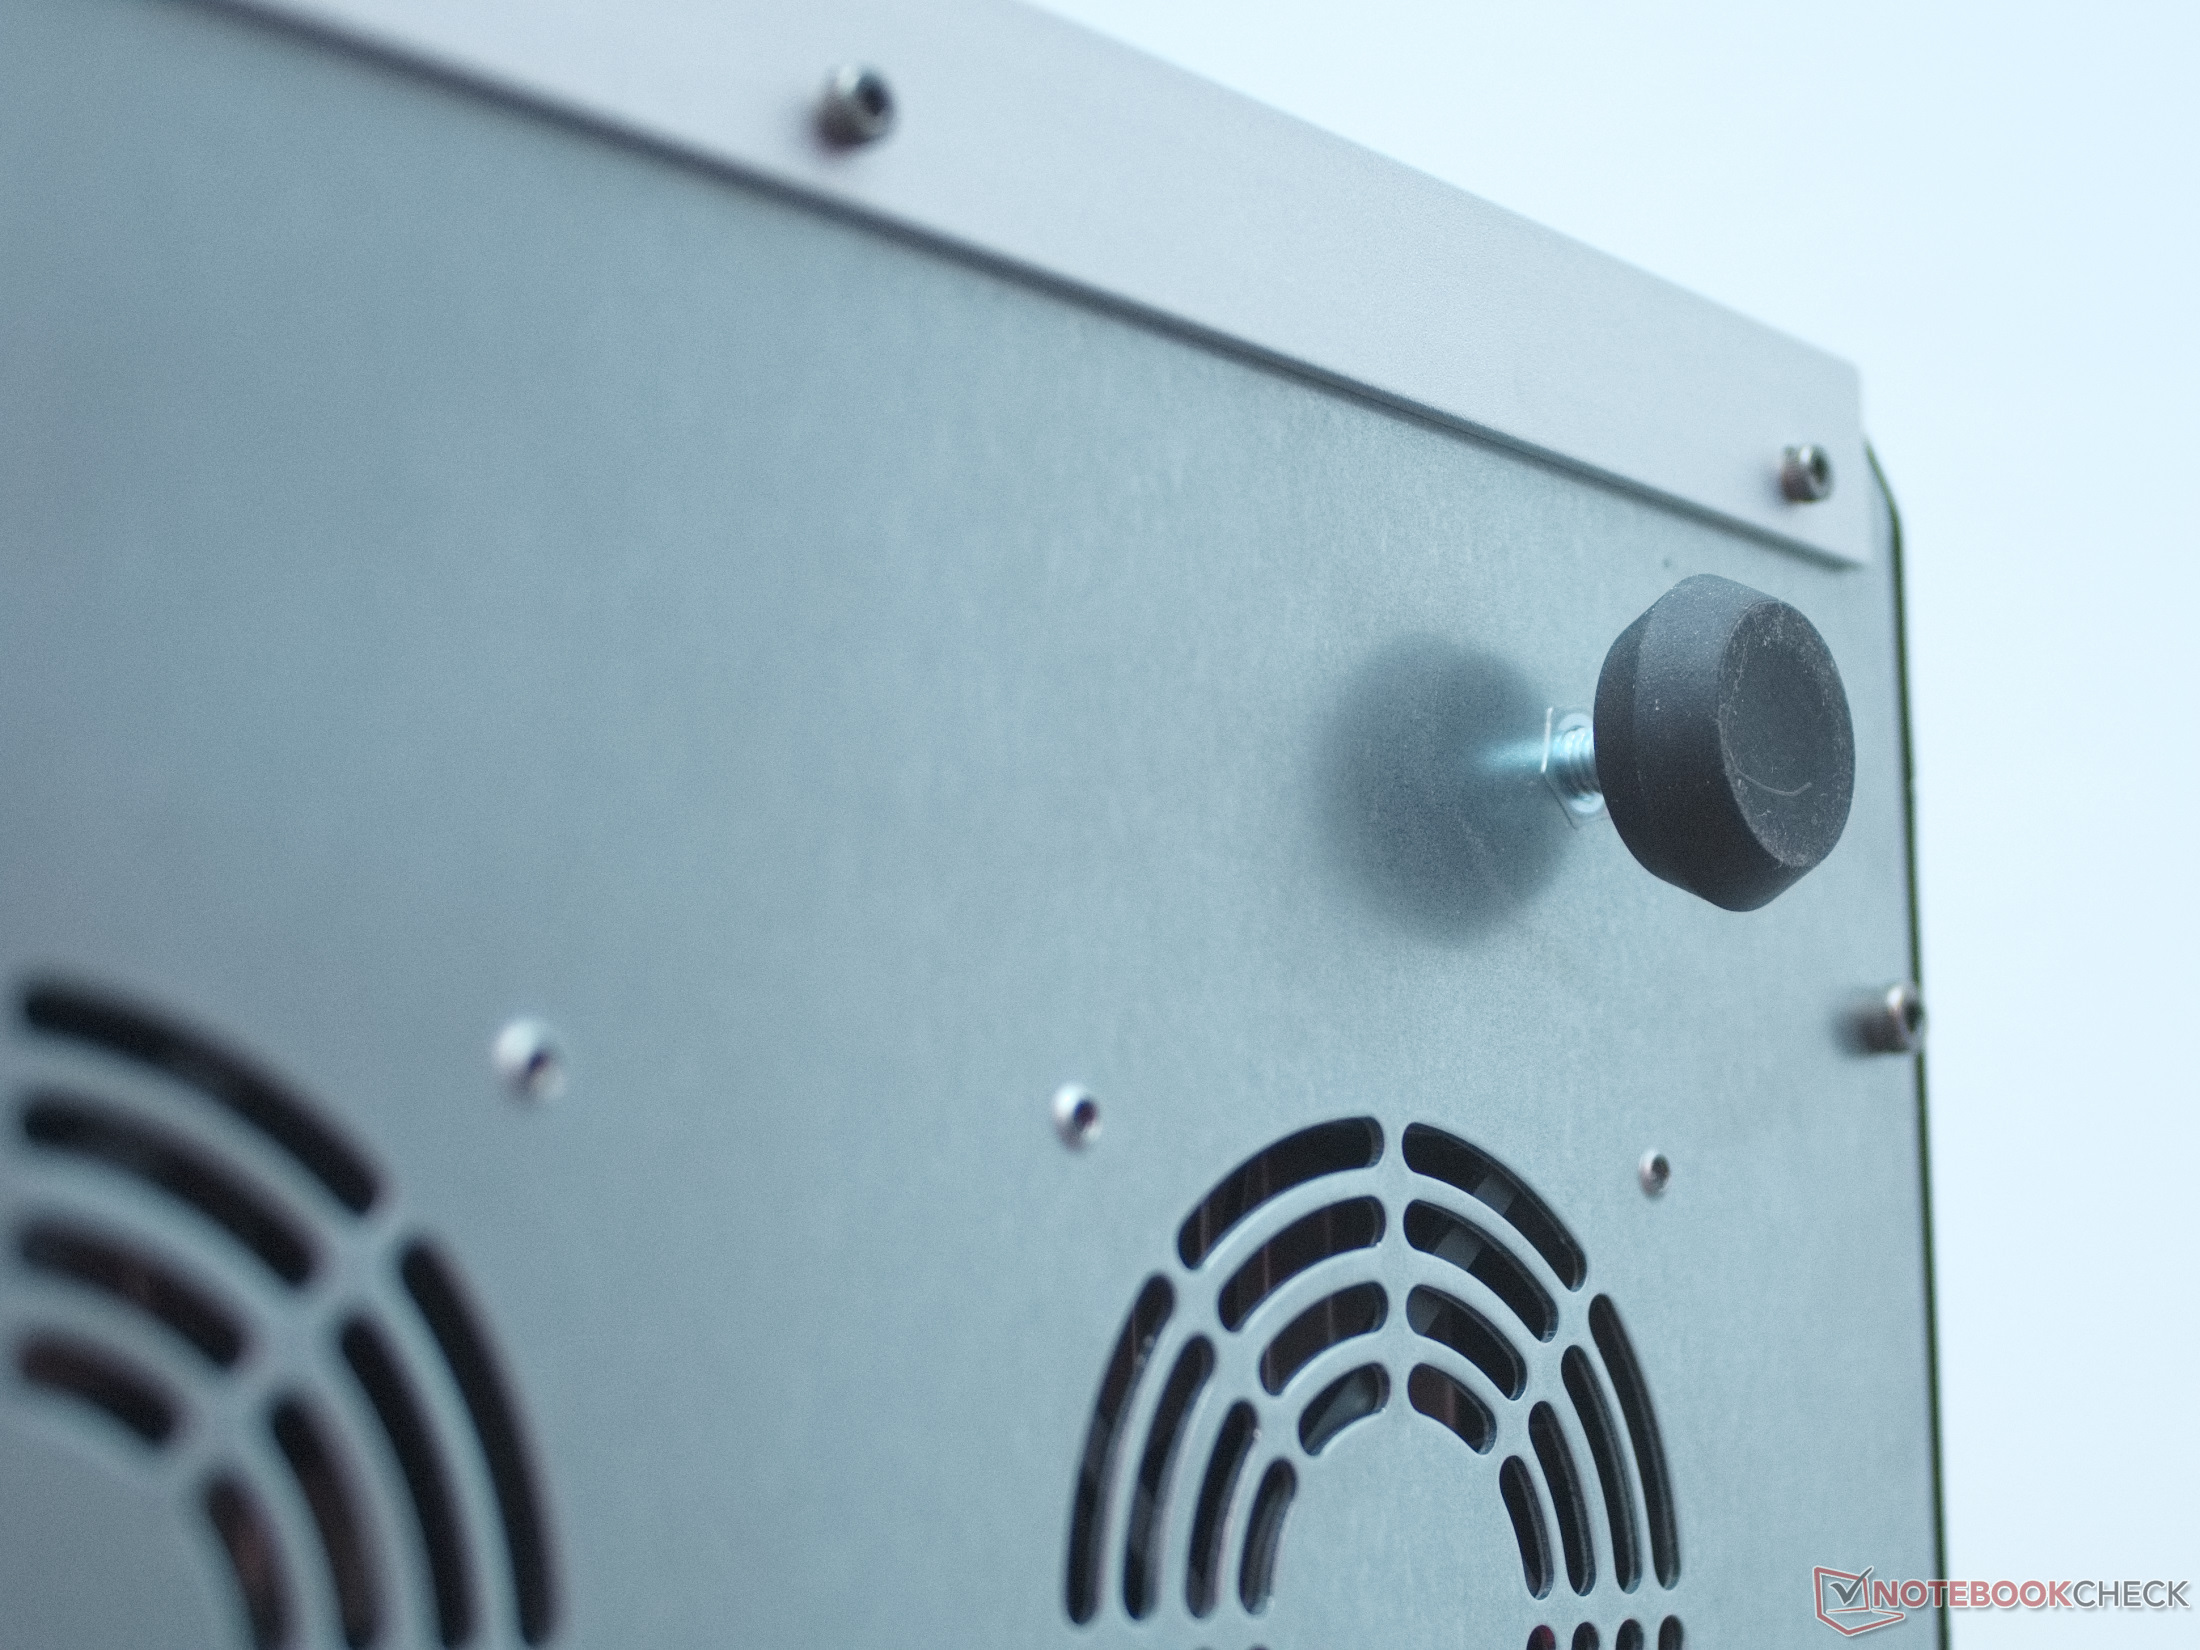
If there is enough time for the build plate and the object to drain thoroughly, gravity does most of the cleaning work. For this purpose, we designed and then printed out a small tool, with which the build plate can be suspended at a slight angle. (The corresponding STL file can be found on thingiverse.com.) After some time has passed, the object and the build plate should be mostly dry. A small amount of alcohol and one or two sheets of kitchen paper will clean of the rest.
We also created a device to get rid of the last remnants of resin in the resin vat. The resin vat drainer is attachable to the lifting mechanism and grips the resin vat upright and at a slight angle. Since gravity does most of the cleaning here as well, about 50 ml of alcohol is enough to clean the vet this way.

If the alcohol is then poured into an amber glass bottle and allowed to settle for a few days, the excess resin will deposit at the bottom. Using a UV light lamp, this can be cured of the top. The alcohol is then transparent again and ready for the next operation.
Using resources economically can also save a lot of waste when dealing with resin 3D printers. In total, we used 12 sheets of kitchen roll, four pairs of disposable gloves, two paint screens and 200 ml of alcohol during the test for 15 test prints.
Emissions: the noise level is not office-friendly
As soon as the Mono X 6K is printing, the four fans for cooling the matrix LEDs also start up, and these are relatively loud. But also, the raising and lowering of the build plate provides an additional background noise. The noise level is still bearable, but when the printer has finished its job after some time, it brings a certain relief.
Concerning odor, it depends very much on the used resin. There are resins that have barely noticeable emissions. With the light protection cover on top, an unpleasant odor is then barely noticeable at the set-up location. But even with stronger smelling resins, the hood could be sealed with adhesive tape if necessary, so that no more fumes escape out of the 3D printer. A silicone lip for sealing along the base would be a nice improvement.
Verdict: The Anycubic Photon Mono X 6K is fast and precise
Resin 3D printing has a reputation for producing beautiful results, but it also has a reputation for producing a lot of waste, being slow, and requiring a lot of work. The review gives a much more pleasant general picture than the poor reputation of mSLA printers would lead one to expect. The Anycubic Photon Mono X 6K works quickly and yet accurately. Moreover, a lot of waste can be avoided with the right workflow. The high-quality of the printed objects was convincing, and printing times reached economical values.
The Photon Workshop supplied by Anycubic works satisfactorily, even if a bit slowly. Overall, everything needed to get started is included with the Mono X 6K. Whether the printer's noise level is a deciding factor is something everyone has to decide for themselves. However, one thing is certain for us:
The Anycubic Photon Mono X 6K delivers outstanding results in a short time. It offers convincing precision and speed.
In our opinion, Anycubic's advertising promises for the Photon Mono 6K were realized.
Price and Availability
At the moment, the Anycubic Photon Mono X 6K is available for preorder in the US exclusive. The next preorder batch will start November 22nd 9:00 AM EST at 599 USD. The regular price supposed to be 659 USD.
Sources
3D models used
3D Printable Mermaid by SMK - Statens Museum for Kunst (myminifactory.com)
3D Printable Discobolus (The Discus Thrower) by SMK - Statens Museum for Kunst (myminifactory.com)
Bed of Nails (Test for even light distribution LCD / DLP / SLA Printers) by m_anas - Thingiverse
Drainers for Anycubic Photon Mono X 6K by MarcImay - Thingiverse
Low poly Gayer-Anderson Egyptian cat by Namurei - Thingiverse
SLA test model by 3DSLA - Thingiverse
Star Trek - Voyager Intrepid Class Voyager by nd4spd1919 - Thingiverse
UV resins used on Amazon:
