Anycubic Kobra 2 3D printer review: The perfect first layer thanks to LeviQ 2.0
Anycubic's Kobra series consists of several 3D printers of different sizes, all based on the Prusa/Mendel principle. Last year, we already reviewed the Anycubic Cobra and the Anycubic Kobra Max. This year, the family gets a new member with the Anycubic Kobra 2, which is supposed to do a lot better. With many small refinements, the manufacturer has managed to achieve significant improvements. The movement system has been improved in all three axes, and Anycubic has also completely revised the print head. The outdated USB port has been replaced by a modern Type-C. A new sensor helps achieve more accurate results without readjustment in automatic mesh bed leveling.
Technical data
A large part of the specifications of the Anycubic Kobra 2 were taken directly from the predecessor, so most of the changes to the device are not evident from our spec sheet. On the motherboard, a Type-C socket has replaced the USB-B socket. The X and Y axes no longer run on Delrin rollers but on ball bearings. The Z-axis is now driven on both sides and has spring bearings. The two most noticeable changes to the 3D printer are probably the new print head and the filament roll holder adopted from the Anycubic Kobra Max. Unfortunately, the latter also drastically increases the 3D printer's space requirements. A whole 30 cm more width has to be planned for the new Kobra 2 in operation.
| Anycubic Cobra 2 | |
|---|---|
| Technology used | FDM, FFF |
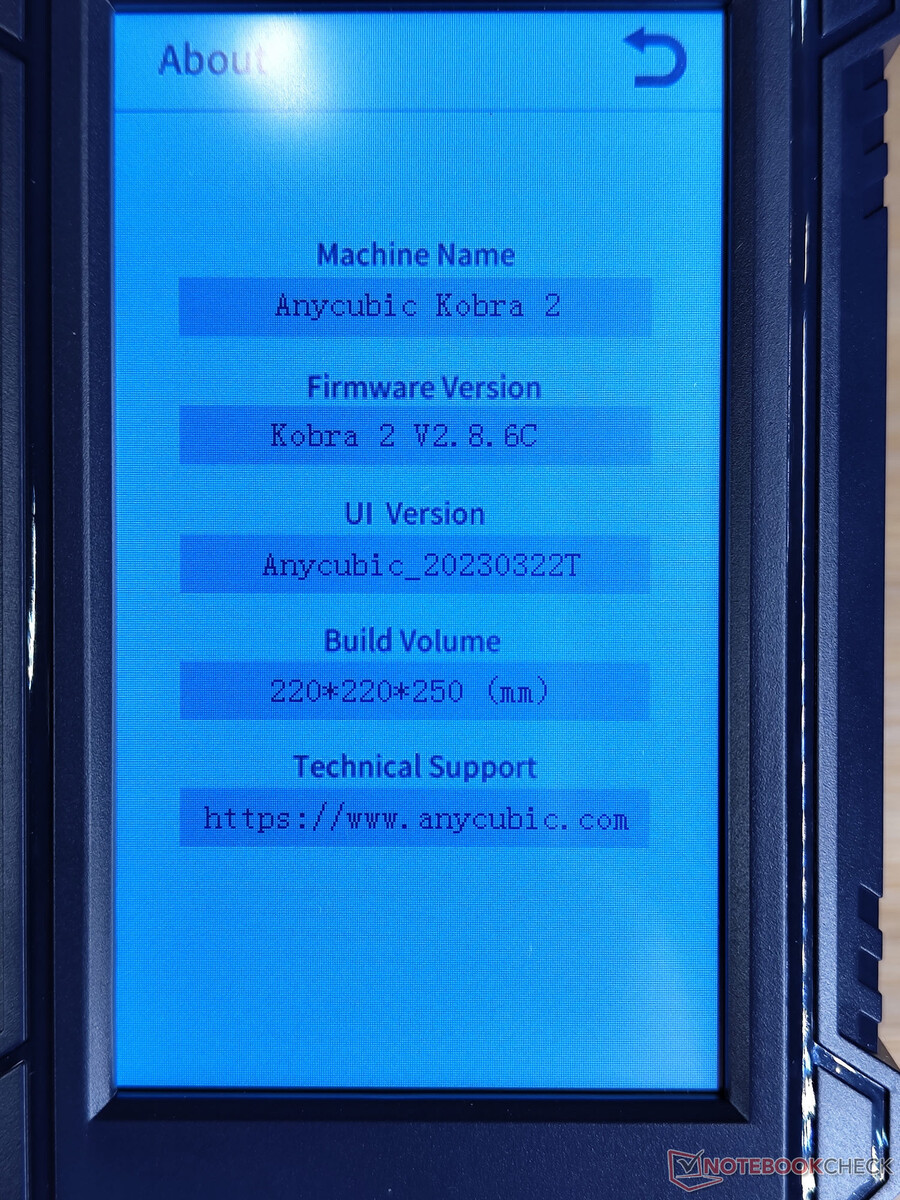
| Maximum print volume | 220 × 220 × 250 mm |
| Unit size without cable and filament roll | 48.6 × 43.5 × 44 cm (H × D × W) |
| Footprint with filament roll holder in operation | minimum 64 × 55 cm |
| Motion system | X,Y,Z-single drive according to Prusa/Mendel |
| Extruder | Direct-drive extruder with Volcano-style hotend 60-watt heating cartridge maximum 260 °C |
| Print bed | magnetic spring steel print bed with PEI coating heated with 24 V power supply maximum 110 °C |
| Automatic bed leveling | Anycubic LeviQ 2.0 with inductive proximity sensor and nozzle sensor |
| Control board Microcontroller |
Trigorilla Pro B V1.0.2 Board HDSC hc32f460 |
| Firmware of the test device | Anycubic Kobra 2 V2.8.6C Firmware (Marlin derivatives) GCode compatible |
| Stepper motor driver | soldered stepper motor driver with 256-step interpolation |
| Connectors | microSD, USB Type-C |
| Control | Touch screen, serial interface via USB |
| Power supply | internal 110 V - 240 V to 24 V power supply unit |
| Manufacturer website | Anycubic |
Construction and cable management
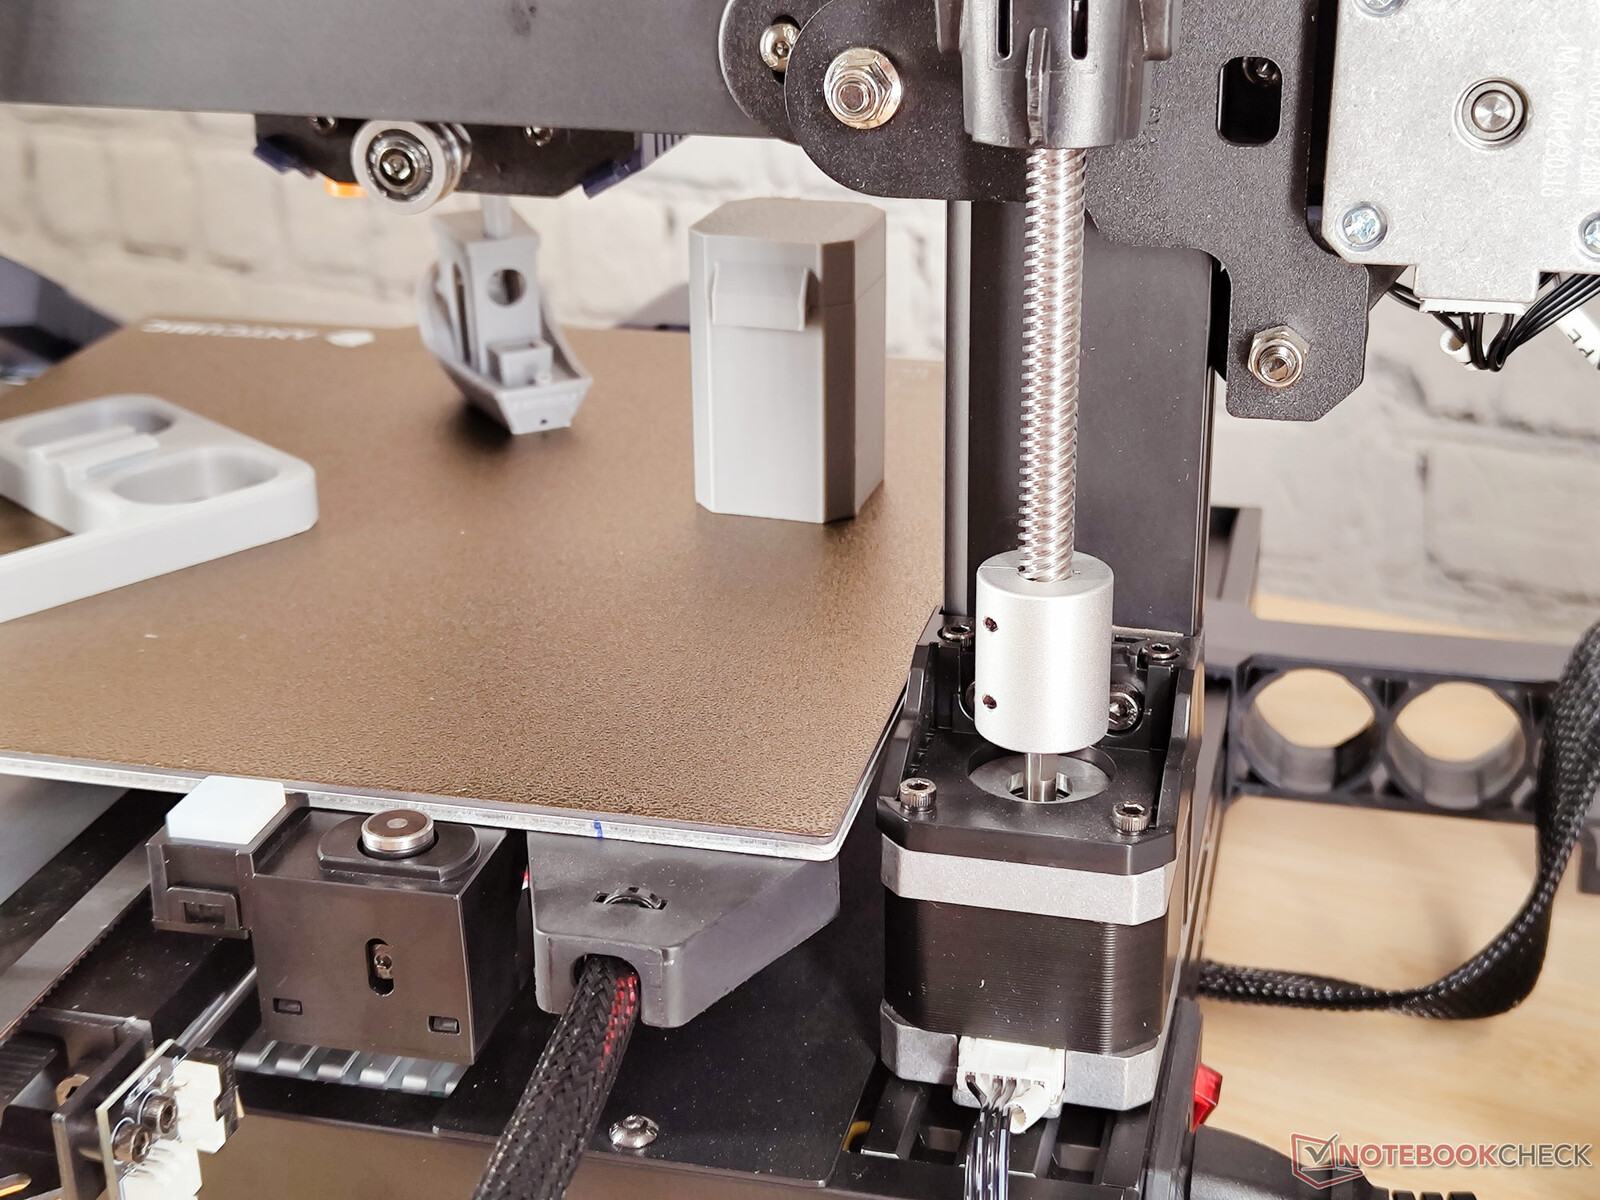
The base and the archway of the 3D printer are still made of V-slot aluminum profiles. The upper crossbar is also still made of plastic. The component was apparently taken over directly from the Cobra. The mounting nuts for the old roll holder are still present here. In addition to the significantly changed print head, we noticed the first major innovation on the back of the print bed when we unpacked it. There is now a sensor here that can be used to precisely determine the nozzle distance. Recalibration during automatic mesh bed leveling is thus almost a thing of the past. The new silver steel axles on which the print head and print bed run with corresponding SG15 ball bearings also quickly catch the eye. This change is a double-edged sword. On the one hand, the new design is much more abrasion-resistant and should run more smoothly. On the other hand, however, the silver steel axles must be cleaned much more often and should always be well lubricated. For this purpose, an appropriate fine-mechanical oil is recommended. Delrin V-rollers are still used for the Z-axis. However, it is now driven on both sides and comes with the same mechanics as the Kobra Max. The T8 nuts are spring-loaded here and can thus compensate for manufacturing inaccuracies.


The design of the 3D printer thus remains stable and mostly angular. One exception in our case was the mounting bracket of the Nema 17 stepper motor on the back of the 3D printer. This was slightly bent in our test device. As a result, the drive belt of the Y-axis could not be tensioned properly and kept slipping against the limit of the drive wheel. The fault, which could also be a small transport damage, could be fixed. To do this, we completely relaxed the belt and then bent the angles back to 90°.
Unfortunately, nothing significant has changed in Cobra's cable management either. However, the new filament roll holder now makes the situation worse. No matter how you mount it, the cable harness to the extruder always drags on the filament, on the filament roll, or directly on the holder. All in all, the two moving cable harnesses come into contact with fixed components too often here.
Mainboard


The Trigroilla Pro board can be seen here in version B. It is a proprietary development by Anycubic and unfortunately only offers a few upgrade options due to many proprietary connections.
The actual innovation here is a USB-C connection.
An HDSC hc32f460 is used as the microcontroller on the board. The 32-bit chip with a Cortex M4 core runs at 200 MHz. Thus, Anycubic Kobra 2 has sufficient computing power.
Disappointingly, we have to note that Anycubic still does not equip all cable ends with cable lugs. Two of the strands are still tinned. Over time, the solder can flow and thus weaken the electrical connection.
Structure and setup
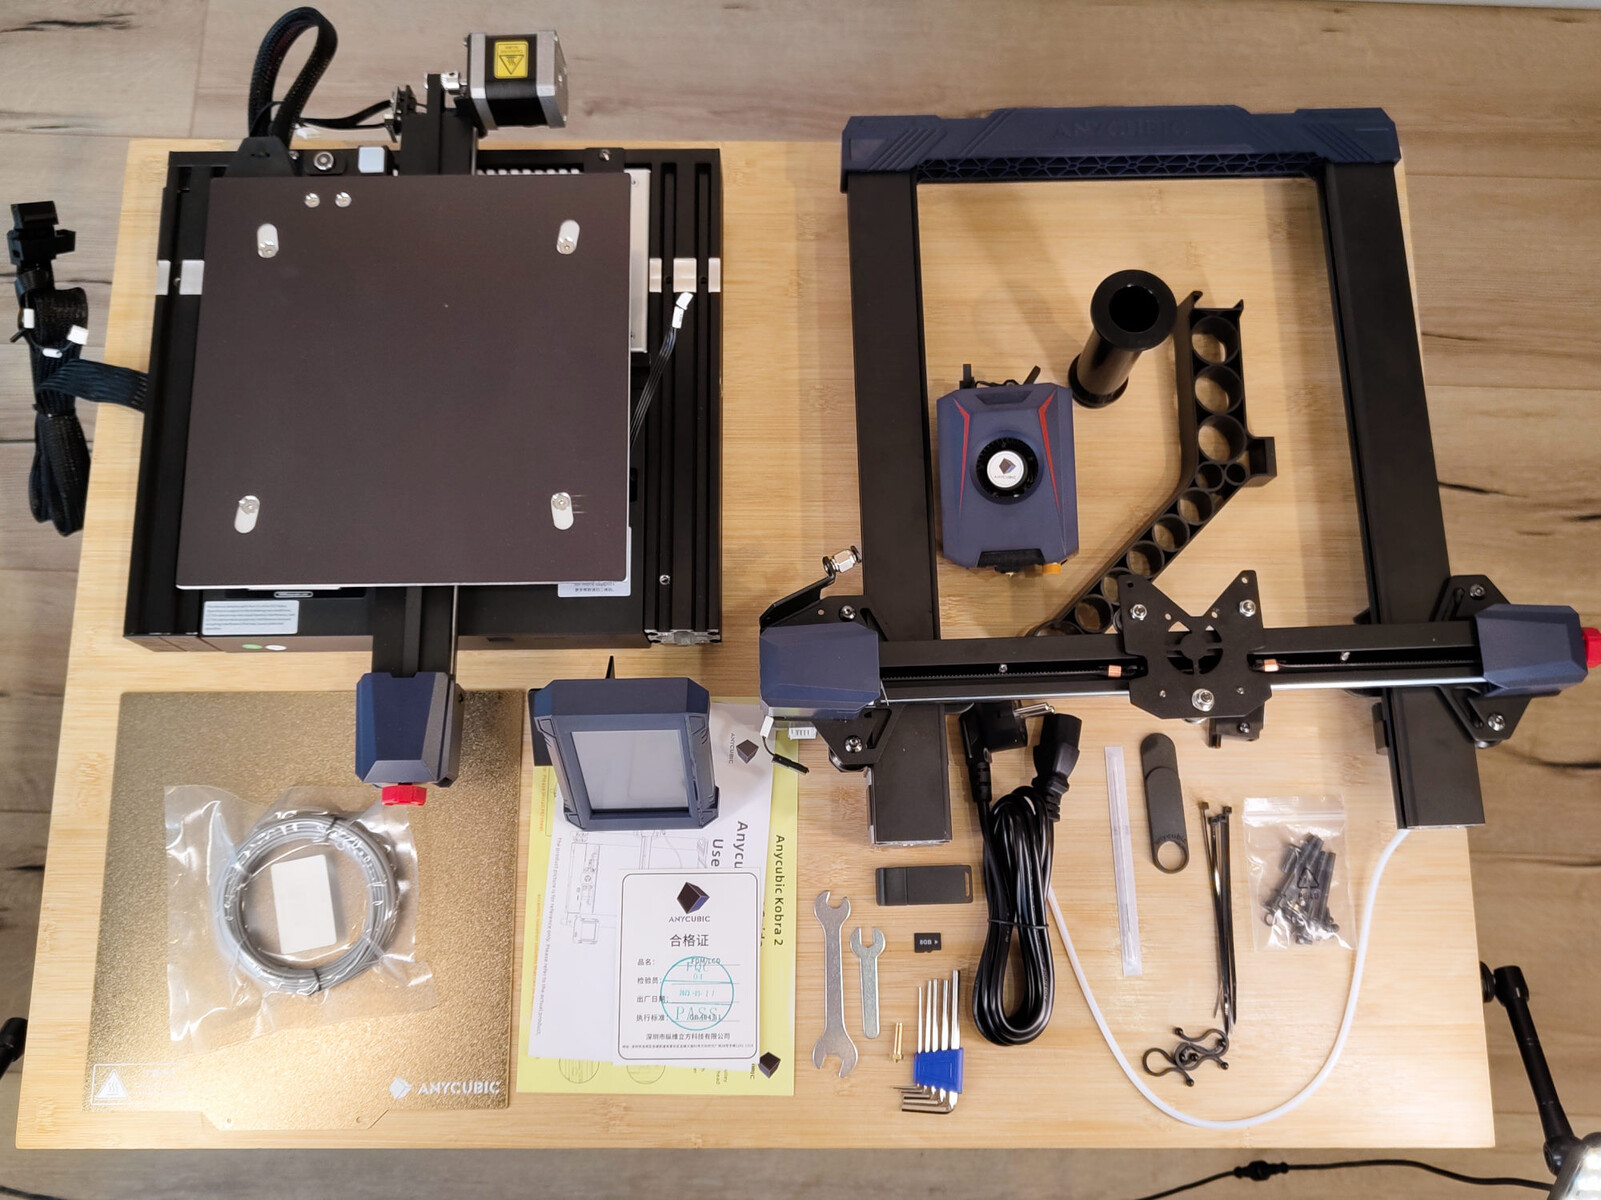


For shipping, the 3D printer is disassembled into four assemblies. The full assembly is not very difficult: a total of eleven screws have to be screwed in. The necessary Allen keys and other tools are provided by Anycubic. Lastly, using the AnchorMake M5, we saw how easy the assembly of a 3D printer can be when the manufacturer provides the packaging as an assembly aid. That is not the case with Anycubic. Here, especially the mounting of the archway is a bit tricky. The long screws must somehow be screwed in from below. To do this, the base can be tilted or placed over the edge of the table. Another difficulty is that on the left side of the printer, a cable harness partially covers the hole for a screw. Once the sheet is mounted, the screen and print head are attached to the appropriate locations. All cables are labeled, so assigning them to the appropriate sockets is not difficult. The complete assembly took us about 20 minutes.
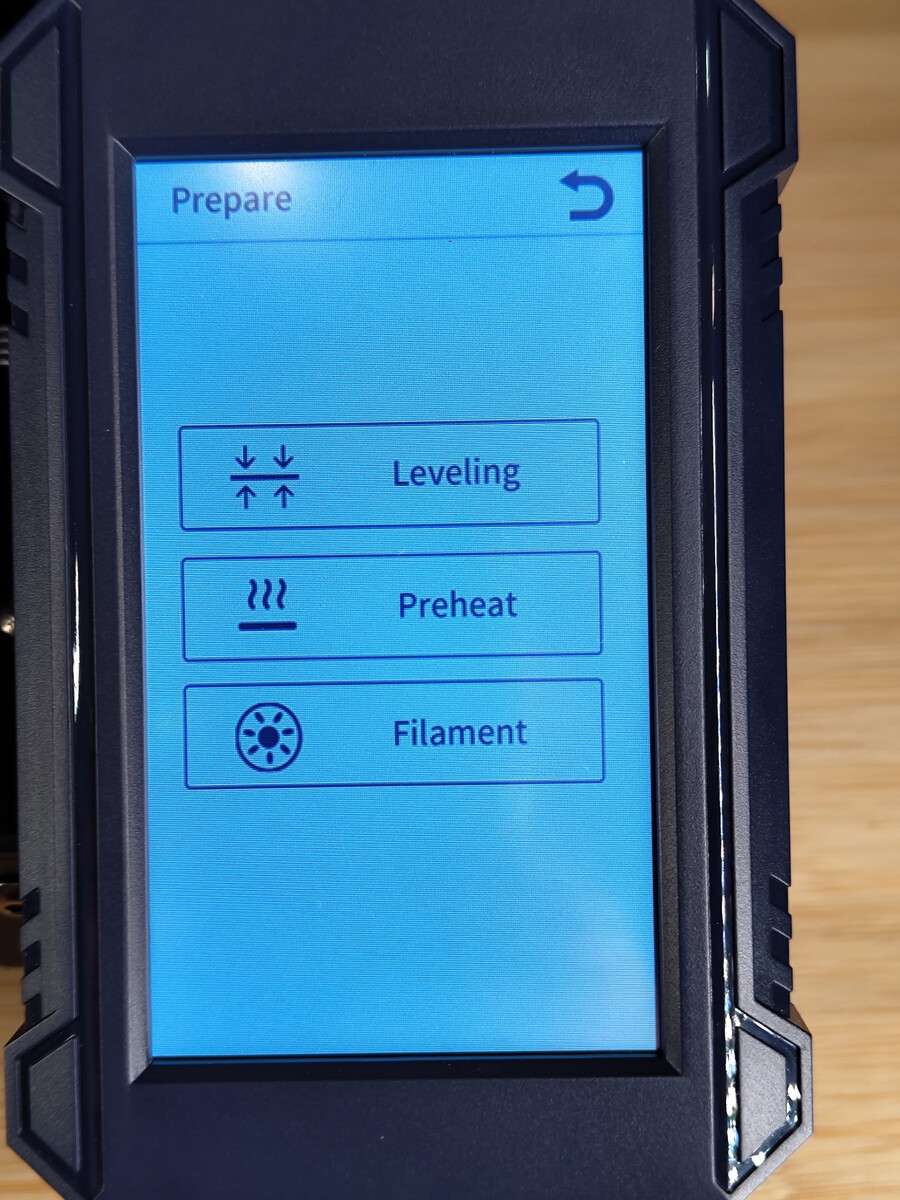
After assembly, the Anycubic Kobra 2 can be put into operation immediately. There are already four print-ready files on the SD card. There is also a copy of Prusa Slicer 2.5 and a corresponding configuration file on the SD card. Before the first print, however, the bed-leveling program should be run. Using an induction sensor and nozzle sensor, the Kobra 2 determines the distance between the nozzle and the print bed over the entire surface completely independently. Manual adjustment of the 220 x 220 mm print area is neither necessary nor possible.
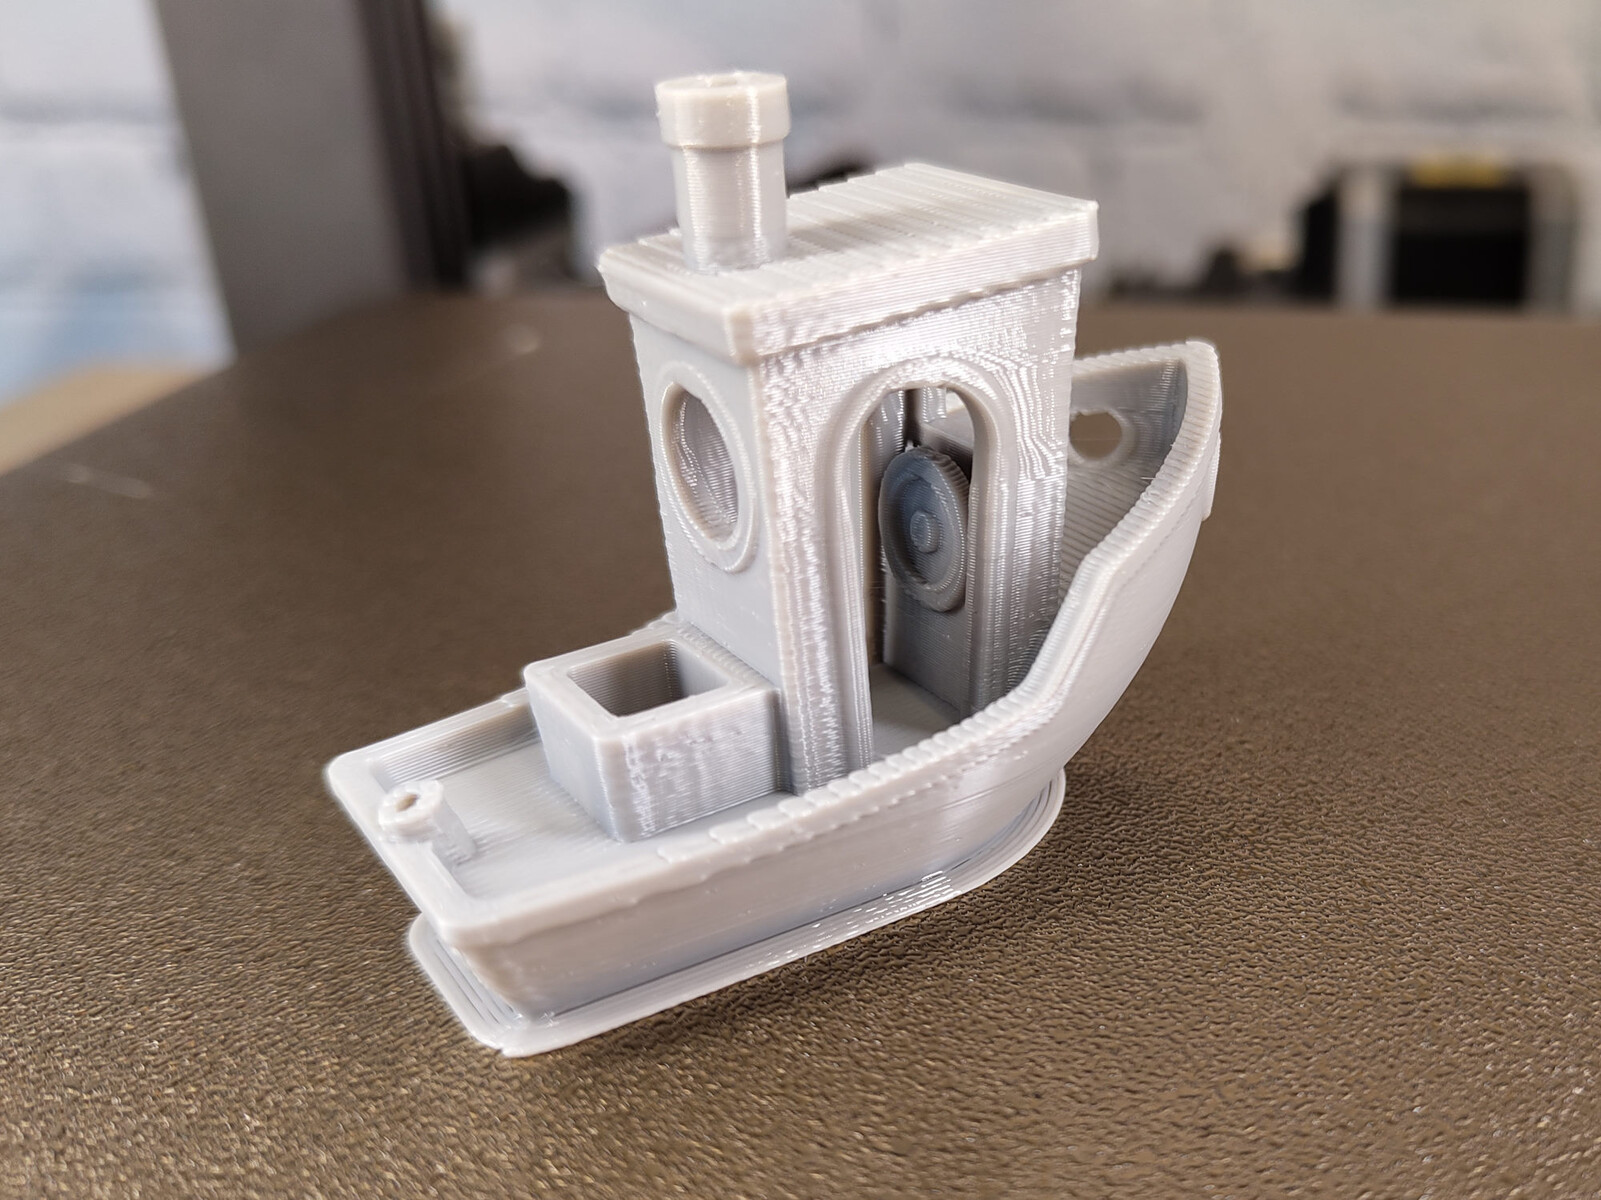
We decided to first print a classic 3D-benchy directly from the supplied files. The bottom of the finished object here shows that the auto-leveling results were not quite perfect. Before the next print, we reduced the nozzle distance by 0.05 mm in Kobra 2's menu.
Control
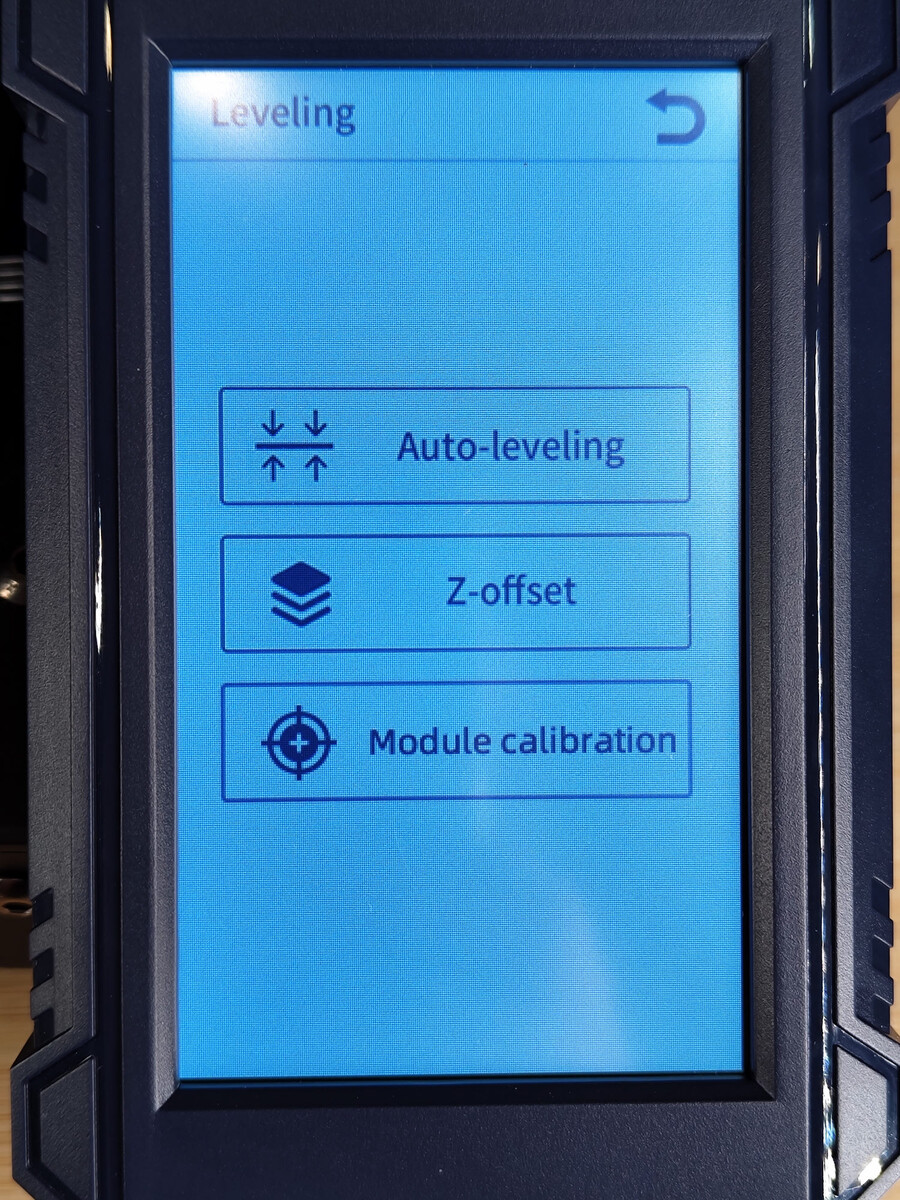
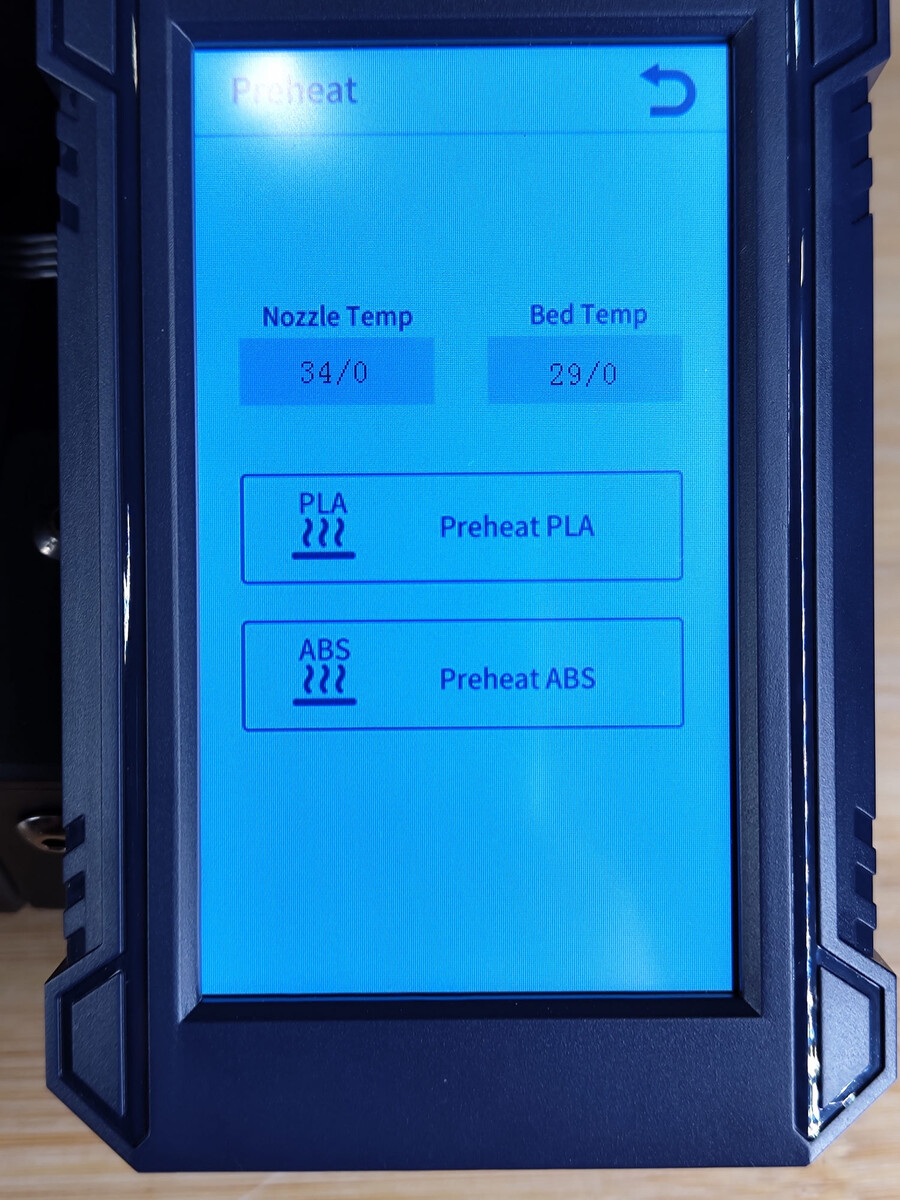
Like most 3D printers from Anycubic, the Kobra 2 is controlled via a touchscreen. The user interface is English on delivery and can be switched to Chinese. The 3D printer does not support other languages. Four clearly structured submenus can be accessed from the start screen. Saved GCodes, temperature, print speed, fan control, and mesh bed leveling are accessible from the start screen. If you want more information or control options, you can't get around programs like Pronterface and the serial connection via USB.

In order to convert a 3D file into the GCode that the 3D printer understands, a corresponding program is necessary. Until now, Anycubic delivered the slicer Ultimaker Cura with corresponding configuration files. However, the SD card of the Kobra 2 contains an installation file for Prusa Slicer together with a configuration file. Those who are not comfortable with the program will probably have to create their own configuration file for Cura. However, Prusa Slicer is in no way inferior to Ultimaker Cura and can also boast the same Arachne Slice Engine. Why Anycubic did not enable it by default in the configuration file is beyond us, as Arachne provides much better print quality and shorter print times. Anycubic also specifies the speeds rather conservatively, considering that the manufacturer advertises a printing speed of up to 250 mm/s for the 3D printer.
Performance
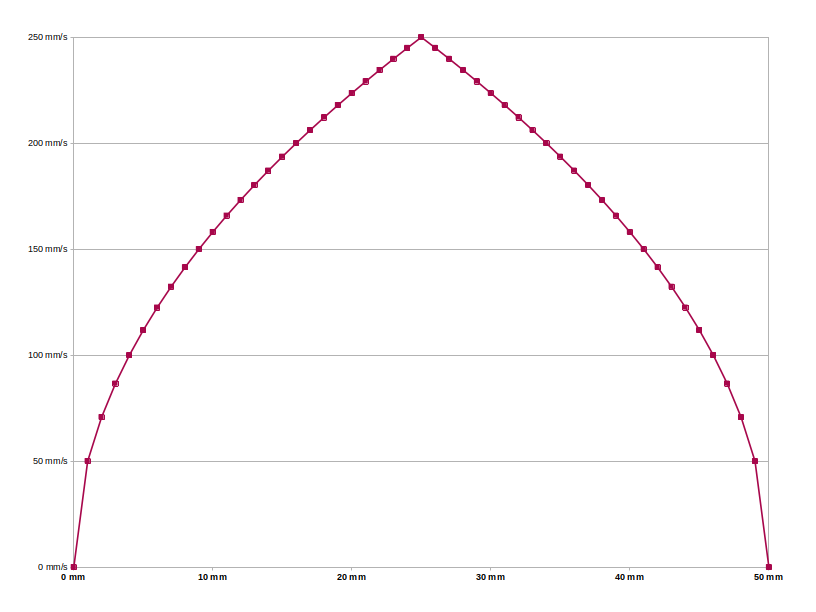
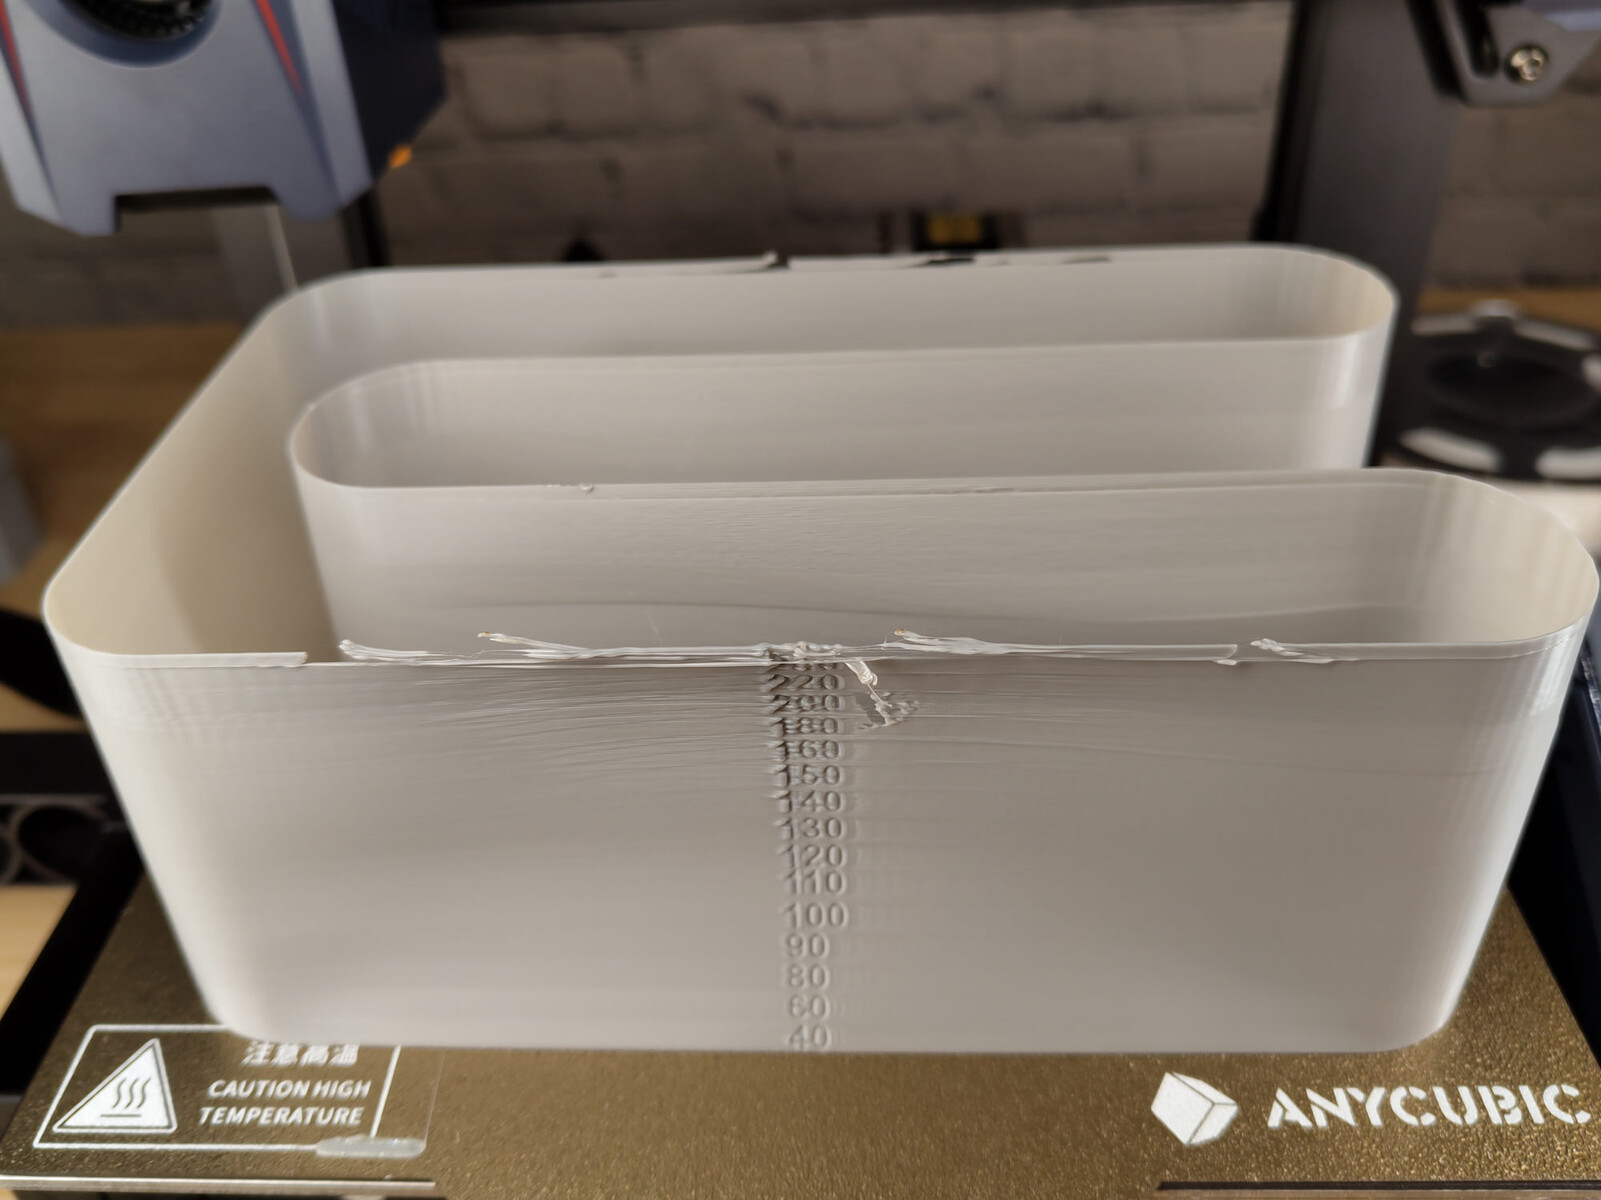
Anycubic raises high expectations with the advertising promise of 250 mm/s. In the practical test, 150 mm/s seems more realistic. While the powerful combination of the extruder and hotend can convey enough plastic to achieve even more than 250 mm/s, it is the motion system that limits the speed here. Even at Anycubic's recommended 150 mm/s, the print results show clear signs of too high a speed. In addition, the settings of the Cobra 2 actually provide for relatively low accelerations of 2,500 mm/s. To achieve 250 mm/s at this acceleration value, there would have to be straight lines at least 50 mm long. Nevertheless, the 3D printer produces objects of more than acceptable quality.
Print Bed

The print bed of the Anycubic Kobra 2 also consists of a multilayer structure. The base here is an aluminum plate that is approximally 2 mm thick. This is heated from the underside. On the upper side a magnetic foil is glued almost over the entire surface. The magnetic printing plate made of PEI-coated spring steel is applied to this. The PEI coating is heavily roughened and ensures good adhesion. However, the prerequisite is that the surface is clean and free of grease and has been heated above the glass transition temperature of the filament. Since PEI is very resistant to chemicals, caustic soda, acetone, or alcohol can also be used for cleaning.
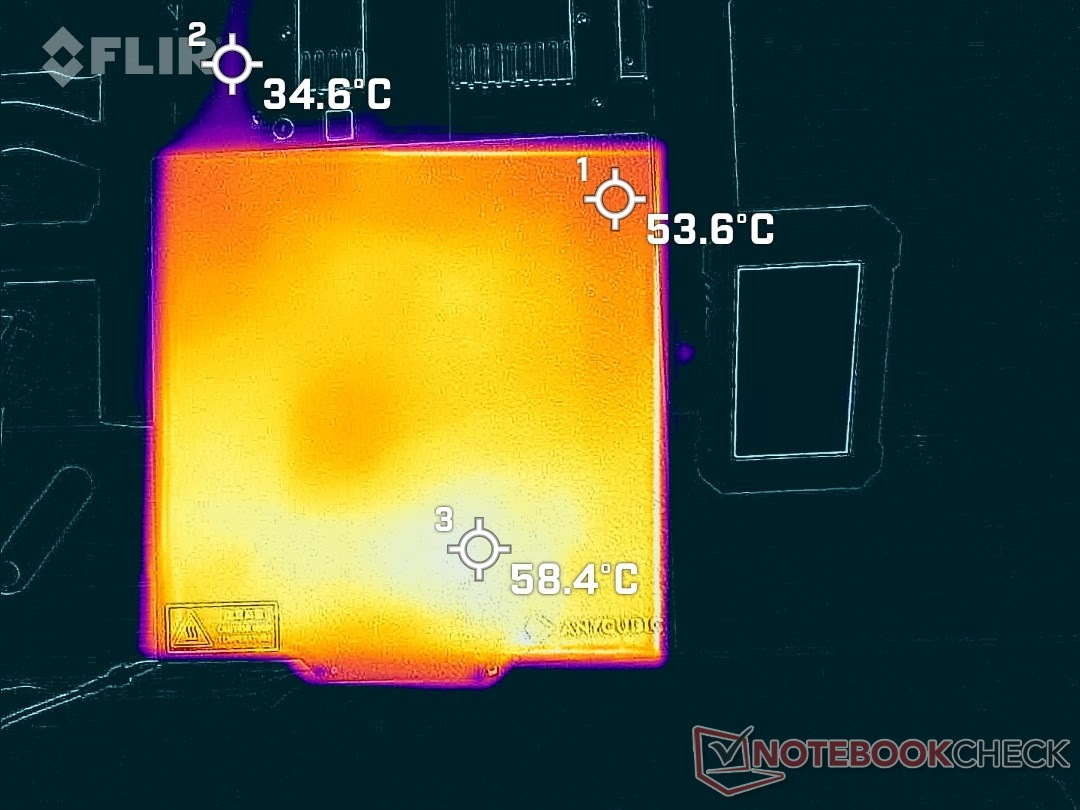
The print bed is not insulated on the underside. This can be retrofitted with little effort; without insulation, the 3D printer consumes more power, and the print bed exhibits more temperature differences. The thermal image shows temperatures between 53.6 °C and 58.4 °C at a target temperature of 60 °C on the test device. At a room temperature of 22.6 °C, the cable harness to the print bed heats up to 34.6 °C. The low heating is evidence of a well-chosen cable cross-section to the print bed. The cable has to transmit up to 400 watts. The operating temperature of 60 °C for printing PLA is thus reached within about 100 seconds. At most, the print bed can be heated up to 110 °C. This takes more than 5 minutes.
LeviQ 2.0 Automatic Mesh Bed Leveling
In the practice of 3D printing, a good first layer often determines the success or failure of a 3D print more than anything else. With LeviQ 2.0, the Anycubic Kobra 2 takes another step away from the user to set up the 3D printer optimally. As we found in testing, this process also needs to be set up by the user first, however, it is only a single step that ensures a perfect result here. After setting up the 3D printer, it is important to set the position of the sensor correctly in the firmware. If the filament nozzle hits the sensor exactly in the middle, the results of LeviQ 2.0 will be almost perfect. We did not pay attention to this at the beginning, which meant that the nozzle distance to the print bed was too large in the first 3DBenchy and too small in the Notebookcheck FDM test. Only towards the end of the test period did we become aware of this error.
LeviQ 2.0 measures the print bed with an inductive proximity sensor at 25 points. The nozzle is then heated up on the extruder, cleaned on the silicone pad, and also measured. The end user only has to start the process via the menu on the touchscreen, and the Anycubic Kobra 2 does the rest on its own. The process takes about five minutes.
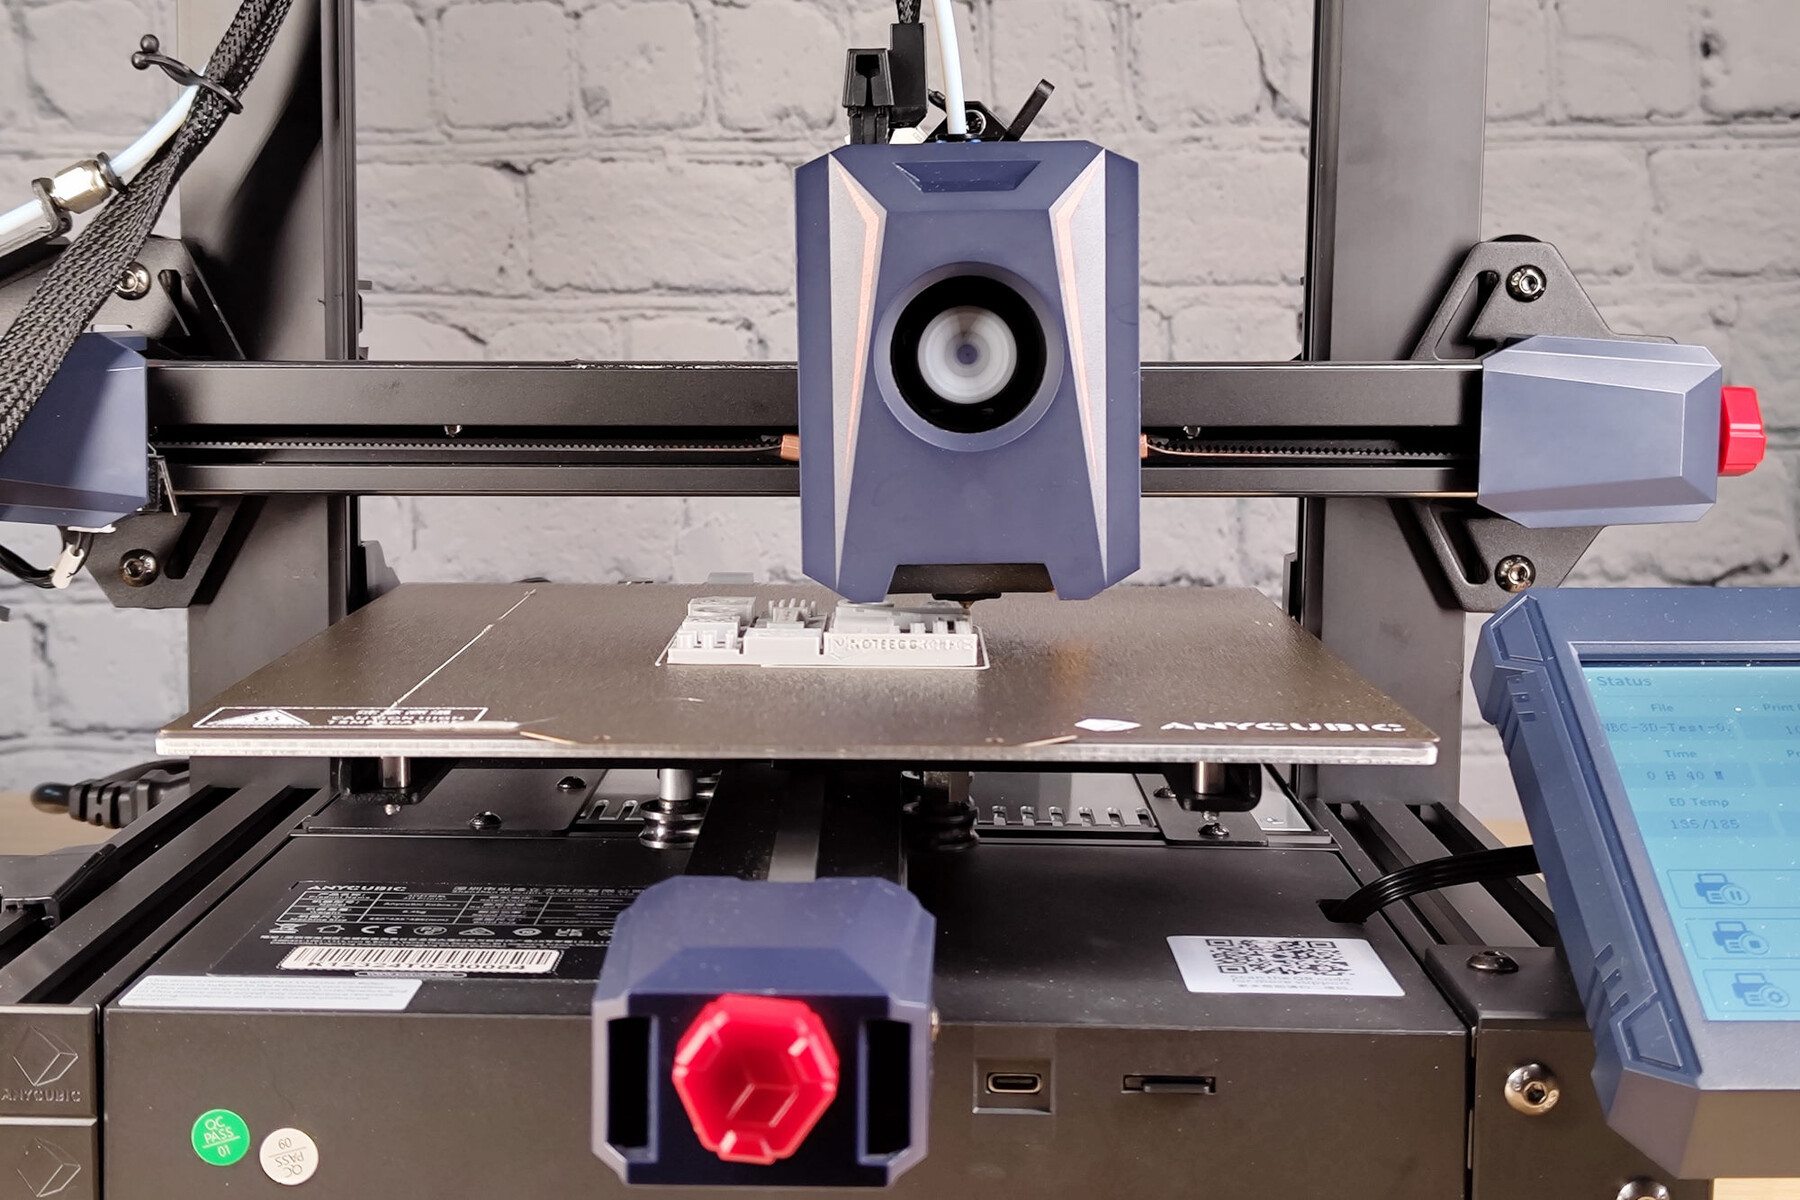
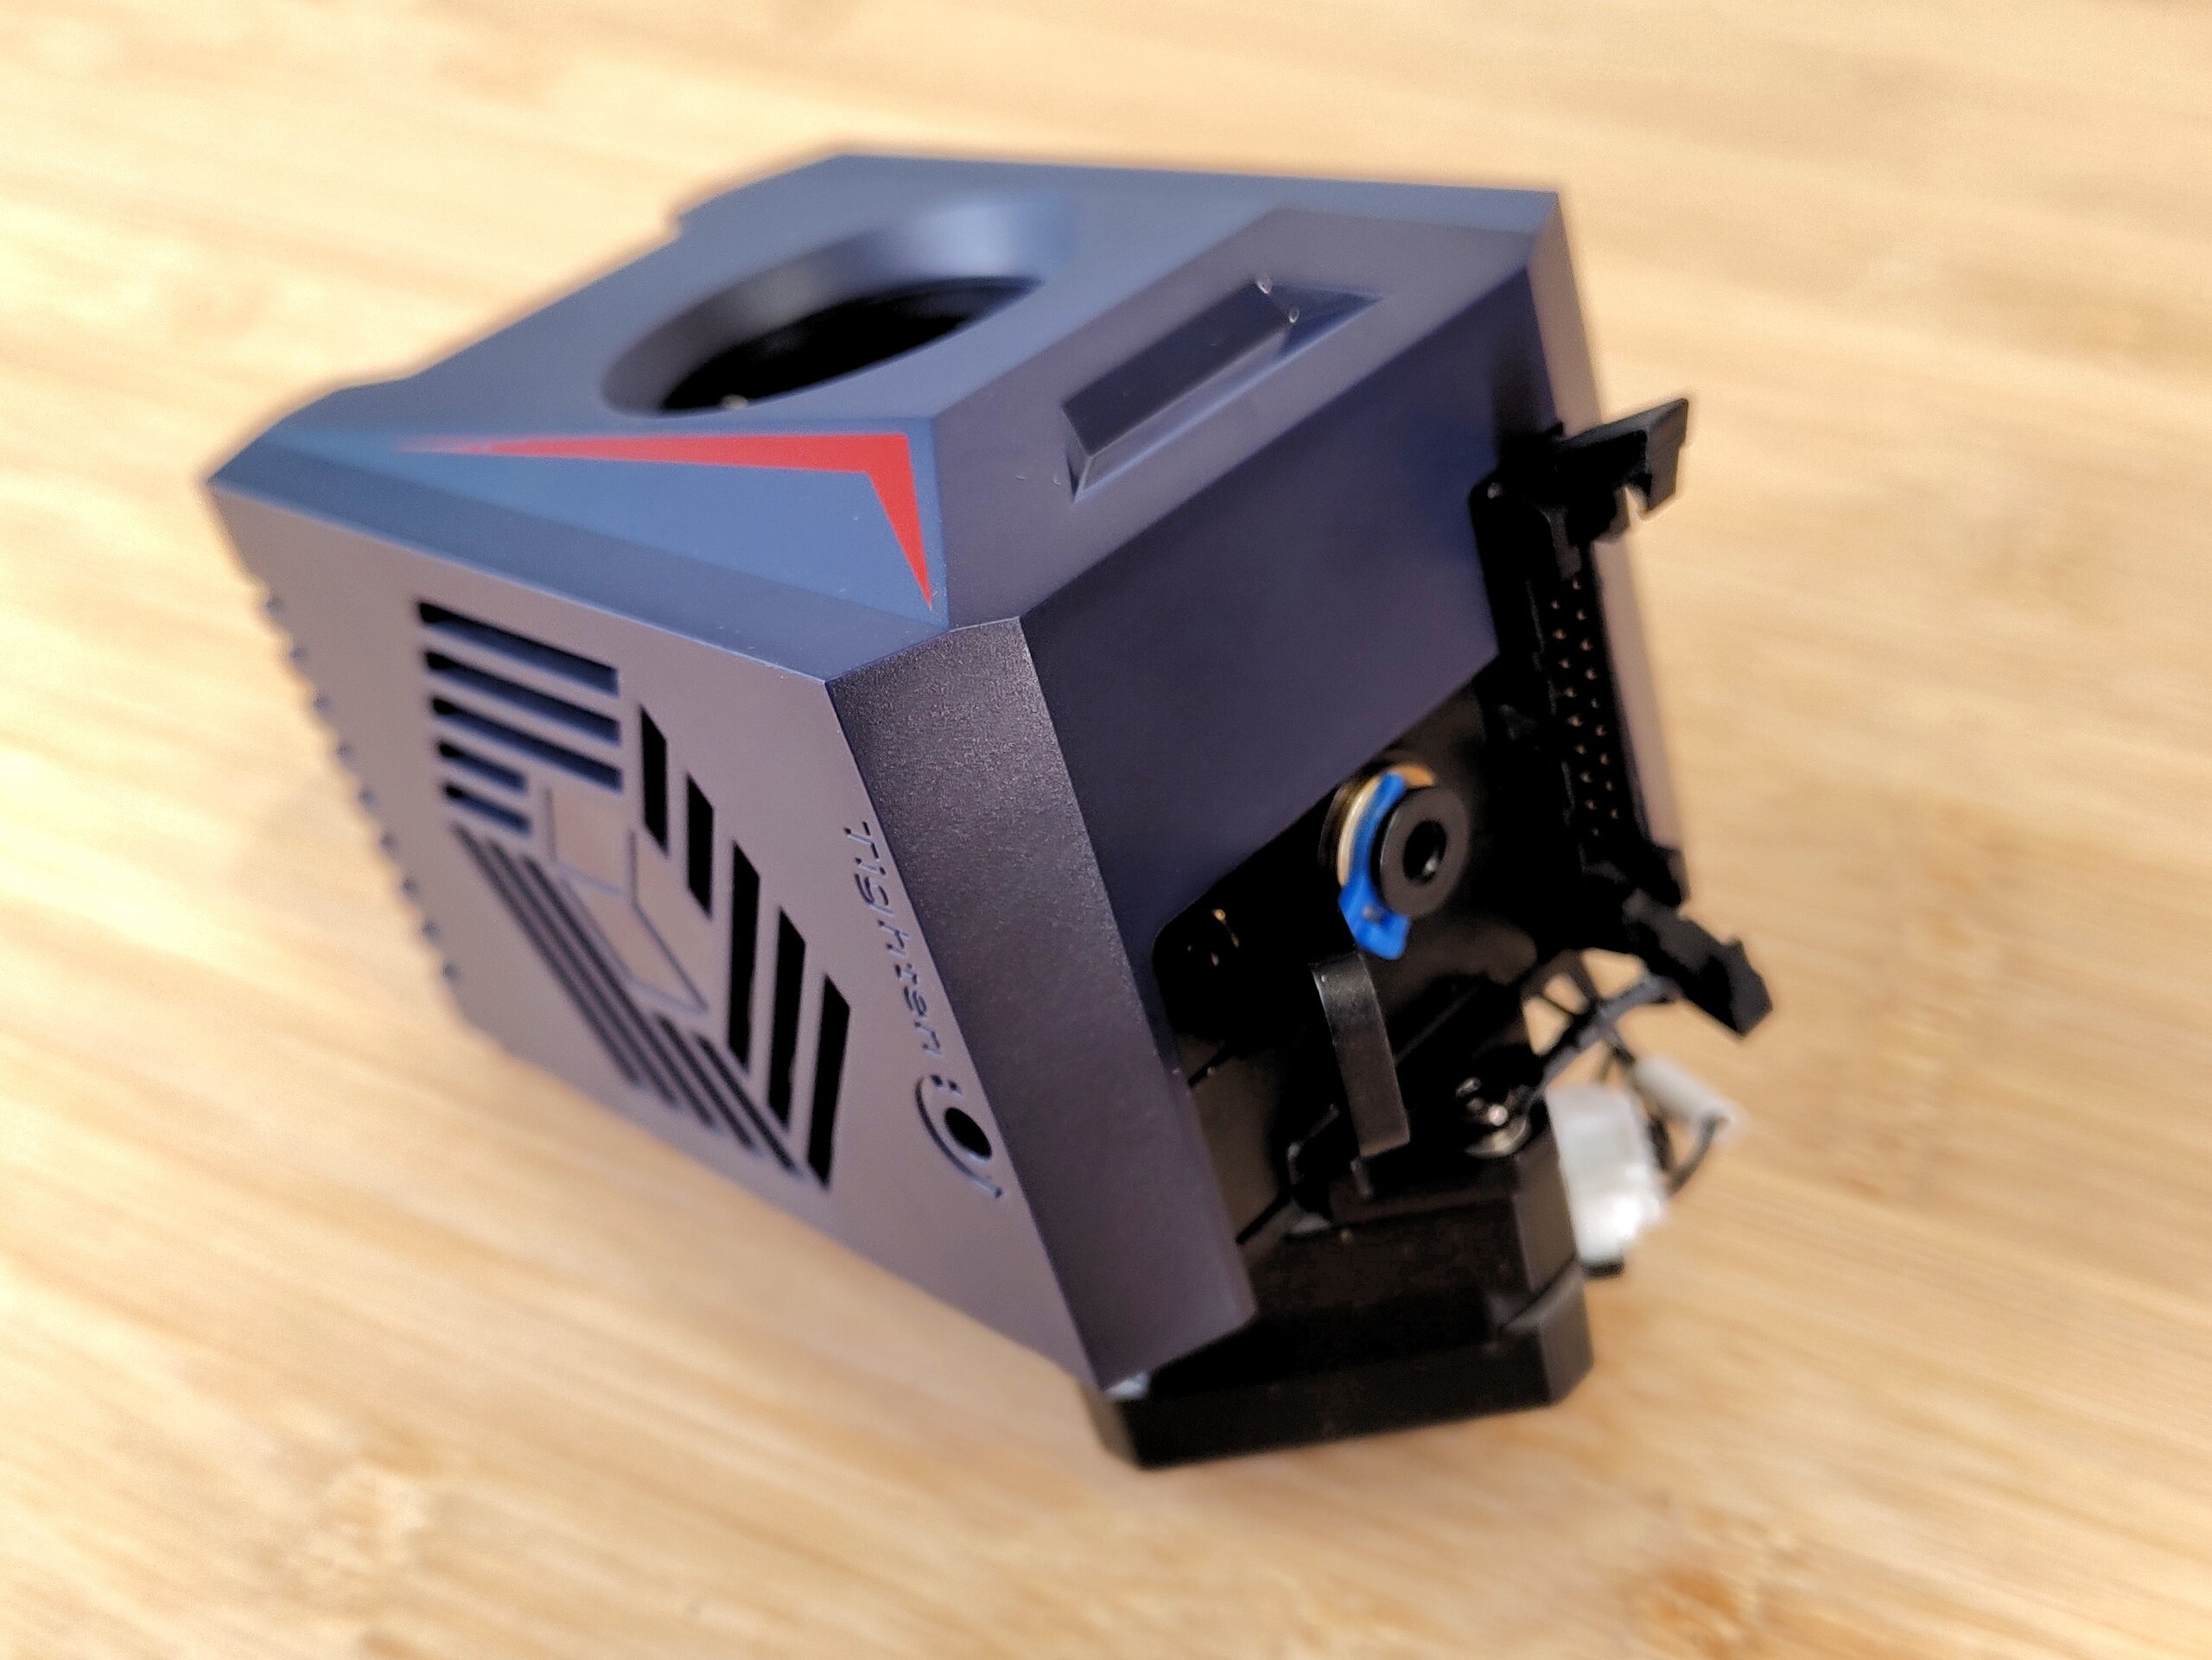
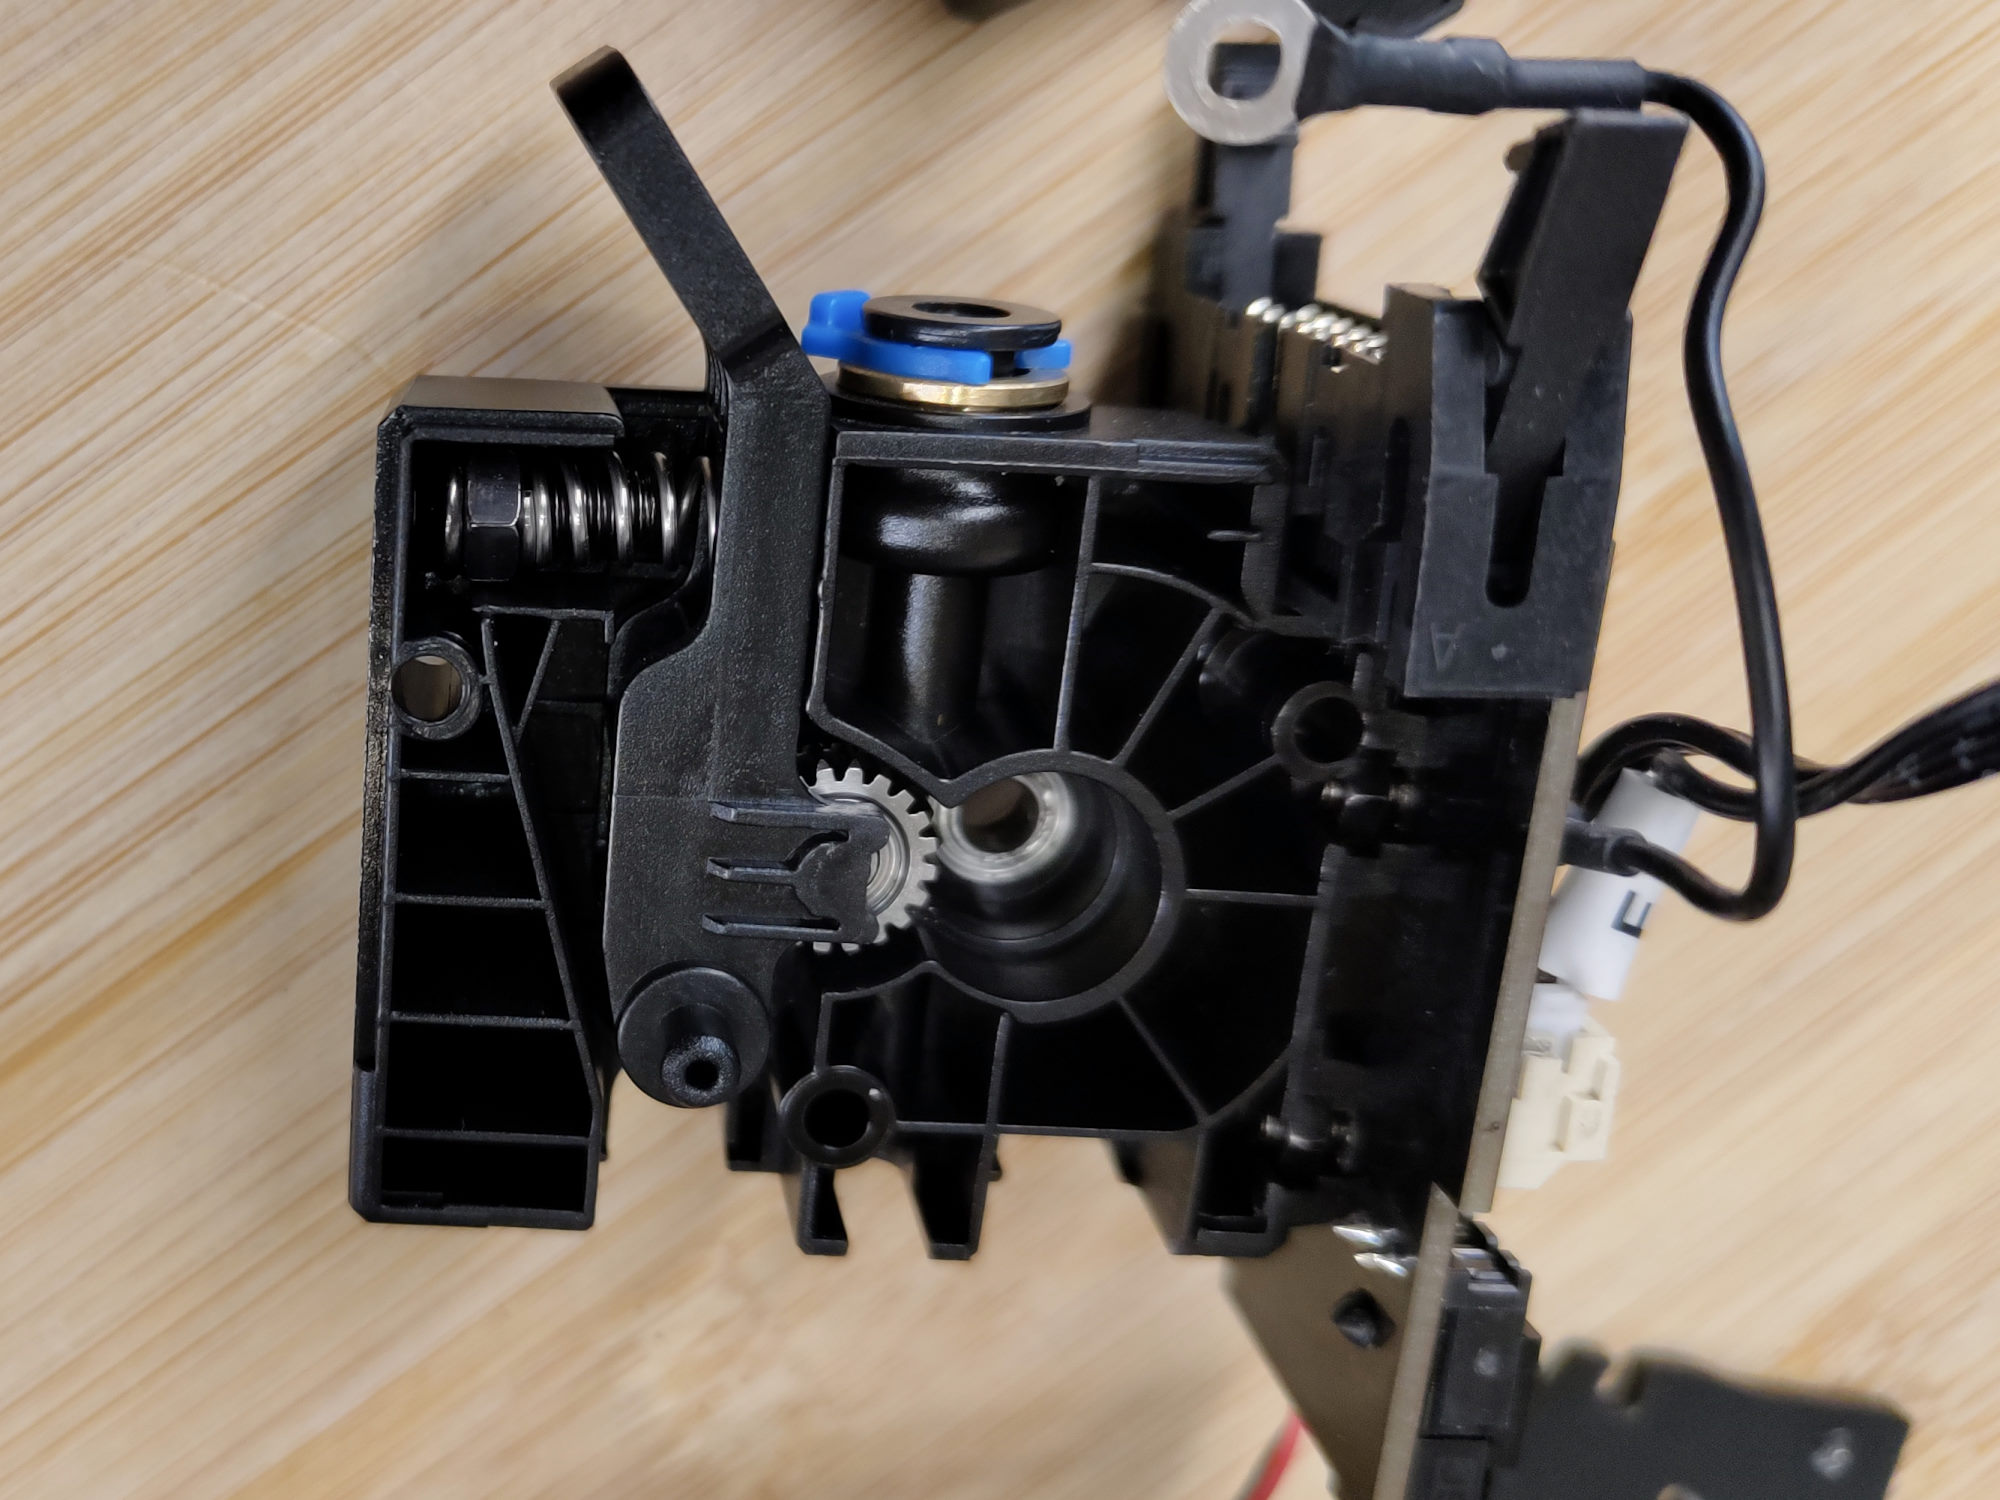
Hotend and extruder
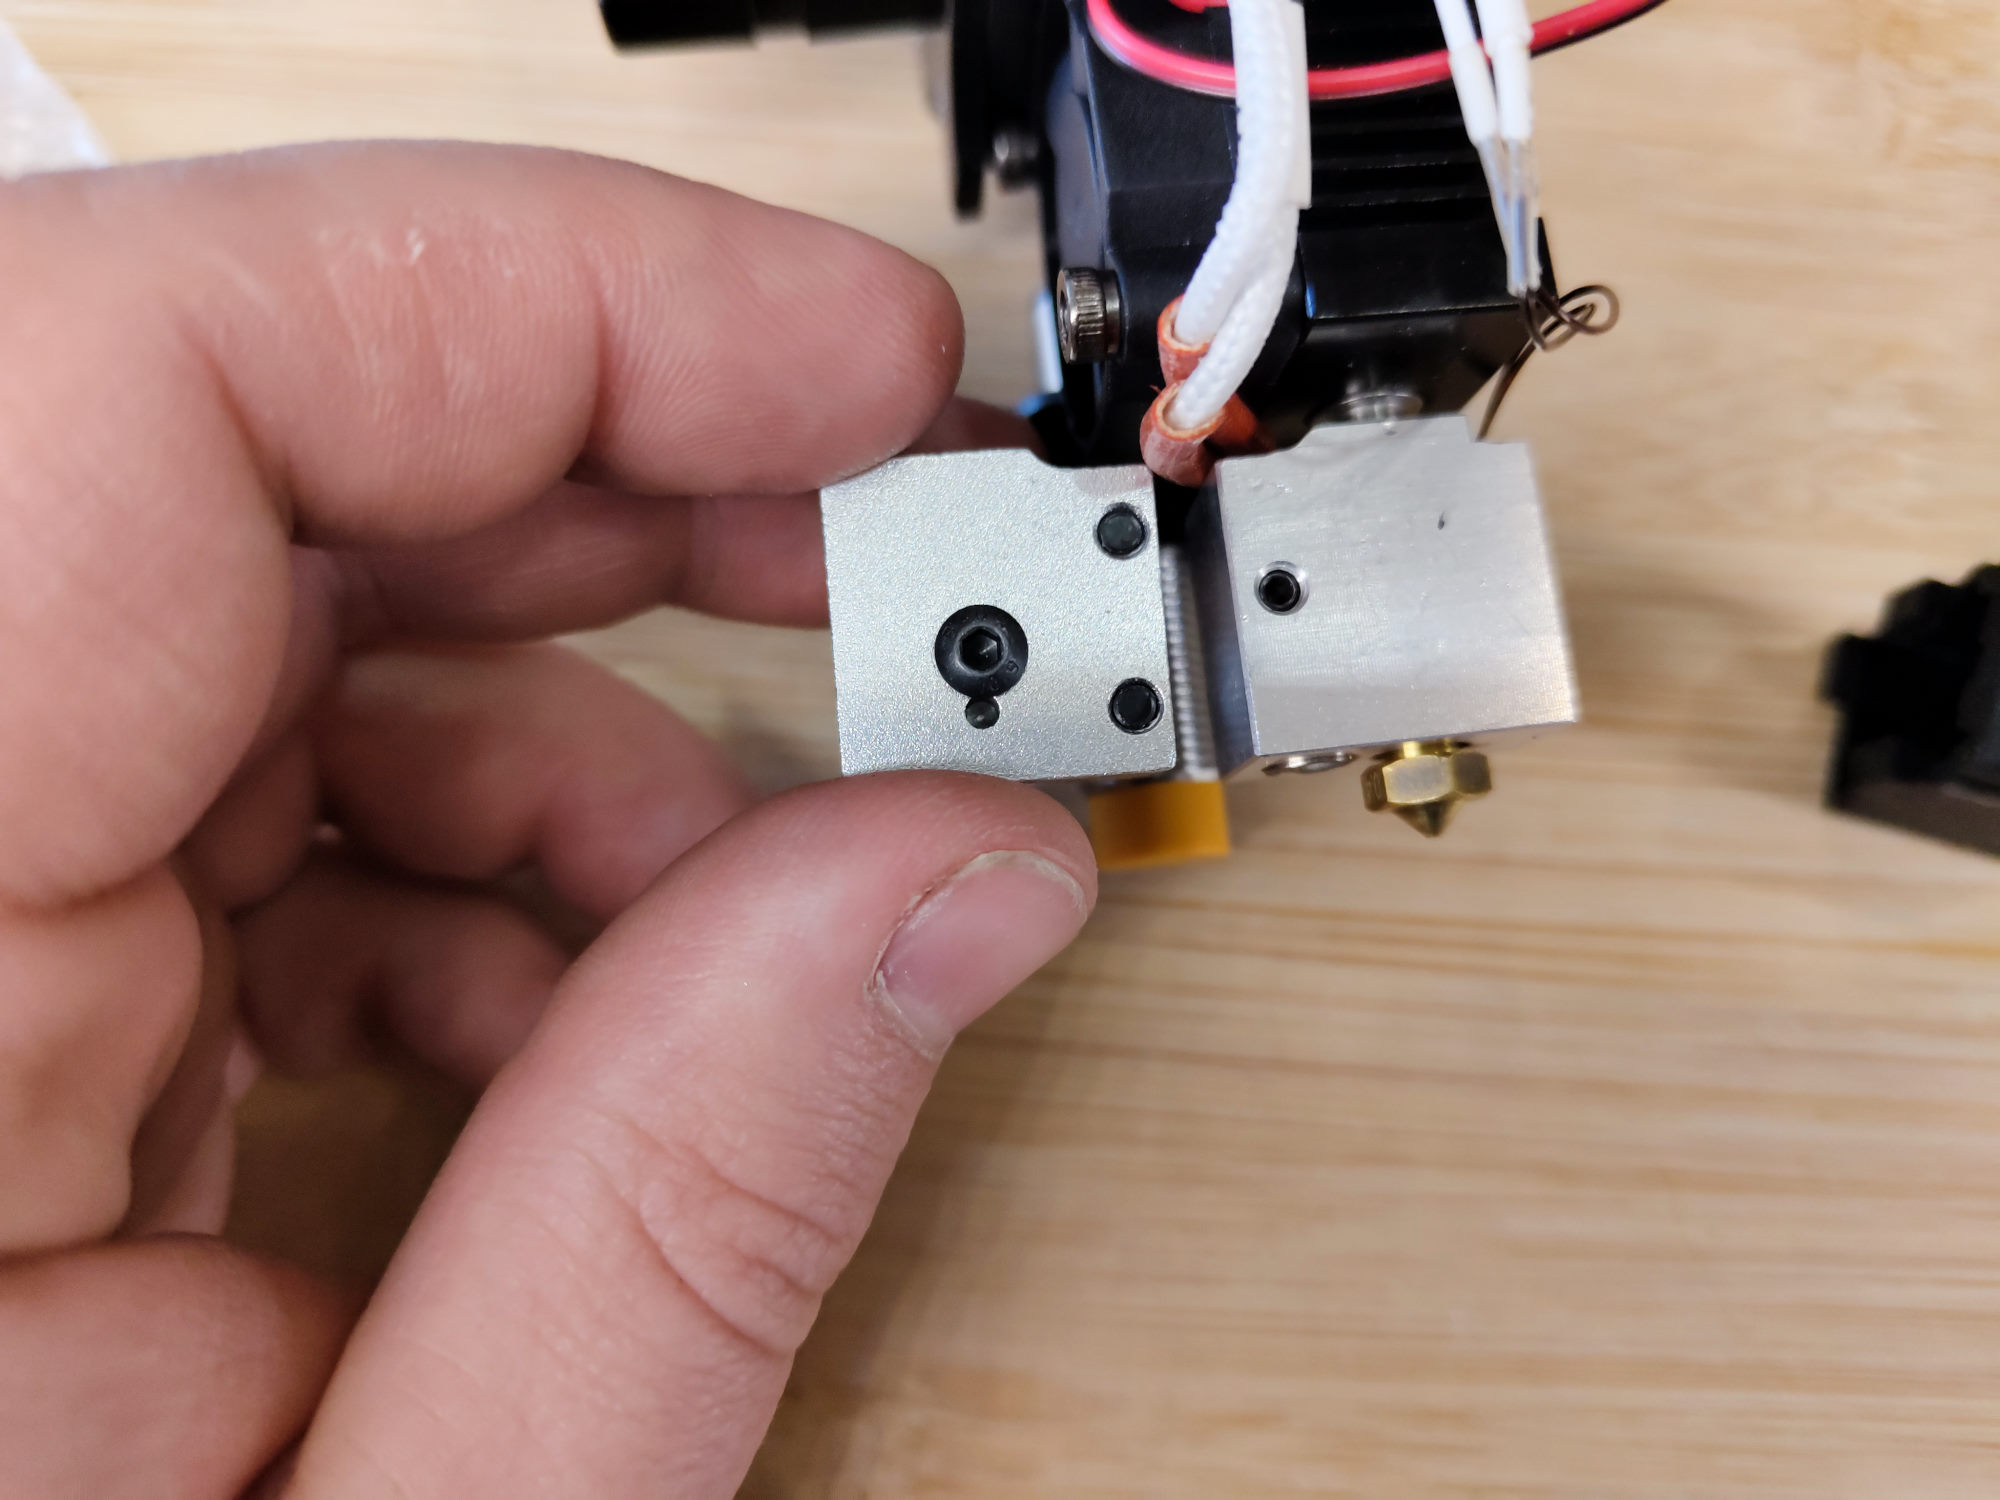
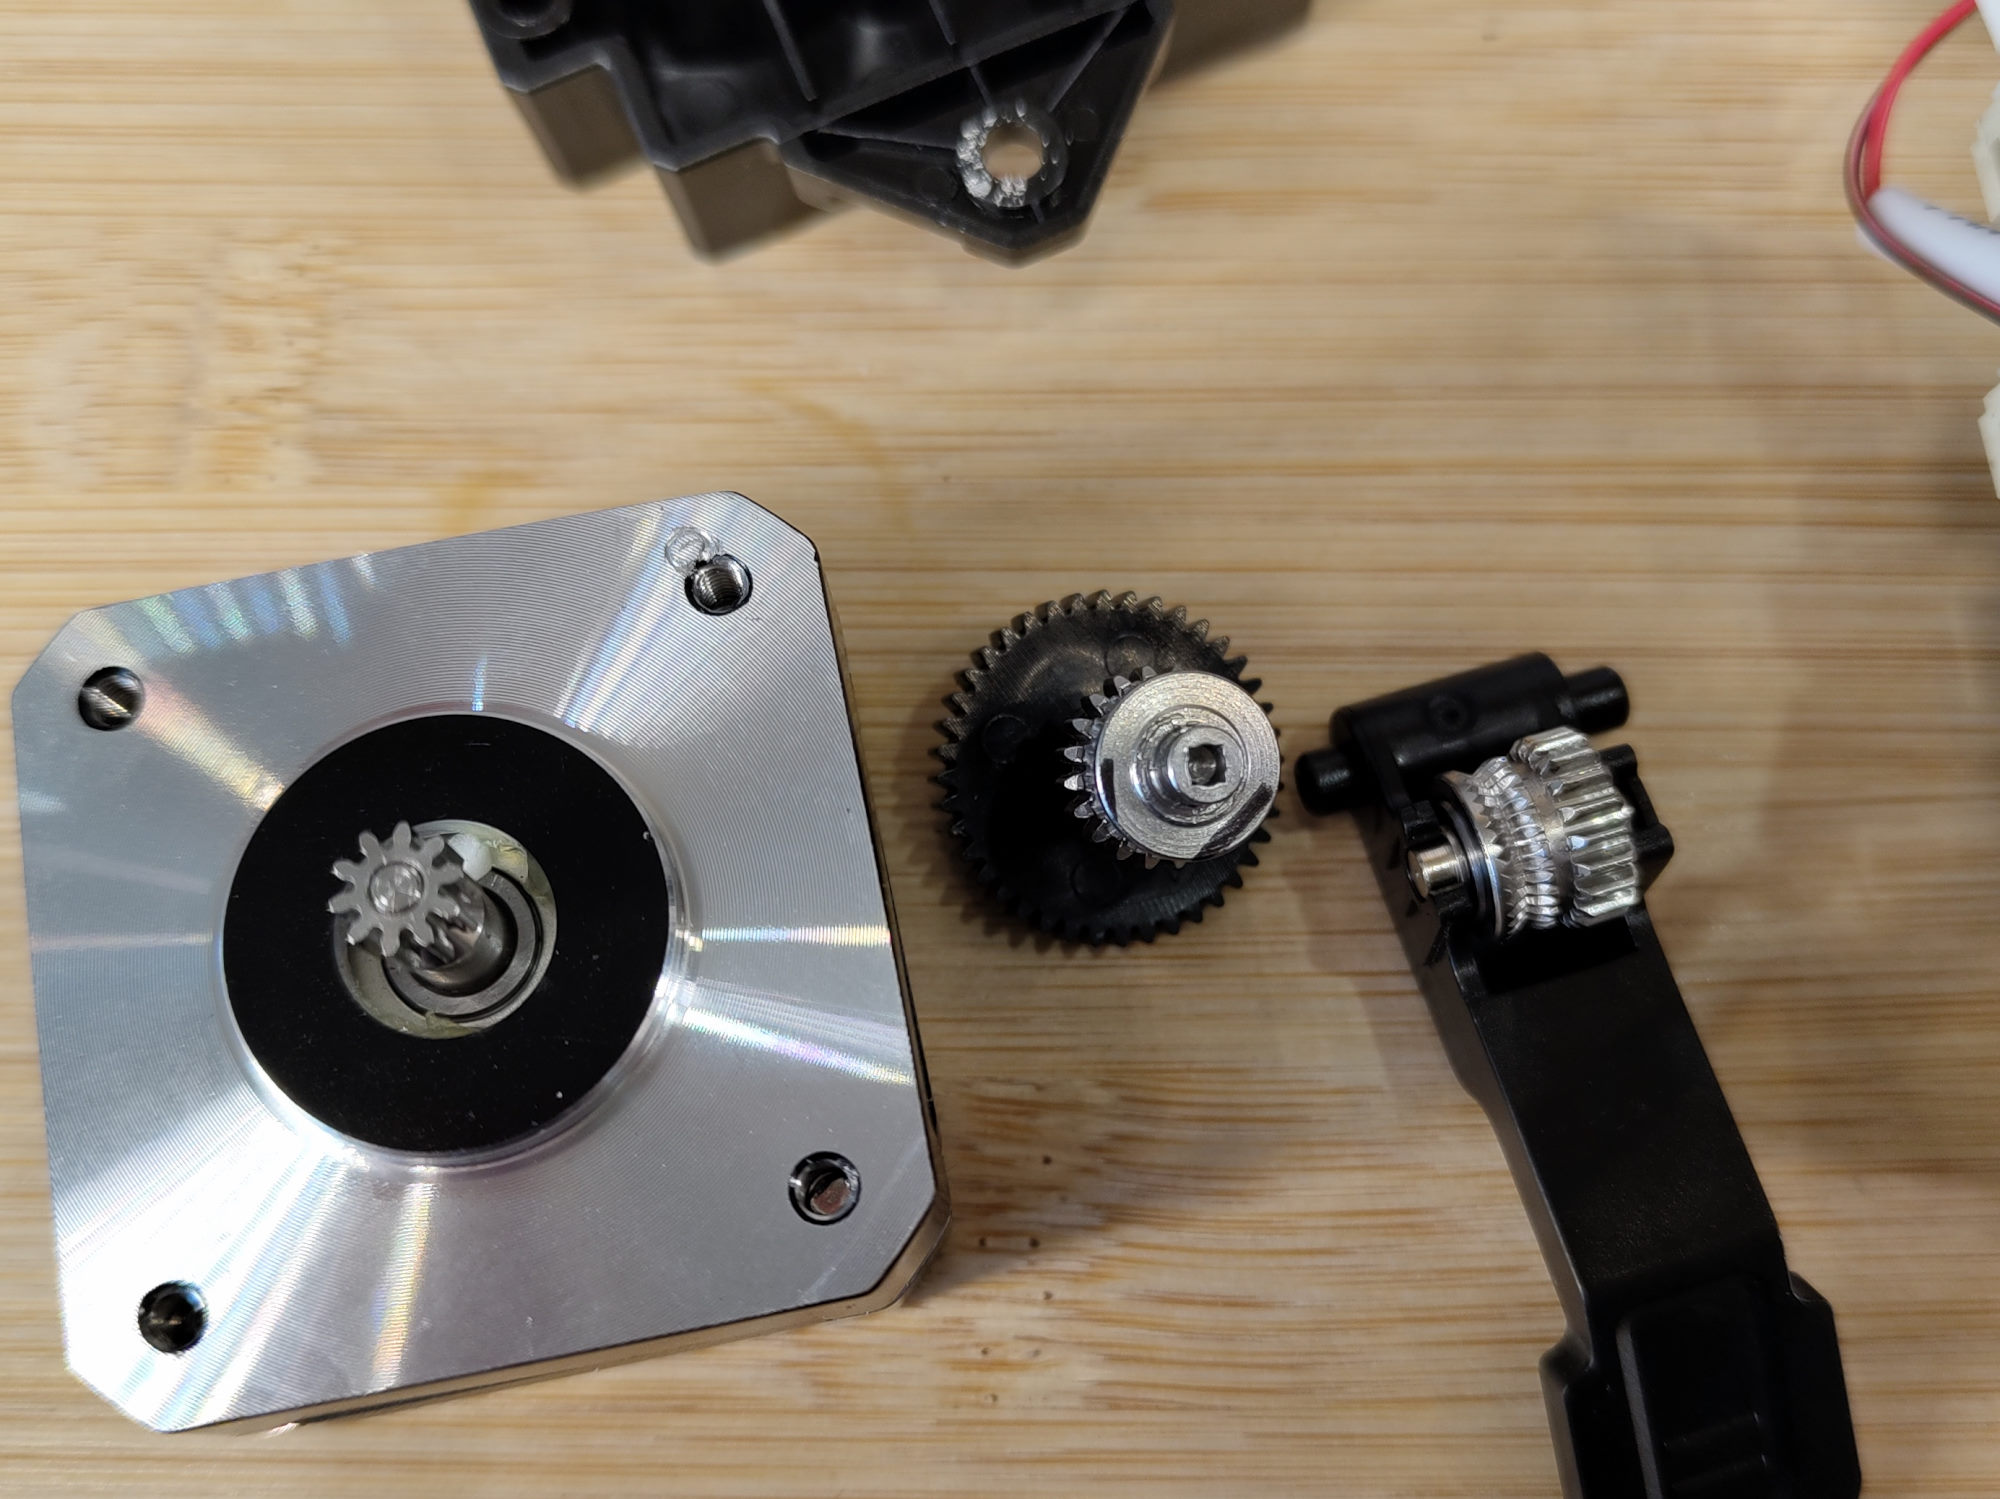
Probably the most noticeable changes to the new Cobra 2 are the hotend, the extruder, and the entire design of the printhead. The extruder sits directly above the hotend, so it's still a direct drive extruder. But no component stays the same. The heater block and die are now in Volcano format. From both sides, the filament in the extruder is driven by a NEMA 17 stepper motor. This is mounted so that its center of gravity is approximately above the X-axis of the printer. As a result, the entire print head is much better balanced compared to the predecessor.
The Volcano hotend is heated with up to 60 watts. This means it is up to operating temperature within a few seconds and can maintain this even at high flow rates.


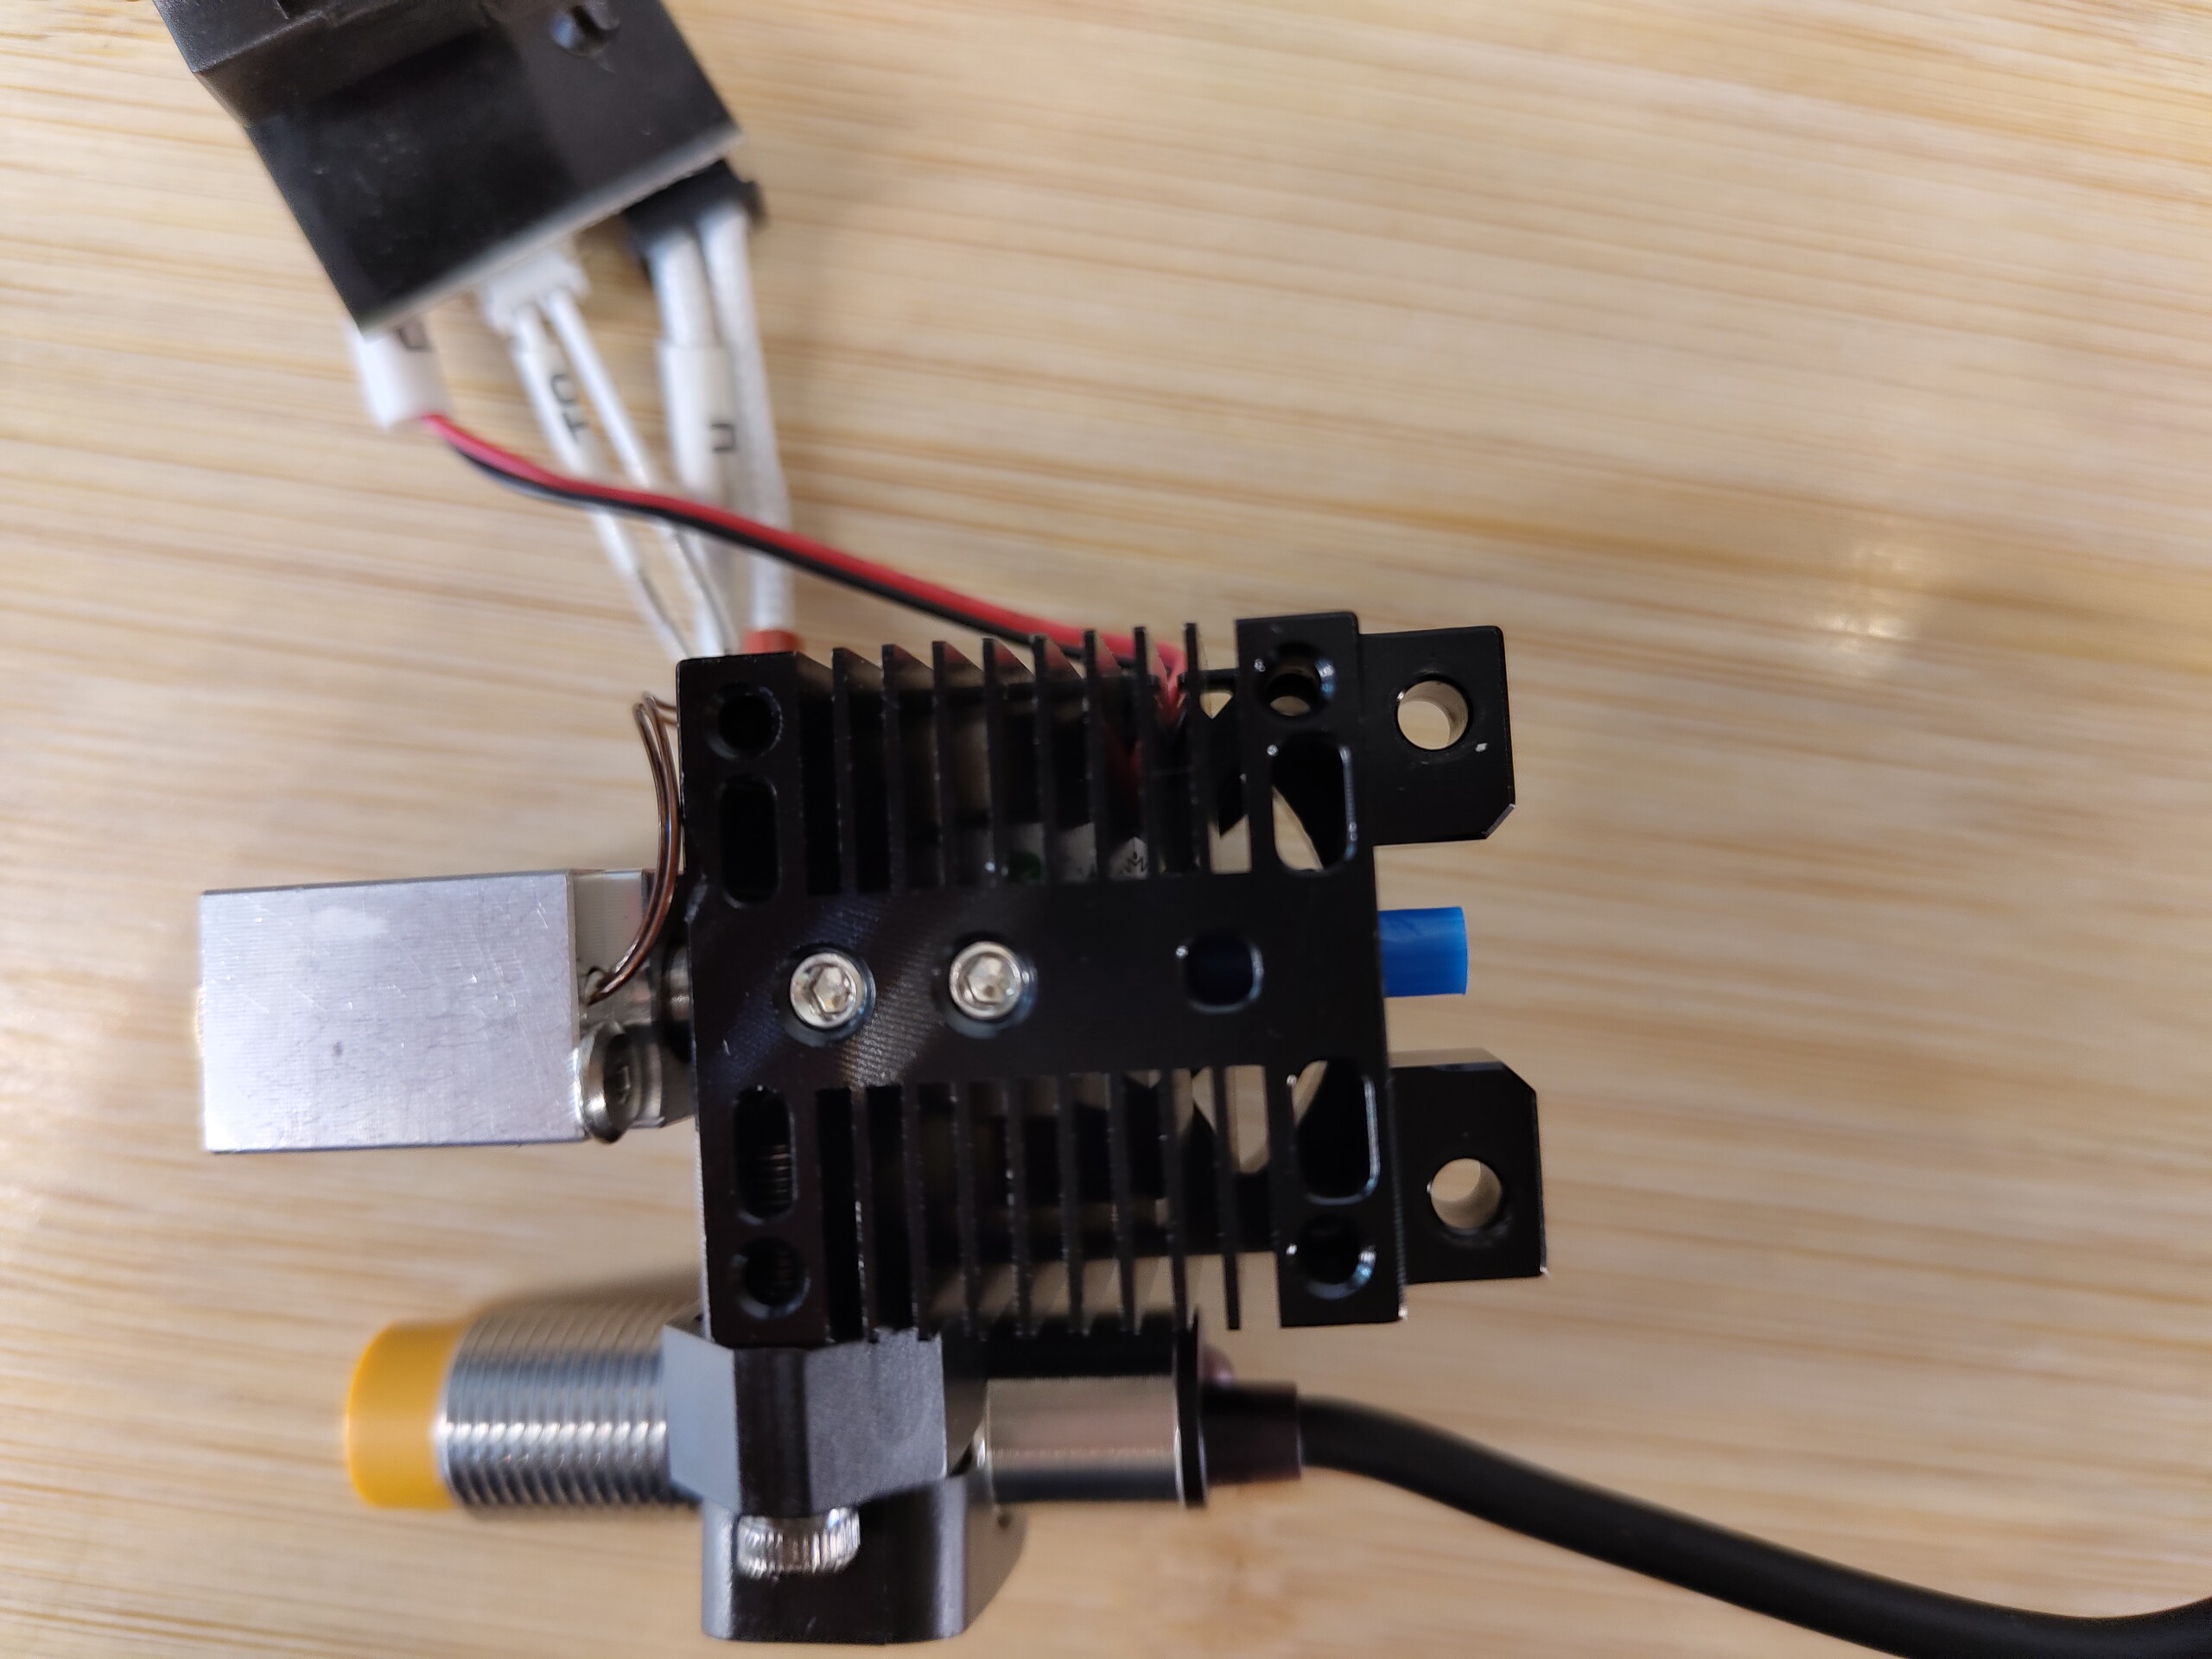
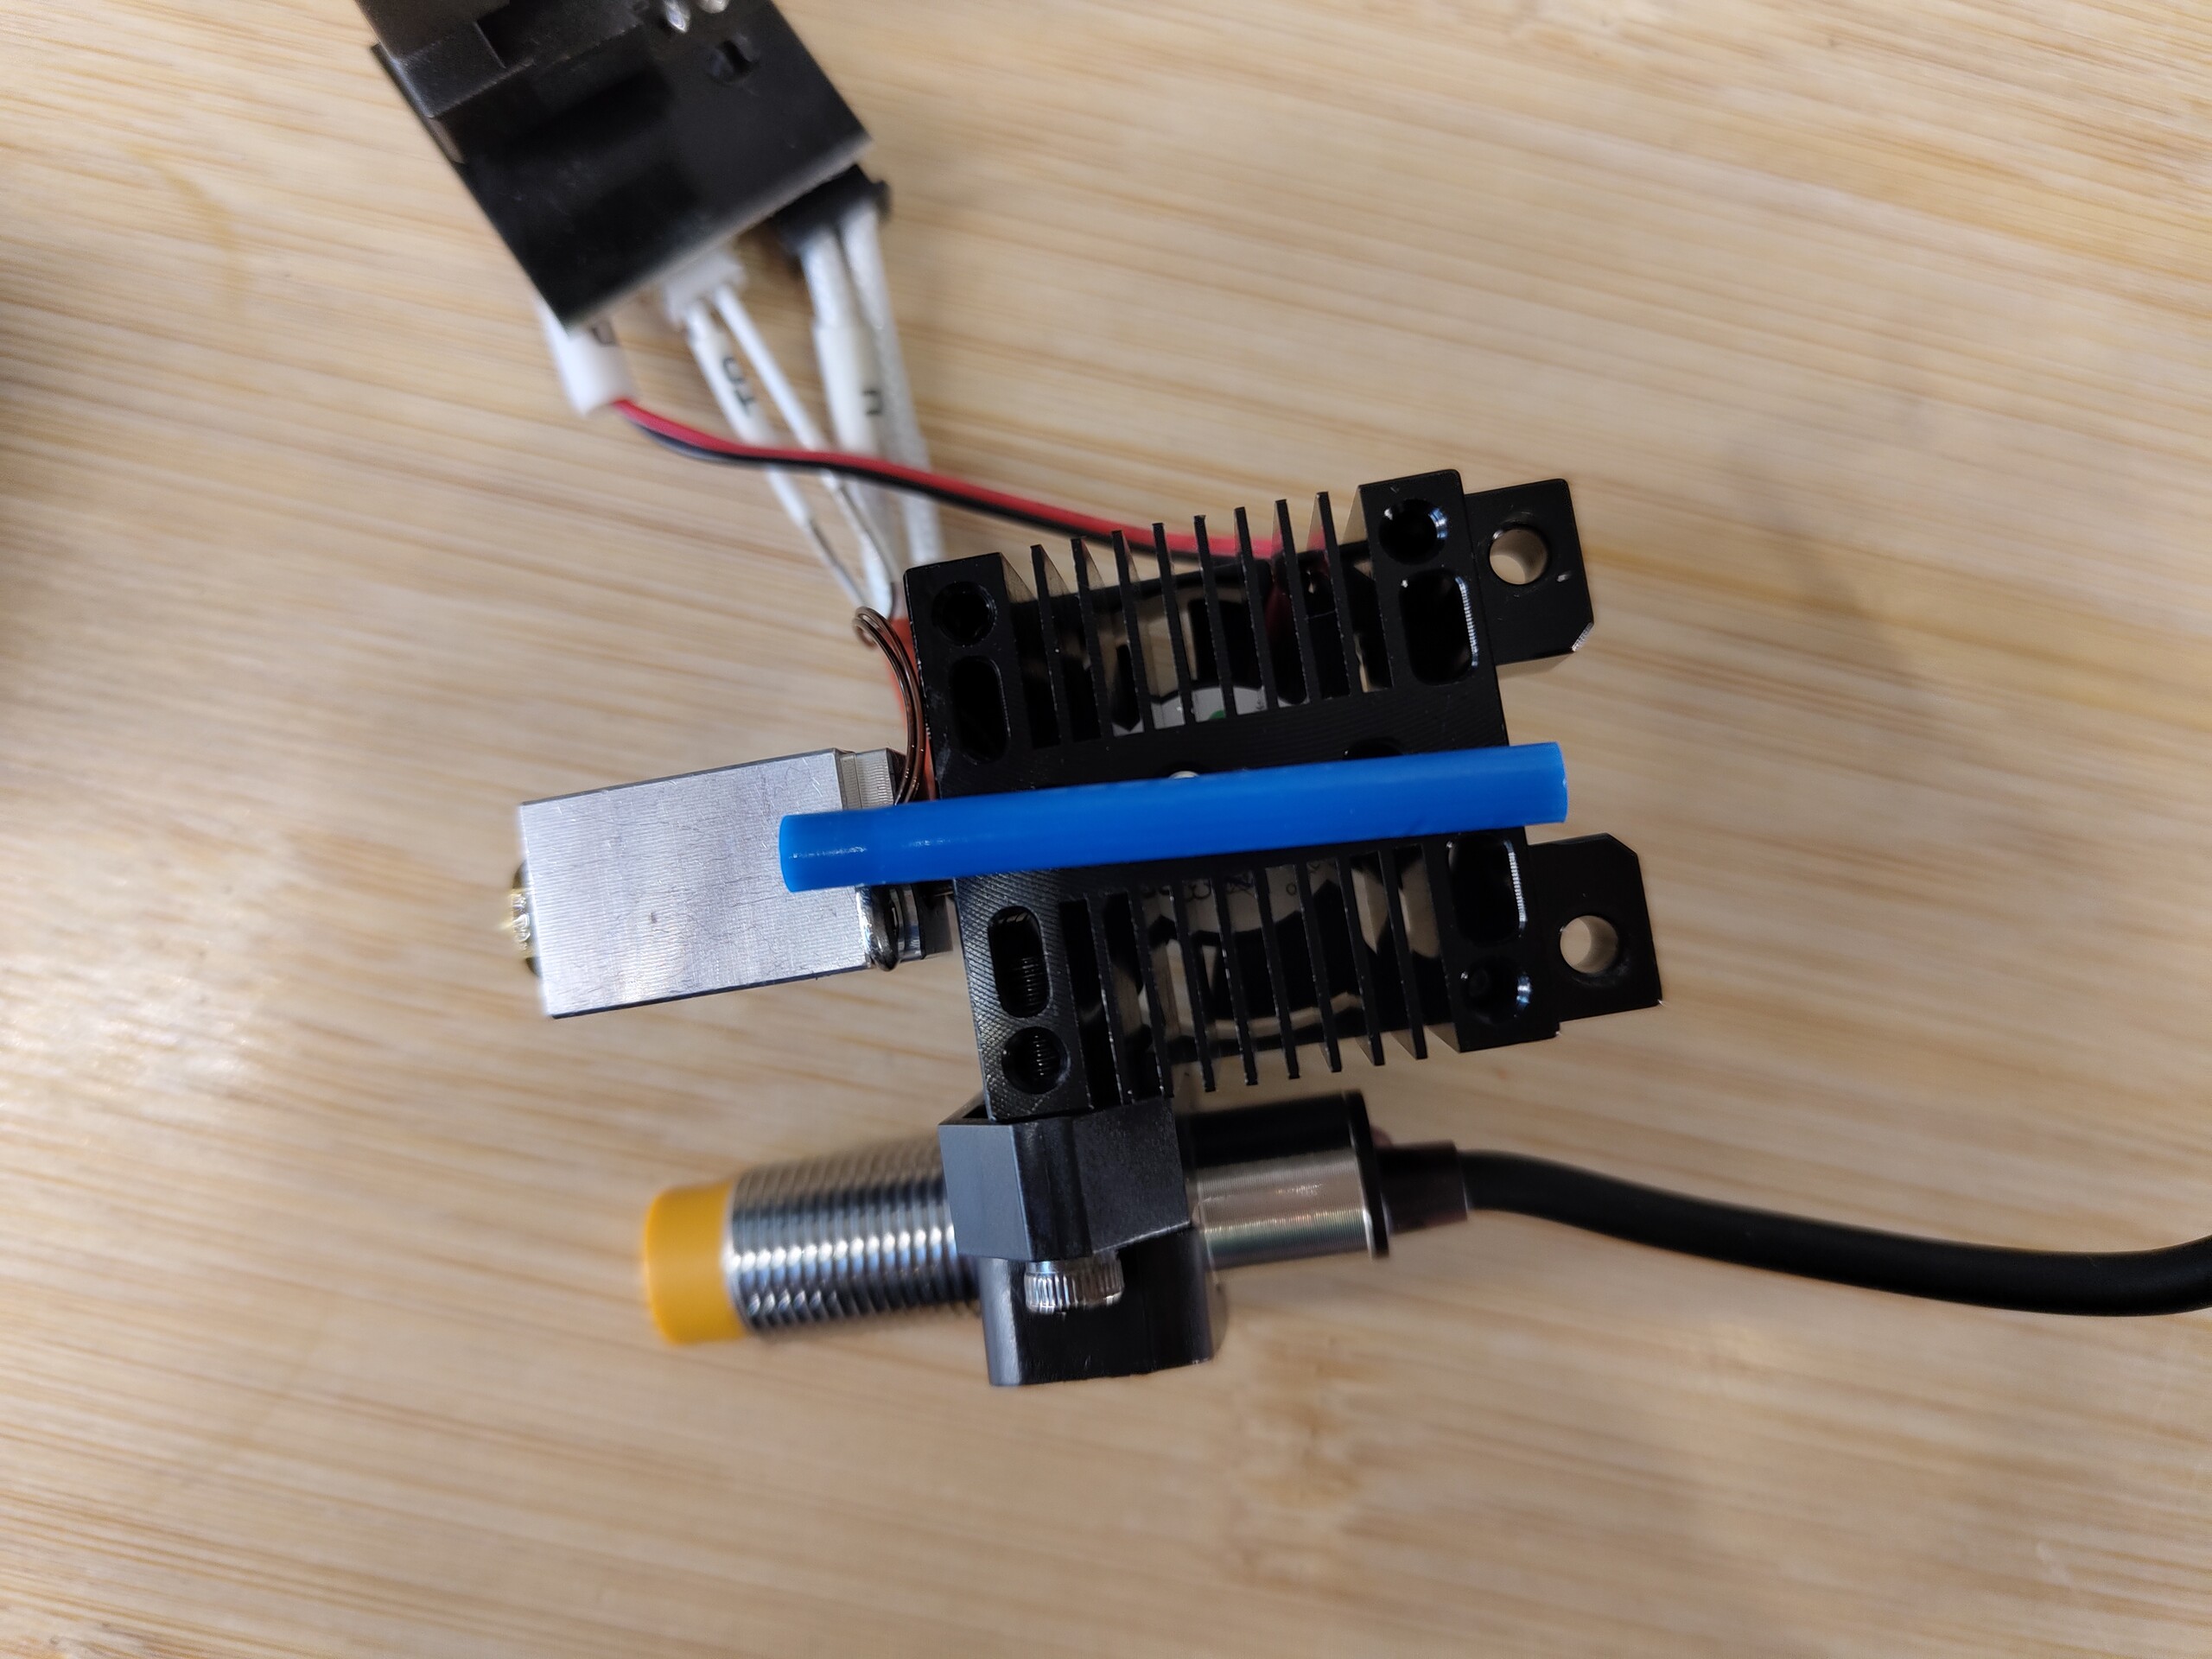
A 4.8-watt fan ensures that the freshly printed filament cools down quickly. Anycubic has connected a nozzle from the 3D printer upstream of it, which directs the airflow pretty much past the 0.4 mm filament nozzle.
In real-world print speed testing, the extruder reliably delivered a flow rate of more than 24 mm³/s, which would make it ideally suited for print speeds beyond 250 mm/s. Unfortunately, the motion system cannot keep up at these high speeds. Despite clean, freshly lubricated axes, considerable vibrations occur on the device at printing speeds of over 240 mm/s. These were so severe that we were able to move the device at high speeds. These were so severe that we felt forced to abort the practical test of the printing speed here.
A minor point of criticism on the hotend is the PTFE inliner. The plastic, which should not be heated above 270 °C, also reaches into the heating zone of Cobra 2.


Print quality
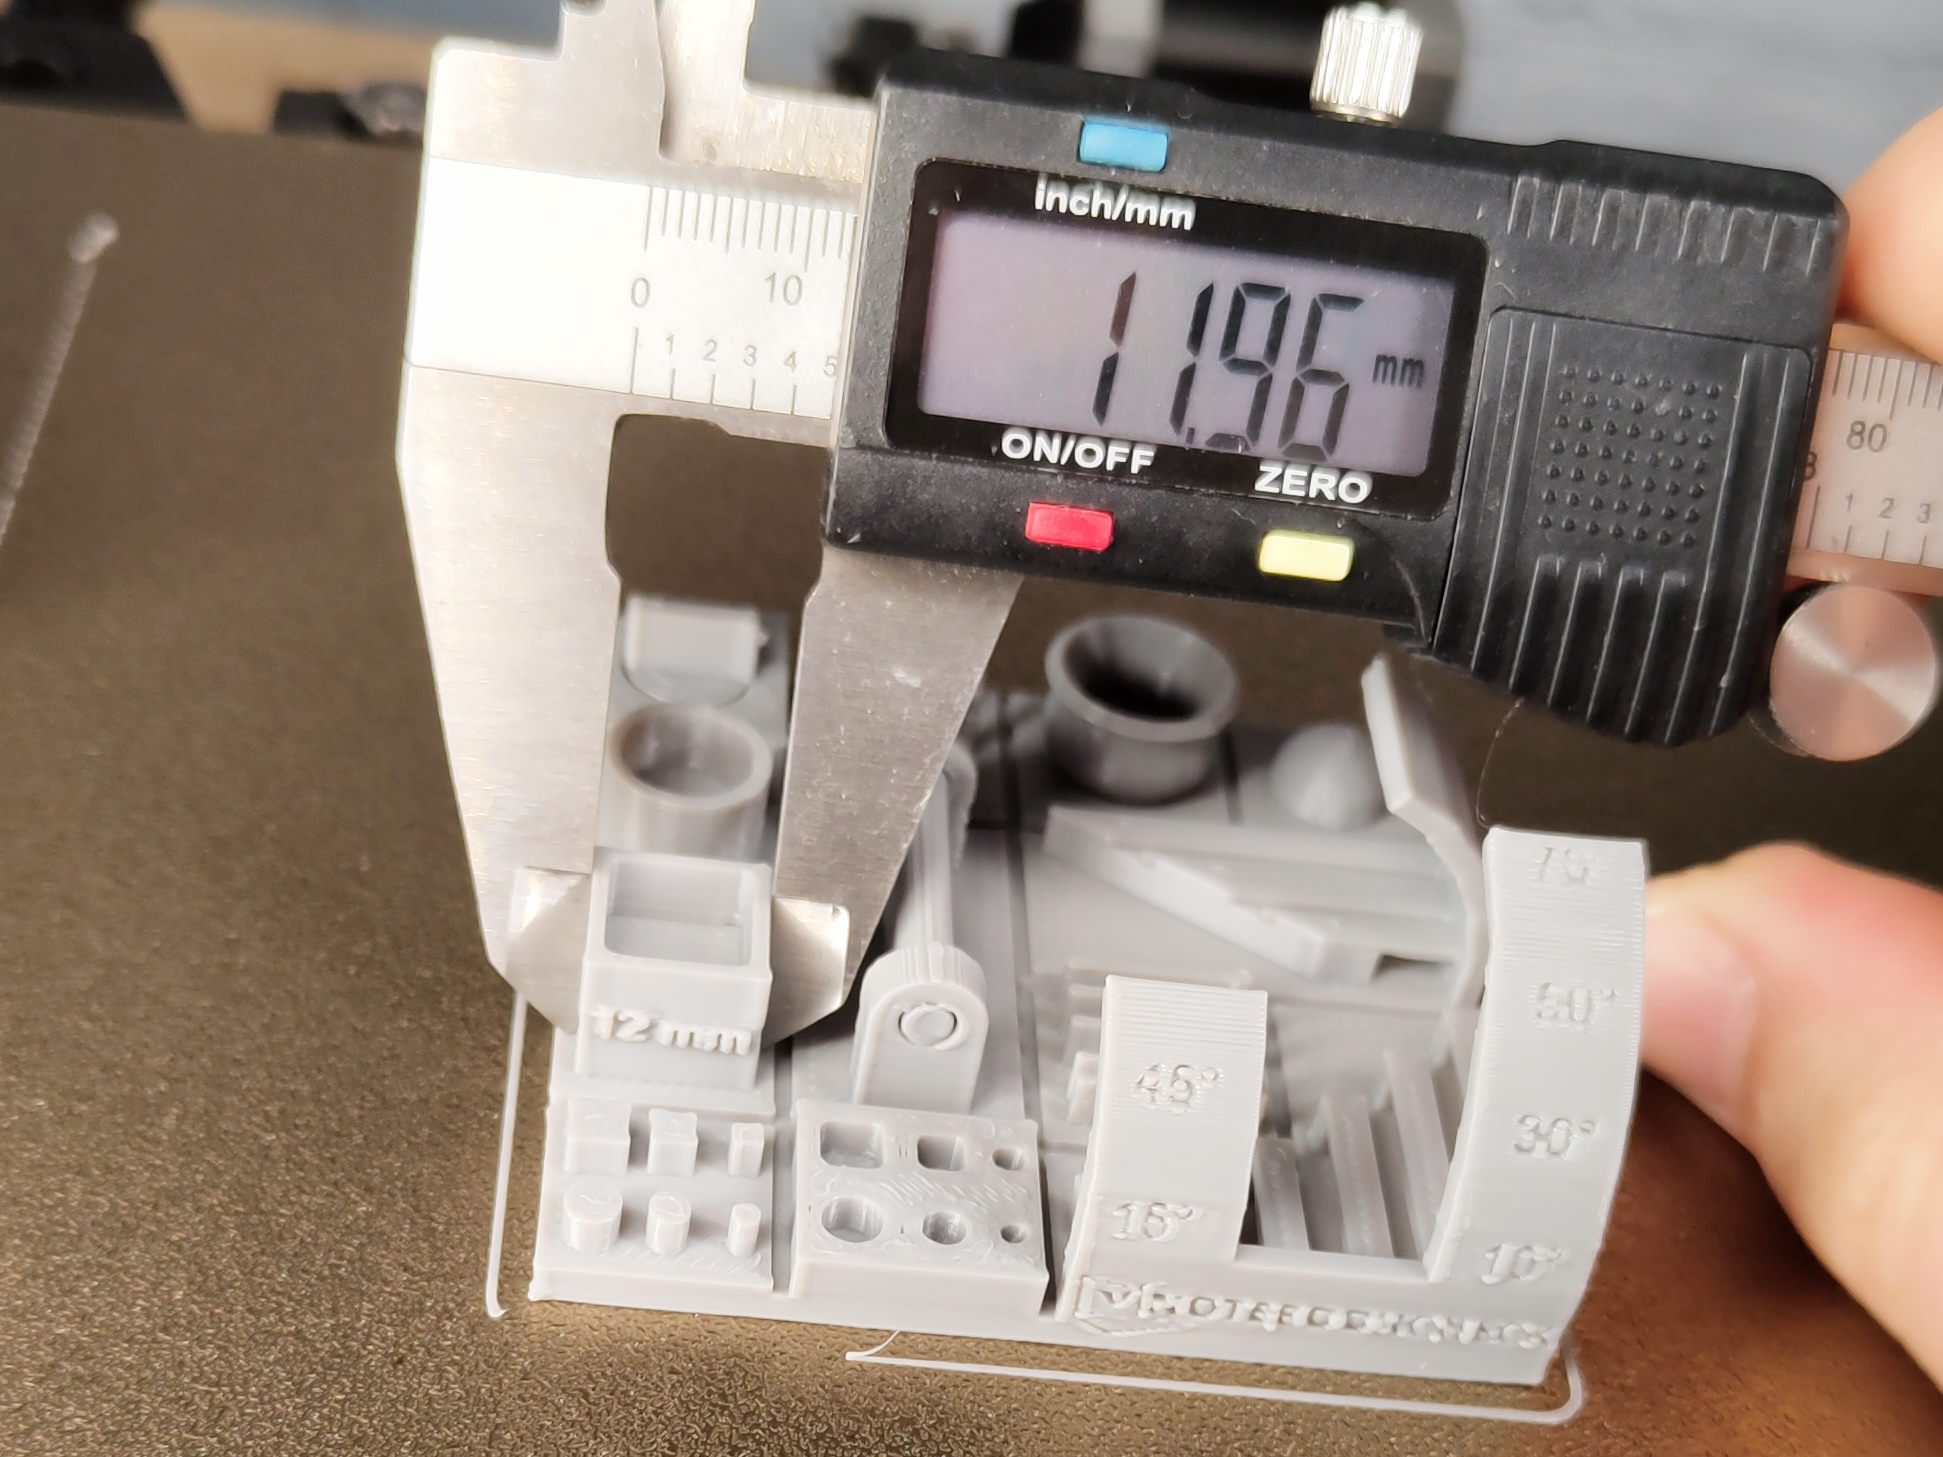
At first glance, what the Anycubic Kobra 2 fabricates looks good. We had our test file processed by the Prusa slicer. We only changed one small thing in the settings suggested by Anycubic. The perimeter generator was changed to Arachne.
Little stringing, good overhangs up to 70°, low manufacturing tolerances, and, above all, a repeatably good print image can be seen in the result. The two parts, which should be able to be moved after printing, detached extremely easily from the rest of the object here. Again, the problems of the 3D printer are clearly not with the extruder. The values for acceleration and jerk are probably set too high by the manufacturer. This can be seen mainly at the edges. On the one hand, we see so-called ghosting in several places due to vibrations that occur after direction changes. However, the exaggerated acceleration becomes more obvious at the edges. The print head almost always overshoots the target on these. This results in bulges. At these points, the manufacturing tolerances of FDM printing are clearly exceeded.


The same strengths and weaknesses, which we could determine with our test file, also show up in practice across all tests. The Anycubic Cobra 2 lacks a bit of fine-tuning. These settings can be set by the user or you can wait for the first firmware update from Anycubic. According to experience, the manufacturer implements such adjustments quickly and provides corresponding updates.


Safety

As always, we tried to trigger all possible temperature errors with this printer. The Anycubic Kobra 2 responded reliably to all scenarios. Whether a temperature sensor was disconnected, shorted, or deviated too much from the expected values, the 3D printer consistently shut down all heating elements. This is an essential safety feature that can prevent damage to the 3D printer and, in the worst case, fires. The fact that the Anycubic Kobra 2 does not trigger an audible alarm in case of temperature deviations is perhaps the only point of criticism. Only an error message is displayed.
As we also criticized with the AnkerMake M5, the maximum temperature of hotends with PTFE inliner should not exceed 250 °C. On the Anycubic Kobra 2, up to 260 °C can be set. PTFE, better known under the brand name Teflon, can outgas toxic fumes at a temperature above 260 °C.
The now continuous protective conductor also contributes to safety. All metal parts of the Kobra 2 are connected to the protective conductor. To this end, Anycubic has in some cases pulled additional cables through the wiring harness to the extruder.
However, we are missing a step when it comes to protection against jamming on moving components. The drive wheel of the Y-axis could be provided with a cover here to further increase the safety of the 3D printer. In principle, however, you should also keep in mind that there are also many other sources of danger with the open design of the Anycubic Kobra 2. For example, pickled and moving components are always easily accessible. The possibly harmful vapors from heated plastic can also spread around the room.
Emmisions

Up to 59 dB(A) was measured with the Voltcraft SL10 sound level meter at a distance of one meter from the 3D printer during operation. Together with the strong vibrations at the maximum speed of the printer, this value rises to up to 72 dB(A). The object fan in the print head makes a large contribution to normal operating noise. To reduce the operating noise, the fan can be throttled down or switched off completely in certain situations. Prusa Slicer is able to control the fan depending on the situation. It is thus possible to reduce the minimum fan speed from 100% to a lower value. This not only makes the printer quieter but also reduces power consumption. A large part of the energy required for 3D printing is used for heating and reheating the print bed. The less air circulating above the print bed, the lower the energy consumption.
The open design also disperses odors and vapors from the melted plastics throughout the room. Depending on which plastics are processed with the 3D printer, the vapors can smell unpleasant or even be harmful to health.
Power consumption
You have to reckon with a power consumption of up to 430 watts for the Anycubic Kobra 2. During the short heat-up phase of the 3D printer, the Voltcraft SEM6000 determines an average energy consumption of 380 watts. During printing, the energy consumption is between 140 and 160 watts. This makes the 3D printer significantly more energy-hungry than many other devices of the same size. The absolute leader in energy savings in our tests is still the Artillery Genius Pro. With around 75 watts during printing, this 3D printer only needs half the power of the Kobra 2.
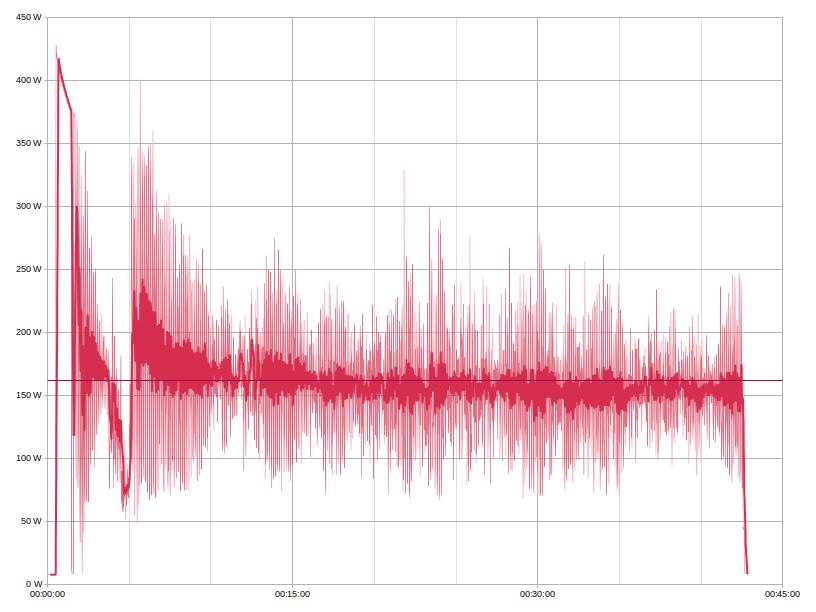
It can also be deduced from the strongly scattering measurement results that the PID values stored in the firmware probably deviate somewhat from reality. A PID tuning could achieve more stable temperatures and at best a slightly lower power consumption. With good PID tuning, only as much energy is supplied as is required to maintain the set temperature.
Verdict

A completely new print head, new guide rails on the X and Y axes, and the new Anycubic LeviQ 2.0 bed leveling are the three most important upgrades from the Anycubic Kobra to the Kobra 2. This makes the 3D printer somewhat faster but above all more convenient to operate. Readjusting the bed leveling is no longer necessary. This should be an interesting innovation for beginners because a 3D print stands and falls with a good first print layer. At the time of this review's completion, there are still a few days until the Kobra 2's market launch. Anycubic should use these to improve the last fine adjustments. Then the Cobra 2 could become a price-performance tip. At around 300 Euros, the 3D printer is affordable.
However, the same points of criticism that we have seen in all Kobra 3D printers so far stand out negatively. Only mediocre cable management, tinned cables, and only a few control options via the touchscreen. With the Kobra 2, the impression of poor cable management has intensified in combination with the new filament roll holder.
Compared to the predecessor model, Anycubic has made detail improvements in the Kobra 2, but they have a big impact on the usability of the 3D printer. Longer maintenance intervals and faster setup, even for 3D printing novices, are to be expected.
When it comes to maintenance in particular, Anycubic's new 3D printer should require significantly less effort than its predecessors. Instead of Delrin rollers that wear out quickly, SG15 ball bearings combined with silver steel axles are much easier to clean and more durable. As long as the axles are regularly dusted and oiled, maintenance should be minimal. Switching from Ultimaker Cura to Prusa Slicer, on the other hand, is certainly not an easy step for every user. However, the results of both programs are equivalent.
In the end, the 3D printer hardly differs from competitors like Anycubic Kobra, Artillery Genius Pro, or VoxeLab Aquila. It is the details that distinguish the 3D printers from each other. Meanwhile, the performance spectrum of modern 3D printers is very similar.
Prices and availability
The Anycubic Kobra 2 will be available directly from the manufacturer on May 25, 2023. In the in-house store, Anycubic offers the 3D printer for around 300 Euros. Import duties may apply when shipping from China.
Sources
Transparency
The selection of devices to be reviewed is made by our editorial team. The test sample was given to the author by the manufacturer free of charge for the purposes of review. There was no third-party influence on this review, nor did the manufacturer receive a copy of this review before publication. There was no obligation to publish this review. As an independent media company, Notebookcheck is not subjected to the authority of manufacturers, retailers or publishers.
This is how Notebookcheck is testing
Every year, Notebookcheck independently reviews hundreds of laptops and smartphones using standardized procedures to ensure that all results are comparable. We have continuously developed our test methods for around 20 years and set industry standards in the process. In our test labs, high-quality measuring equipment is utilized by experienced technicians and editors. These tests involve a multi-stage validation process. Our complex rating system is based on hundreds of well-founded measurements and benchmarks, which maintains objectivity. Further information on our test methods can be found here.

