Guide: How to install Google apps on Huawei phones
The trade ban between Google and Huawei has been around since the spring of 2019 due to spying allegations from the US government against the Chinese tech giant. As a result, Huawei smartphones and tablets are no longer allowed to ship with Google services and apps.
Since then, Huawei has relied fully on its own AppGallery, which already enjoyed a high level of acceptance in Asia even at the start of the embargo, particularly in the company’s domestic market, China. Gaining acceptance in western countries continues to be more difficult, especially considering large US software companies aren’t allowed to offer their apps in AppGallery. Microsoft is an exception but also faces restrictions.
This means that Huawei phone users currently not only lack access to many apps, but also can’t use features such as Android Auto and Google Pay. The GBox, which we discussed in our P60 Pro review, offers users an option to at least install most of the apps in a sandbox. However, this comes at the price of significantly reduced battery life and performance. Push notifications also don’t always work reliably.
Now there is an alternative: microG. It is integrated much more harmoniously into the operating system and runs very reliably. The German-based software project is actually designed for people who are unwilling to voluntarily share their data with the Internet giant Google and yet still want to use all their favourite apps. In fact, the project predates the Huawei ban and is aimed at users of other open Android-based operating systems, such as LineageOS.
Here is a step-by-step tutorial on how to install Google apps and services on your Huawei P60 Pro or a Pura 70 Series phone.
What works and what doesn't work with microG
The Mate 30 Pro was the first high-profile Huawei phone that had to manage without any preinstalled Google services and apps. This was back in the days of Android 10 and EMUI 10.
The instructions provided were created based on the Huawei Pura 70 Ultra, which runs on EMUI 14.2, based on open Android 12. This version of the operating system is probably required for the installation process to work as described in this article. The phones from the P50, P60, Mate 50 and Nova 11 Series are expected to receive this update as well. Online guides are also available on how to install microG on older Huawei phones, although we haven’t tested them yet.
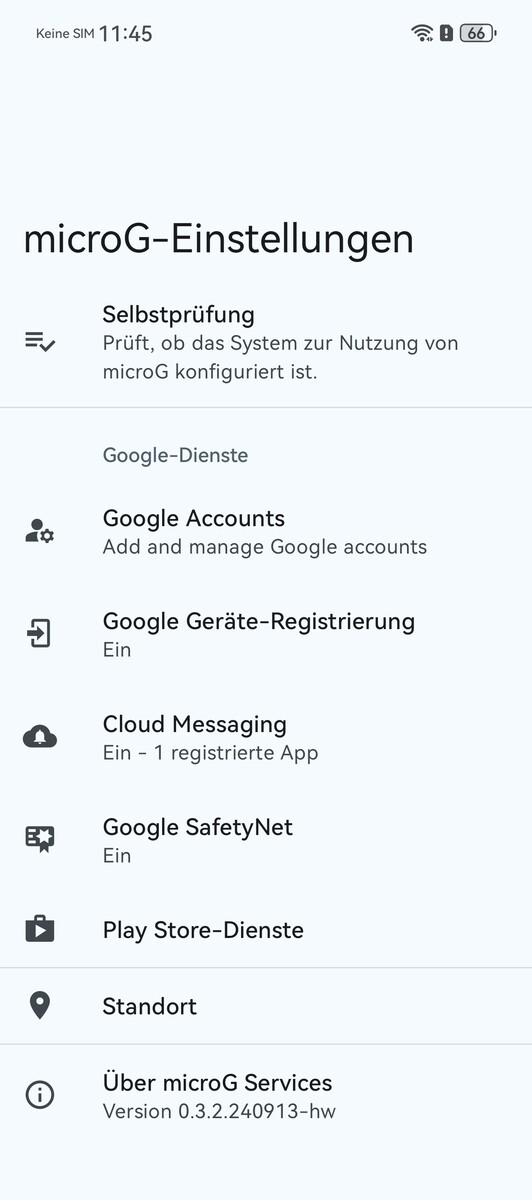
MicroG implements the following components in the EMUI system: Service Core (GmsCore), Services Framework Proxy, Unified Network Location Provider, Maps API and the Store. Using a third-party app store will then enable access to all Play Store apps. Even Android Auto is functional with microG.
And because Google Wallet still doesn’t work, Google Pay remains unusable.
Installing microG and Aurora Store
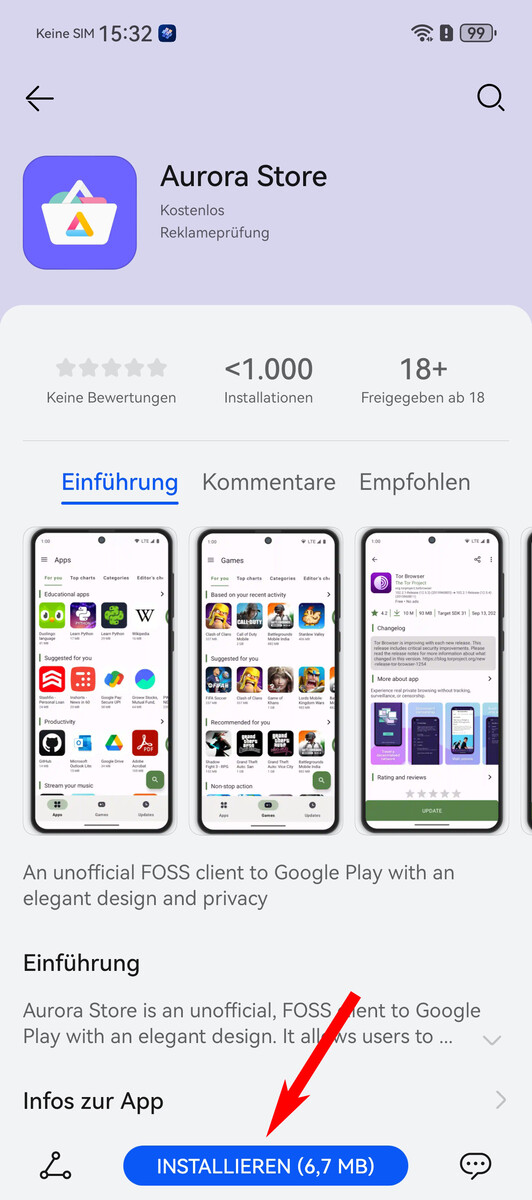
The Aurora Store is an alternative to the Google Play Store. Nevertheless, Aurora still accesses Google’s database for apps and downloads APKs from there. It can be easily downloaded and installed from the Huawei AppGallery.
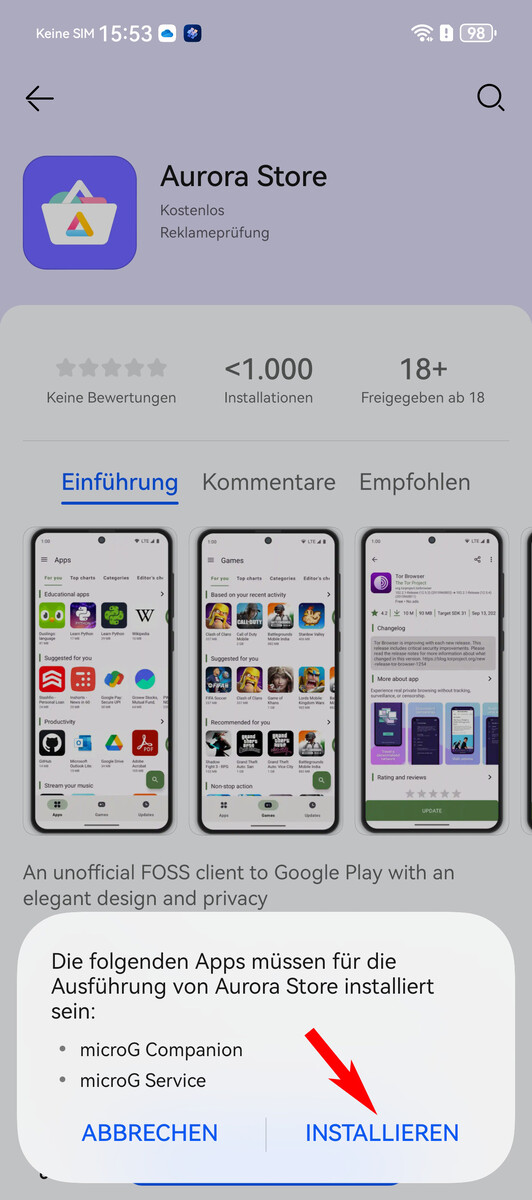
After pressing the Install button, you'll be asked whether you wish to install microG Companion and microG Services as well. Confirm this by tapping the Install button again.
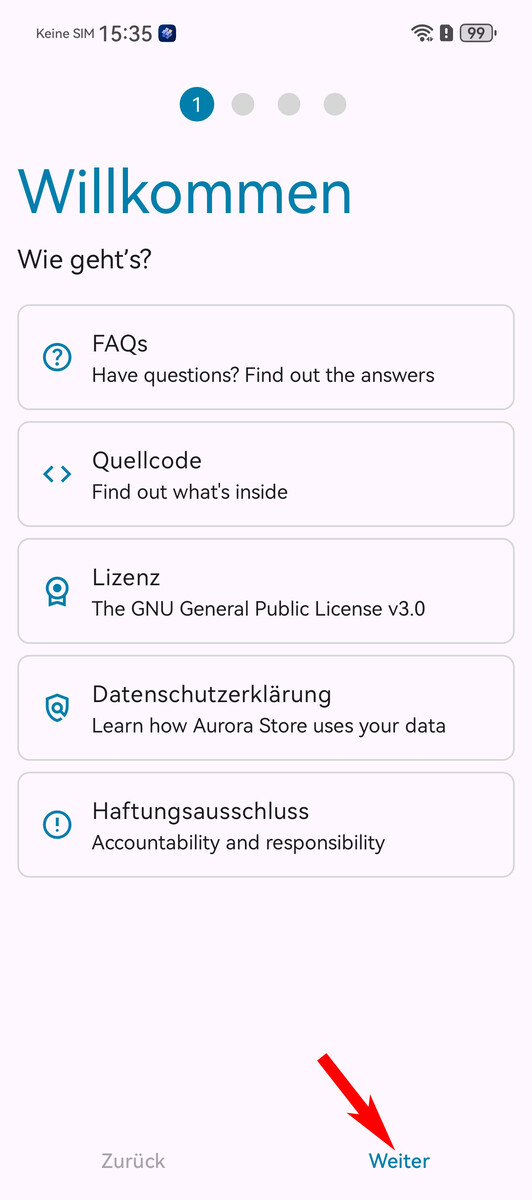
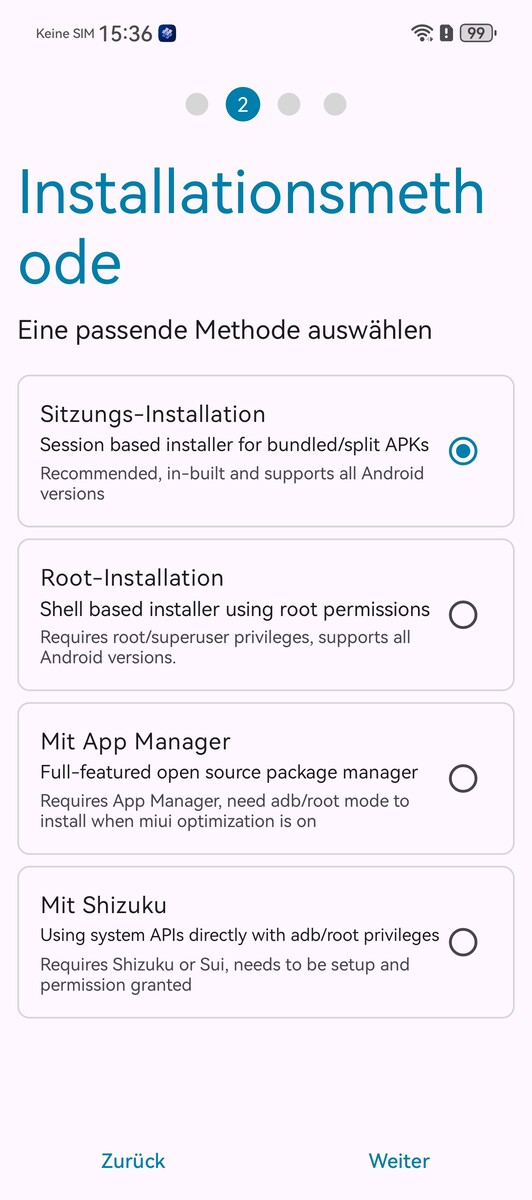
The Aurora Store icon will then appear on your home screen. At first launch, the app will guide you through a setup process. Once past the welcome page, select Session Installer as the installation method.
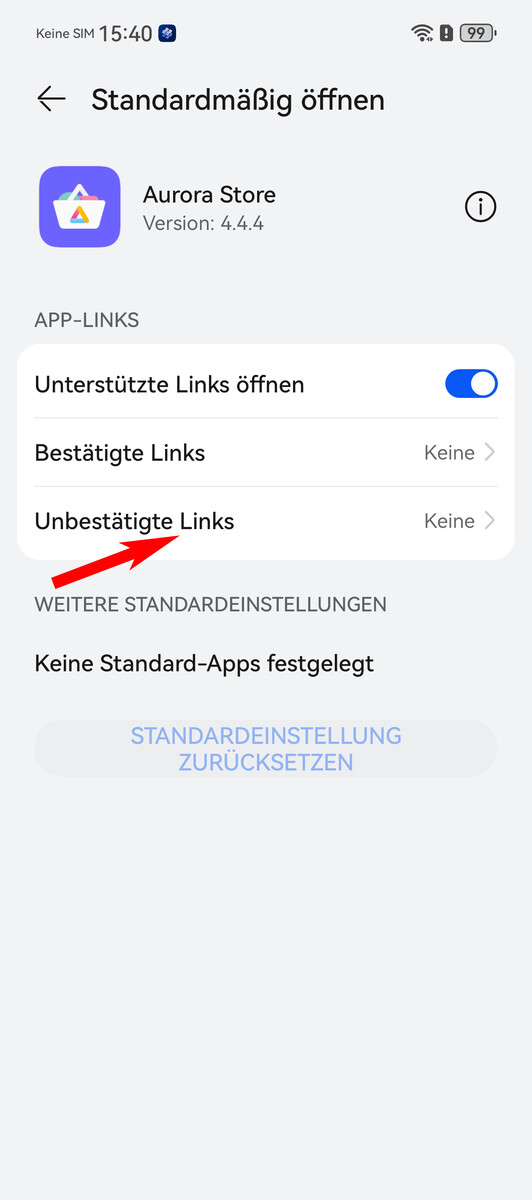
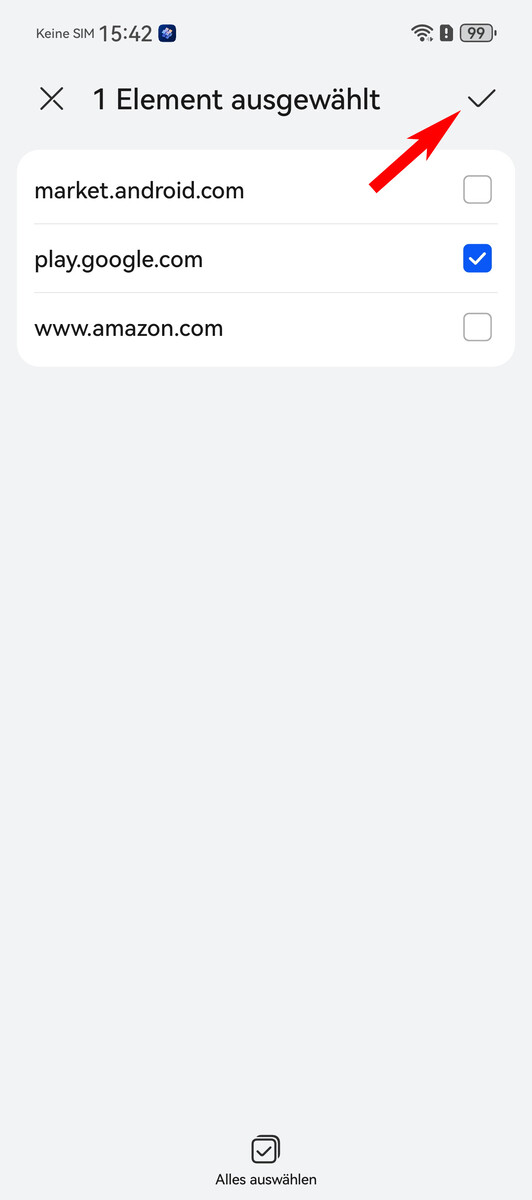
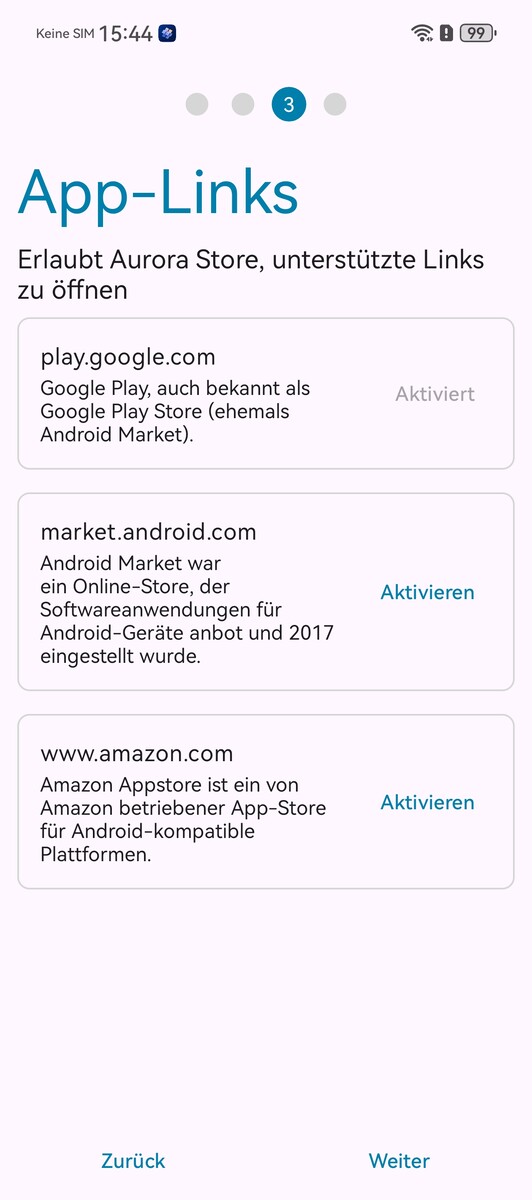
On the third page, you will now able to select which app stores to activate. Press the Activate button for play.google.com. Subsequently, an Open by Default dialogue will show up for the Aurora Store, where you need to tap Unconfirmed Links, followed by Add. Then choose the app stores you want and confirm your selection by tapping the tick at the top right. The Google Store will now be listed in the overview.

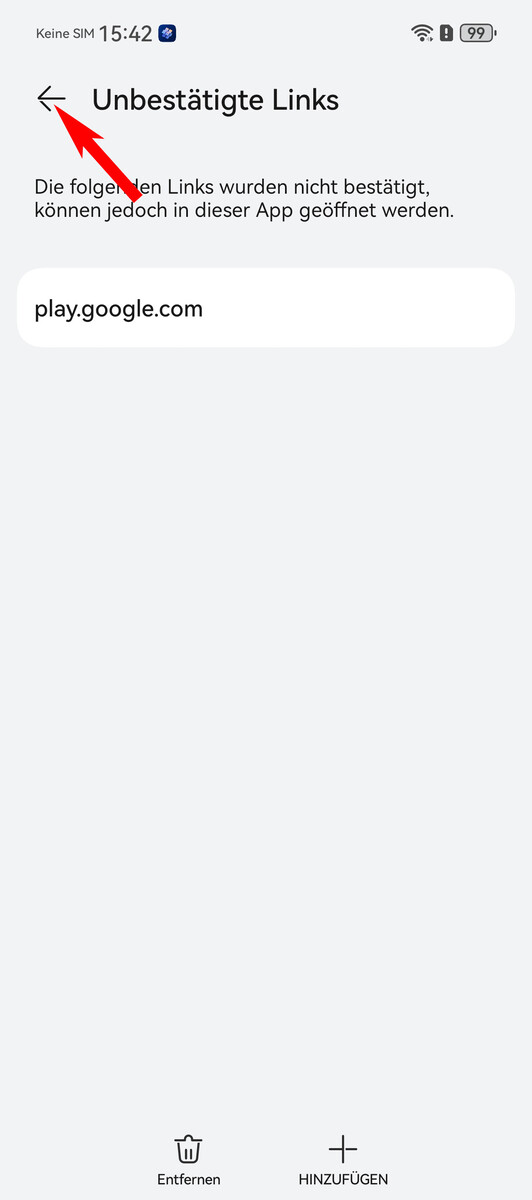
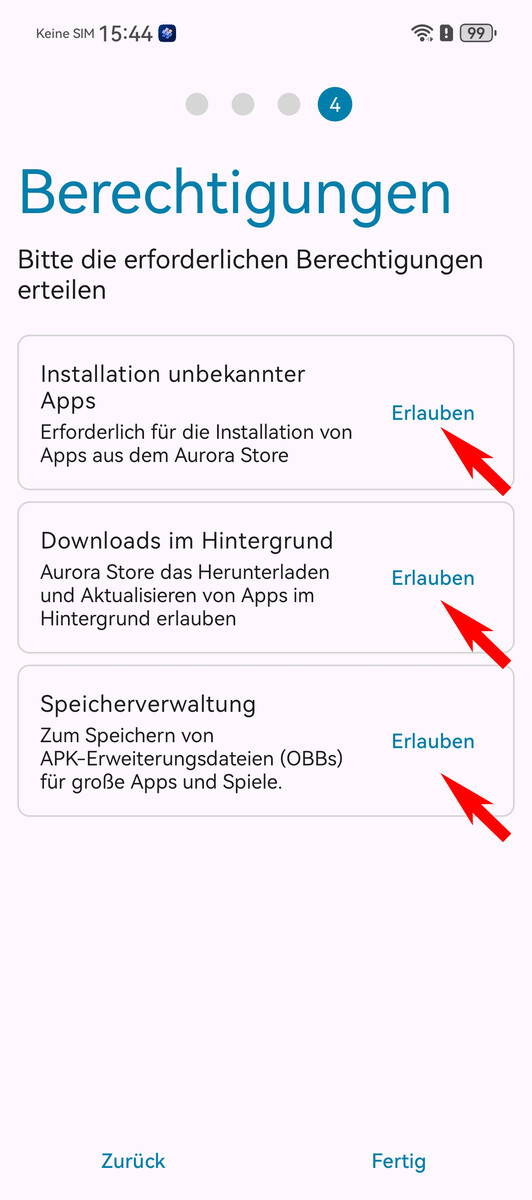
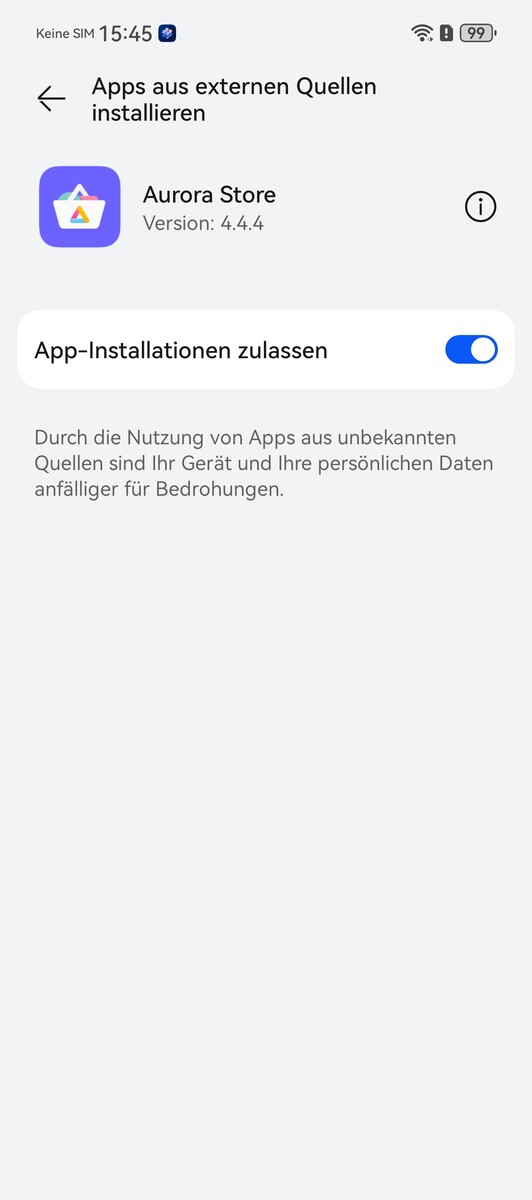
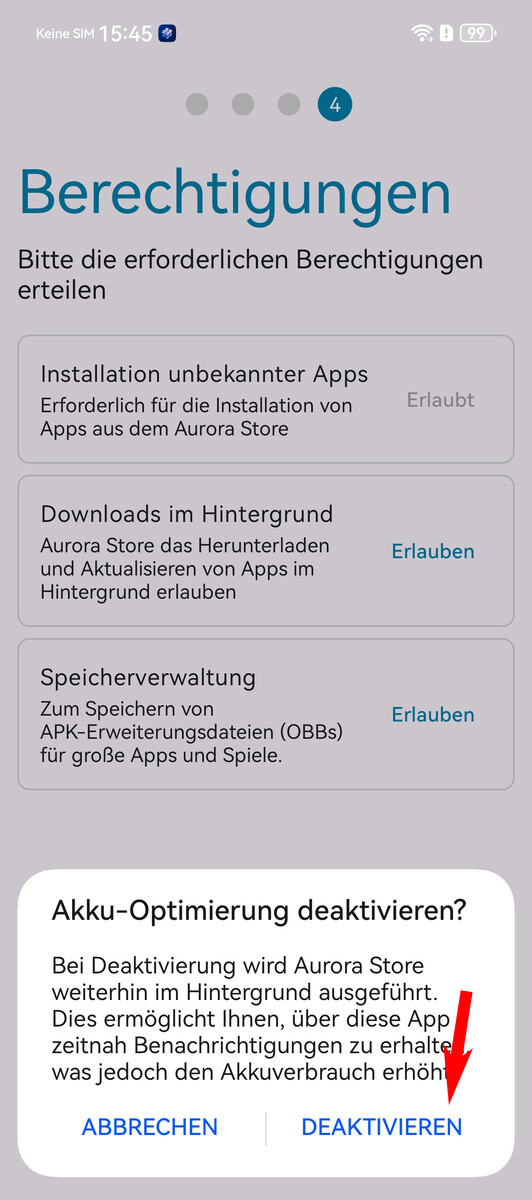
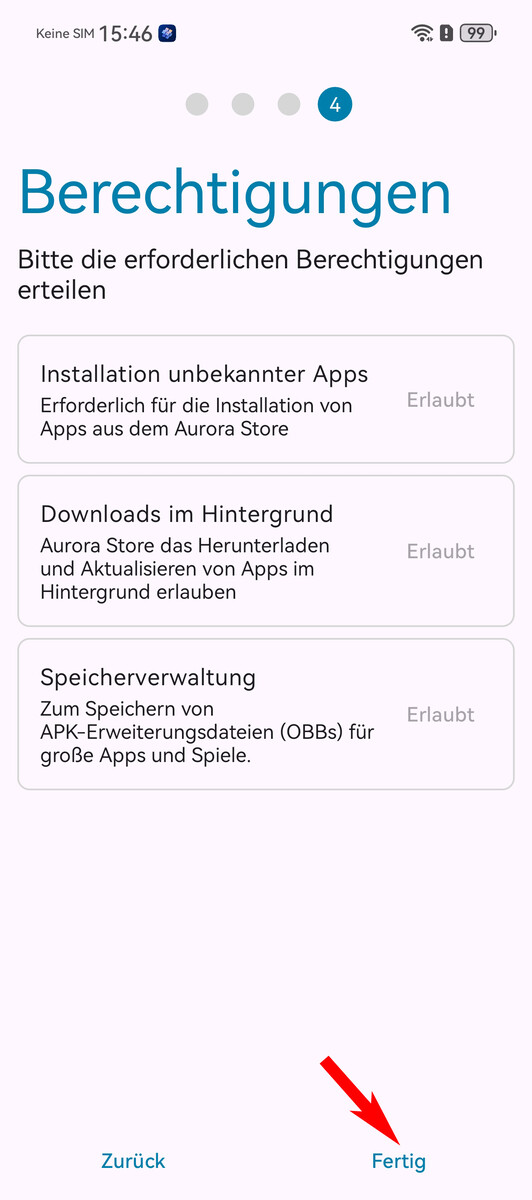
Tapping the Back button twice (or using a corresponding touch gesture) will bring you back to the third step of the Aurora Store’s setup process. The only difference now is that the Google Store is marked as activated. Pressing Continue will bring you to the permissions page, where you need to work through the three sections and grant the required permissions. Once this is done, all three sections should be marked as Allowed. Finish the setup by tapping Done.
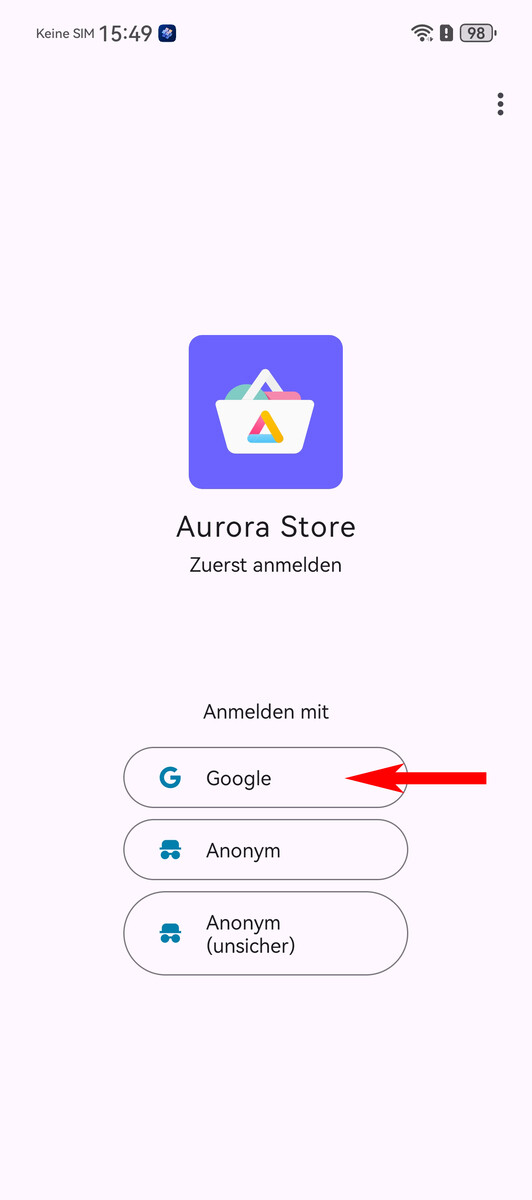
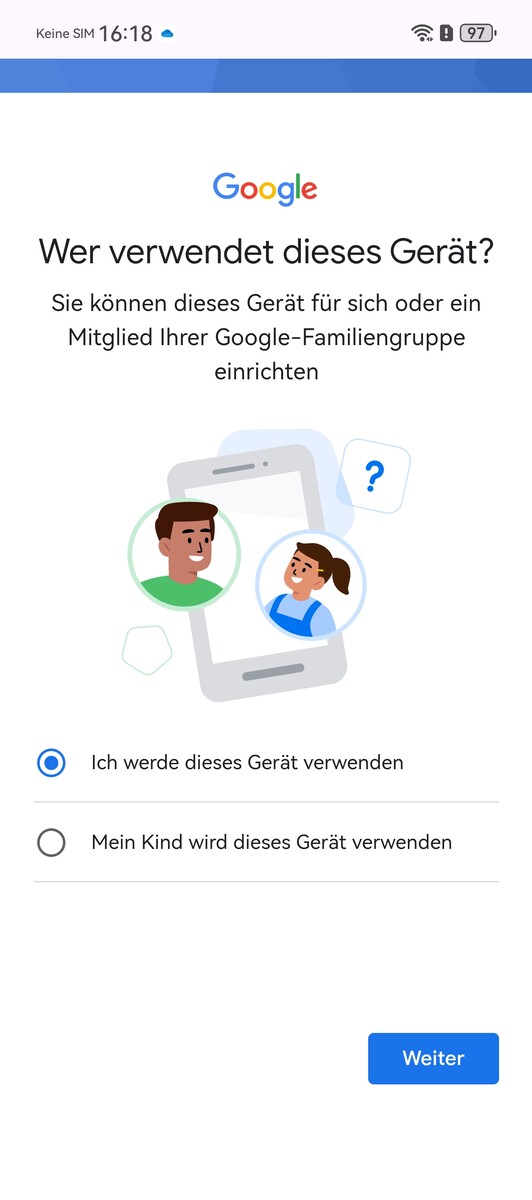
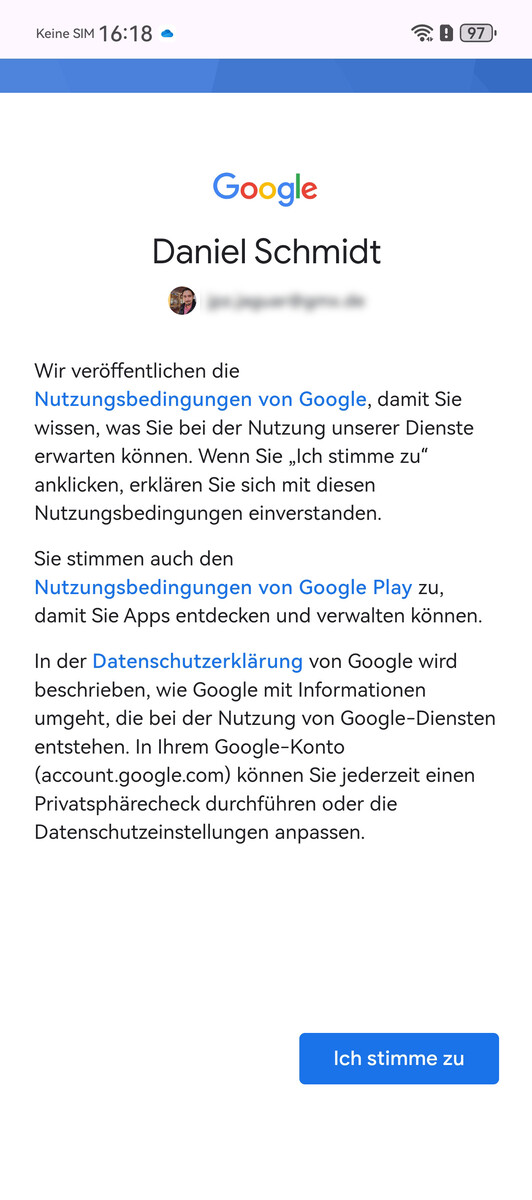
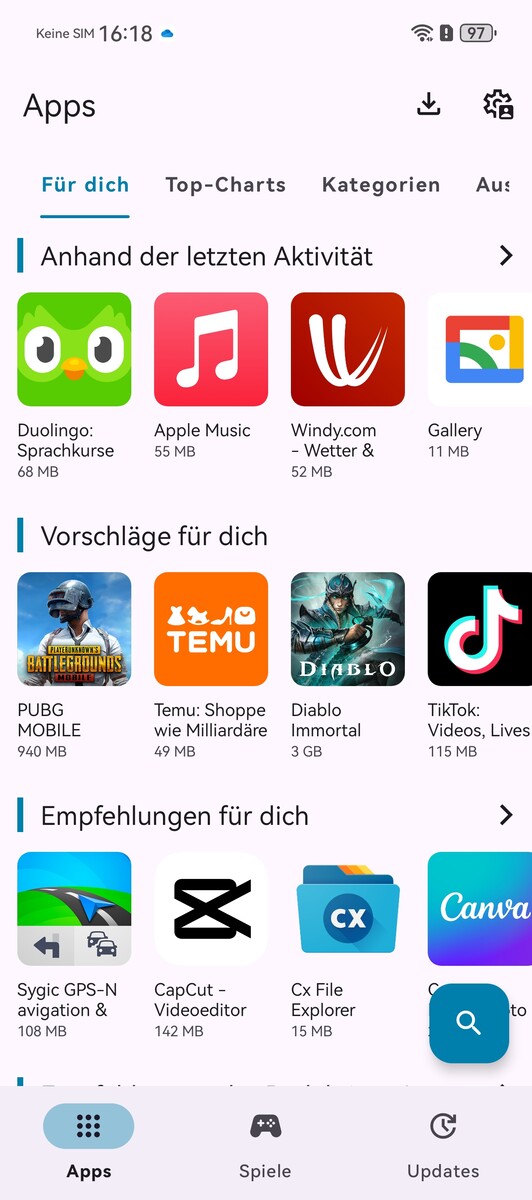
Now you are able to log in to the Aurora Store with your Google account. There is also an anonymous login option, but you won’t be able to restore any purchases with it. In our case, we decided to sign in with our Google account. After going through two-step verification (if enabled), you will be asked whether the device is going to be used by you or a child, and also need to confirm that you accept Google’s Terms of Service and Privacy Policy. Once this is step is complete, you will end up on the Aurora Store’s front page and can start installing any apps you want.
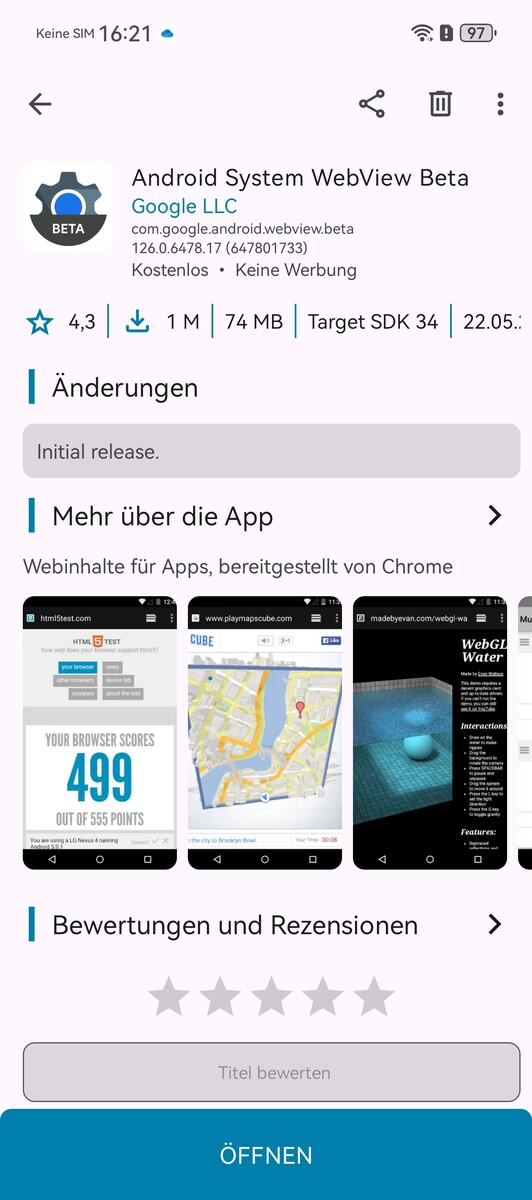
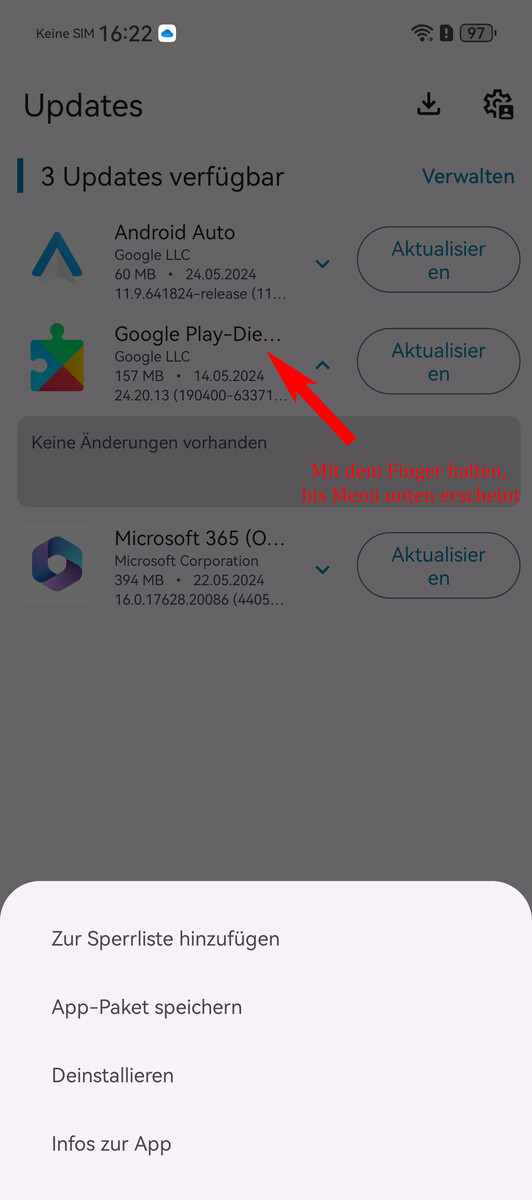
To ensure the process goes smoothly, we recommend installing Android System WebView. Moreover, you’ll notice that an update for Google Play Services is available in the Updates tab. However, since the update can’t be installed anyway, it's best to just hide the info. To do so, press and hold the app until a sub-menu appears, then select Add to Blacklist.
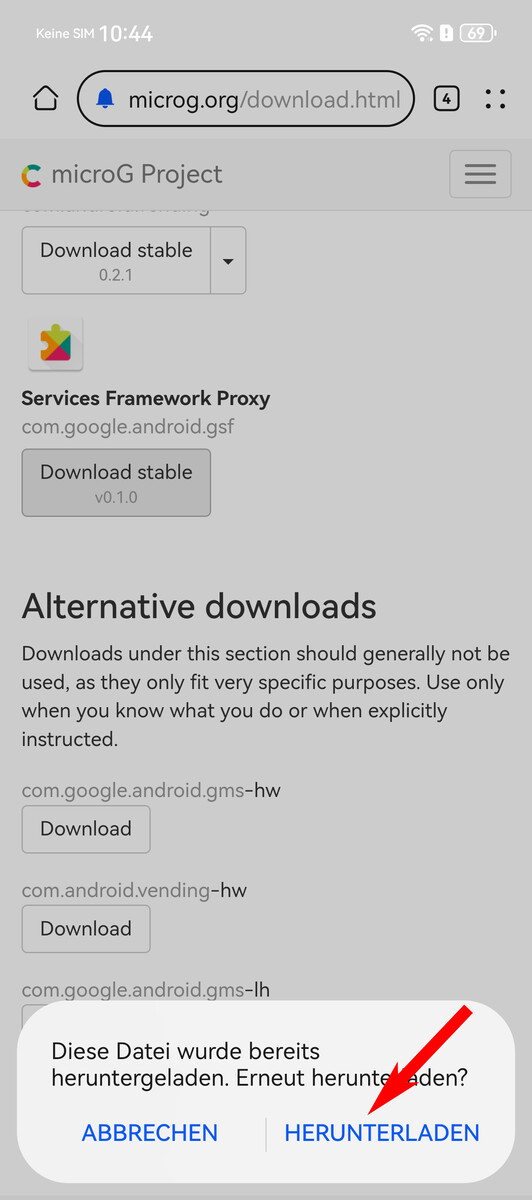
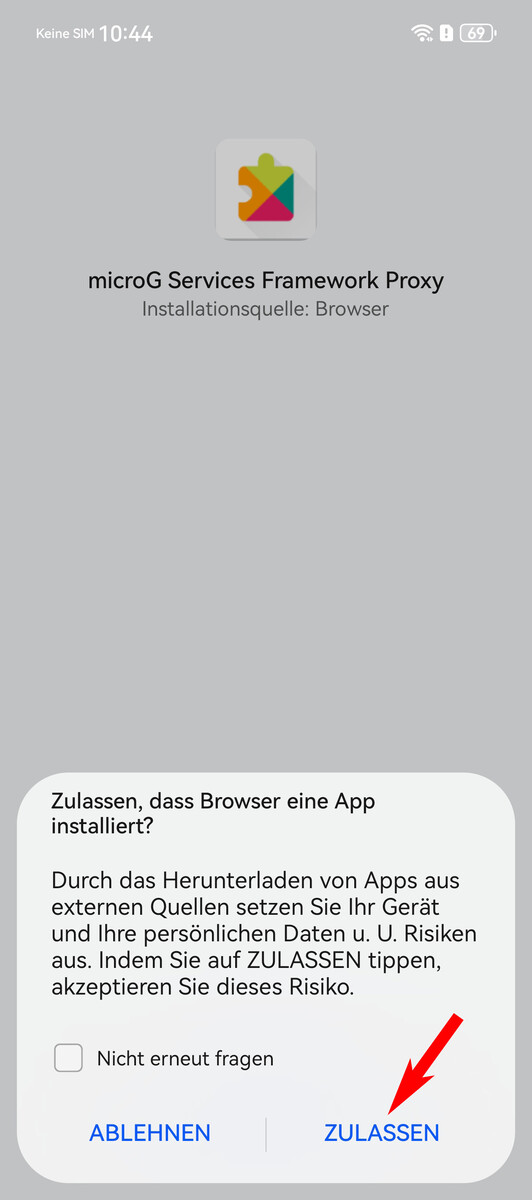
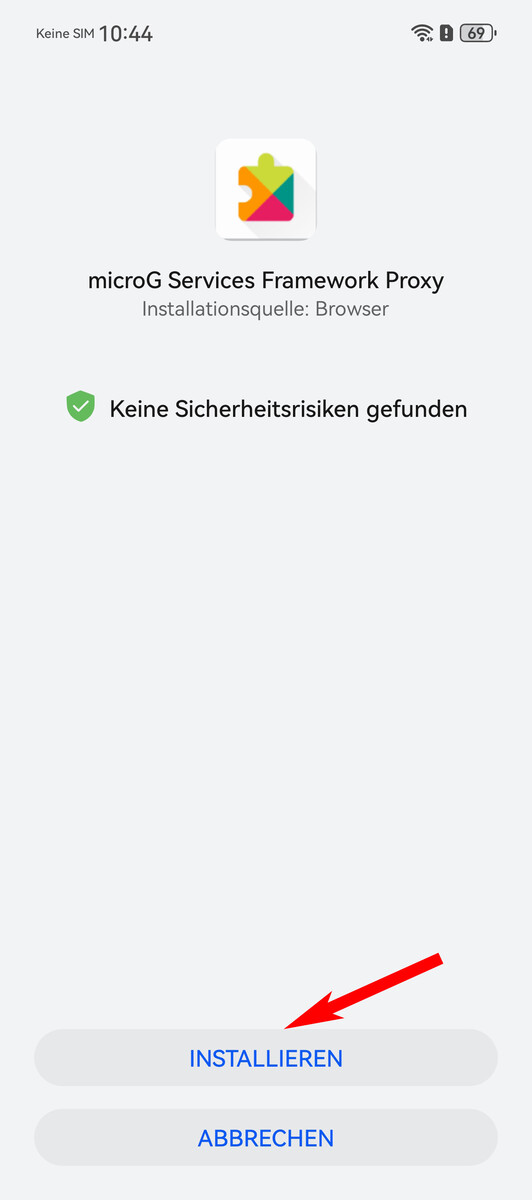
Whilst not absolutely essential for most users, the Services Framework Proxy package should also be installed to help prevent issues. The APK can be downloaded and installed directly from microG using a browser. For the installation, you may need to enable the necessary permissions, e.g. installation from unknown sources, in your browser. On the Pura 70 Ultra, a security prompt will otherwise also appear right before installation.


Optimising the permissions given to microG
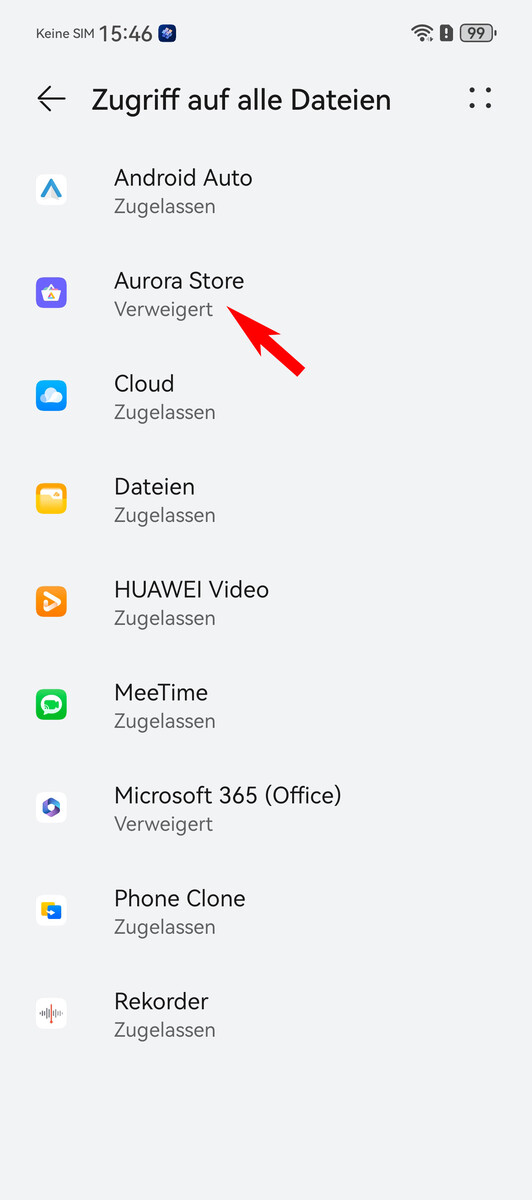
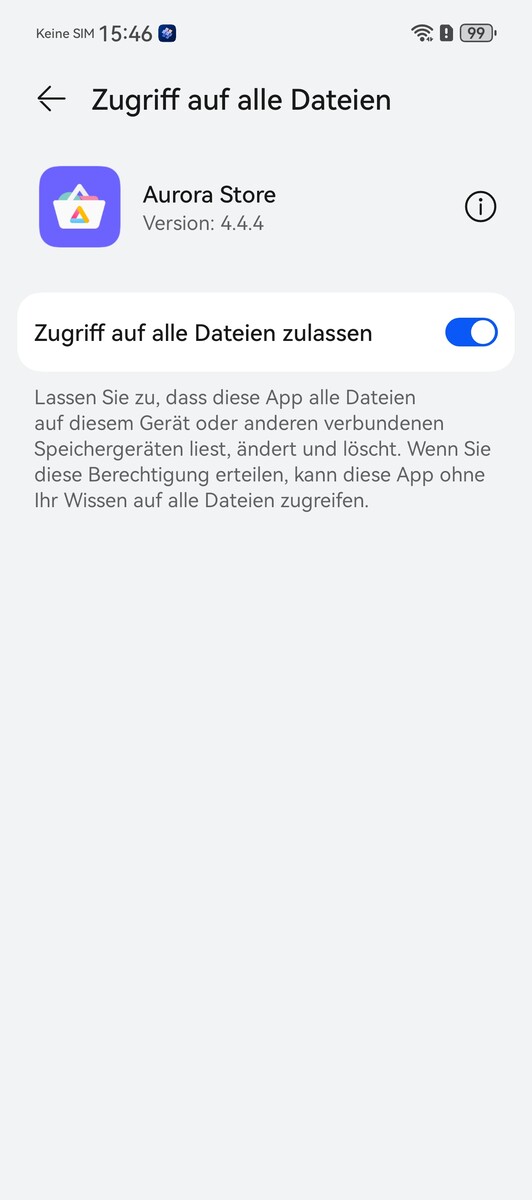
Now you should now be able to install and update apps via the Aurora Store. But in order to ensure that notifications from messaging apps, such as WhatsApp, work as intended, we recommend relaxing and optimising the permissions given to microG.
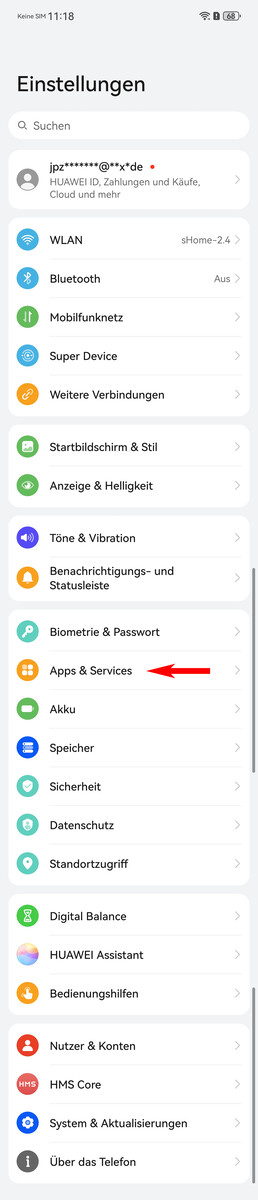
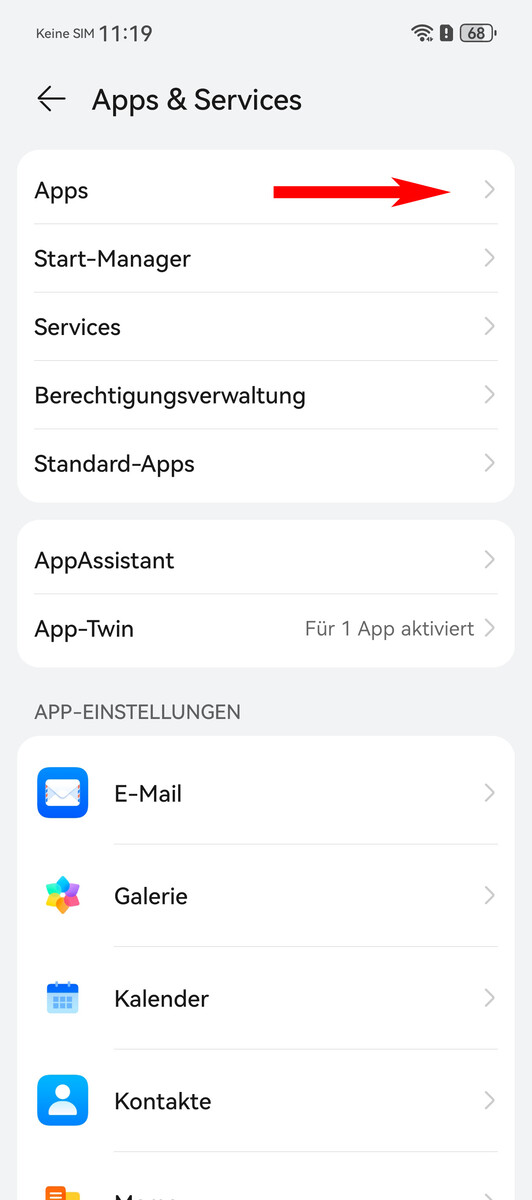
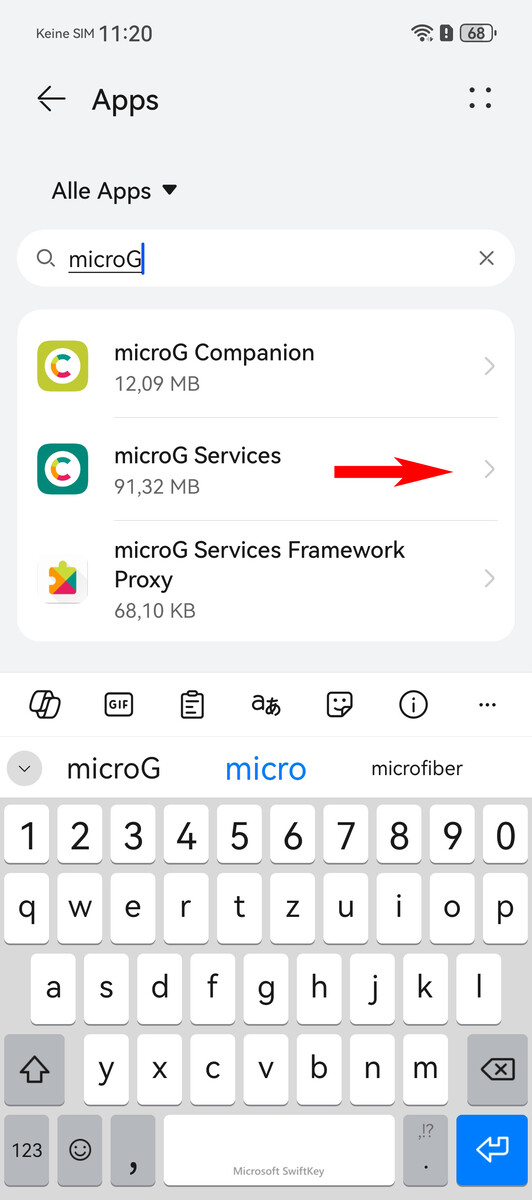
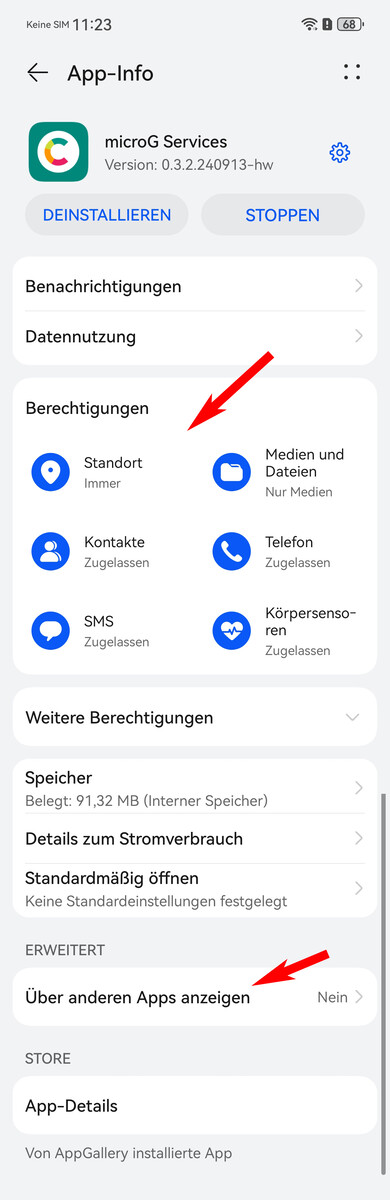
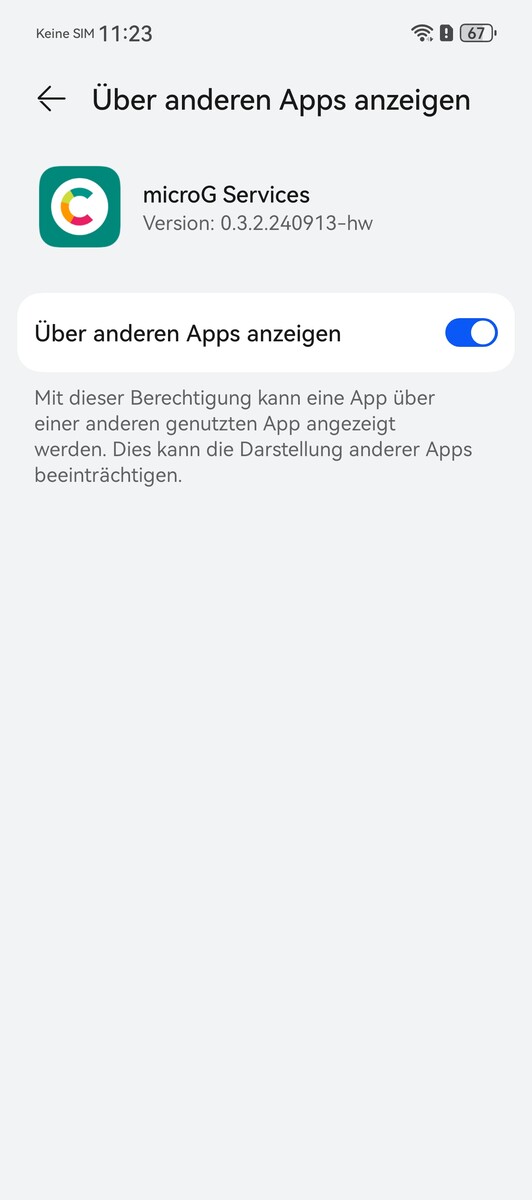
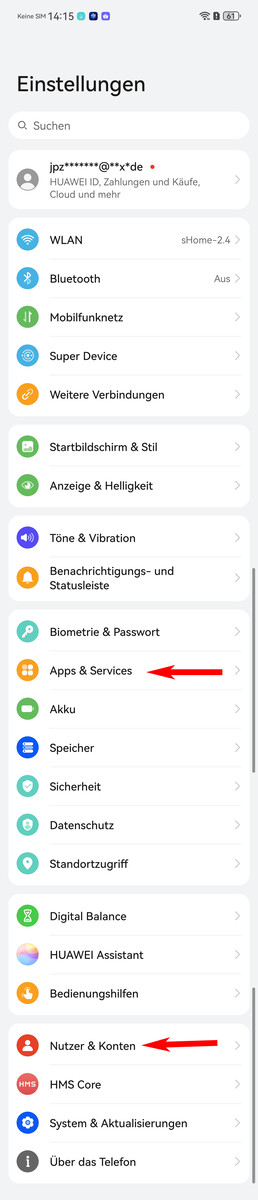
To modify permissions, first you need to go to Apps & Services in the settings. Next, search for “microG” under Apps and then tap microG Services. Once in this menu, enable all options under permissions as well as the Display over Other Apps setting. For location, select the Always Allow option.
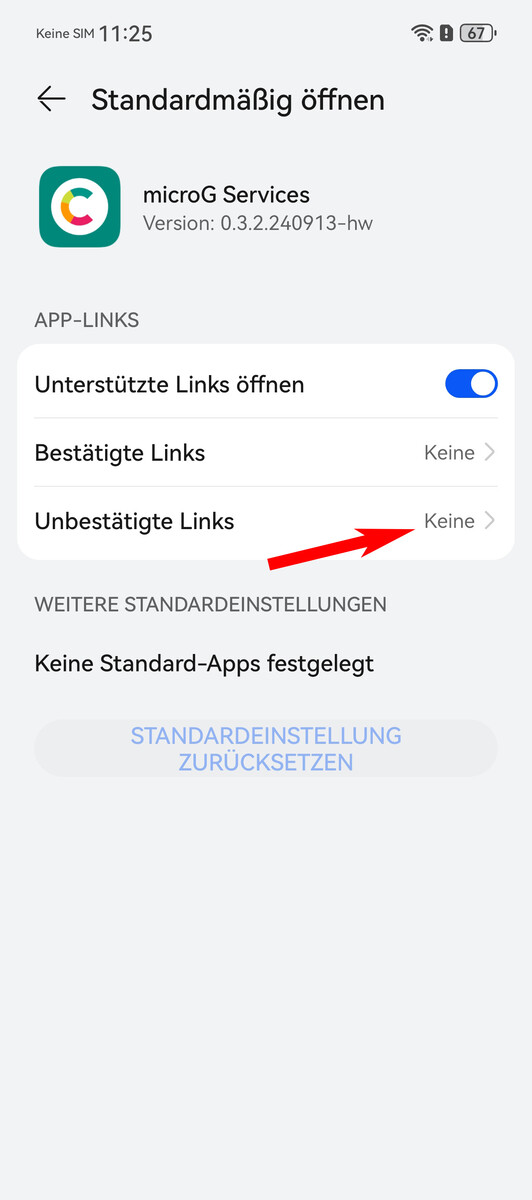
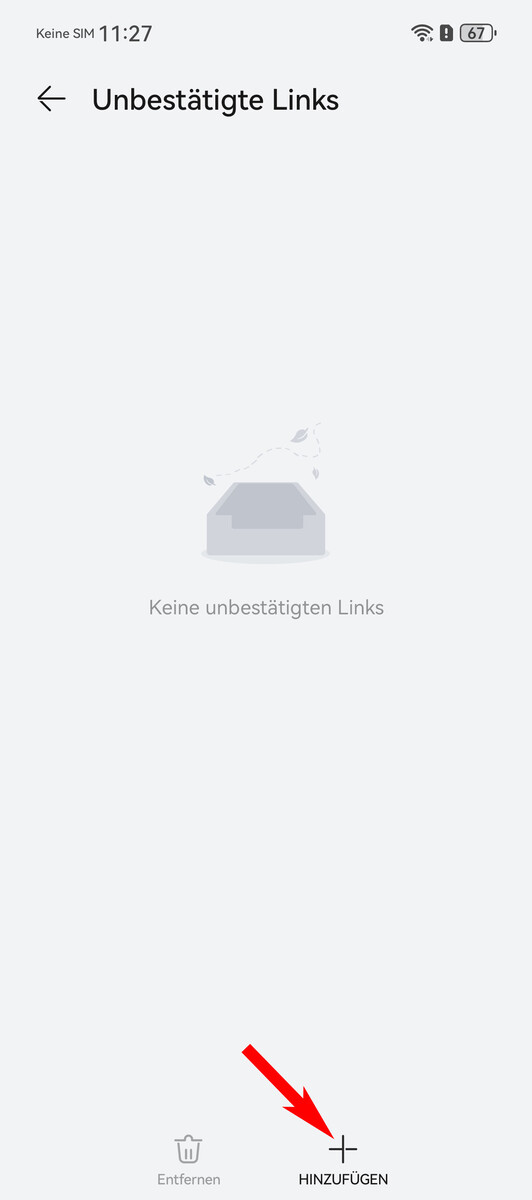
In the Open by Default sub-item, tap the Add button in the Unconfirmed Links sub-menu, choose the recommended link, and confirm your selection by pressing the tick symbol at the top left.

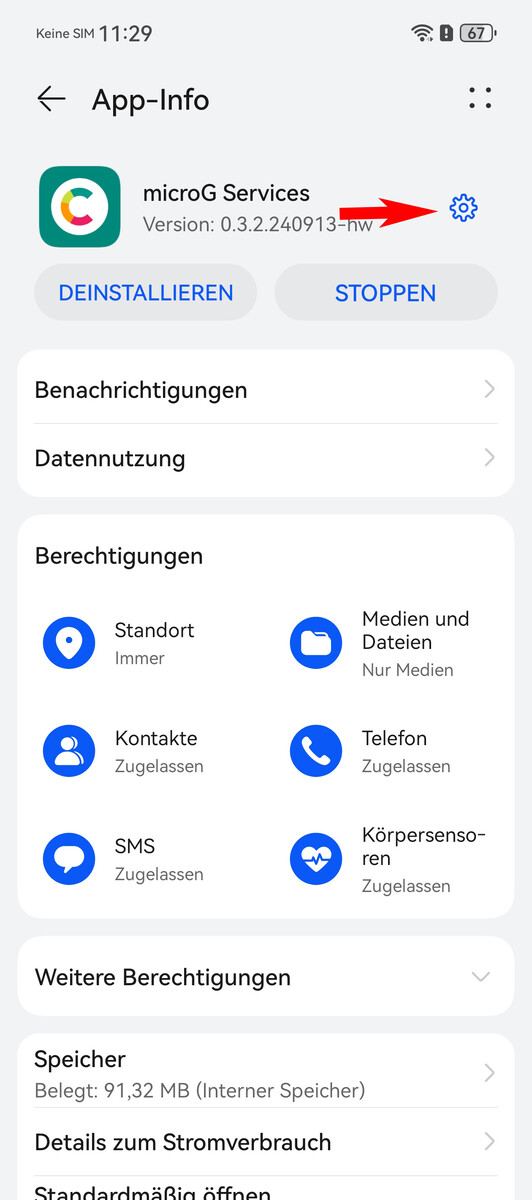
MicroG's settings and self-check can also be found in the app info of microG Services. Simply tap the cogwheel to the right of the app icon. All boxes under self-check should be ticked.
Under Google Accounts, you now need to sign in with your Google accounts once more.
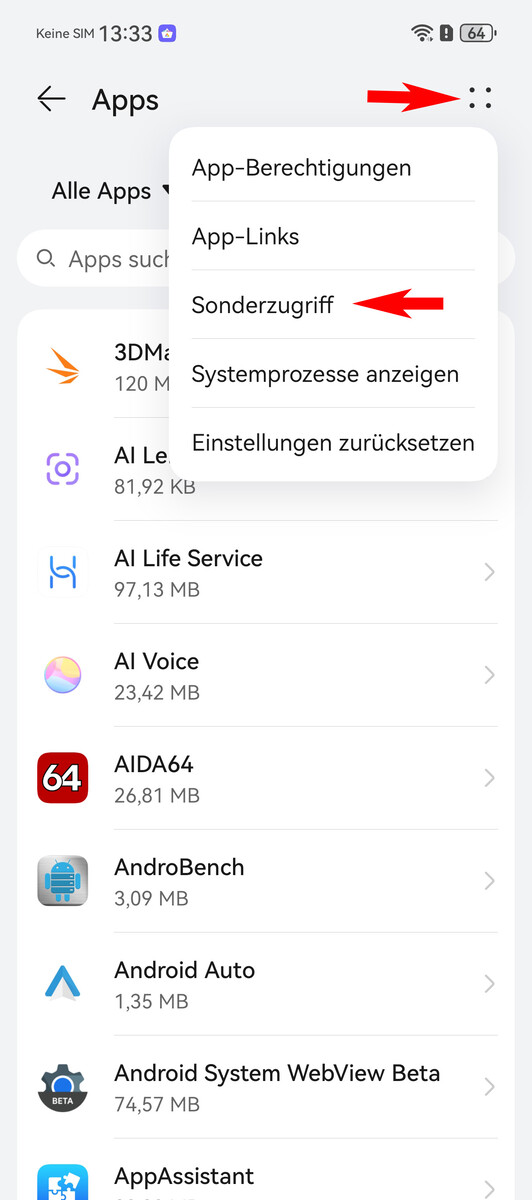
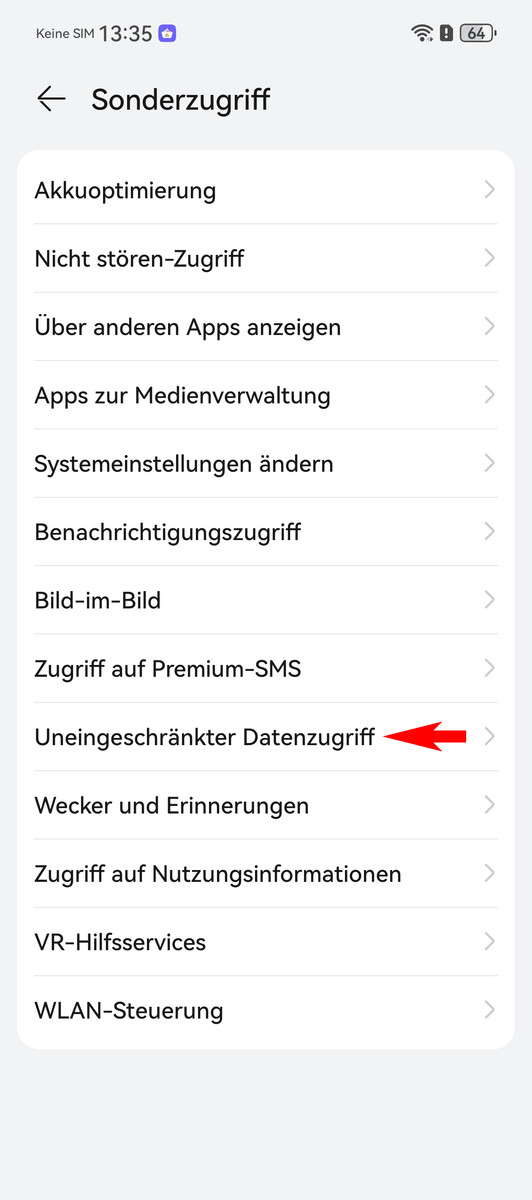
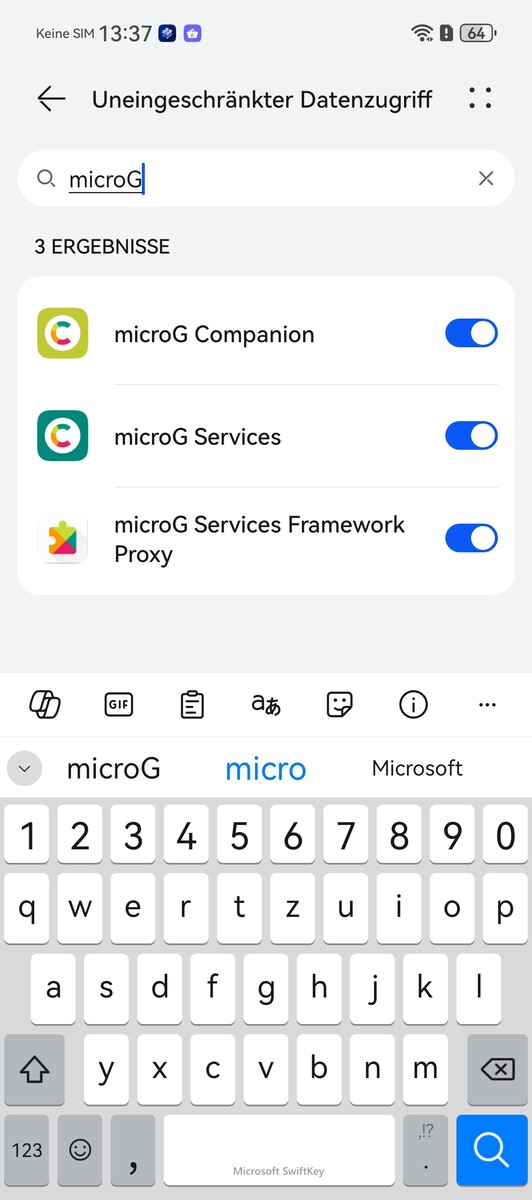
Subsequently, return to the app overview and select Special Access after tapping the four-dots icon. Here, tap Unlimited Data Access and enable the option for all microG apps.
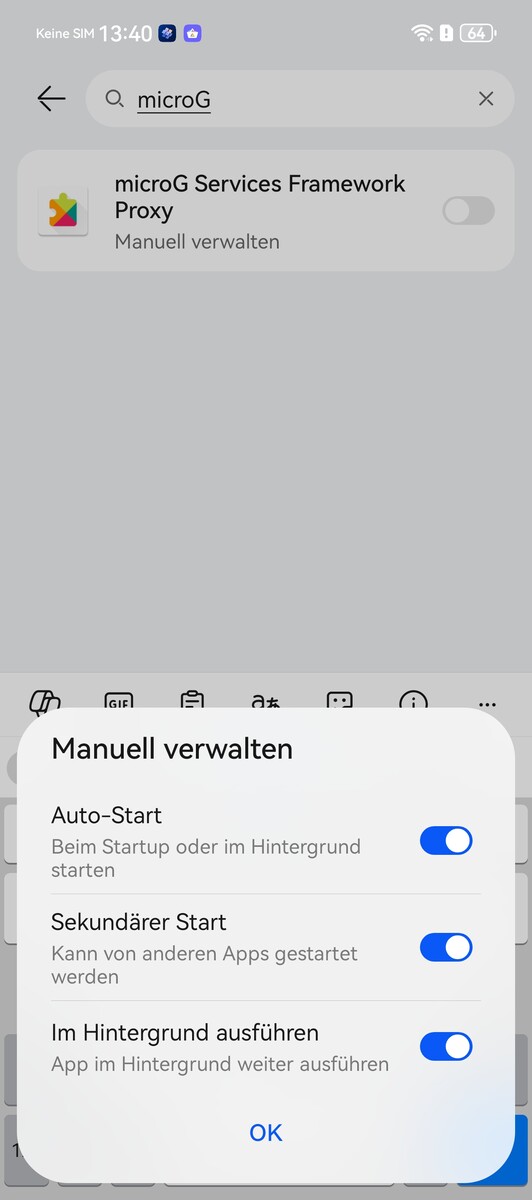
When you return to Apps & Services, tap Startup Manager and disable automatic management. Then simply confirm this in the pop-up menu for Manual Management by pressing OK.
Synchronising Google contacts with the Huawei phone
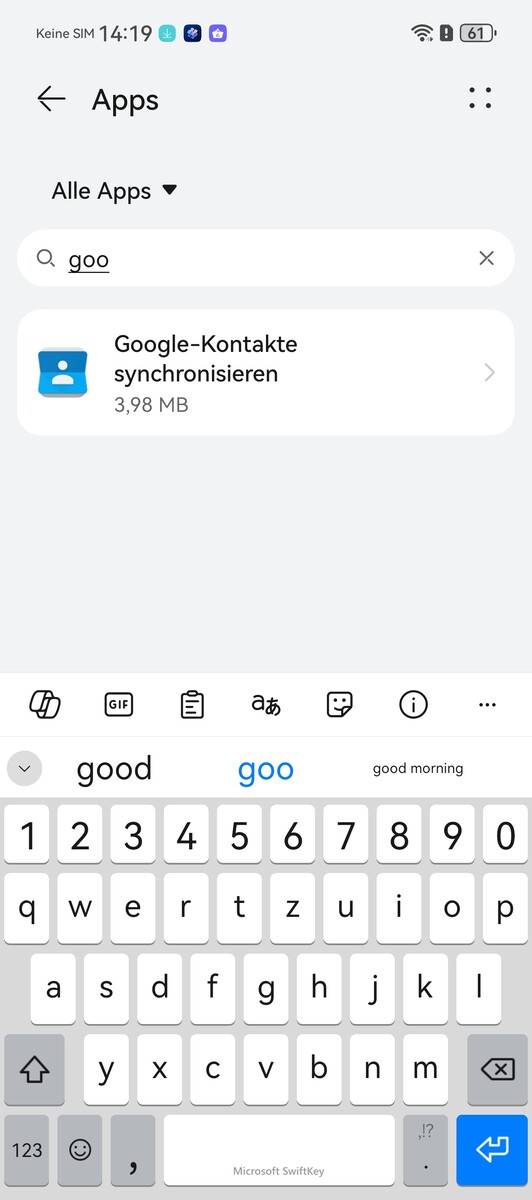
If you want to sync your Google contacts from the cloud with the Pura 70 Ultra, you can also download and install the Google Contacts Sync APK using a browser. The right APK is available on sites such as APKMirror. It is crucial that you choose a third-party website that you know and trust.
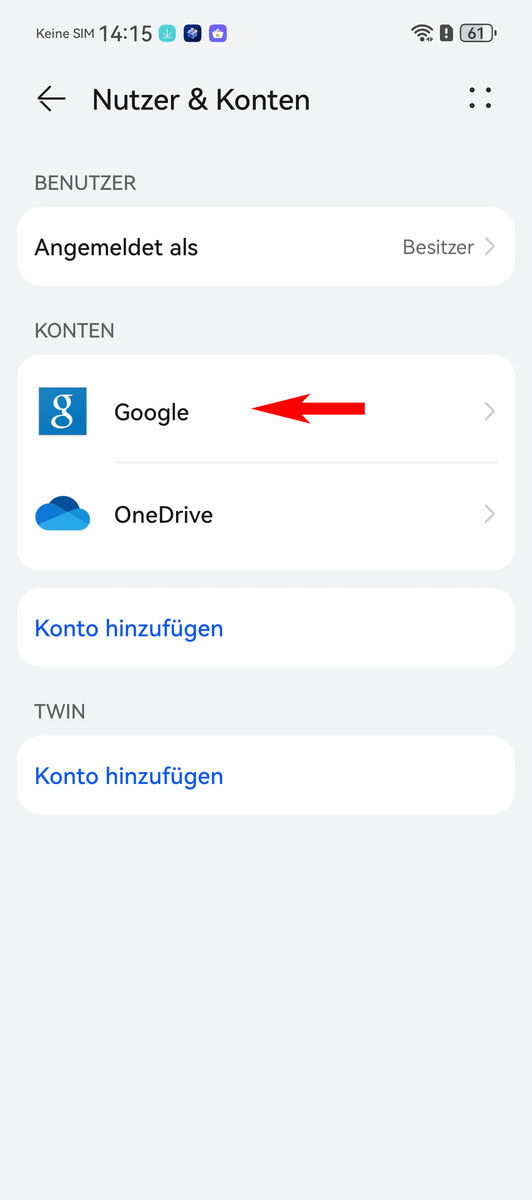
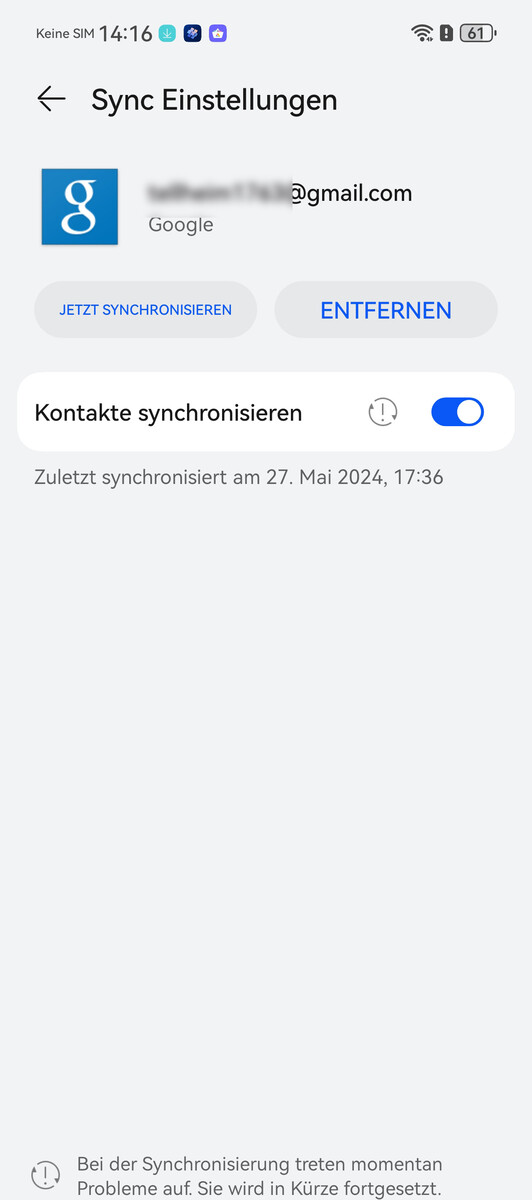
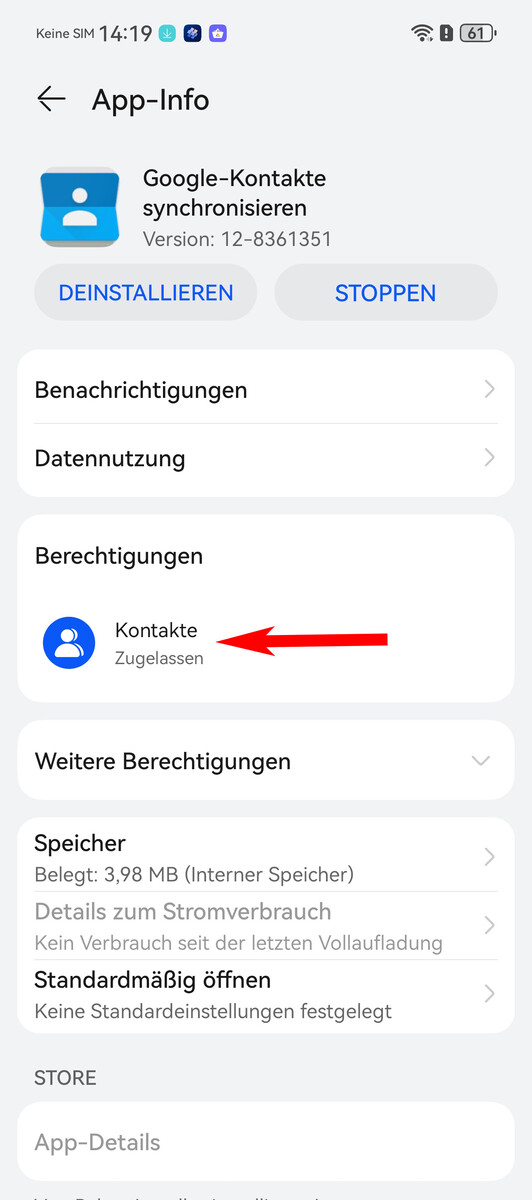
After installation, go to Sync Google Contacts, found under Settings > Apps & Services > Apps, and grant permission to access your contacts. Next, select Google under Settings > Users & accounts, followed by the Google account you want to use, and finally enable the Sync Contacts option. You should now be able to find all your contacts from Google Cloud on your Huawei phone.

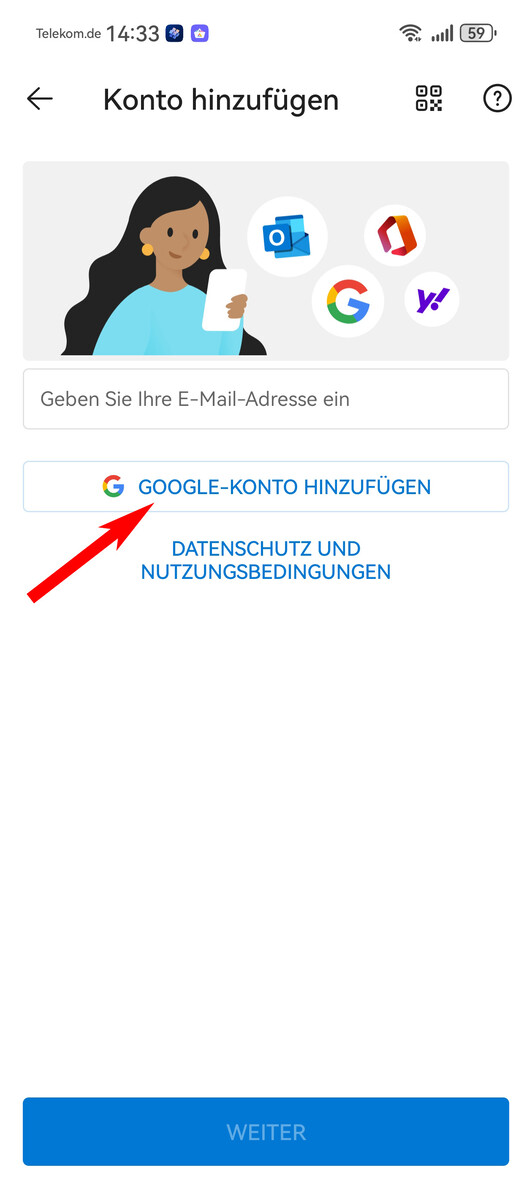
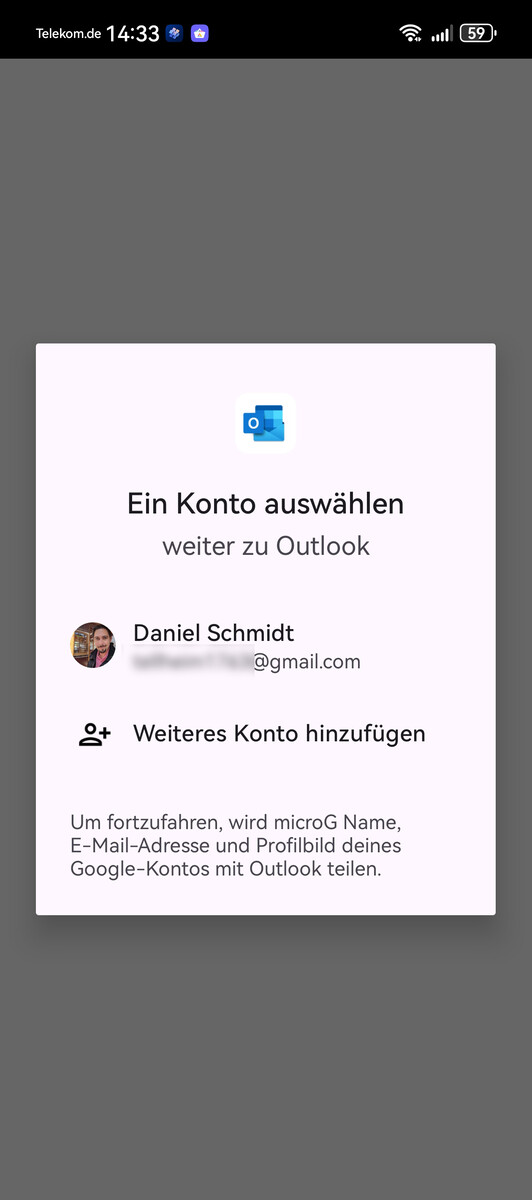
Alternatively, you can also sync your contacts using Microsoft Outlook. The app is conveniently available for download on AppGallery. For those who don’t have a Microsoft account or don’t want to link it to the phone, you can simply skip this step when launching the app for the first time. Immediately after that, Outlook will recommend you to add your Google account as usual.
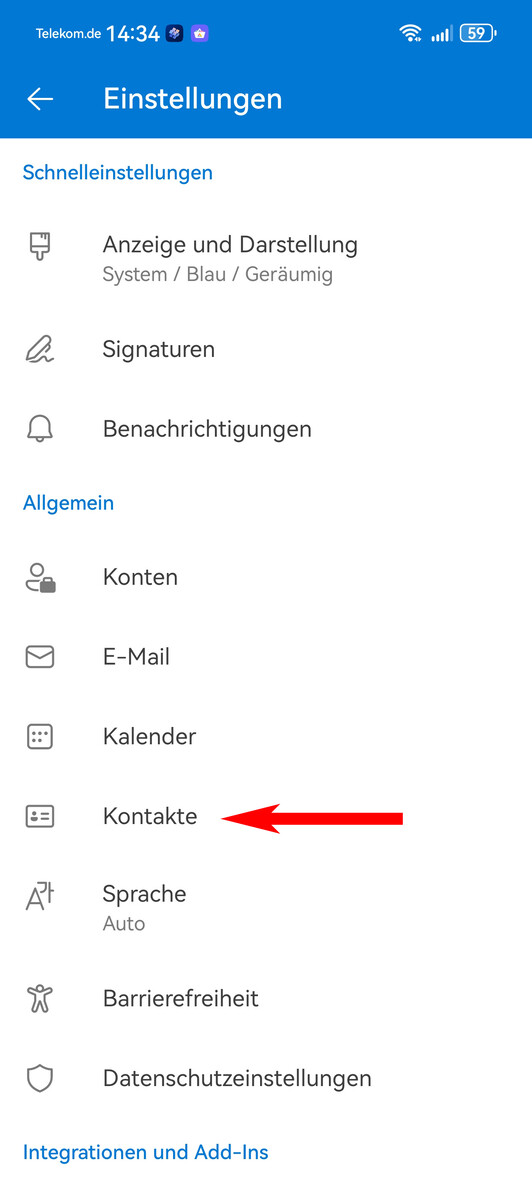
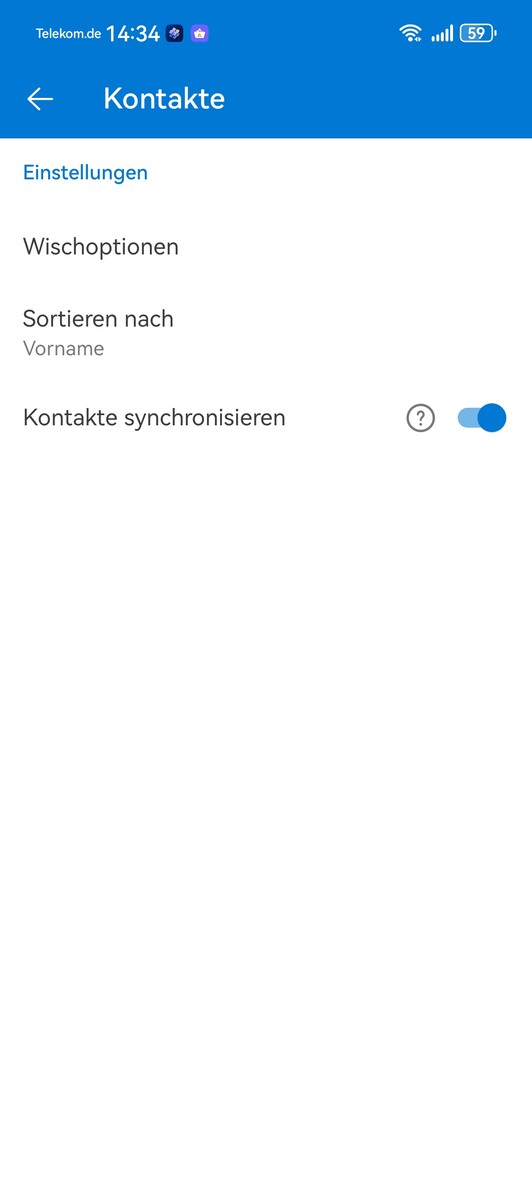
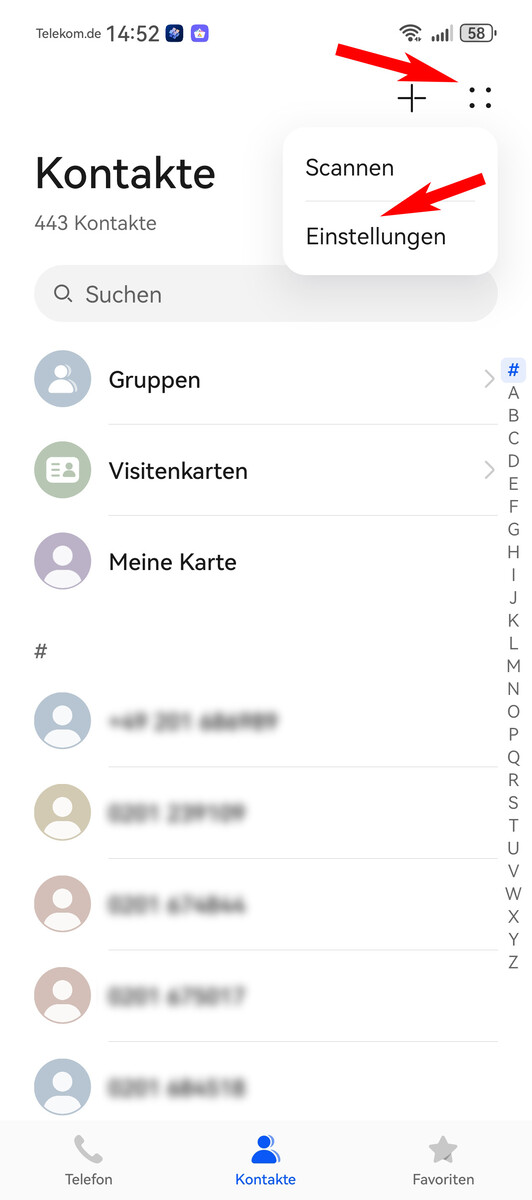
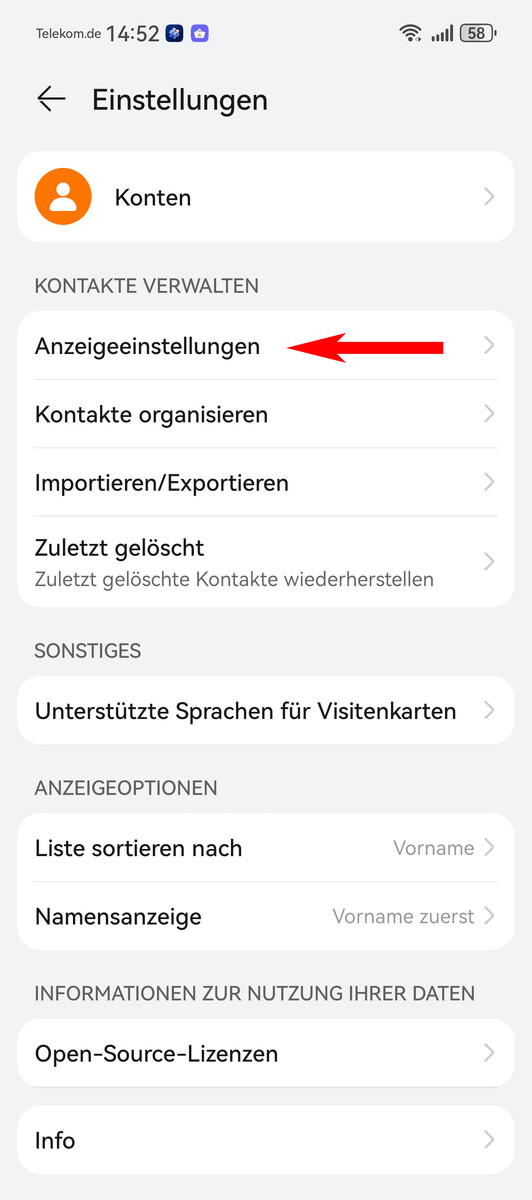
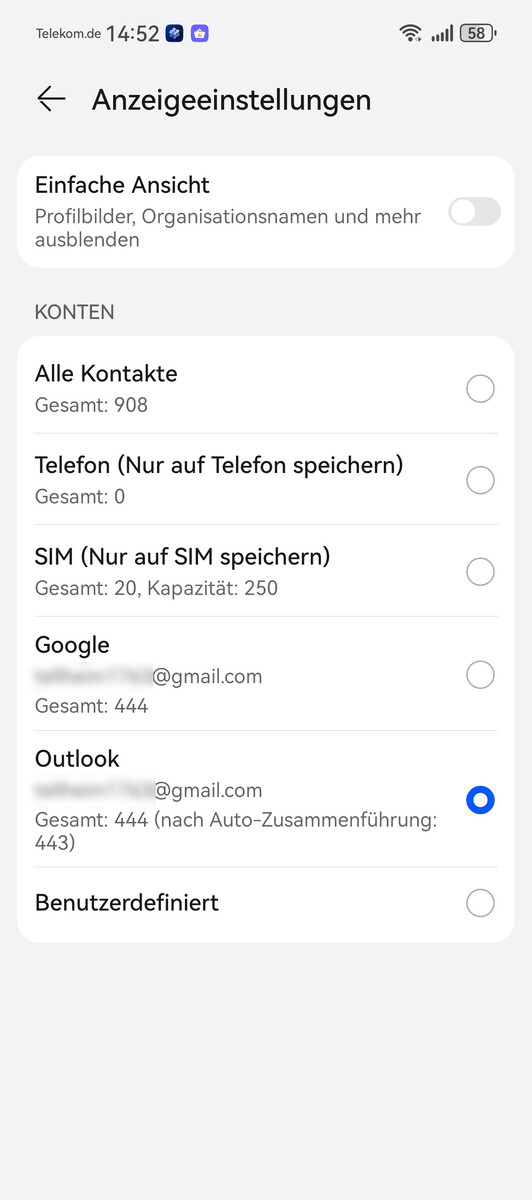
Once this step is done, you will be able to enable Sync Contacts under Settings > Contacts. If your contacts don’t appear in the phone app, check the display options in the app. To access these options, go to the Contacts tab, tap the four-dots icon, followed by Settings and Display Settings. Then select Outlook or simply All Contacts.

Android Auto on the Huawei Pura 70 Ultra
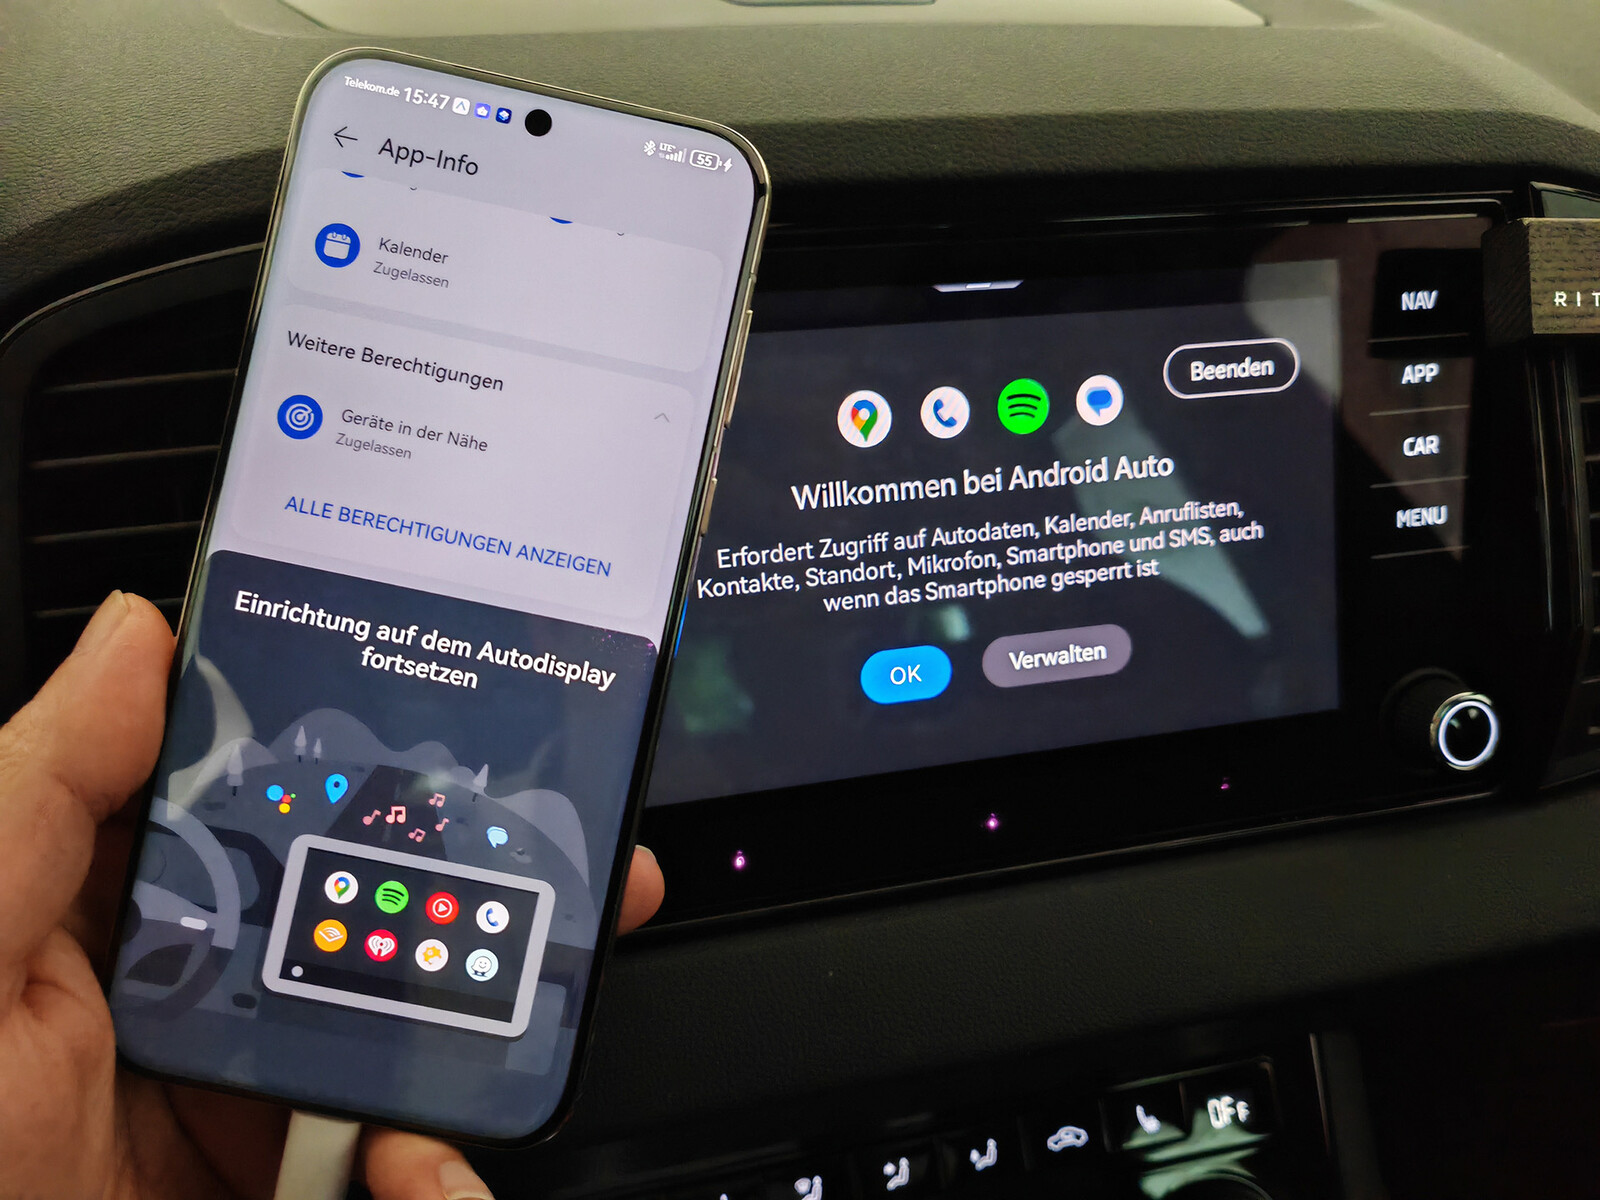
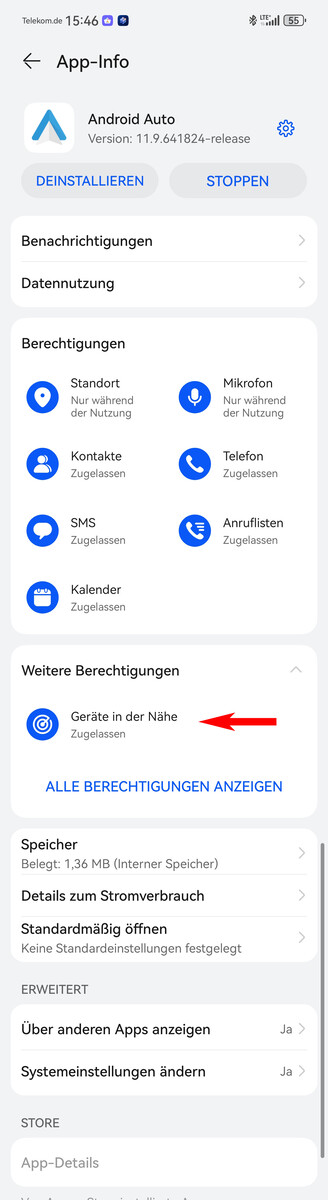
Android Auto is also usable on the Huawei Pura 70. However, a few minor preparations are required for the app to work. First off, you need to download Android Auto on the Huawei phone and modify its app permissions, which are found under Settings > Apps & Services > Apps. The Nearby Devices permission is particularly important here.
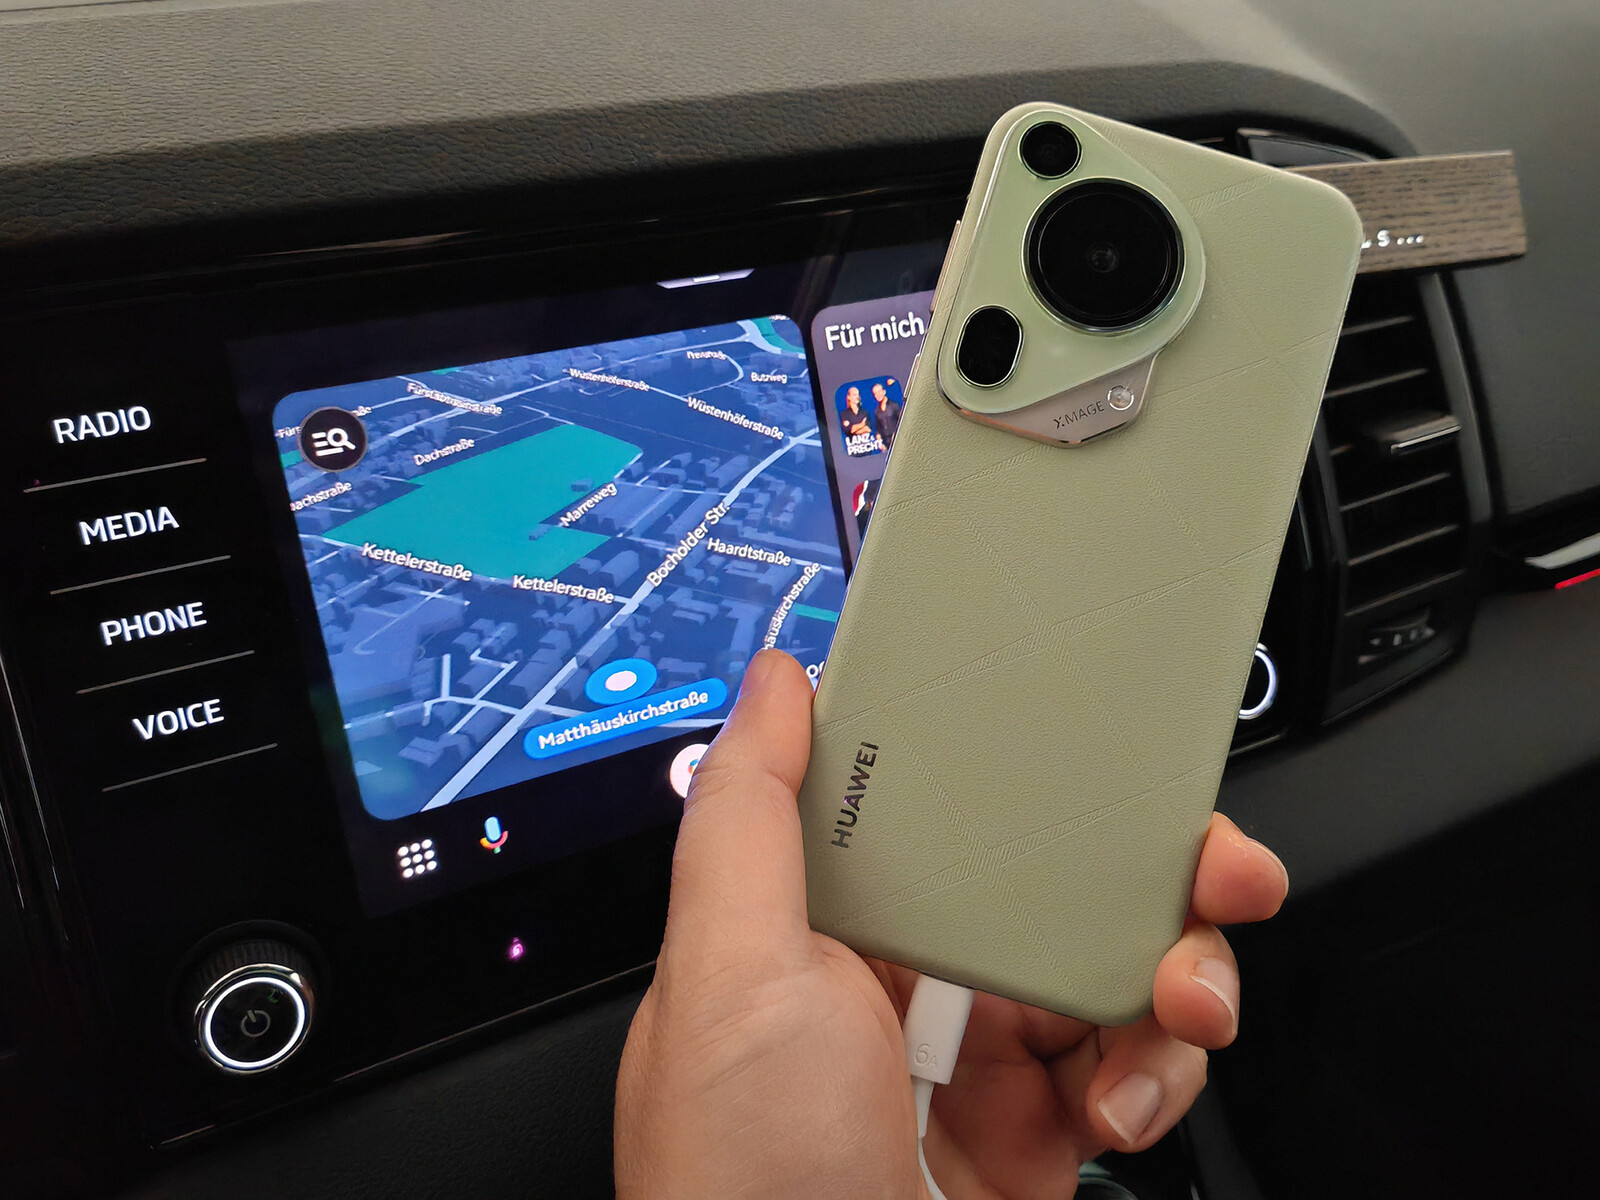
Subsequently, you should install the Google app, Google Maps, and Speech Recognition & Synthesis to ensure the process goes smoothly. In our testing, we were only able to connect the phone to Android Auto in our Škoda Karoq via USB, even though the vehicle supports wireless connection. This is likely a limitation that generally applies to the use of Android Auto with Huawei smartphones.
That said, our colleagues at Huawei.blog have found a way to use Android Auto wirelessly.

microG as a good solution for the Pura 70 Ultra and other Huawei phones
The microG project is a real boon for everyone using Huawei smartphones, enabling access to all the apps that can be found in the Google Play Store. The Aurora Store, which is used for downloading apps from Google, is slightly slower than the original Google Play app in everyday use, but not so much as to mar the experience. The Aurora store also requires the user to always provide an extra confirmation when installing apps.
We have hardly noticed any limitations so far. WhatsApp and other social media apps run absolutely reliably. However, we weren’t able to zoom in on our position in Runkeeper. Our colleagues at Huawei.blog have also reported issues with Pokémon Go. There are bound to be other cases of apps not fully working as expected.
Google Pay continues to elude Huawei users. Those who want to pay with their Huawei phones can only do so if their bank offers its own mobile payment app, such as the German-based Sparkasse and Volksbank Raiffeisenbank.
If this guide is too long for you to read, our colleagues at Huawei.blog has published a tutorial video for the installation process:

