Artillery Genius Pro 3D printer in review: A device for beginners and professionals
With the Sidewinder X1, Artillery has not only brought direct-drive extruders back into fashion, but also introduced many innovations in terms of looks and workmanship to the lower price segment. Direct-drive extruders and flat ribbon cable management also give the Genius Pro its distinctive look and good functionality. In addition, there is a print bed operated with mains voltage, which not only heats up quickly, but should also be somewhat more energy-efficient than its 24 V colleagues, since the detour via a power supply unit is eliminated.
For around 310 Euros (~$340), you get a 3D printer that prints almost flawless results within less than an hour after its arrival. Both a simple assembly and an already integrated profile in Cura contribute to this, where only minimal adjustments have to be made.
Technical data
If you compare the equipment of the Artillery Genius and Genius Pro, the only main difference is the new print bed sensor. There was also a small change in the end stop sensors for the X and Y axes. These are now mechanical and a proprietary development by Artillery.
| Artillery Genius Pro | |
|---|---|
| Technology used | FDM, FFF |
| Maximum print volume | 220 mm × 220 mm × 250 mm |
| Installation size (without cable) | 43 × 40 cm × 63 cm |
| Motion system | X,Y,Z single drive according to Prusa/Mendel type |
| Extruder | 1 Direct Drive Extruder with gearbox (Titan-Styl) |
| Control board microcontroller |
Artillery Ruby STM32 F4 (32-bit ARM) |
| Firmware of the test device | Artillery Genius Pro Firmware 3.1.3 (Marlin derivatives) GCode compatible |
| Stepper motor driver | 4 × FS31W01 (Pololu compatible) |
| Connectors | microSD, USB Type-A, USB Type-B |
| Control | touch screen, serial interface via USB |
| Power supply | internal 110 V - 240 V to 24 V power supply 220 V print bed |
| Features | print bed sensor, ribbon cable |
| Manufacturer page | Artillery |
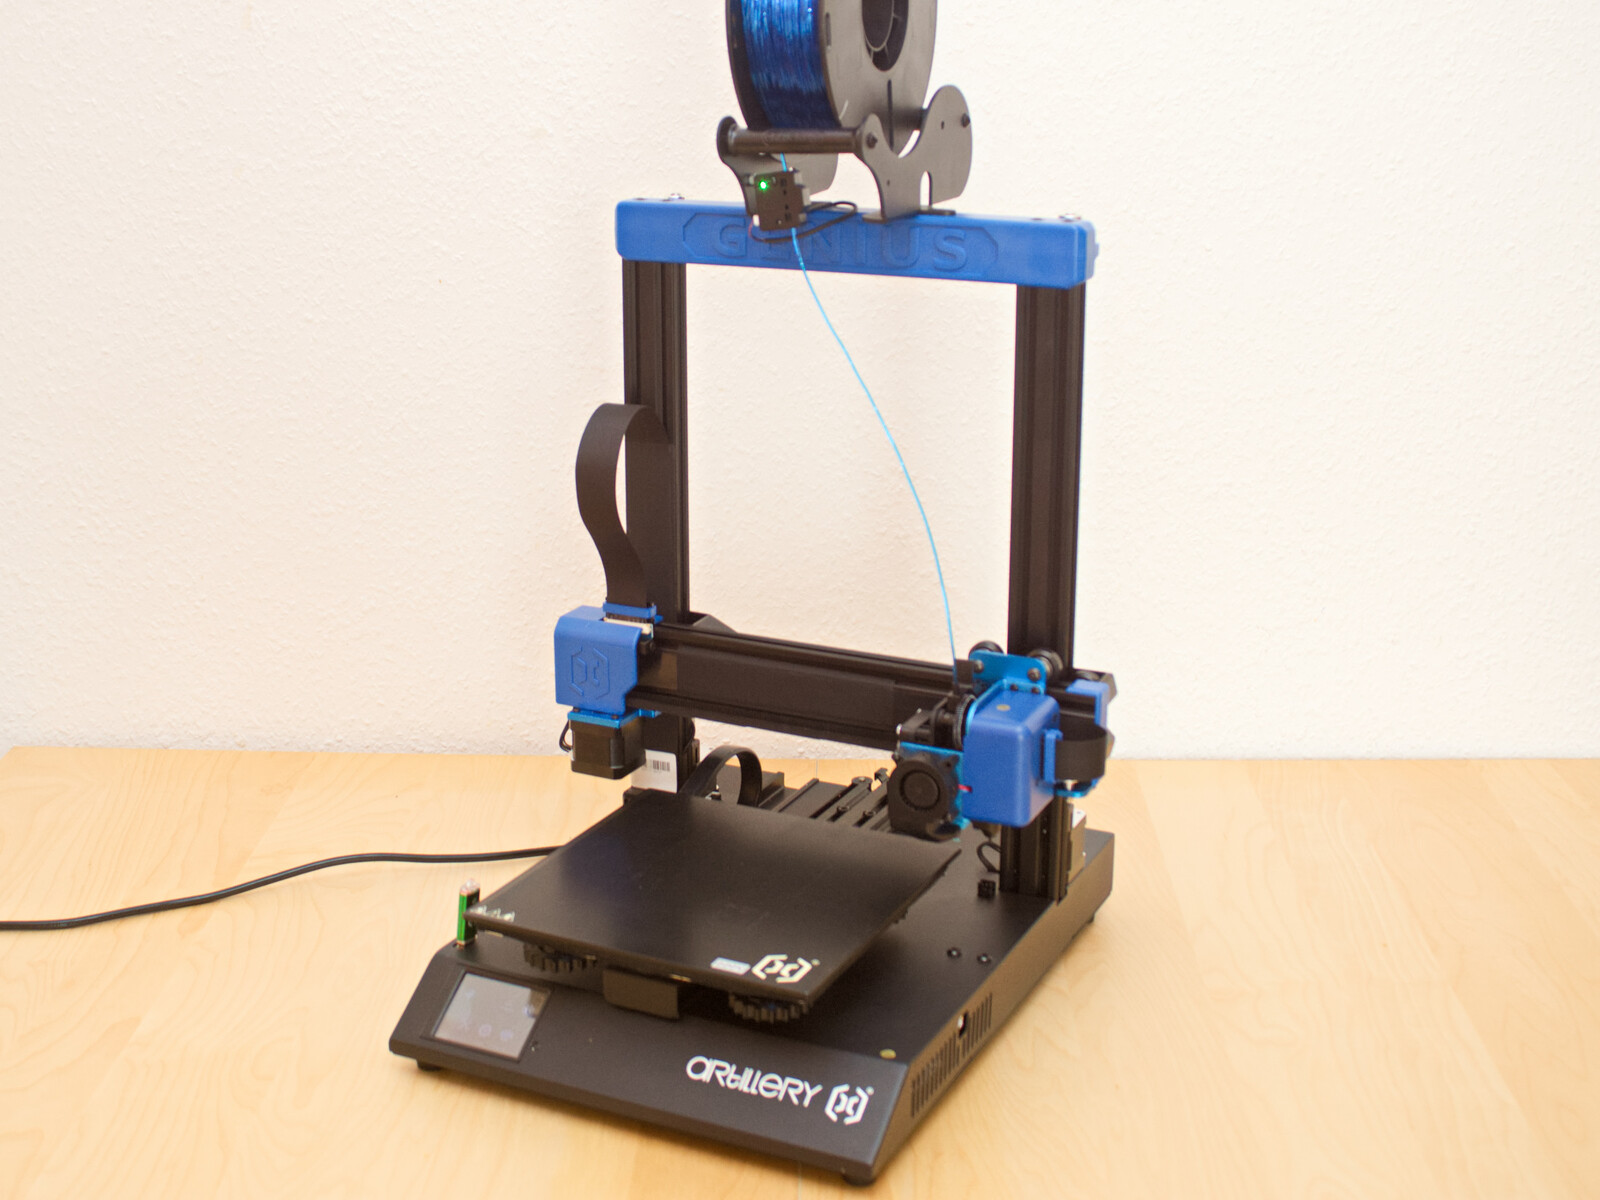
Structure and setup
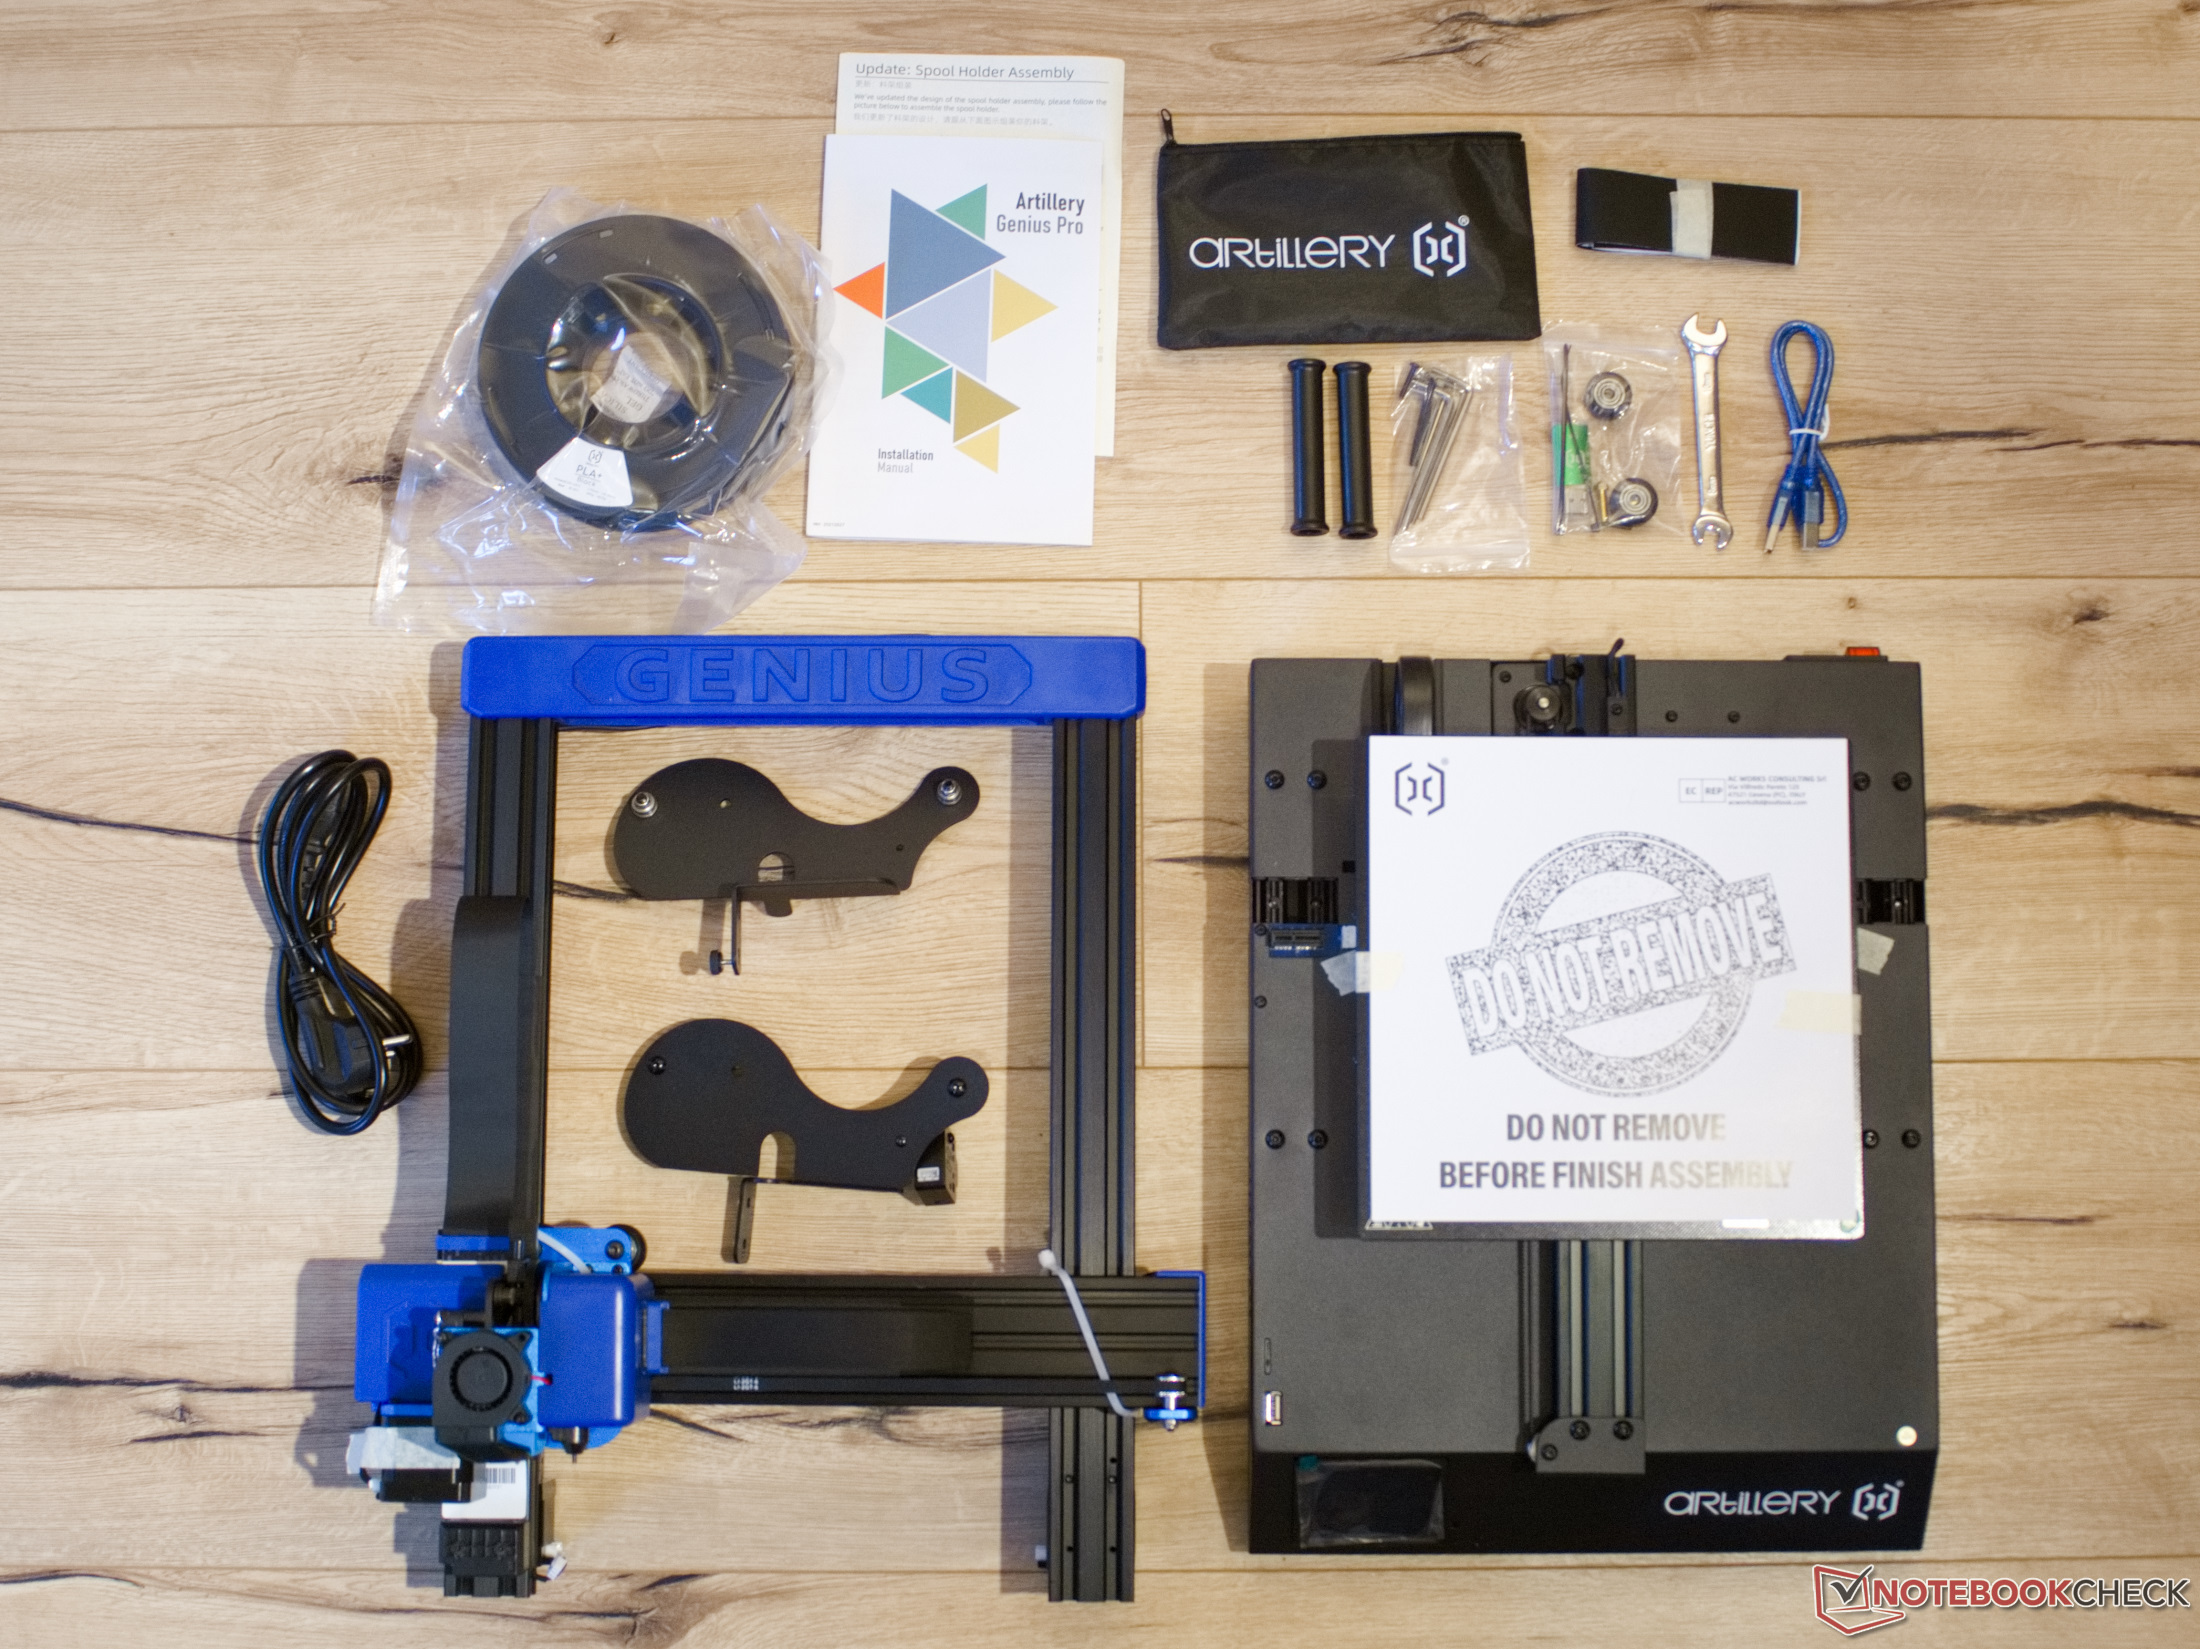
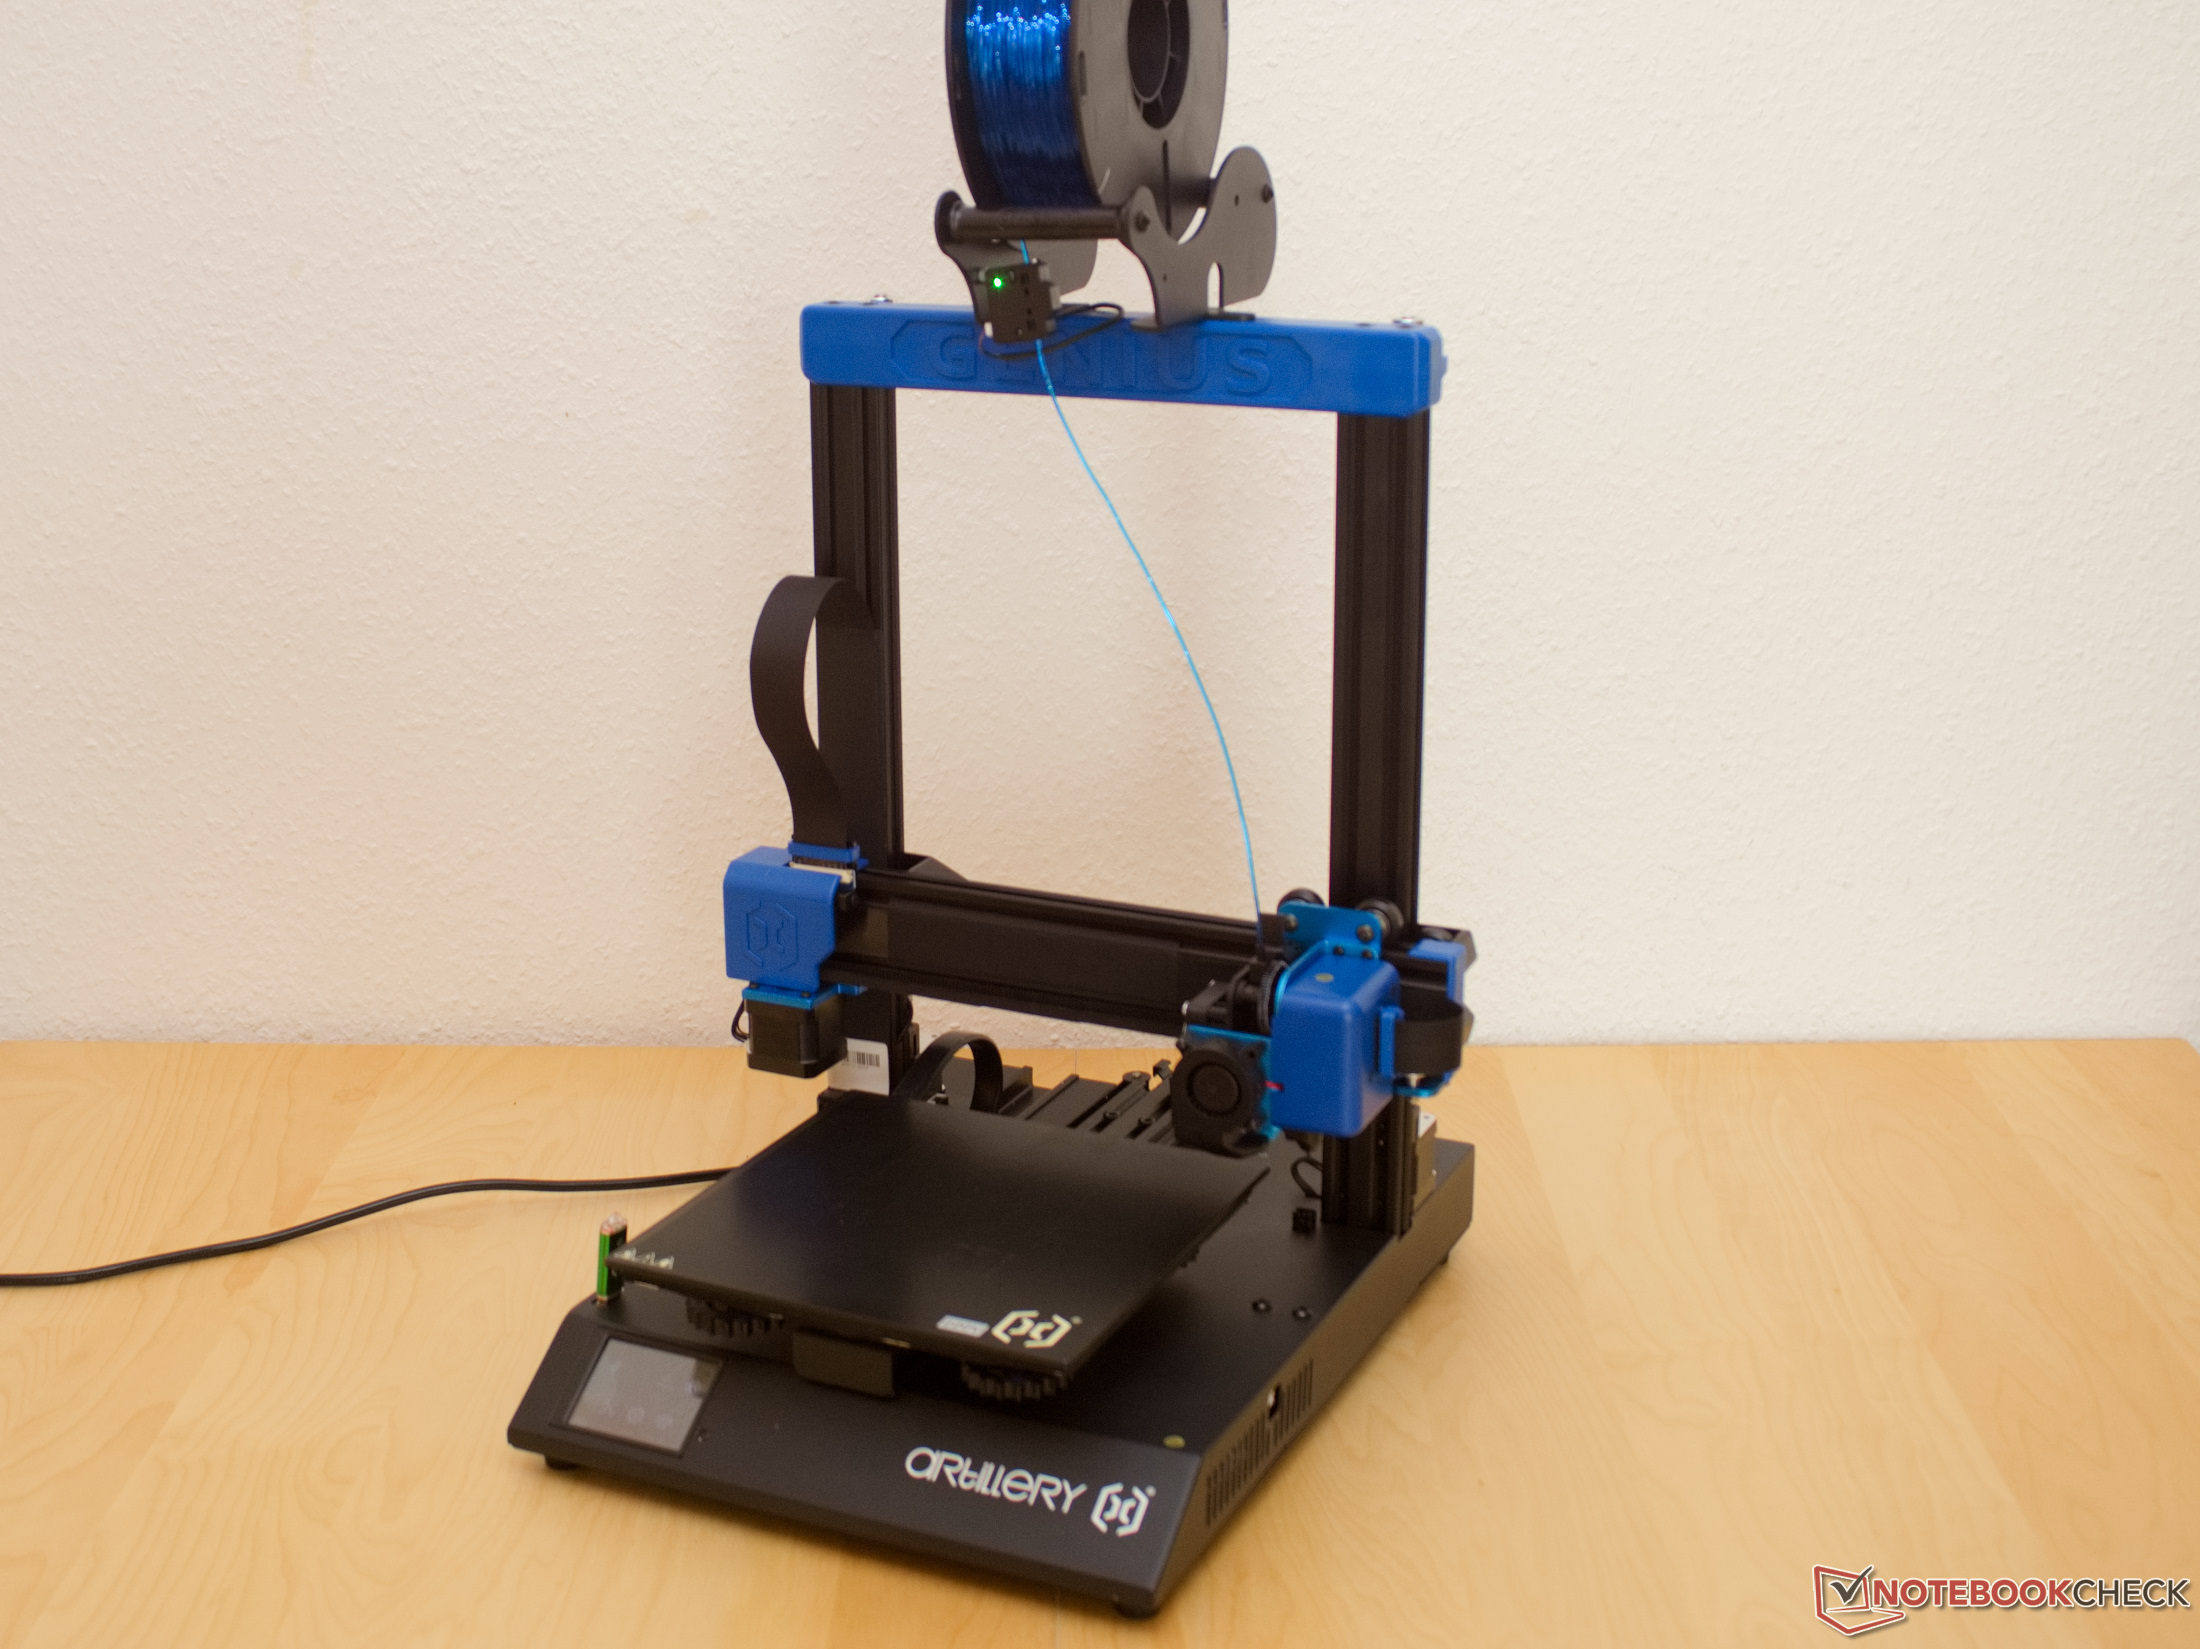
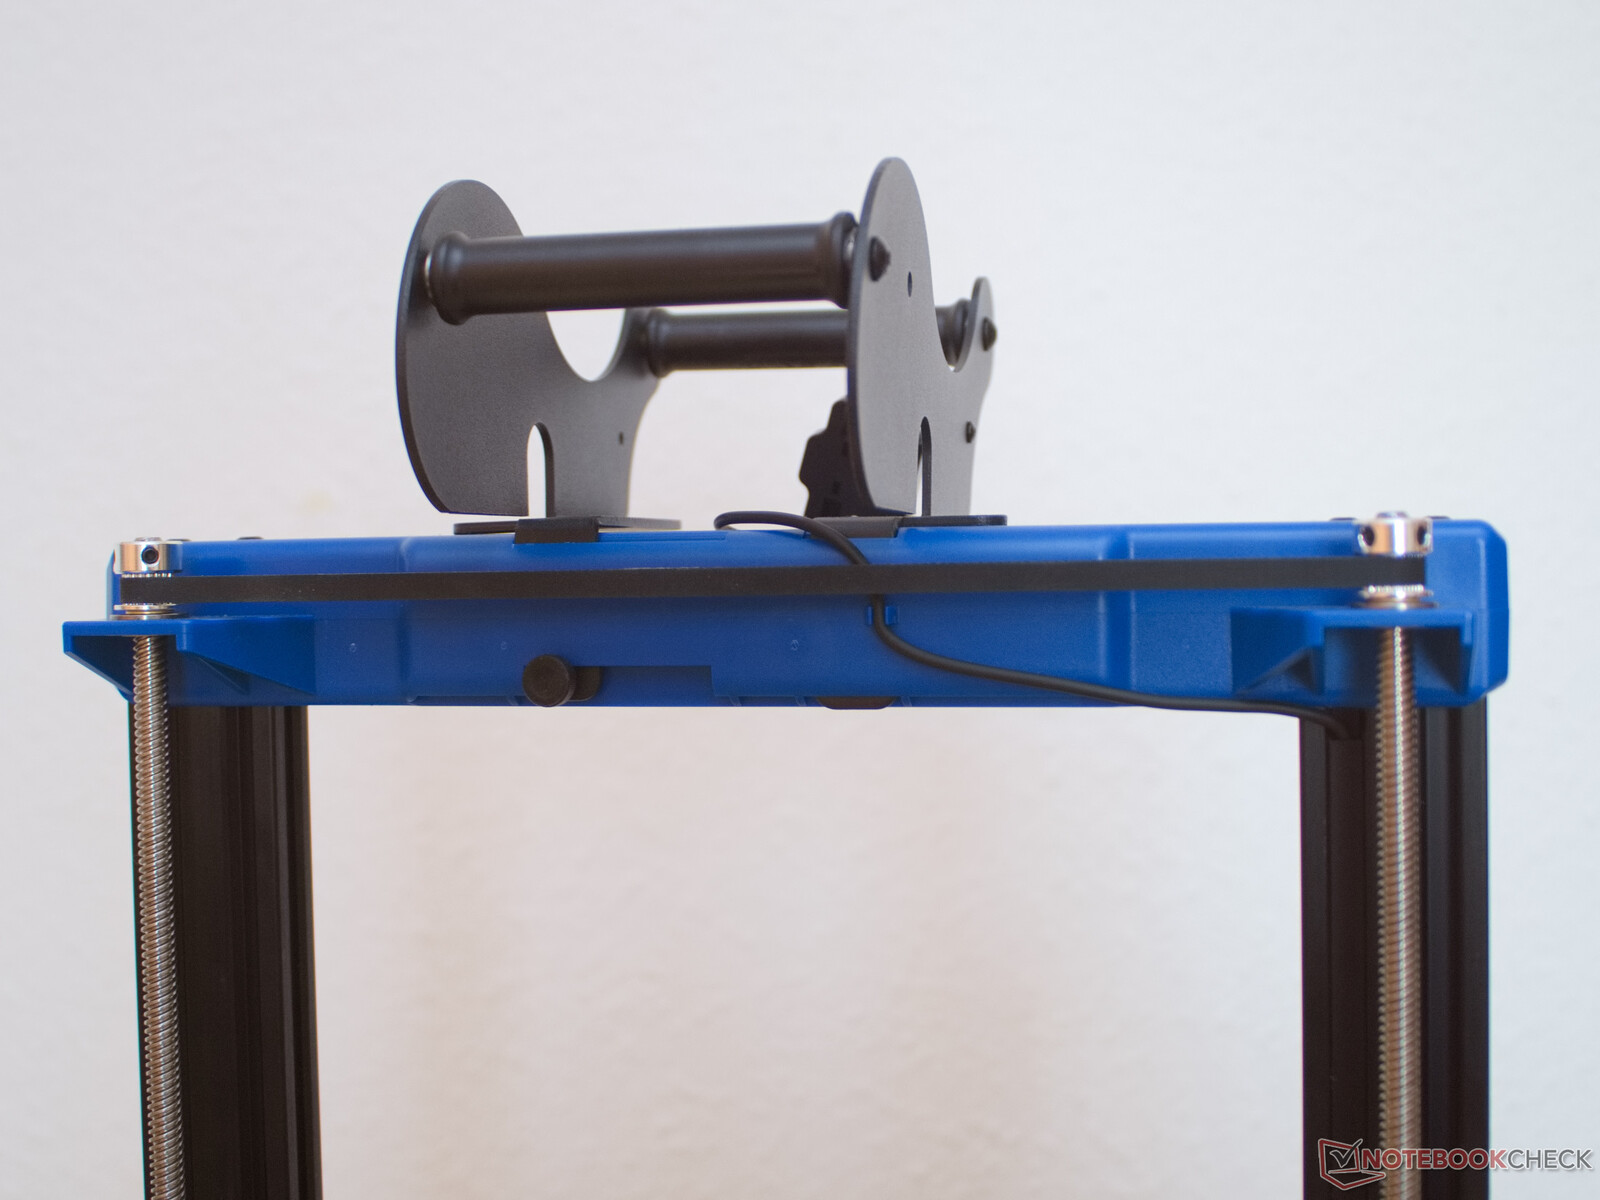
The entire 3D printer is delivered by Artillery in just six individual parts, four of which are the filament roll holder. The actual Genius Pro is disassembled into a base unit and an archway. To assemble it, all you need to do here is put the archway on the base and screw in the four pre-attached screws. The filament roll holder is then plugged together. The missing electrical connections are three cables. Once these are plugged in, the 3D printer can already be put into operation. For the two cables of the Z-motors, however, you should make sure to lead the cables back into the housing as far as possible. Otherwise, the large adjustment nuts of the print bed could scratch the cables.
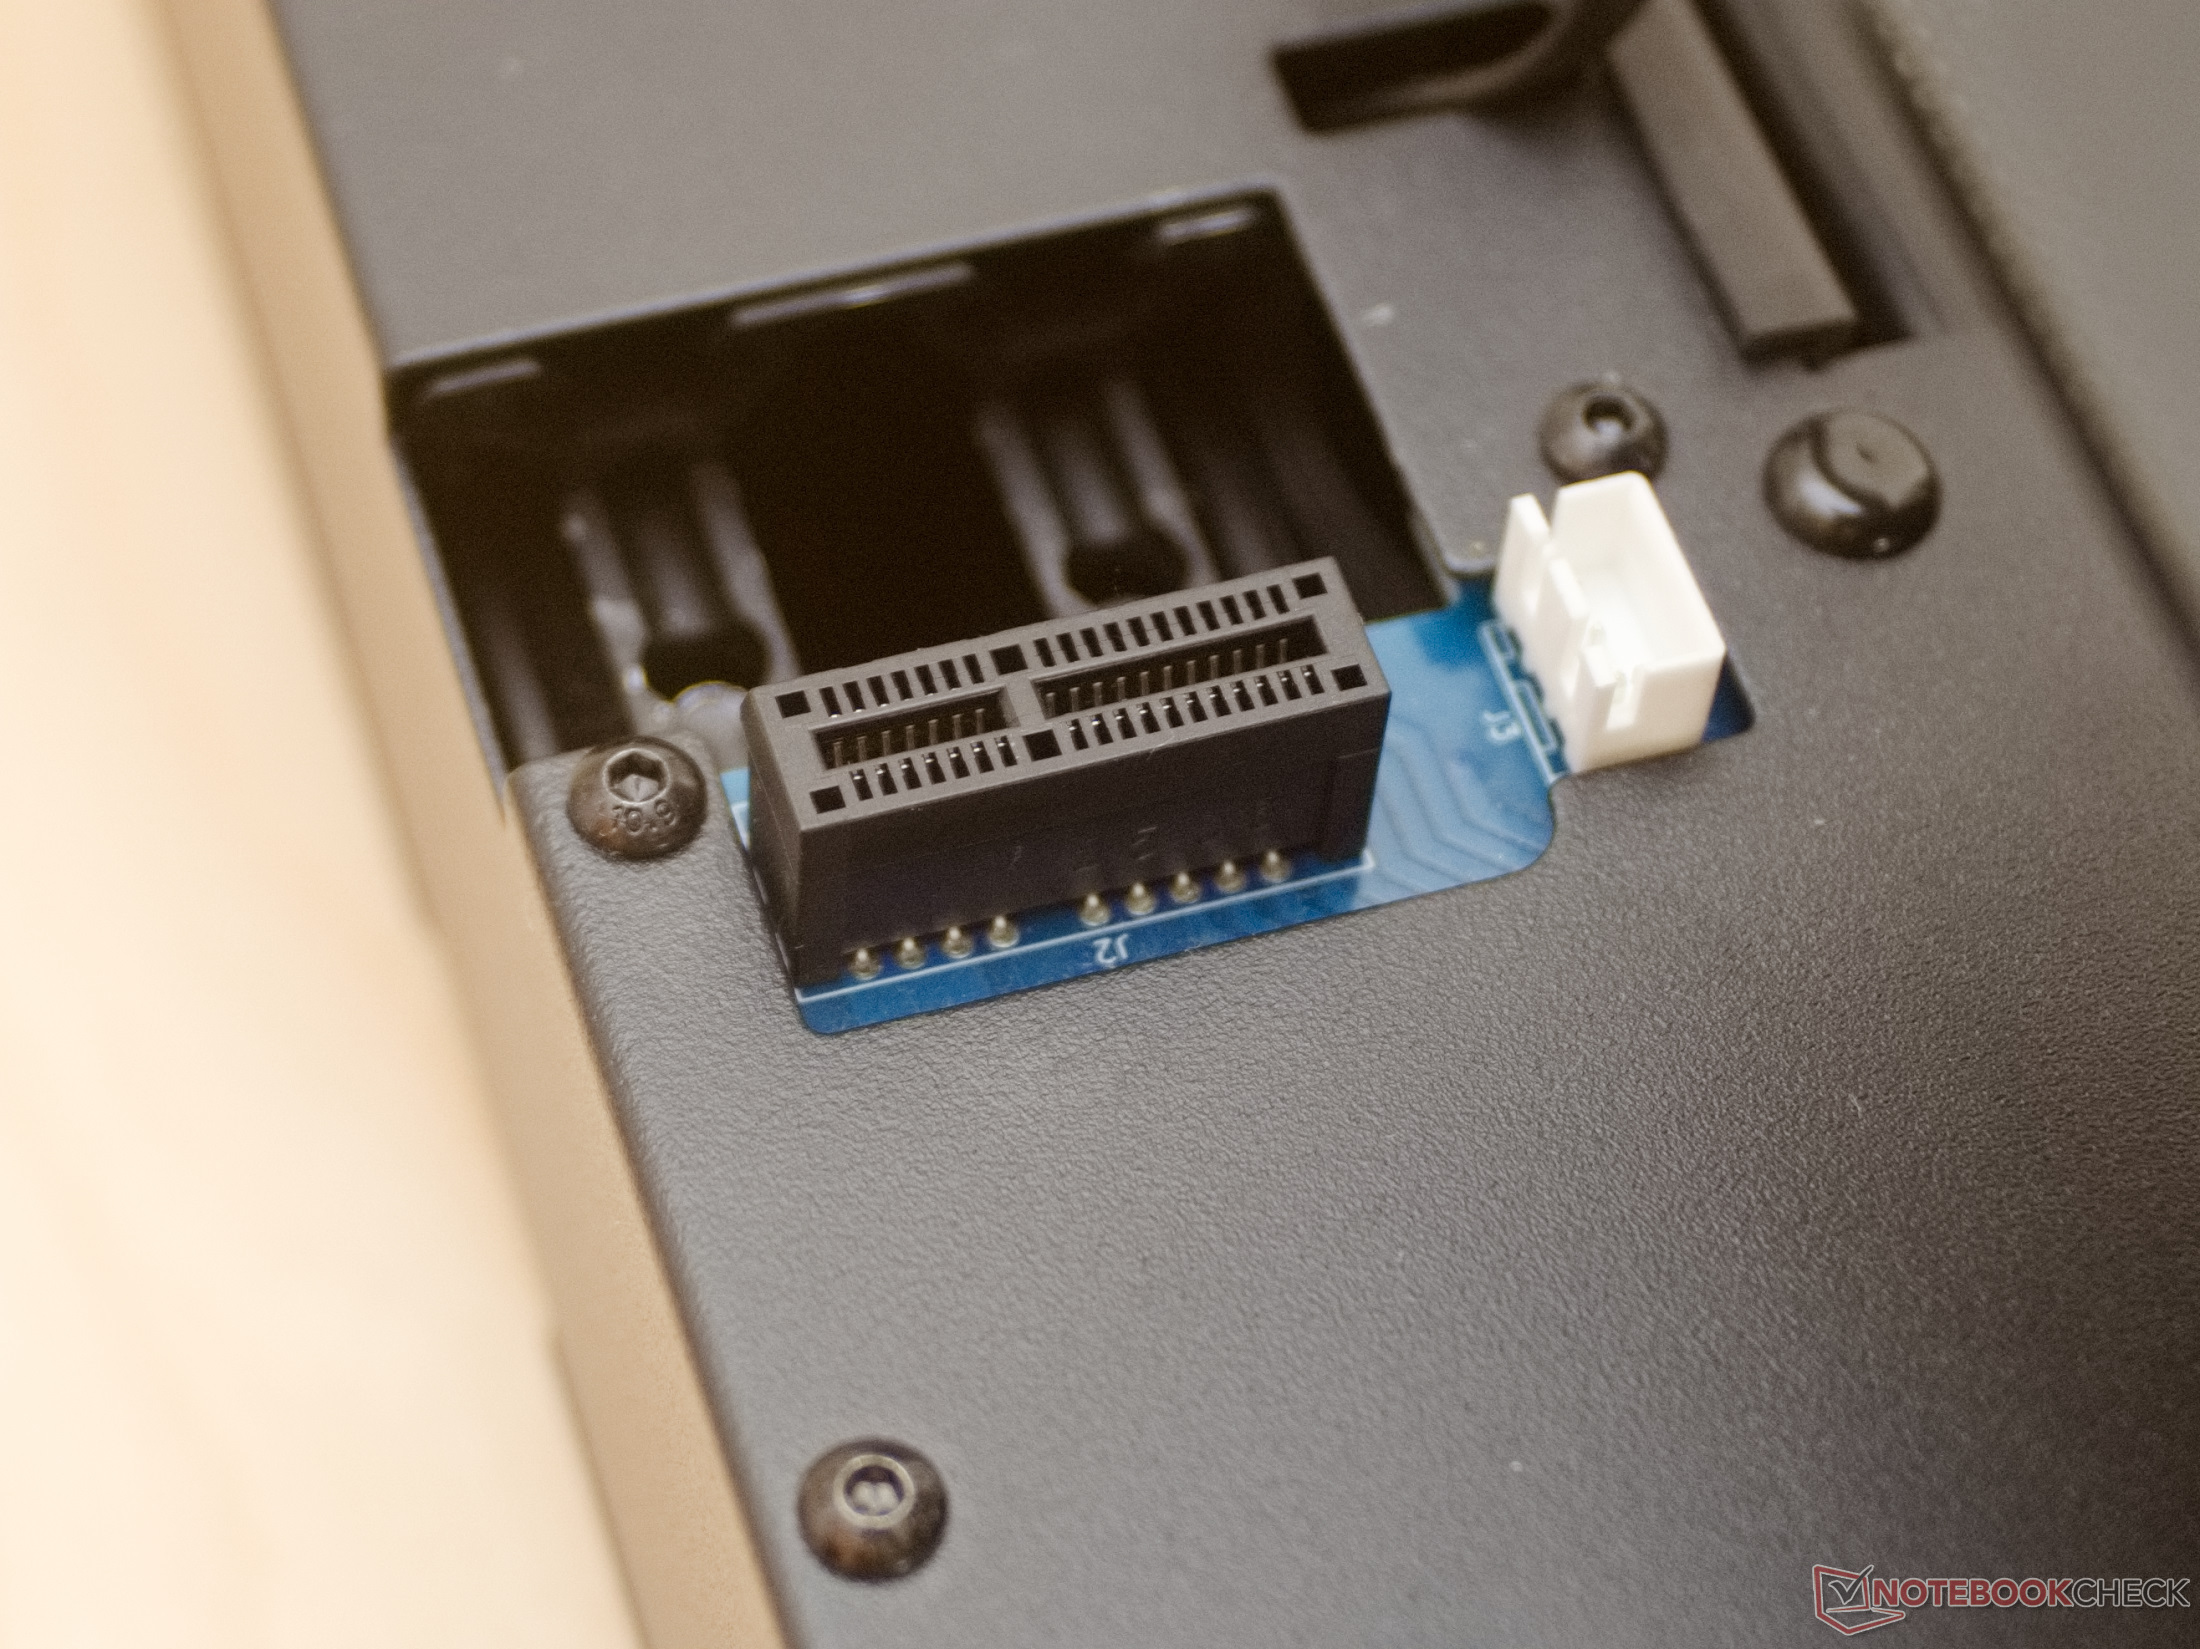
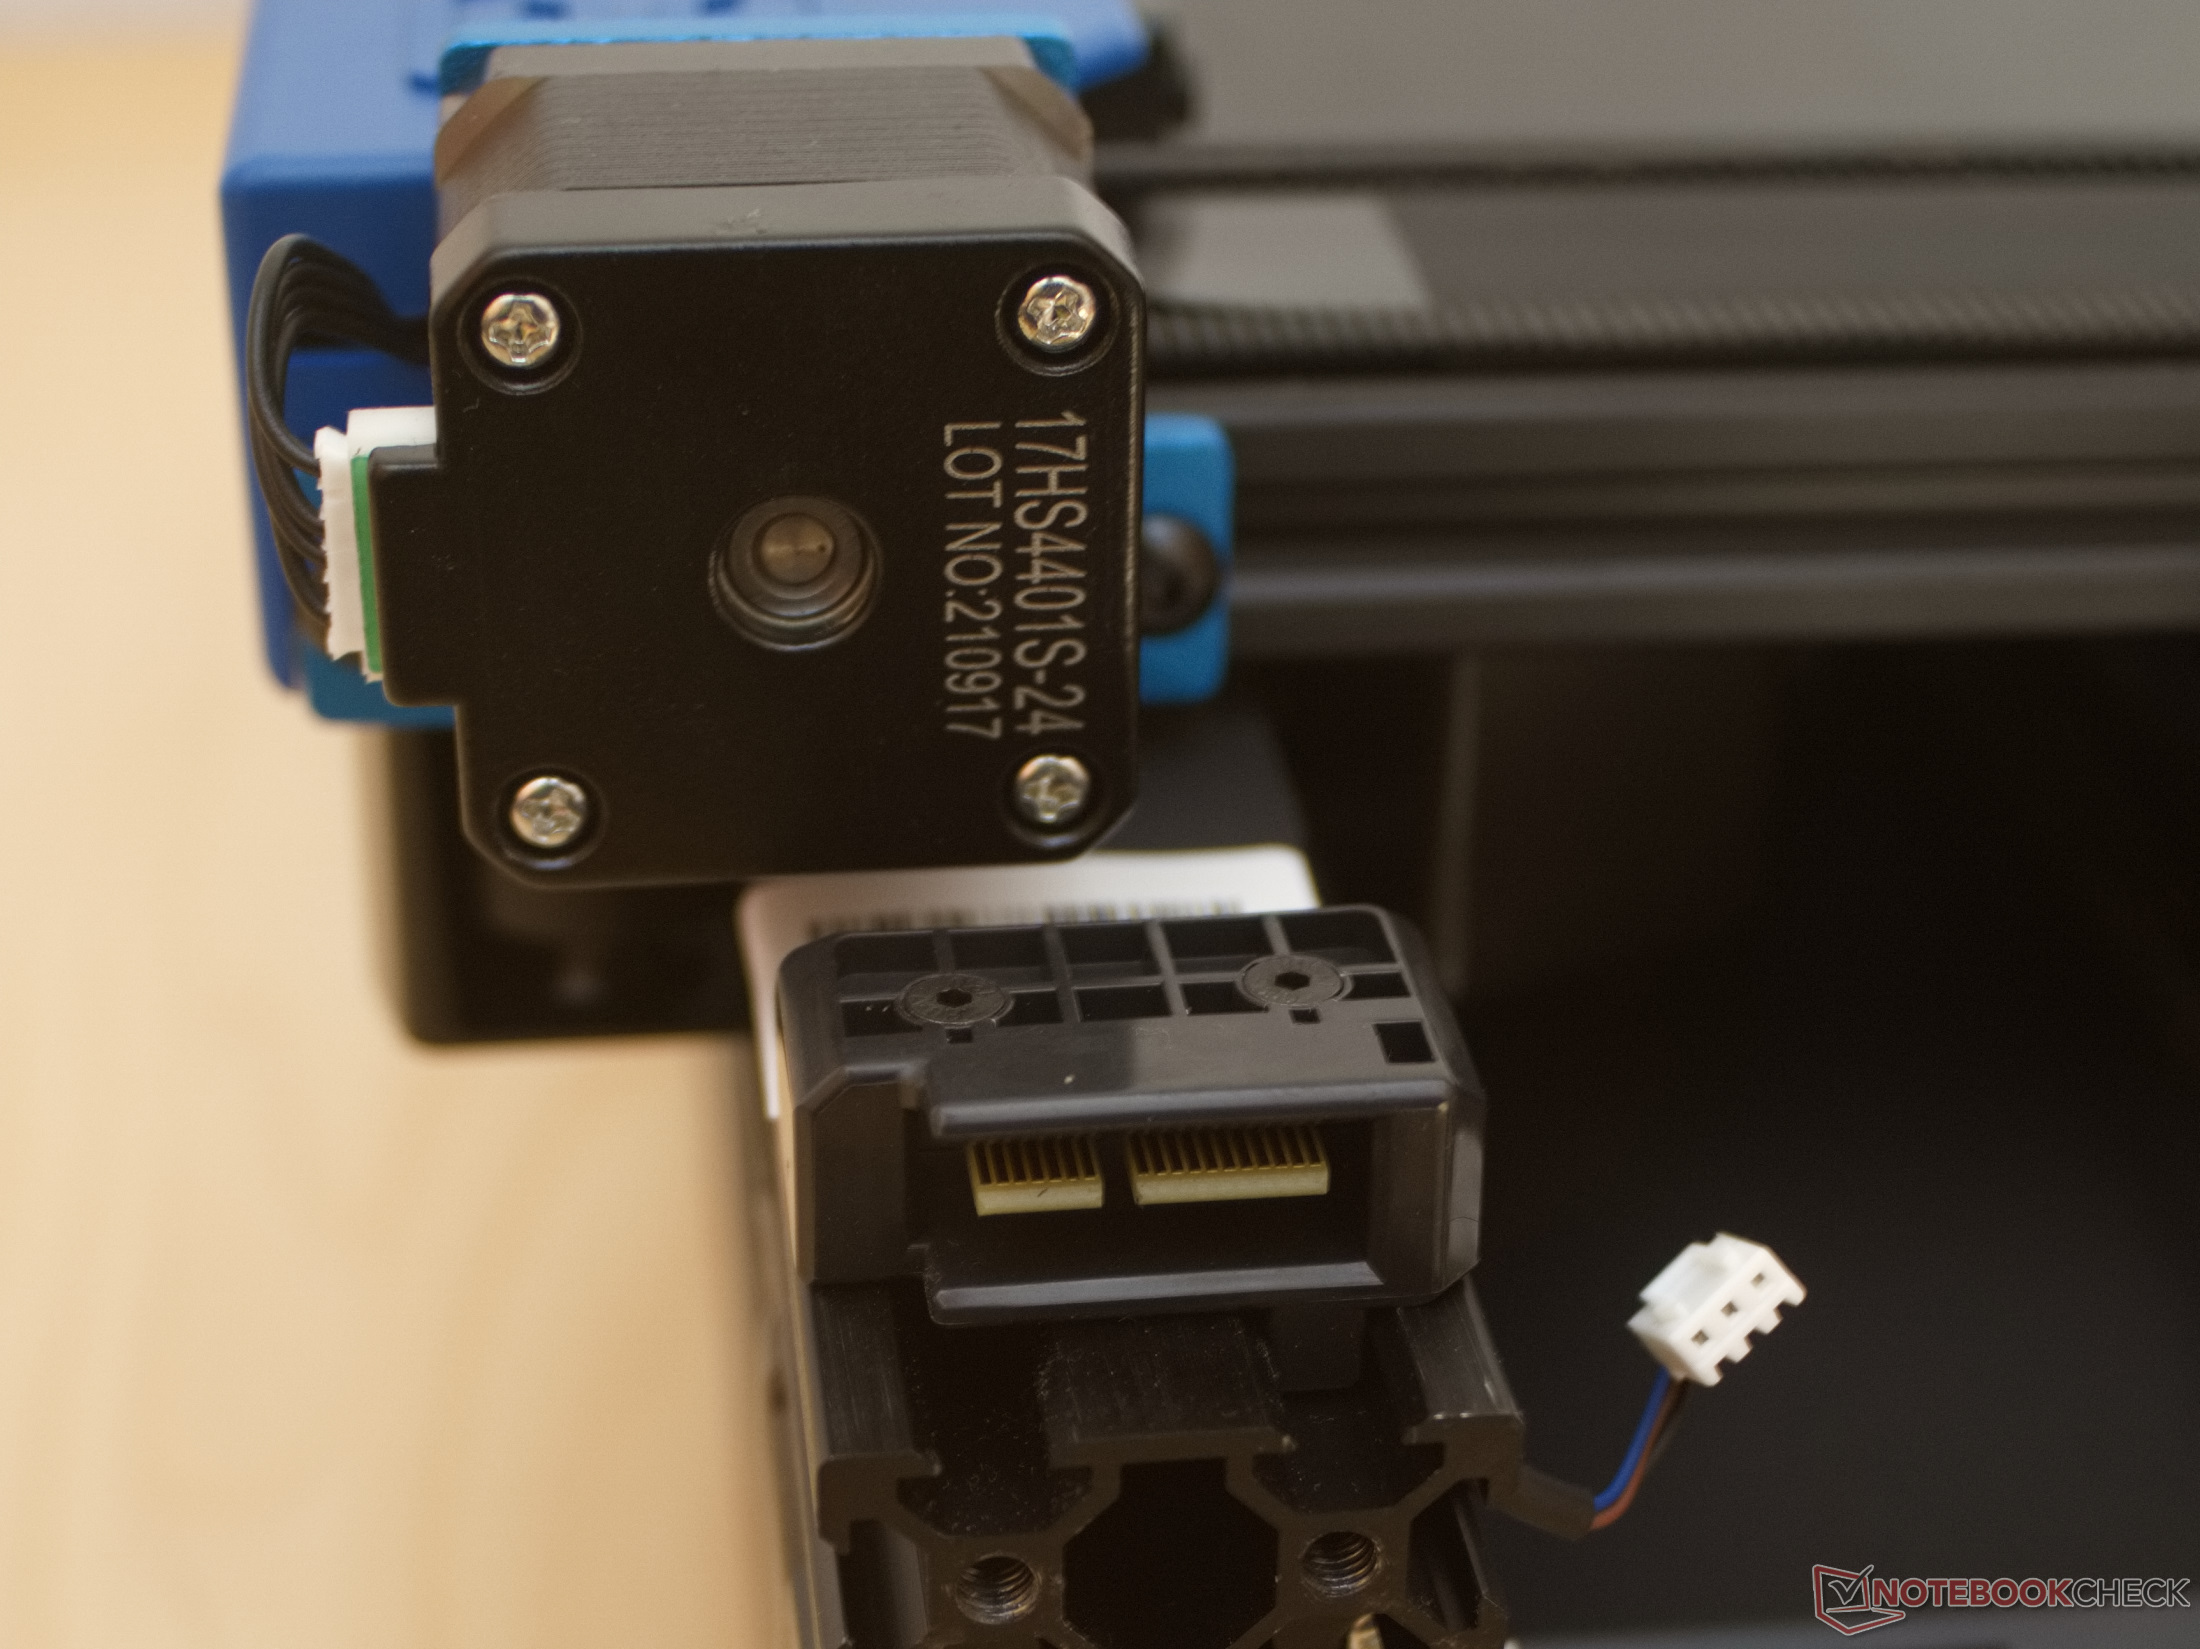
All other connections to the X-motor and printhead are already made via a plug-in contact when the gate is assembled. The connector is apparently a misused PCIe slot. Thus, the assembly of the 3D printer takes less than 10 minutes in our case, considering the unpacking of all components from the box. The Genius Pro can also be disassembled just as quickly if you want to store the printer in a space-saving way.
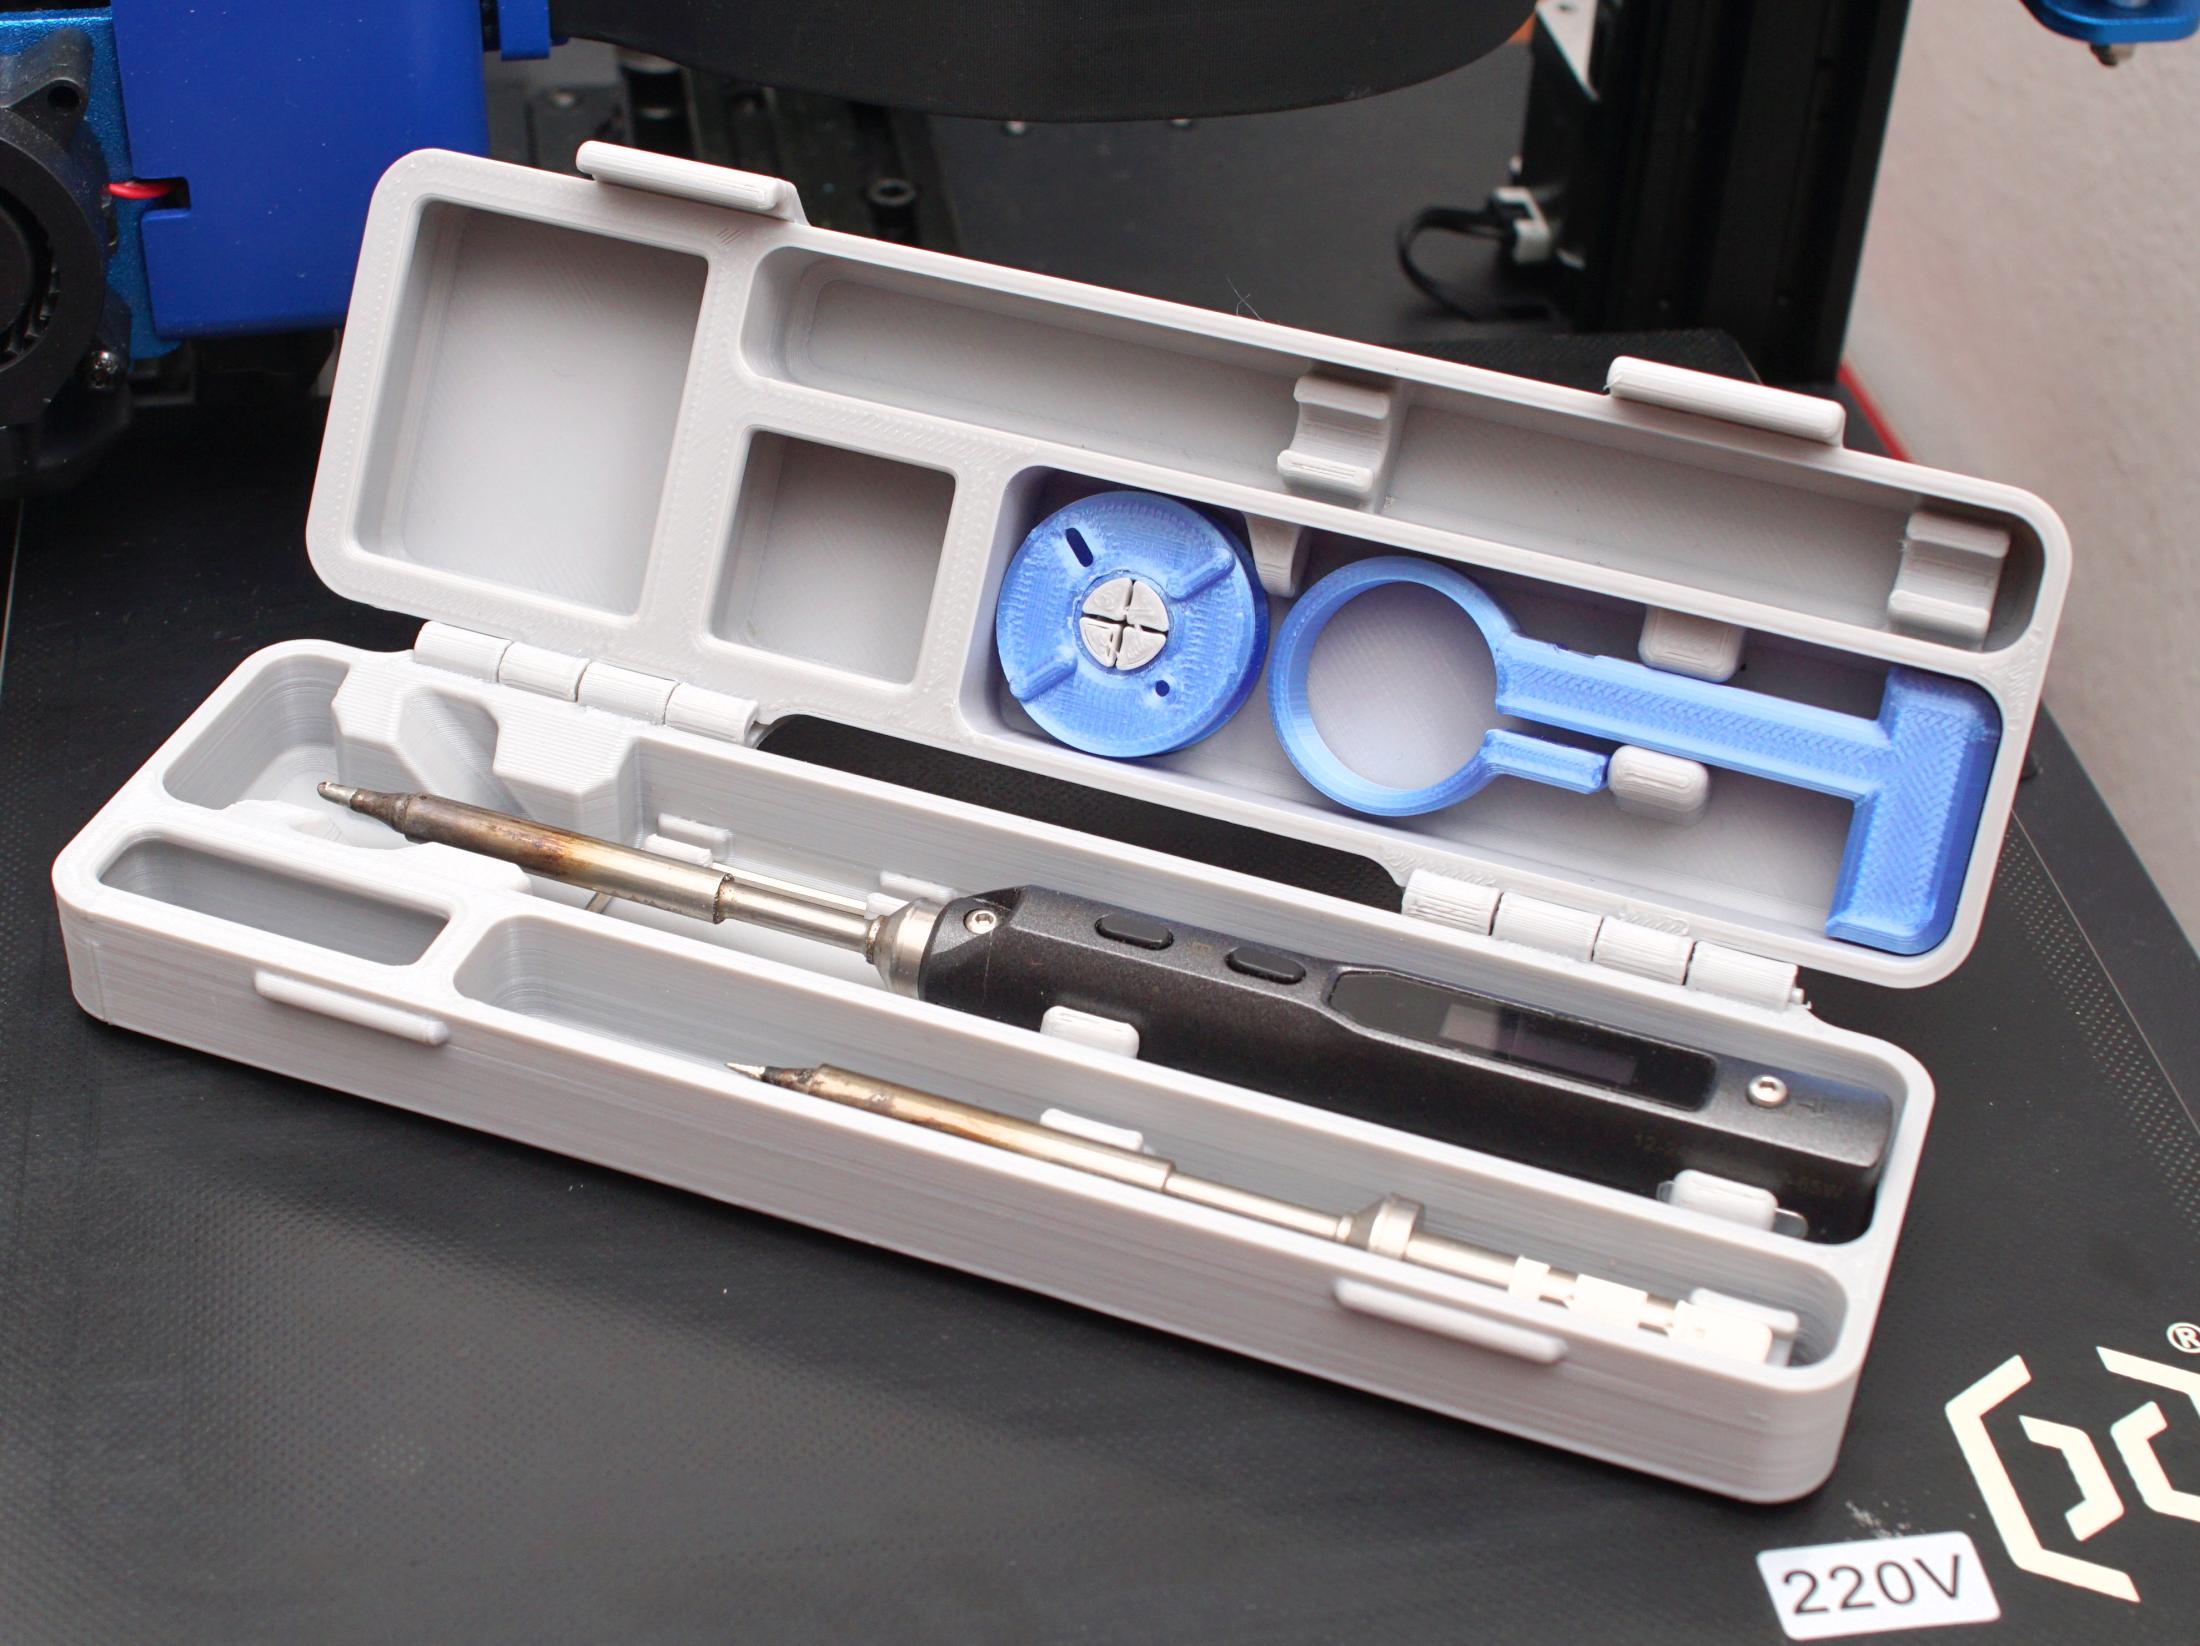
In the scope of delivery of the 3D printer, Artillery also puts 500 grams (~18 oz) of PLA filament and some spare parts, as well as another nozzle in the box, in addition to the tools necessary for assembly. All small parts are packed in a fabric bag with a zipper.

Cable management
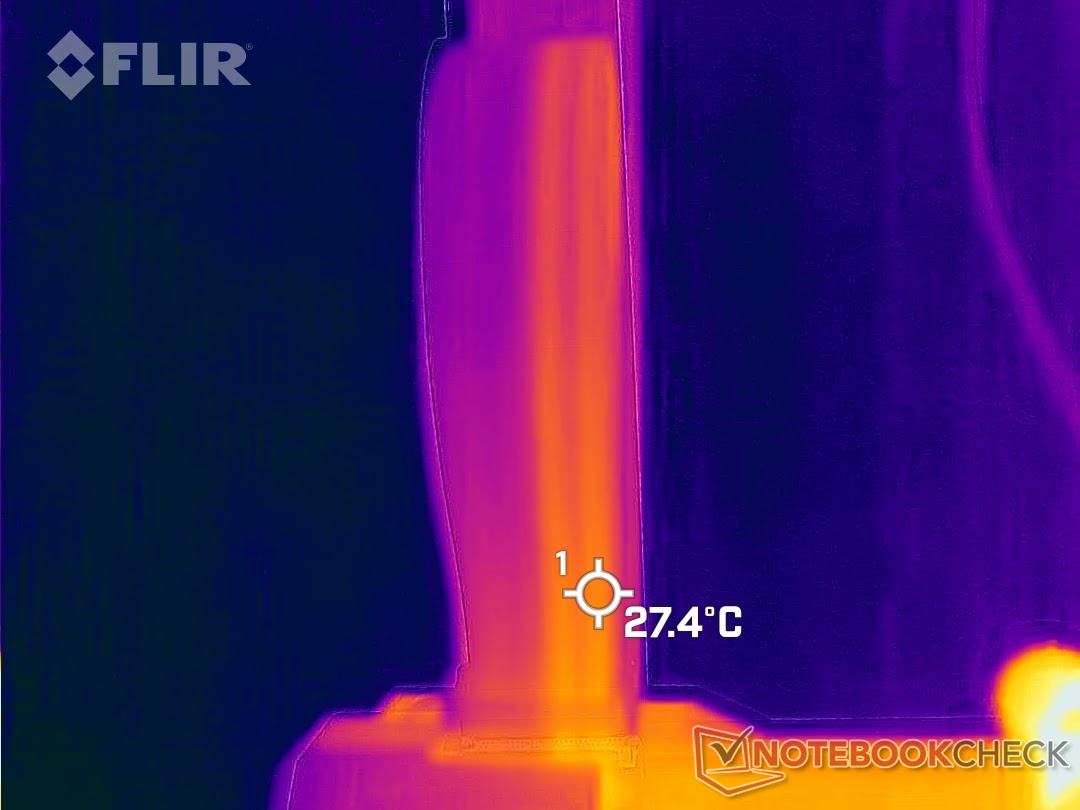
All cables on the Artillery Genius Pro appear tidy. Especially due to the flat ribbon cables used, the potential of errors due to broken cables is close to zero. Even though one might suspect that the thin ribbon cables are not up to the load of 40 to 70 watts for the hotend and motors, the thermal image shows no reason for concern. With a maximum of 28 °C (82.4 °F), these cables do not get particularly warm.
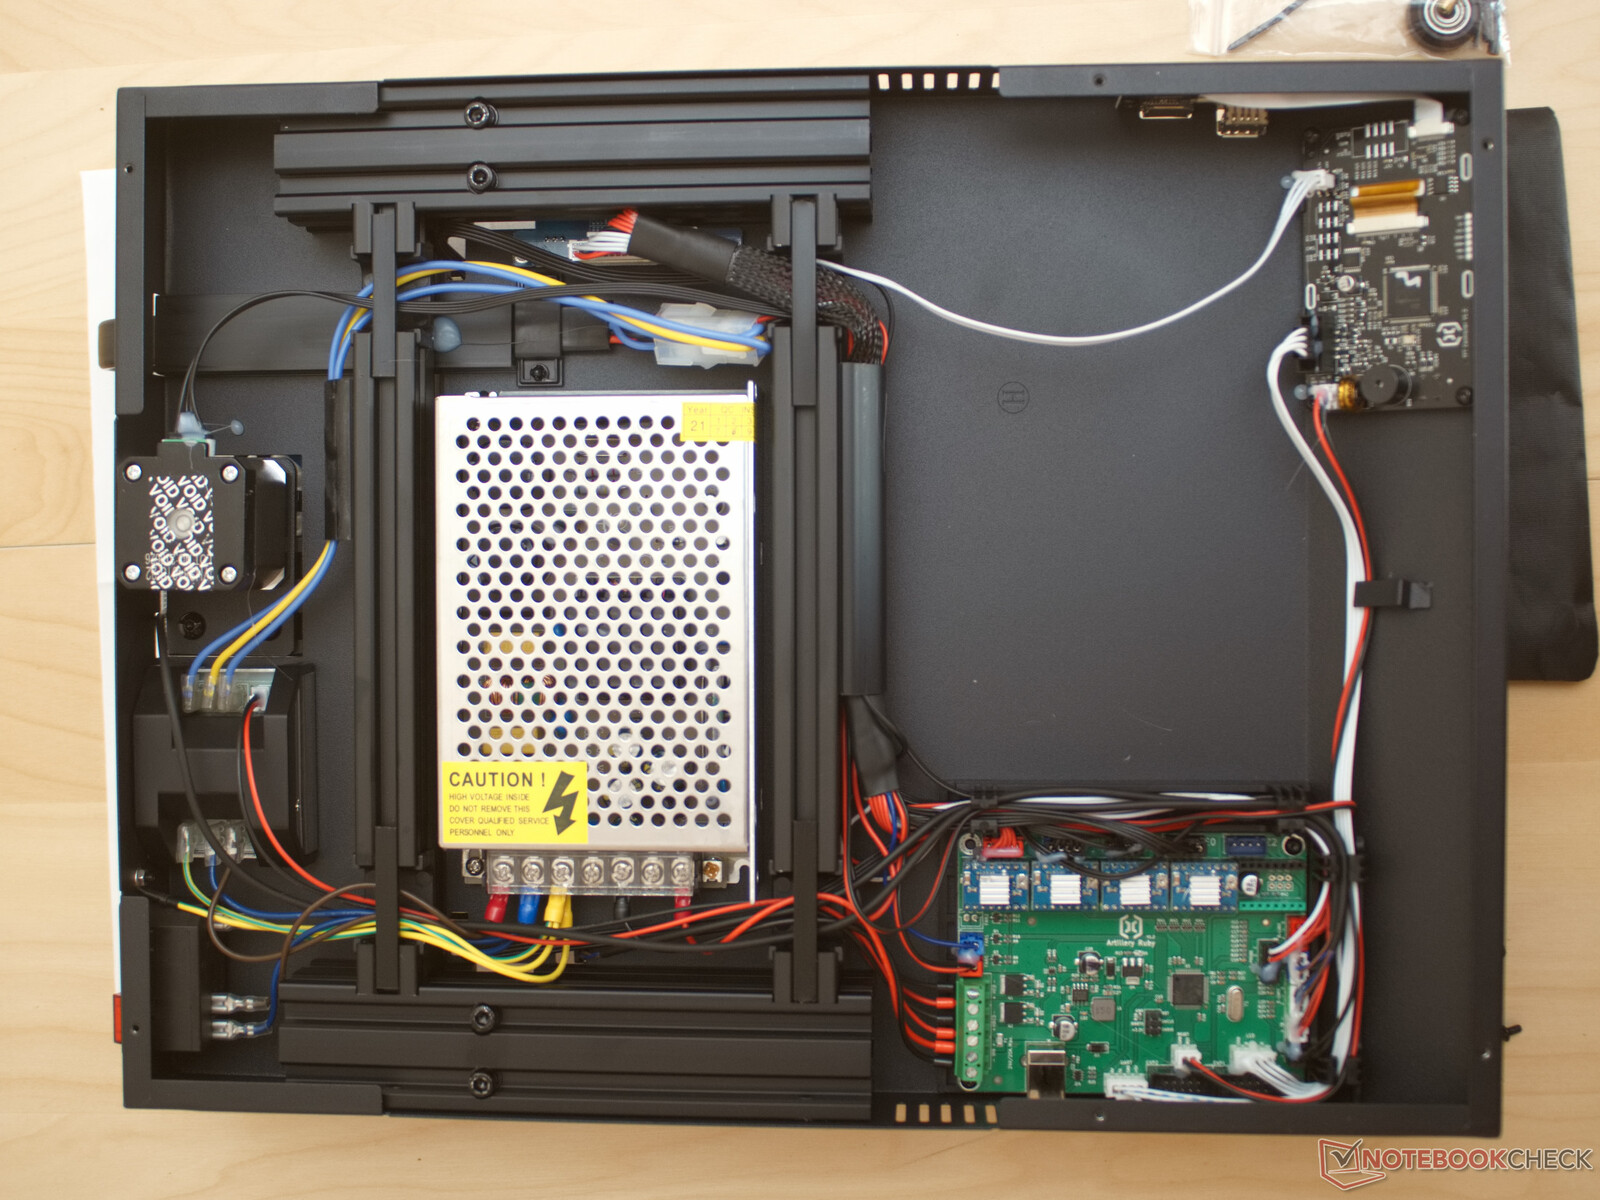
But a look inside the 3D printer also shows excellent cable management. All cables that carry mains voltage are secured with crimped cable lugs that offer touch protection.
Plug contacts in the base are secured with a blob of hot glue in addition to the JST connectors. The only flaw that can be found in the workmanship is probably the two thin hot glue traces that run across the motherboard in our test unit.
Mainboard
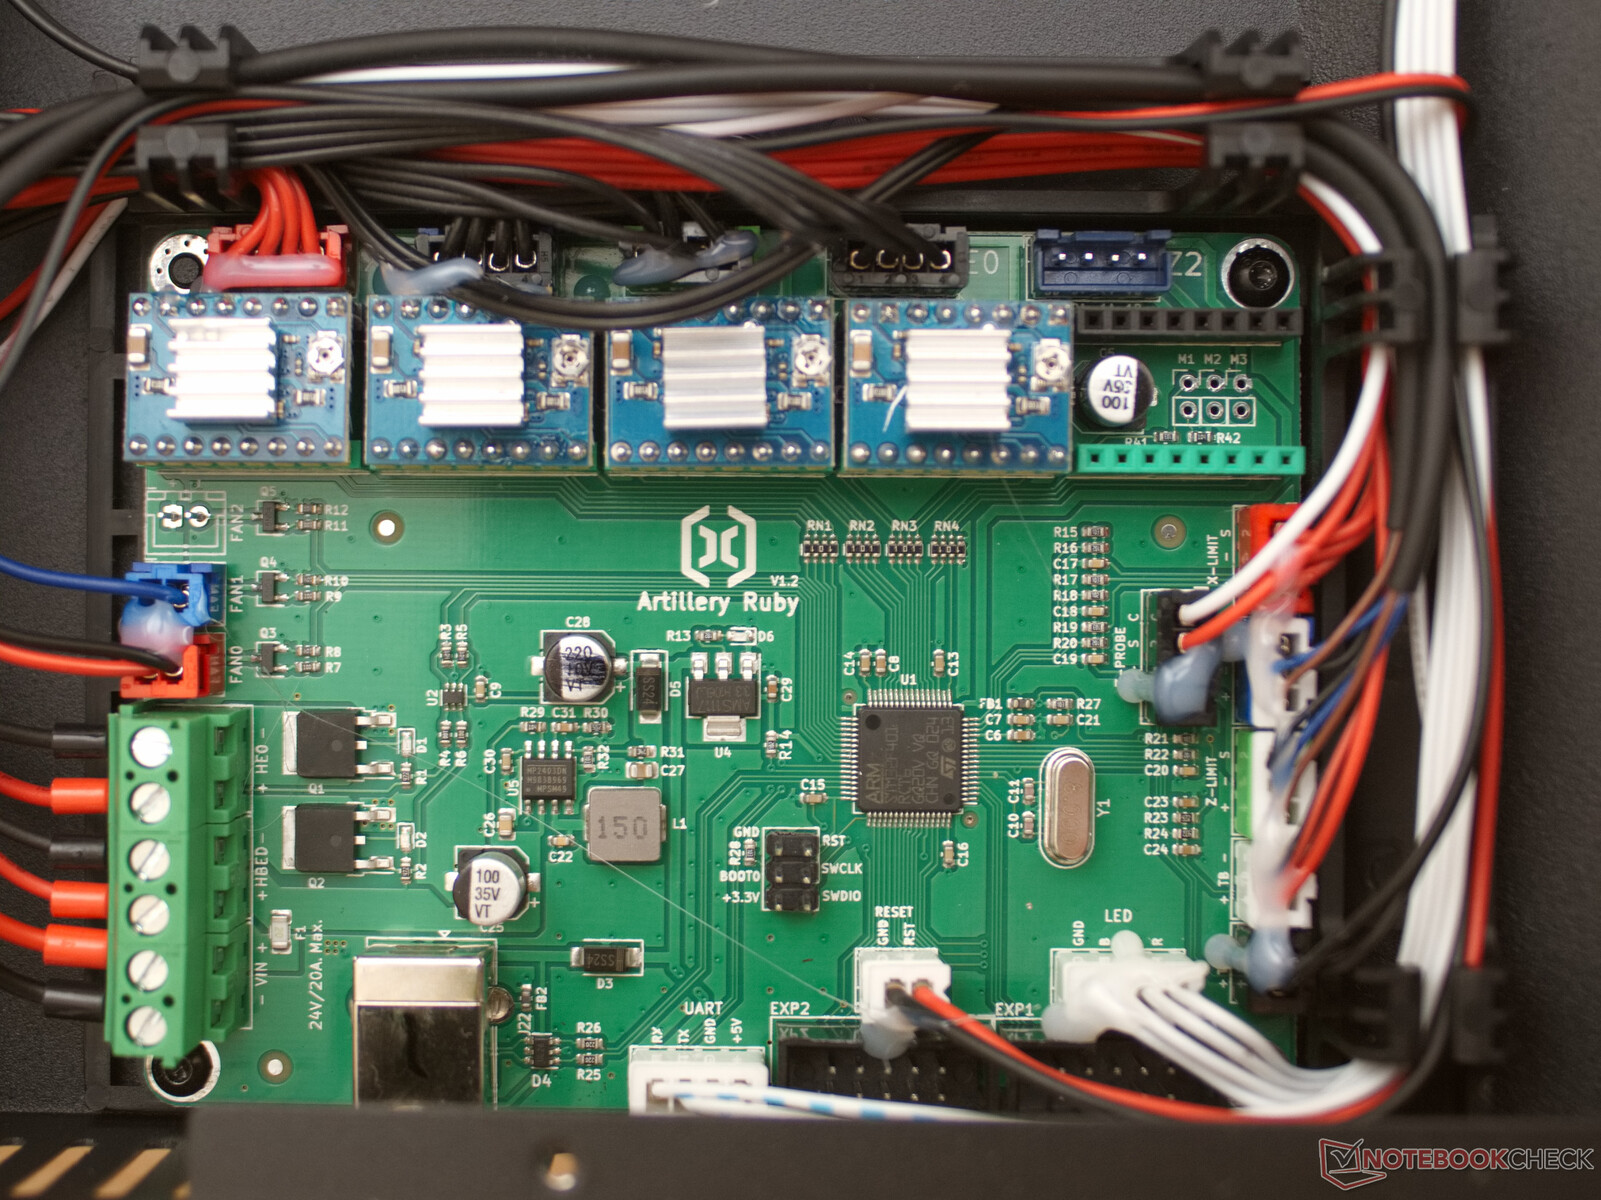

In the center of the Artillery Ruby board works the STM32 F4 32-bit microcontroller. The board offers several expansion possibilities and is fully compatible with Marlin, Klipper and other firmware. It is particularly pleasant that the case fan is also controlled by the 32-bit board. Thus, the 3D printer remains quiet if it is not in use.
The stepper motor drivers are plugged into the Artillery Ruby and are Pololu compatible. In the present configuration, the 3D printer could also be expanded with another stepper motor, since only four of the slots are occupied.
The connection to the touch screen's board is made via a serial port. Thus, this board also has its own microcontroller and does not burden the computing capacity of the STM32 F4 in the Artillery Ruby. However, a USB port and microSD card reader are also coupled to the screen board. The question here is whether the transfer rate between the control board and the display board is sufficient to transfer many small instructions.
Frame
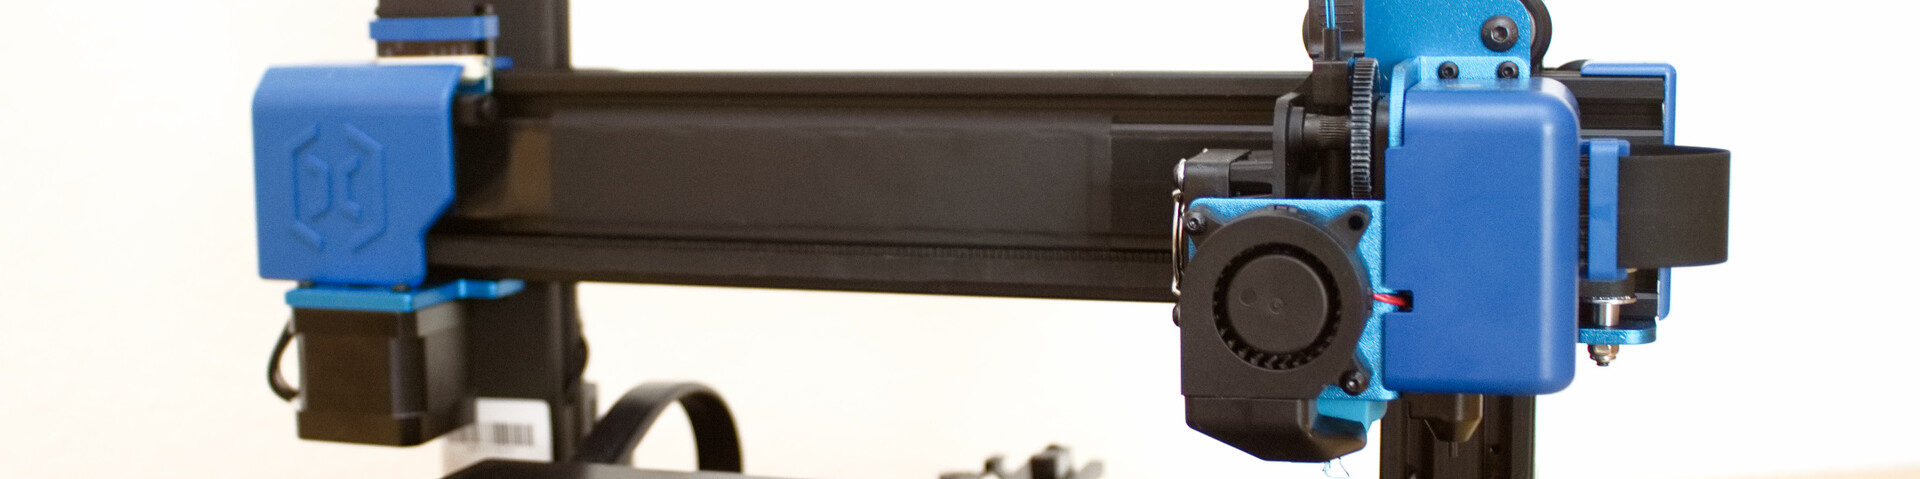
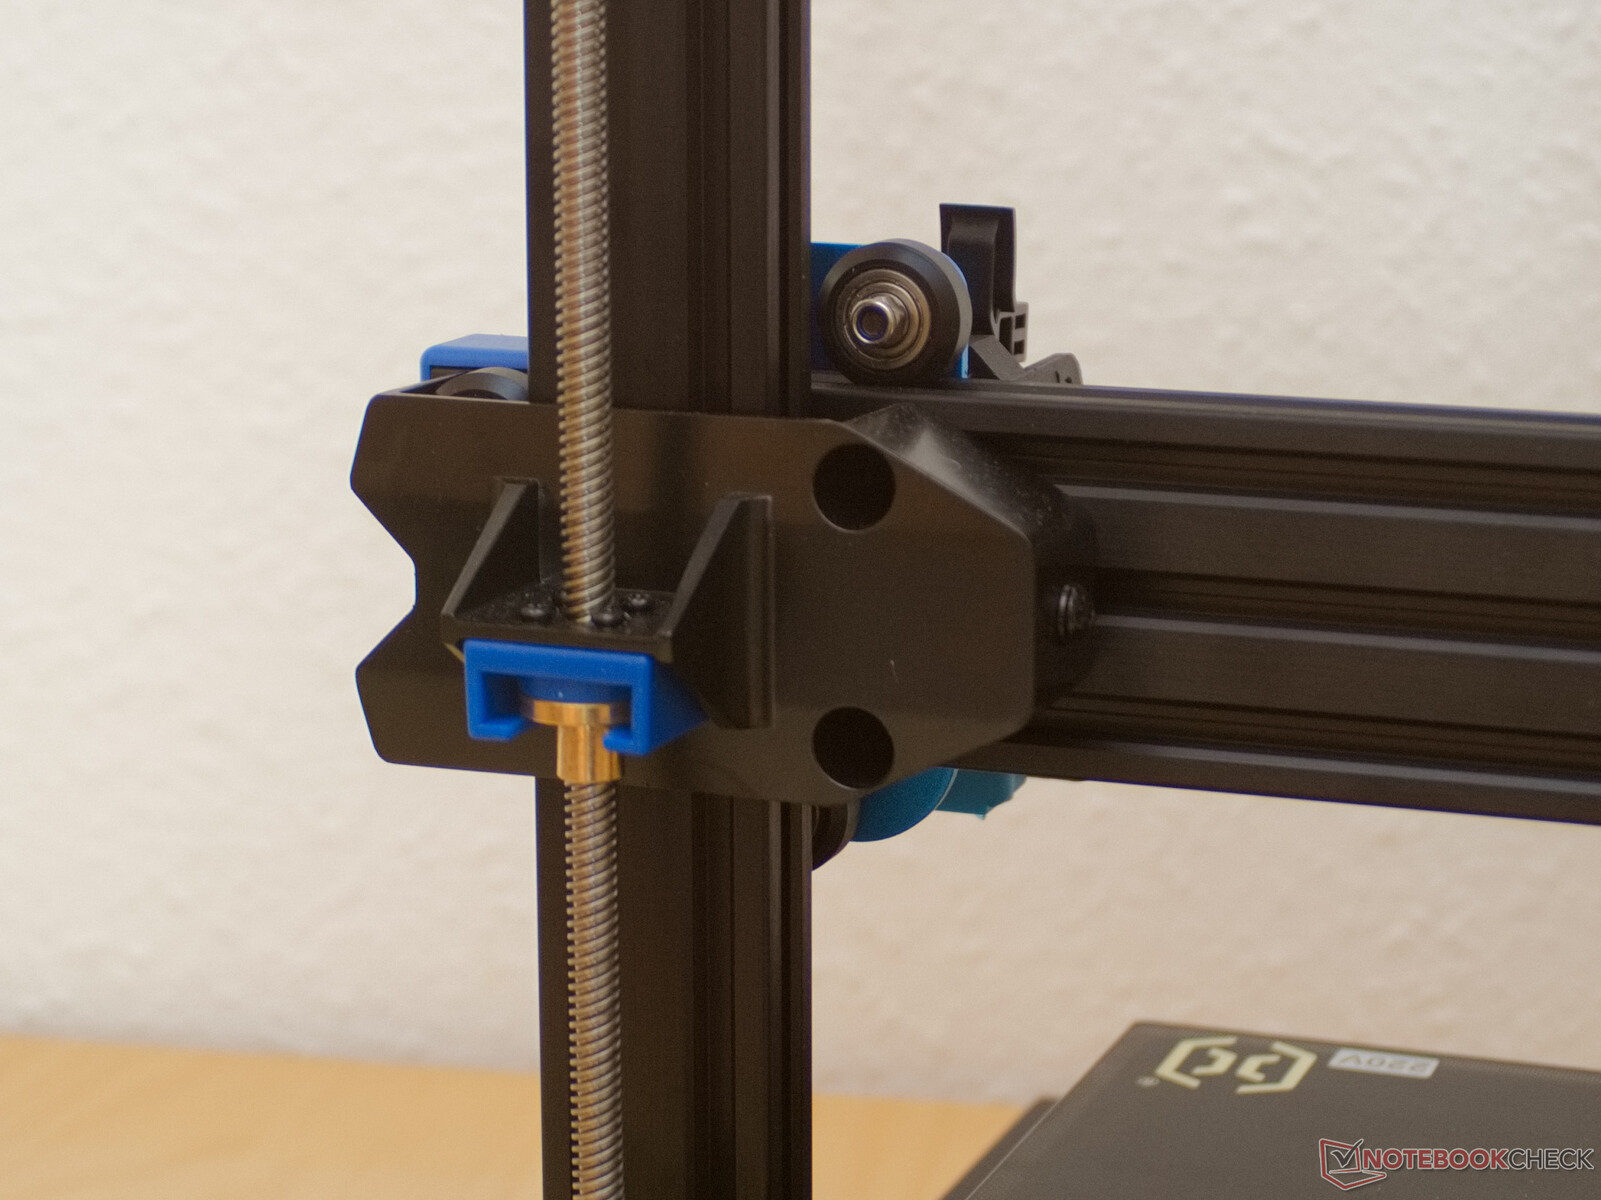
The Artillery Genius also uses many V-Slot aluminum profiles, but the 3D printer has a few special features. The print head runs on a particularly high 60 mm × 20 mm (~2.4 in x 0.8 in) profile. This should provide better stability than, for example, the Voxelab Aquila S2. Artillery also goes its own way with the rollers of the Z-axis and ensures an optimal contact pressure by means of springs. The Z-axis is also driven by two motors and threaded spindles that are synchronized on the upper crosshead by means of a toothed belt. However, belt tensioners on the deflection rollers of the X and Y axes are completely missing here. This means that you would have to loosen and move the attachments of the deflection pulleys if you want to retighten the drive belts of the two axes.
In the base, the amount of stabilizing aluminum profiles is limited. Here, only a rectangle of 40 mm × 40 mm (~1.6 in x 1.6 in) profiles was used. The upper crossbar is also made of plastic. While no disadvantage of the construction can be seen in the test, the question arises whether the large plastic part will also remain stable in the long run.

Control
The Artillery Genius Pro can be supplied with instructions via USB connection or touchscreen. The individual menus on the touchscreen provide a good overview and offer a variety of functions. In addition to a wizard for manually aligning the print bed, all sorts of settings and auto-bed leveling can be called up here.
Before you start the first print, you should run the Auto-Bed-Leveling and then set the Z-offset with the help of the wizard. If the values are stored in the EEPROM afterwards, there should hardly be any problems with a clean first print layer.
Gcode files are provided to the printer via microSD card or USB stick. However, the 3D printer can only access one memory at a time. This must be selected via the settings. During printing, the print speed, extrusion multiplier, temperatures and fan can be adjusted. Thus, one can already react to problems during a print and find better settings. With the many setting options, it was possible in the test to save a Calibration Cube made of ABS after all. In the end, it showed a similarly high quality as a cube previously printed from PLA.


Power
Print bed
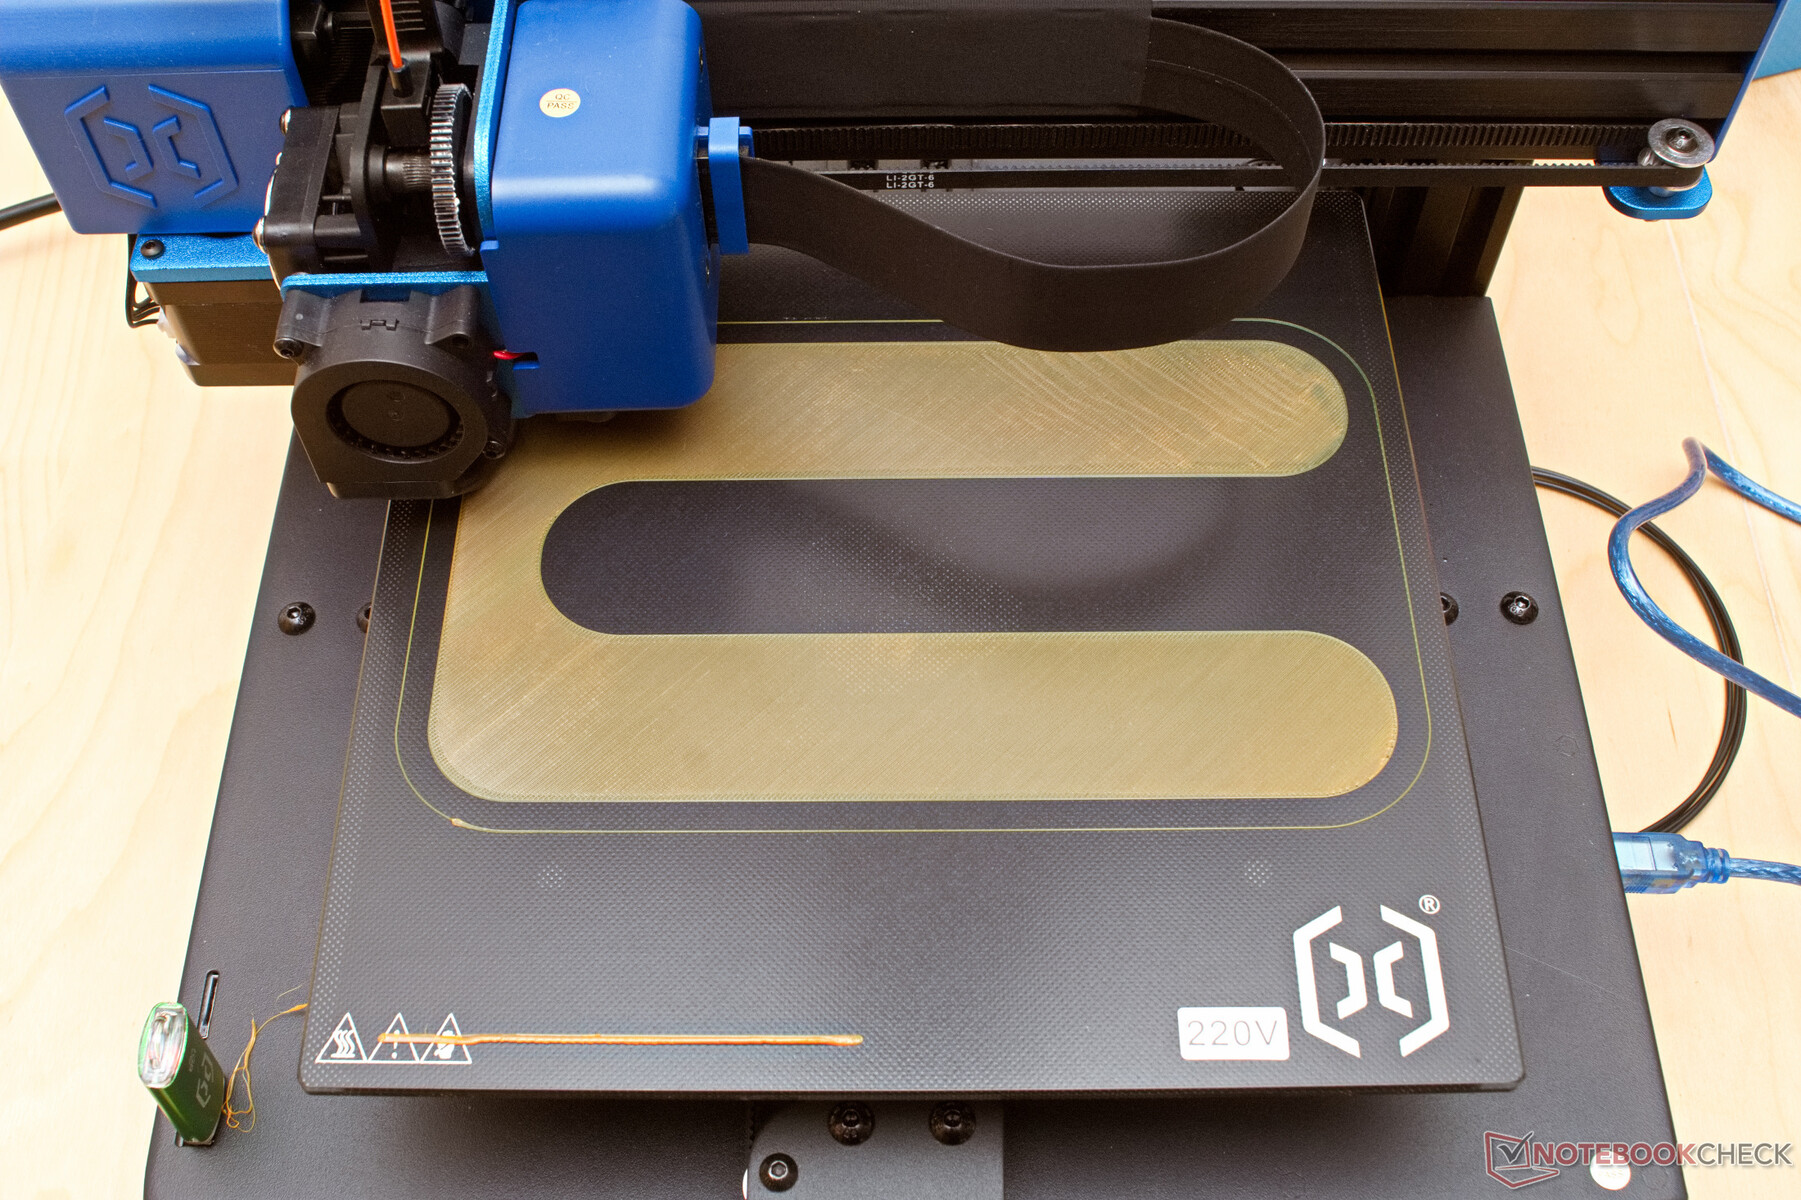
The ceramic-coated glass bed of our test device is decidedly flat. If all four corners of the print bed are set to a distance to the nozzle of 0.1 mm (~0.00394 in), our Artillery Genius achieves a nozzle distance of 0.097 mm (~0.0038 in) in the center. With auto bed leveling, almost every first layer was perfectly placed on the print bed in the test. But when it comes to print bed adhesion, the glass coating does not always work quite optimally. While PLA and TPU adhere perfectly to the heated glass plate, the print bed for ABS first had to be pretreated with an acetone-ABS solution in order to achieve appropriate print bed adhesion at all.
Since the combination of glass printing surfaces and PETG is problematic in some cases, a test with PETG was not carried out. PETG can lead to destruction of the surface on a print bed on glass, as it adheres too well to it in some cases.
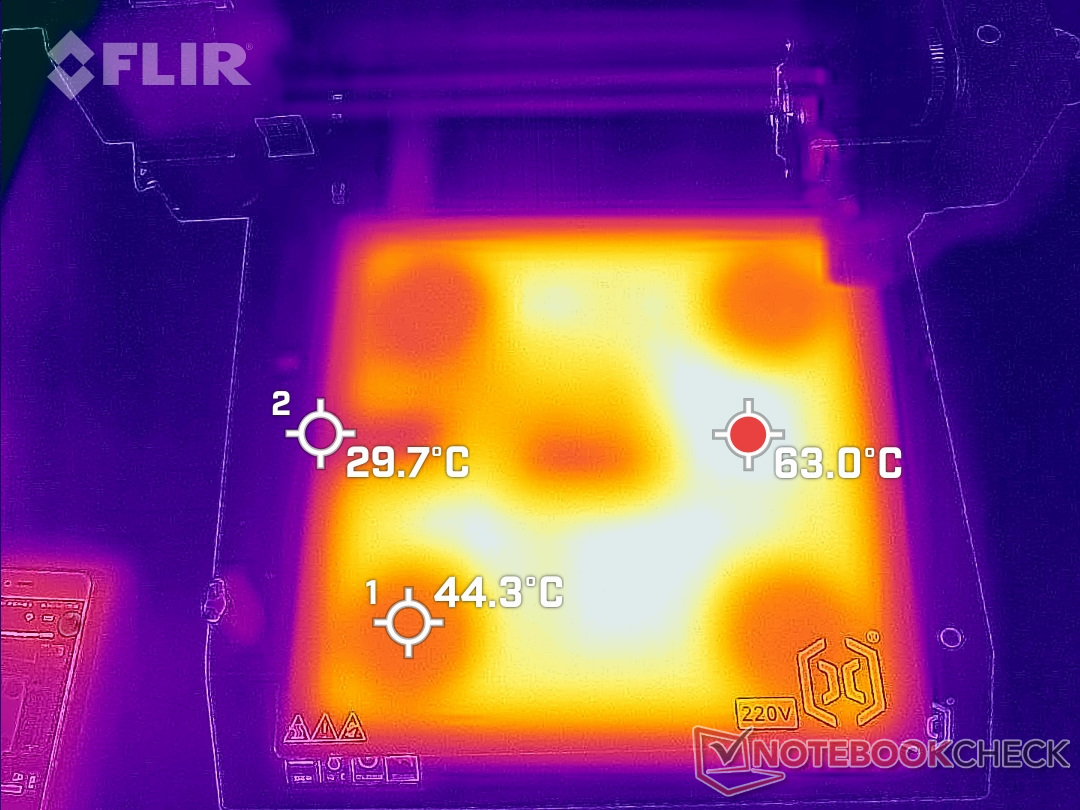
The print bed is heated with a 220 V silicone heating mat. The heating process is controlled via a solid-state relay. The print bed heater had a power consumption of up to 320 watts in the test and was thus able to heat the glass pane from 18 °C to 60 °C (64.4 °F to 140 °F) in less than a minute. The Artillery Genius Pro reaches 120 °C (248 °F) in under three minutes. However, unlike many others, the print bed does not have an aluminum plate that could distribute the heat evenly. Thus, it becomes very clear in the thermal image that there are large temperature differences on the glass plate. Large cold spots can be made out especially at the attachment points of the four adjustment screws.
However, problems due to the uneven heat distribution could not be observed. Also, the fact that the print bed is not heated at the edges does not interfere with printing, as the glass plate extends 5 mm (~0.197 in) beyond the printable area.
As an energy-saving measure, the Artillery Genius Pro is factory-equipped with thermal insulation on the underside of the print bed. The fully bonded foam plate seems to be very effective in this regard, as the print bed cools down only slowly even after a print process has been completed. It can take up to 20 minutes before a print can be released from the plate.
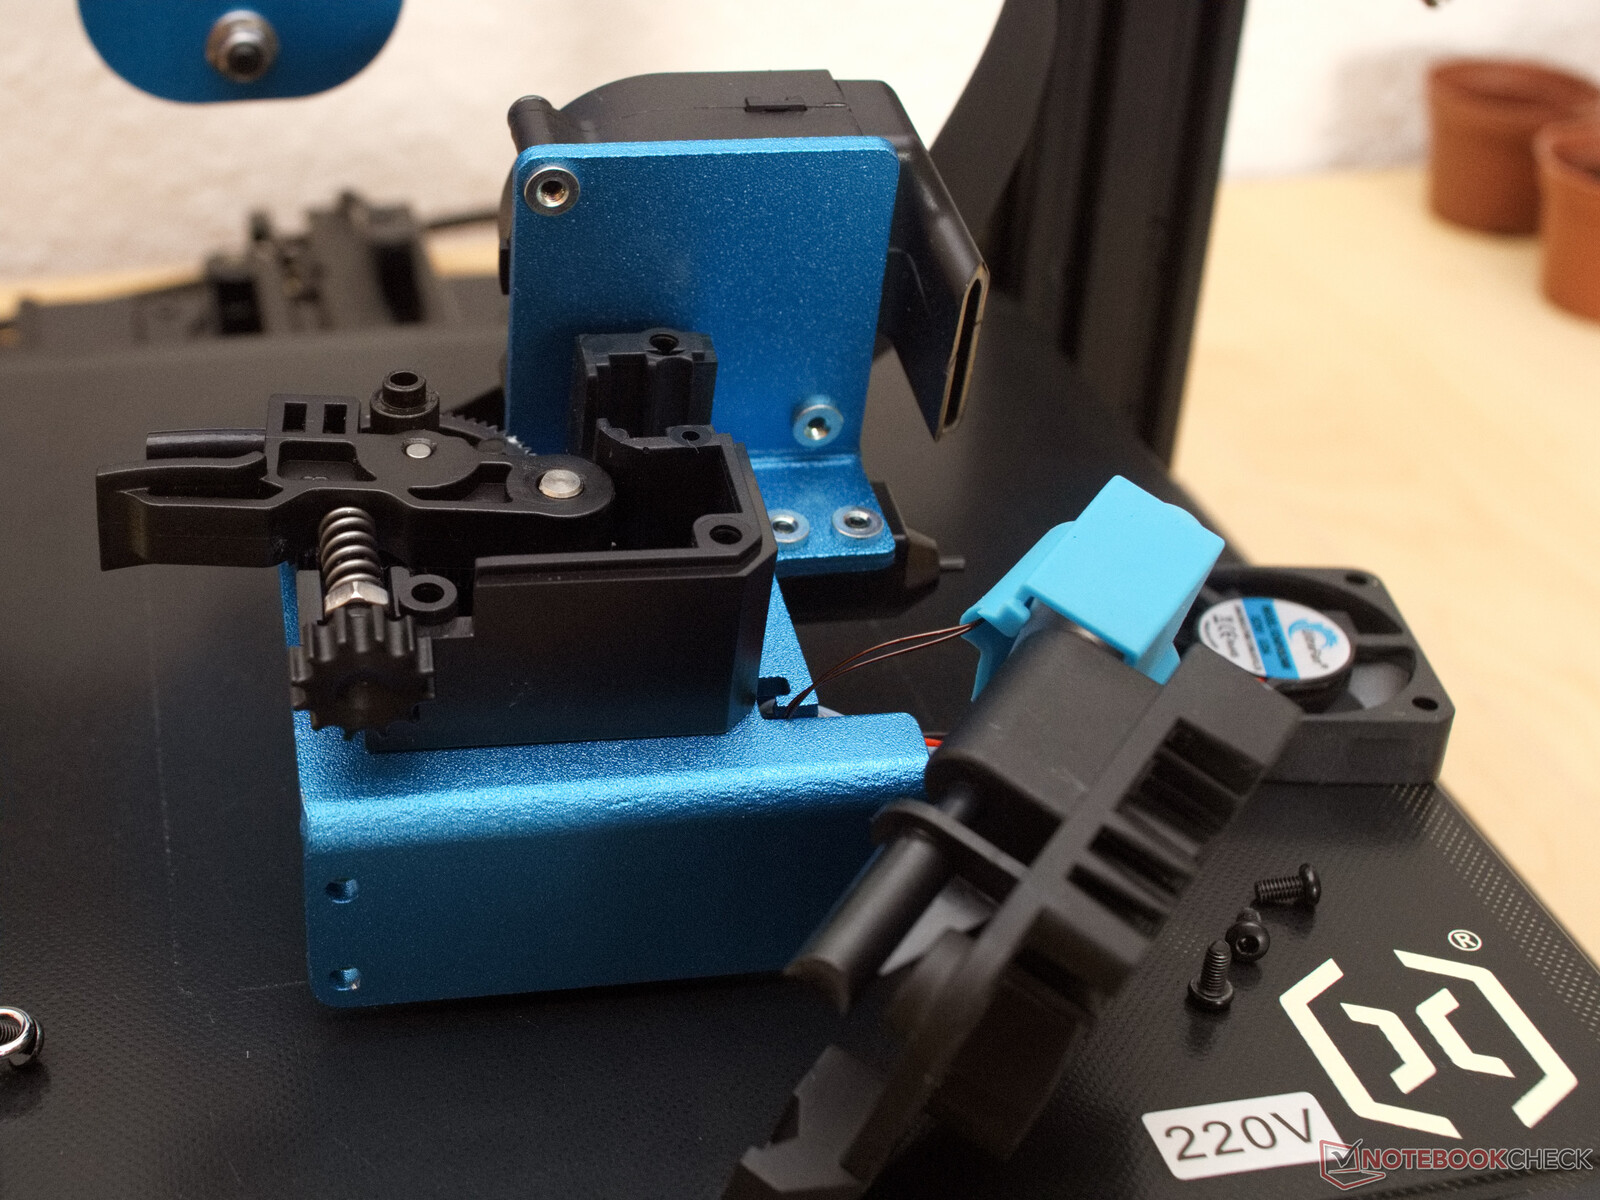
Hotend and extruder
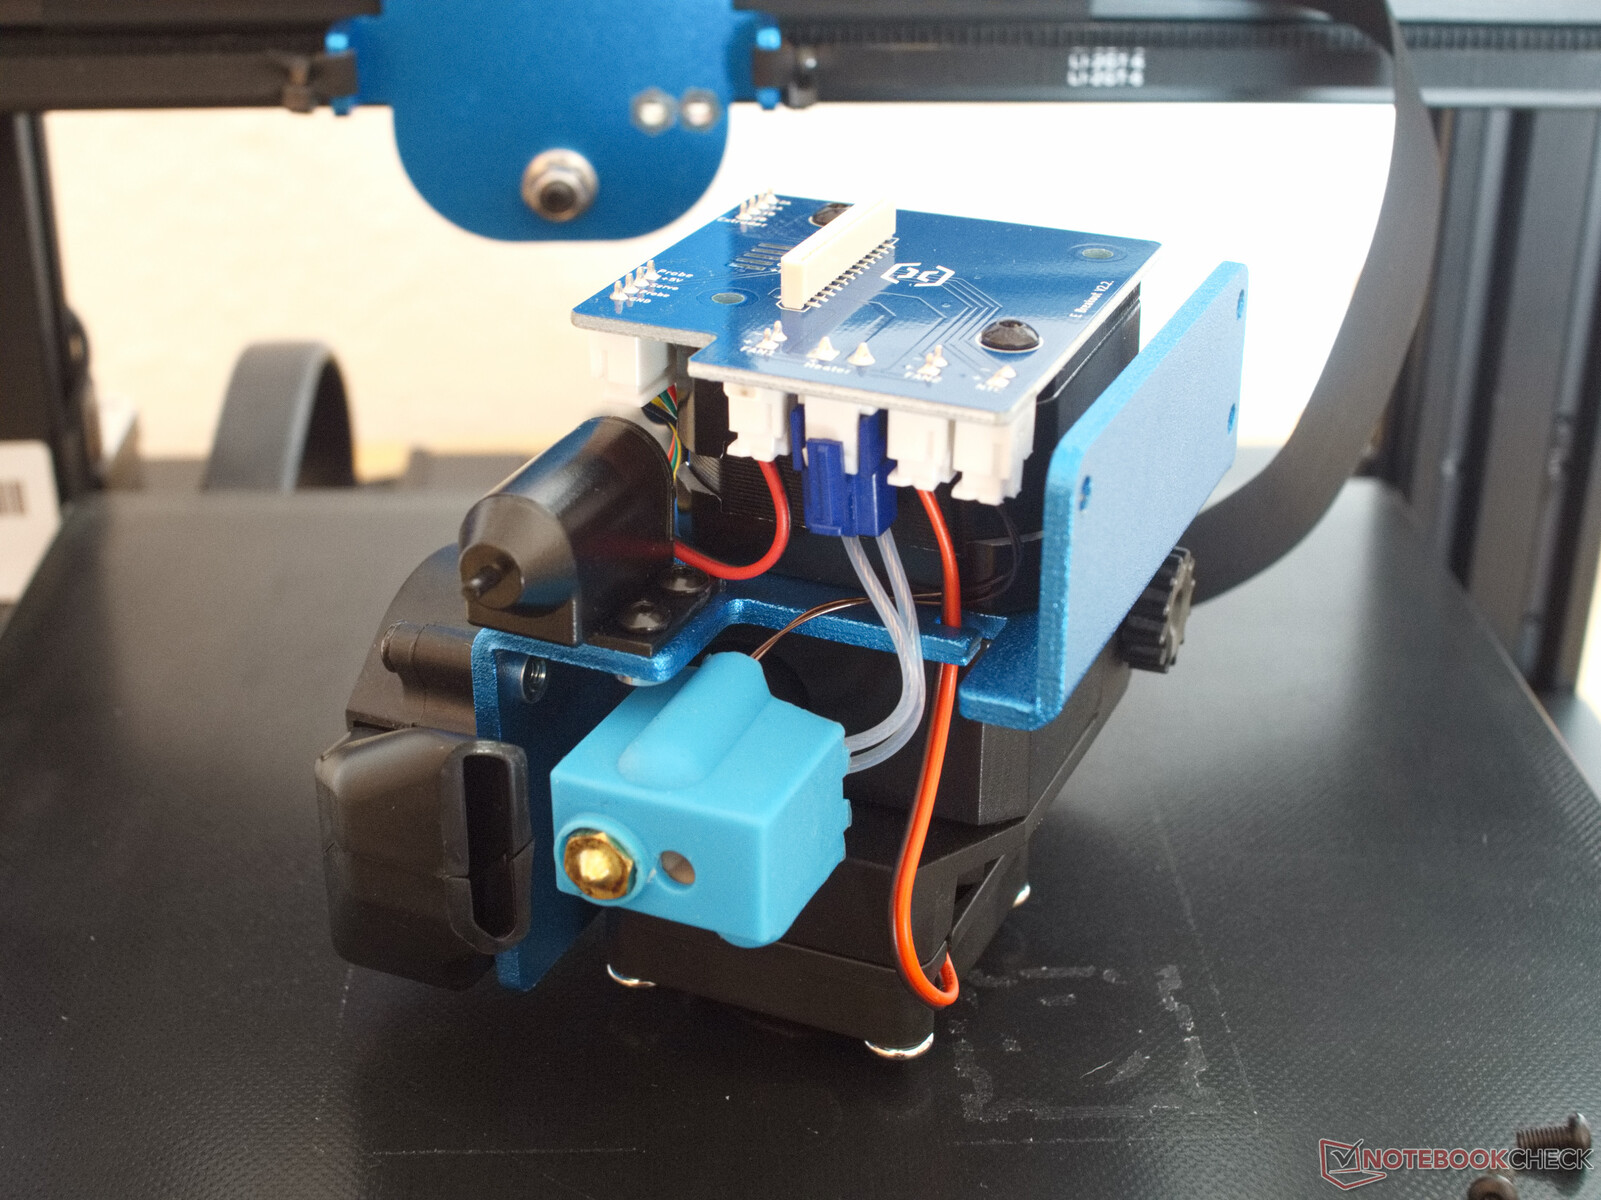
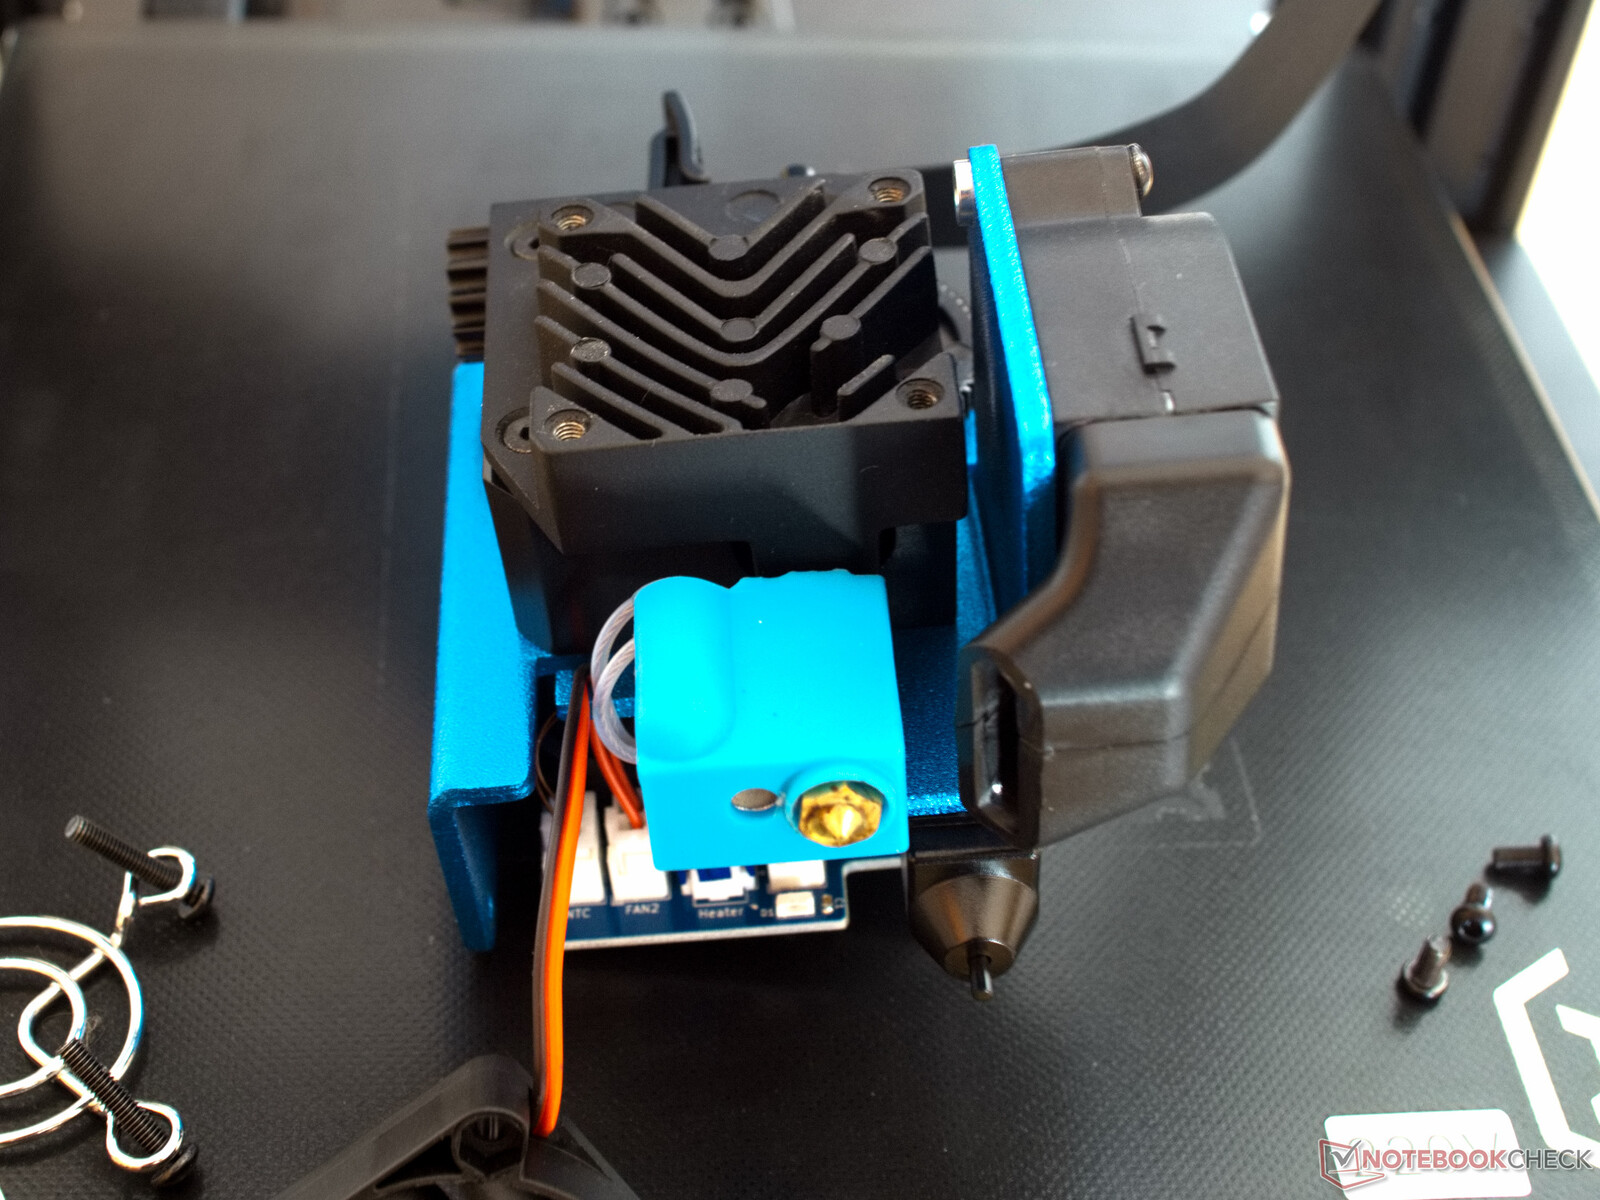
A direct-drive extruder with a reduction gear and a Vulcano hot end with a long heating zone make the Artillery Genius Pro a powerful 3D printer. The upper temperature limit for the hotend set in the firmware is 300 °C (572 °F). The fact that the contact pressure of the rollers in the titanium-style extruder can be adjusted means that flexible materials, where the filament would otherwise be too soft, can also be processed well.
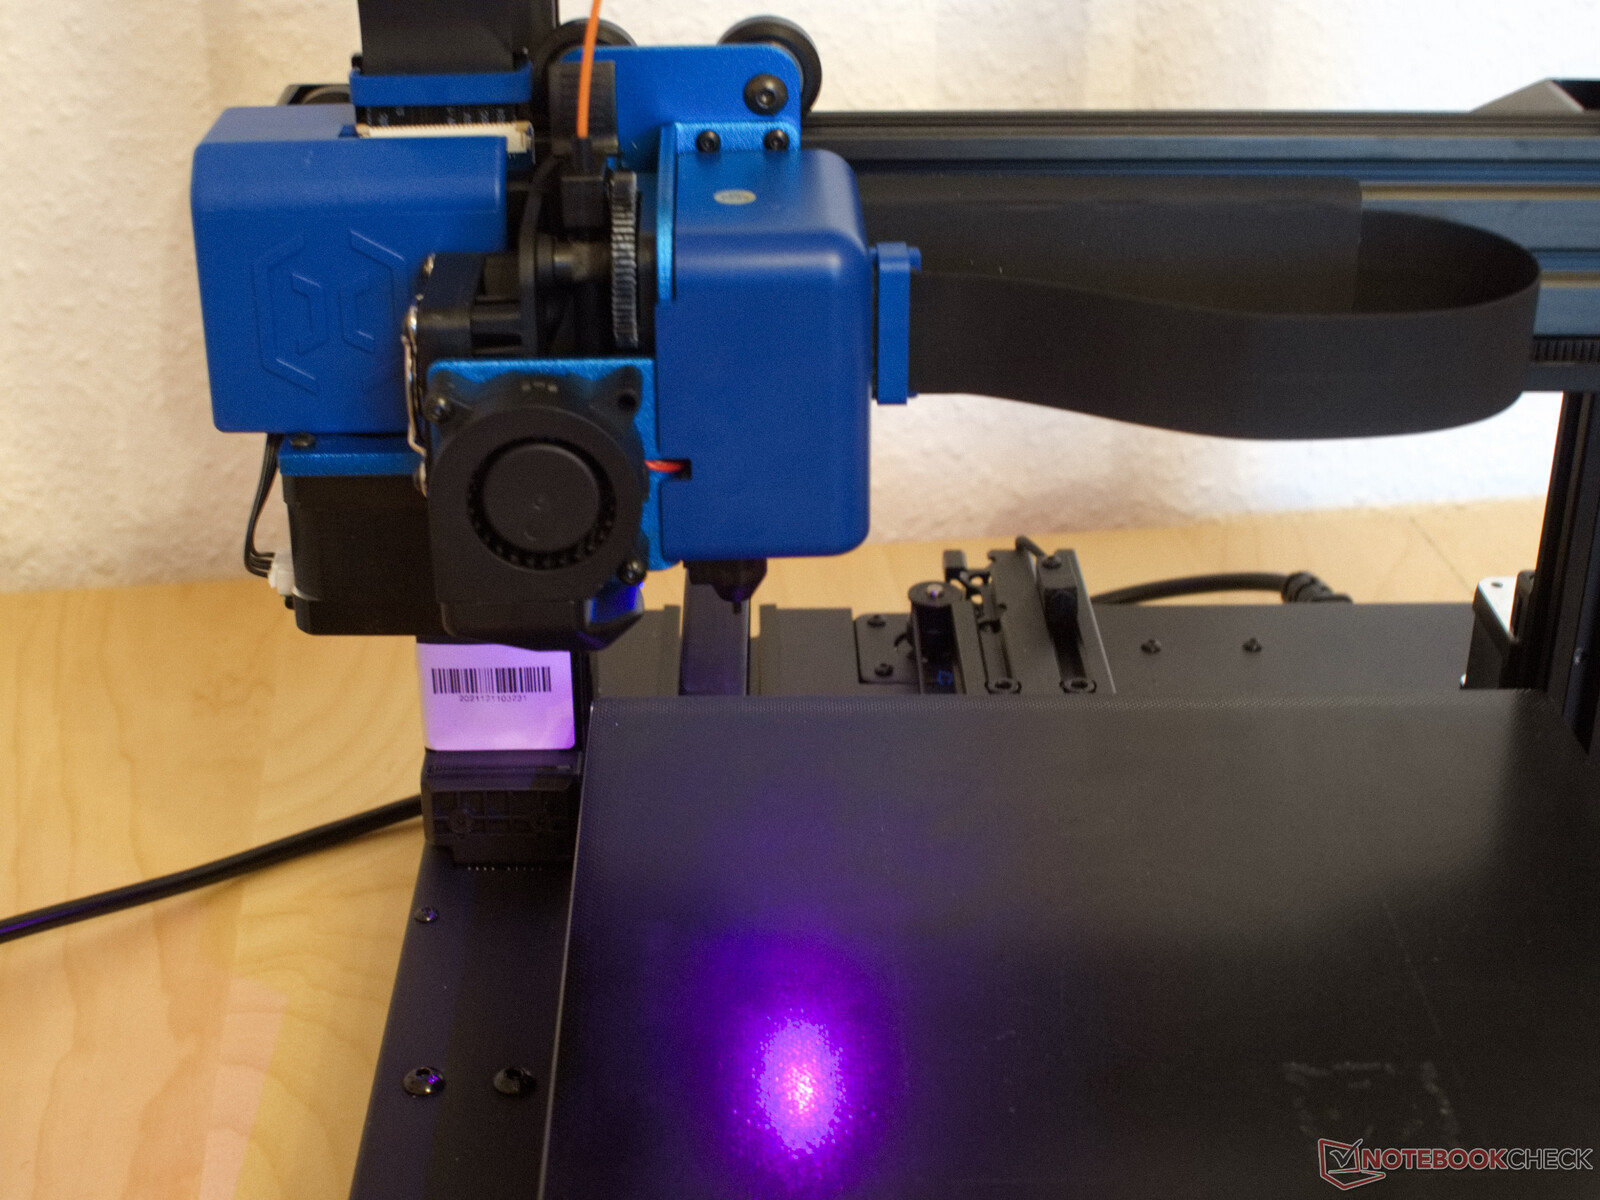
The entire print head of the Artillery Genius Pro already looks a bit bulky, but in addition to the extruder and hotend, a radial fan for object cooling, a print bed sensor and LED lighting are also installed here. During the heating process, the LED changes color from blue to red to indicate that the set temperatures have been reached.
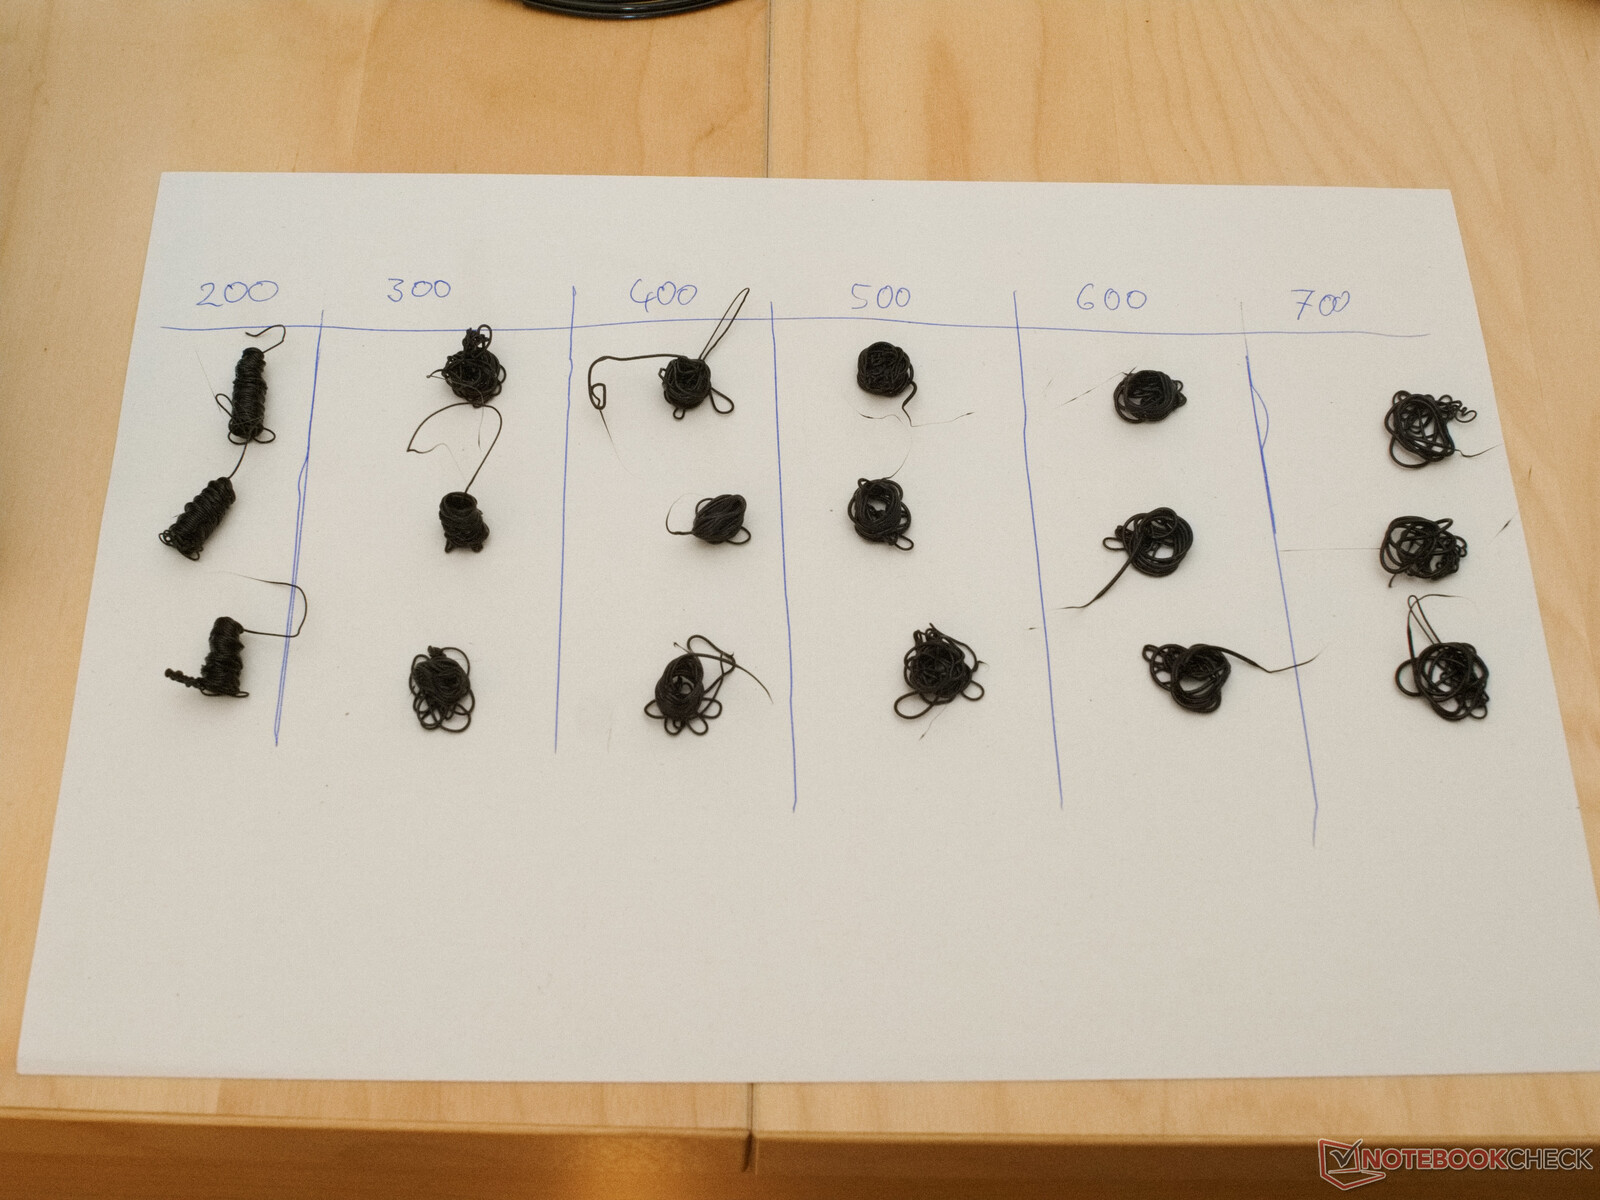
The titanium-style direct extruder of the Artillery Genius Pro shows the expected strong results in the extrusion test with PLA. With the Anycubic PLA used, up to 16 mm²/s (~0.025 in²/s) of plastic can be pushed through the Vulcano hot end at 200 °C (392 °F) without any problems. From this, a possible print speed of up to 180 mm/s at 0.2 mm (~7.1 in/s at ~0.0079 in) layer height and 0.44 mm (~0.0173 in) layer width can be calculated.
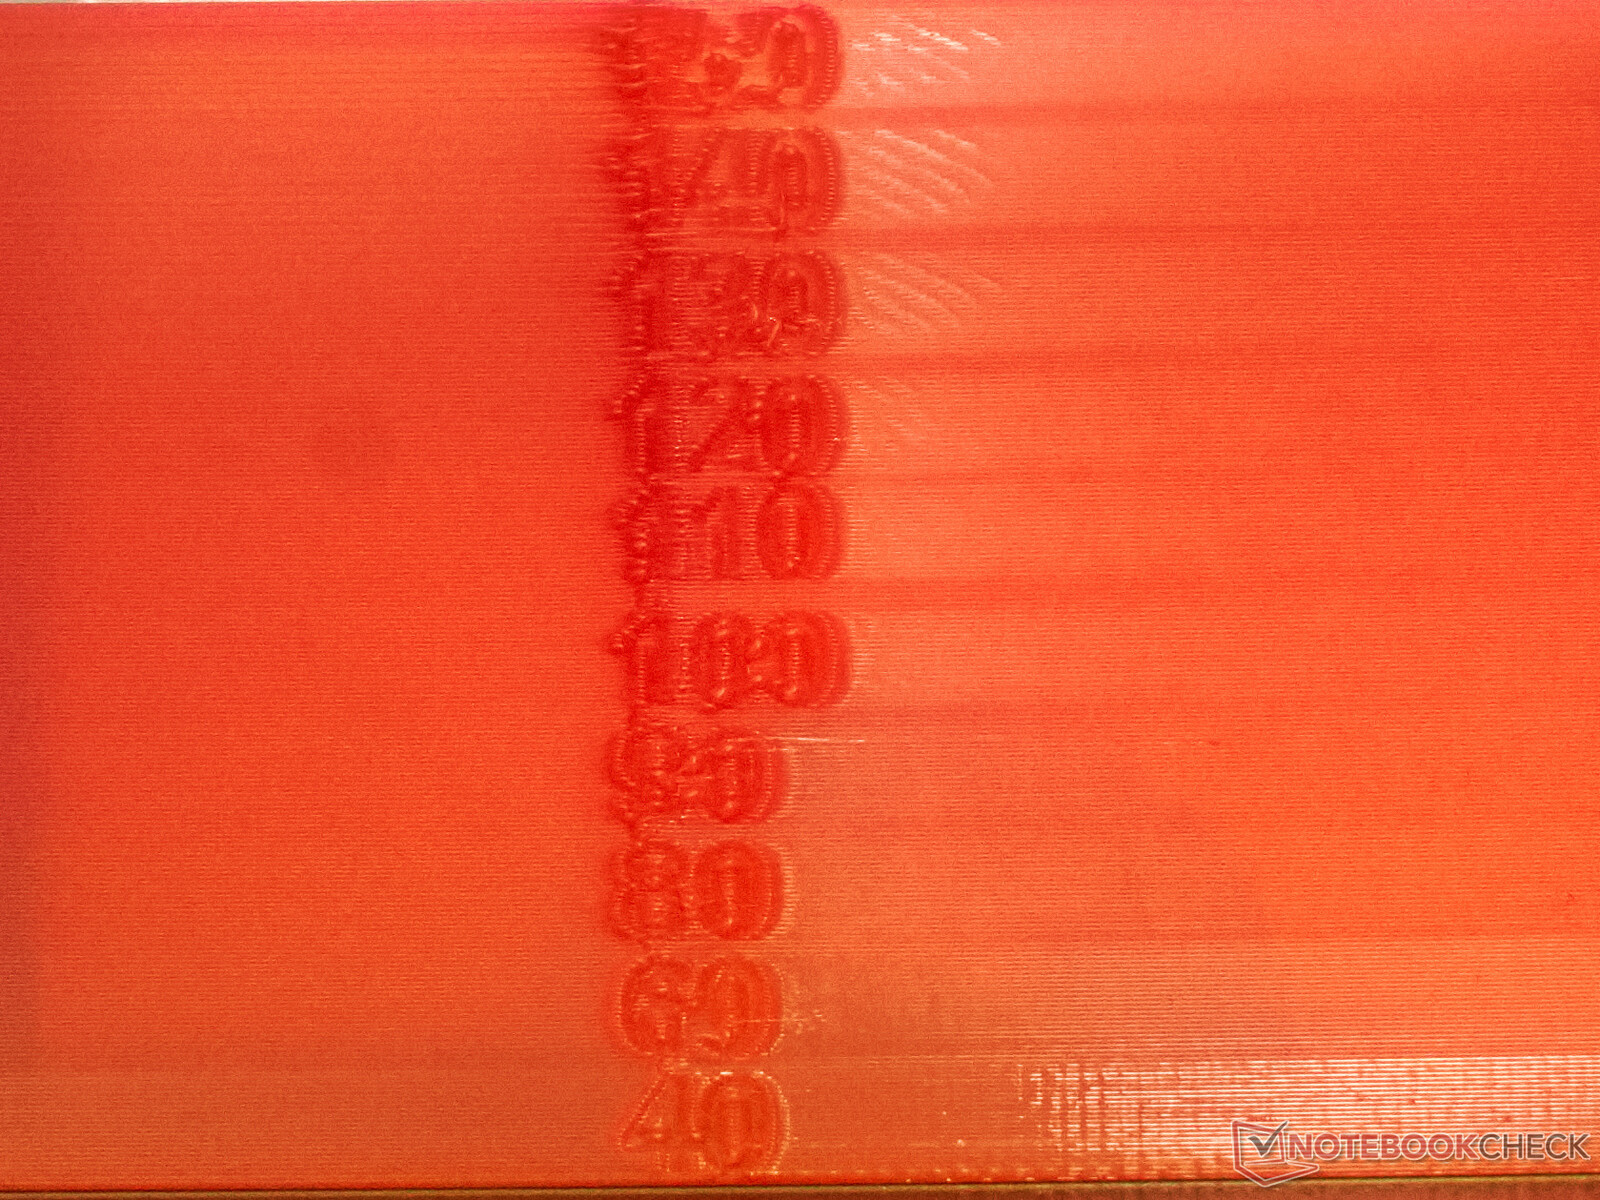
In real terms, 120 mm/s (~4.72 in/s) is possible with the settings in the firmware and PrusaSlicer profile. Above this, adjustments would have to be made to the retracts, accelerations and linear advance to avoid small imperfections. However, the test result of 20 mm/s to 150 mm/s (~0.787 in/s to 5.9 in/s) in the practical test suggests that the 3D printer is probably capable of such high speeds when calibrated accordingly.

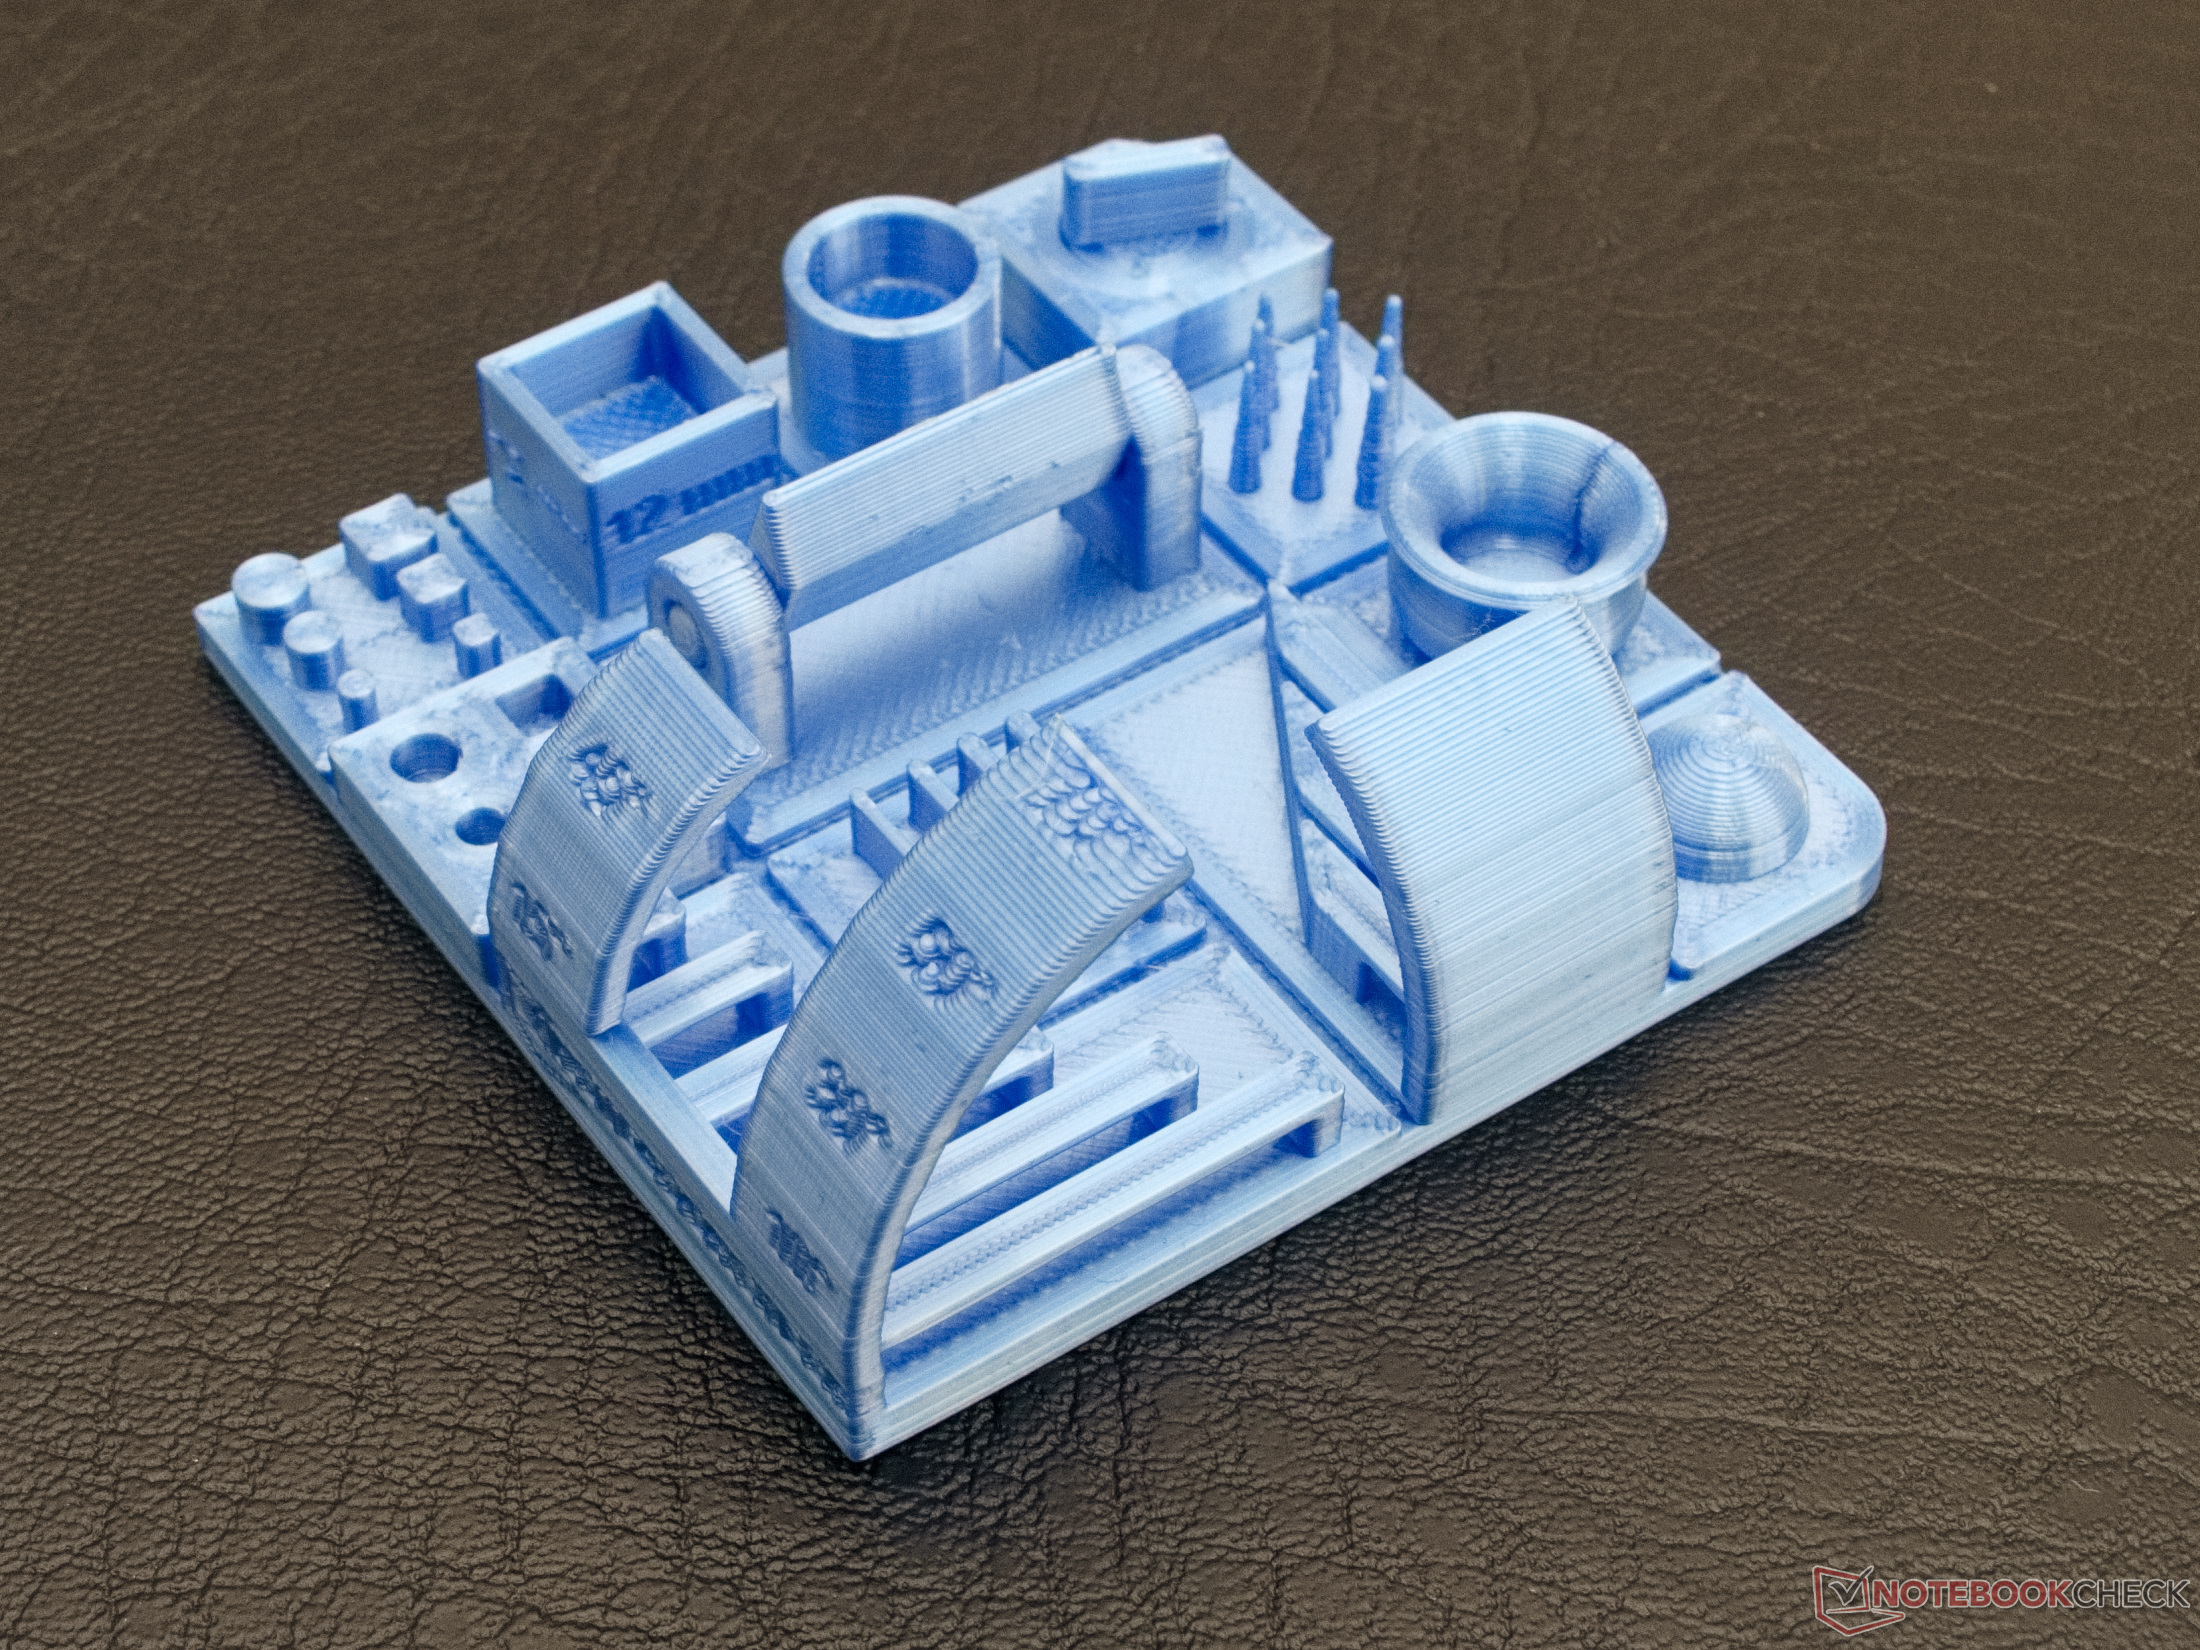
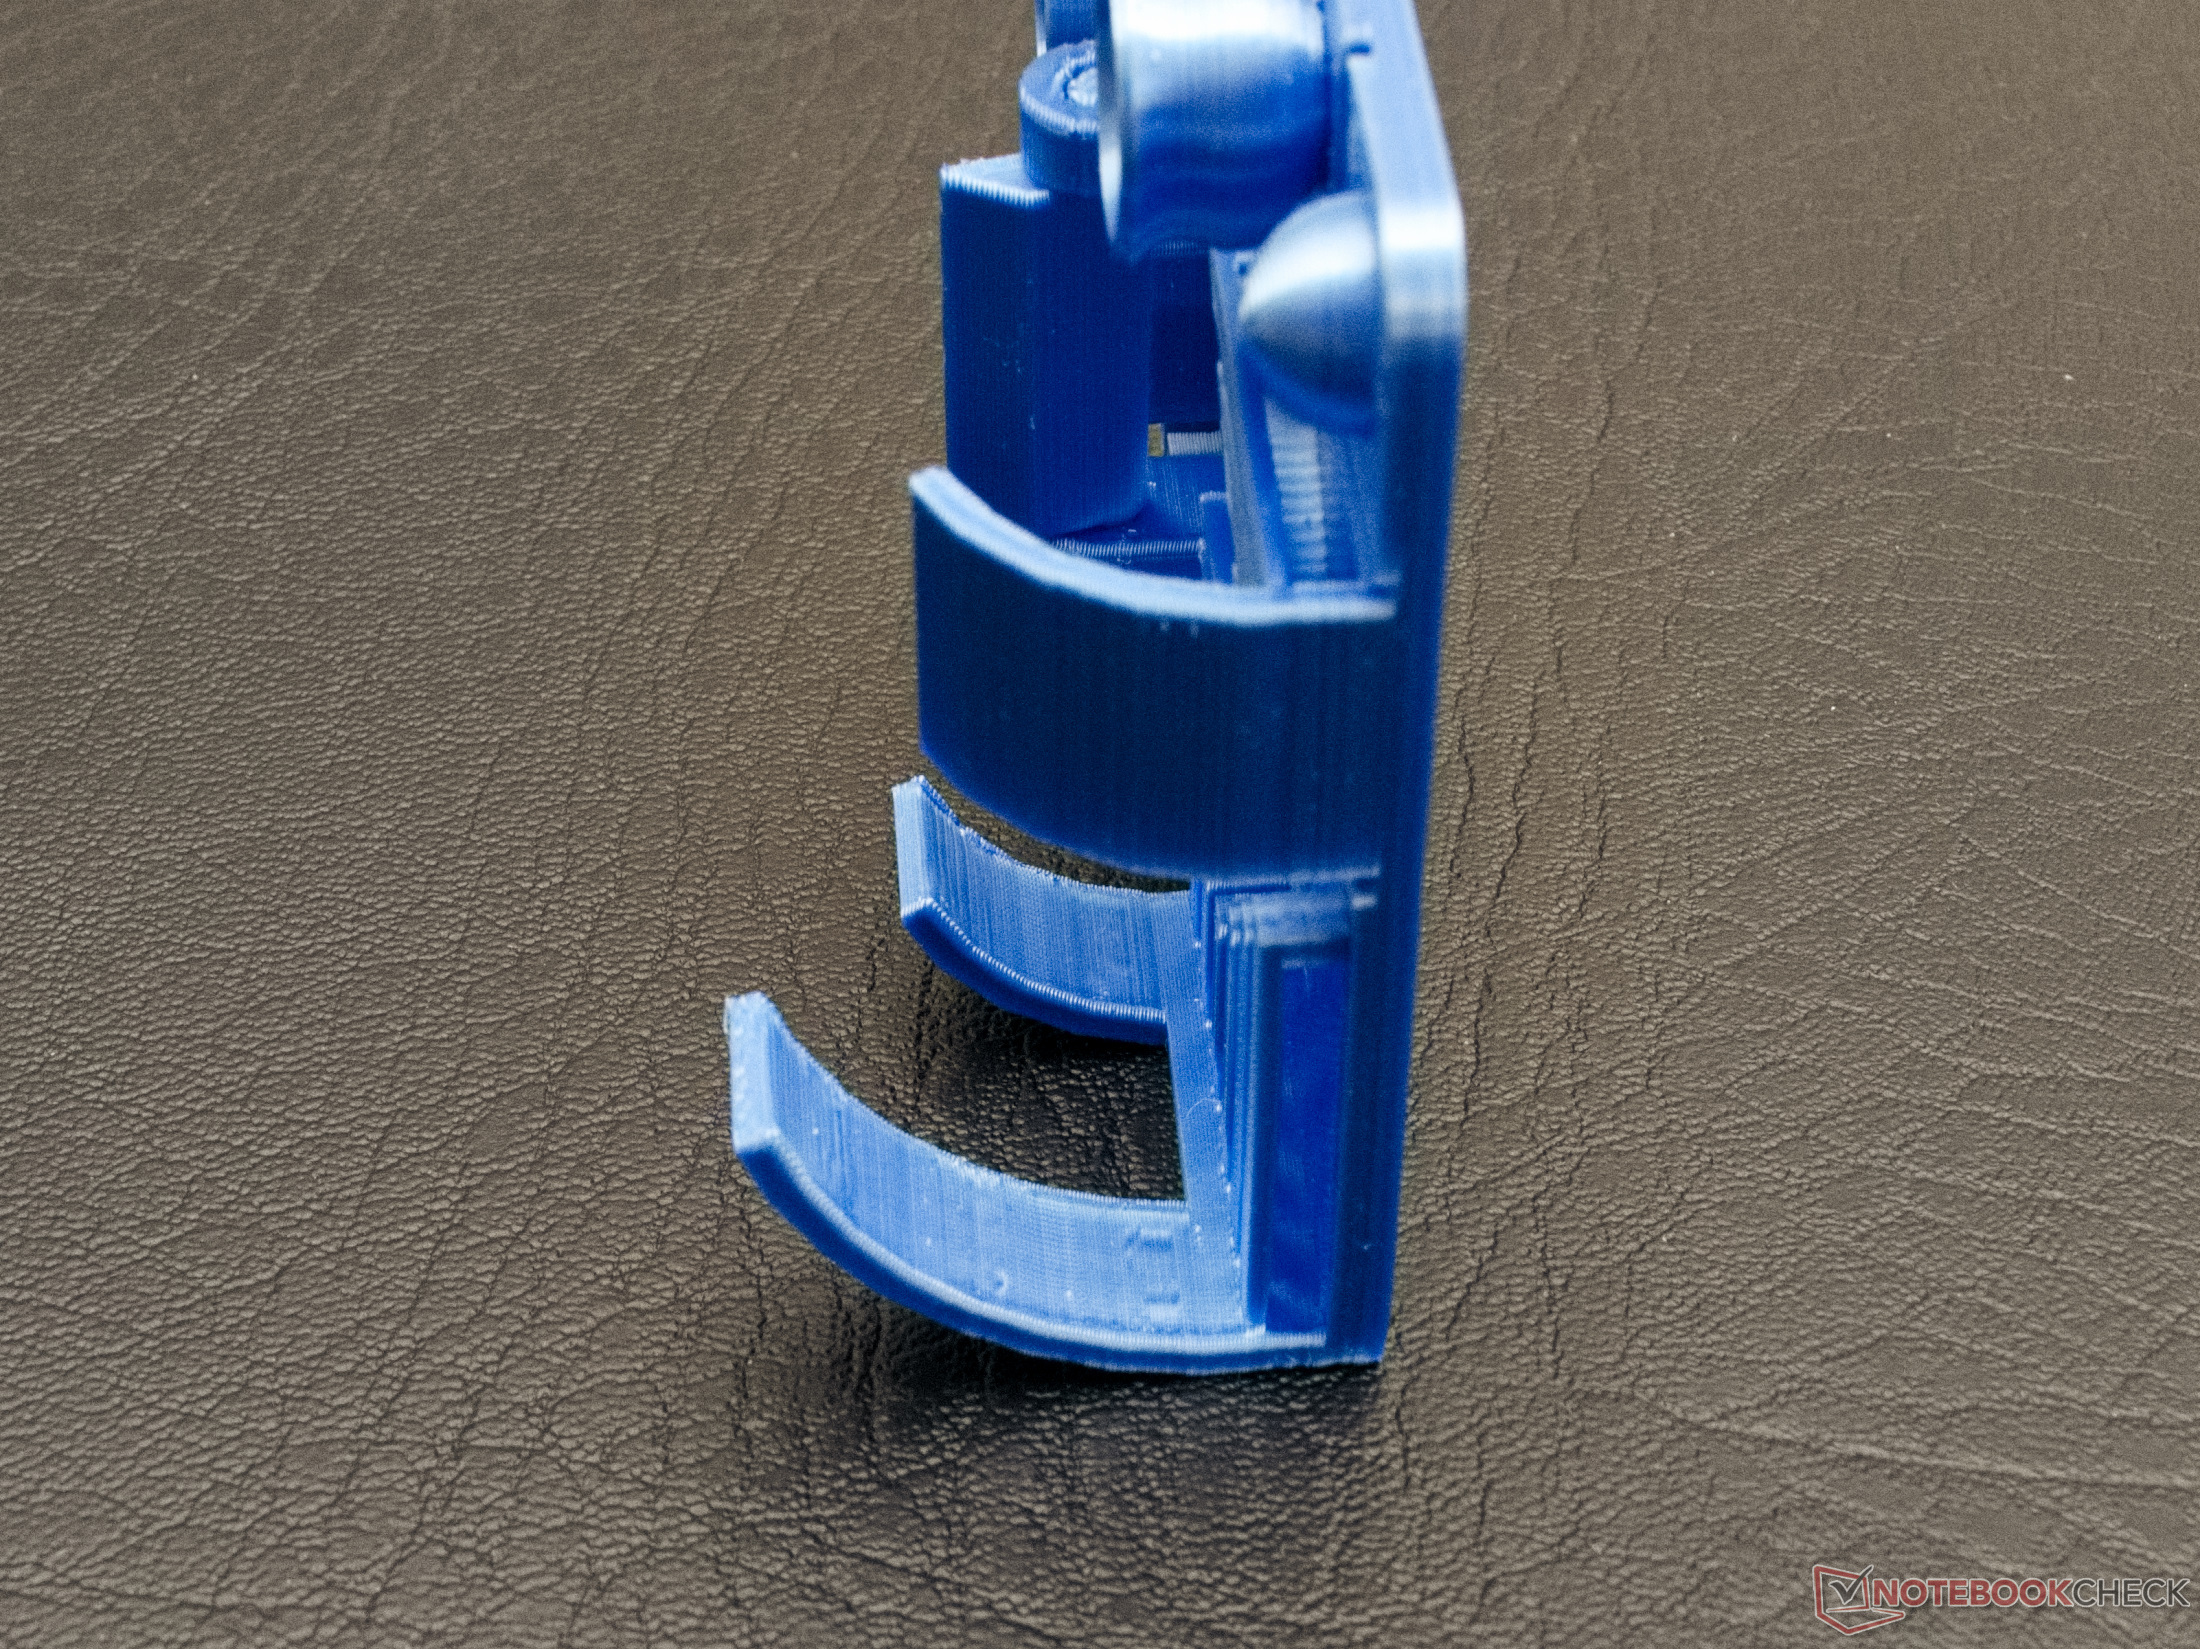
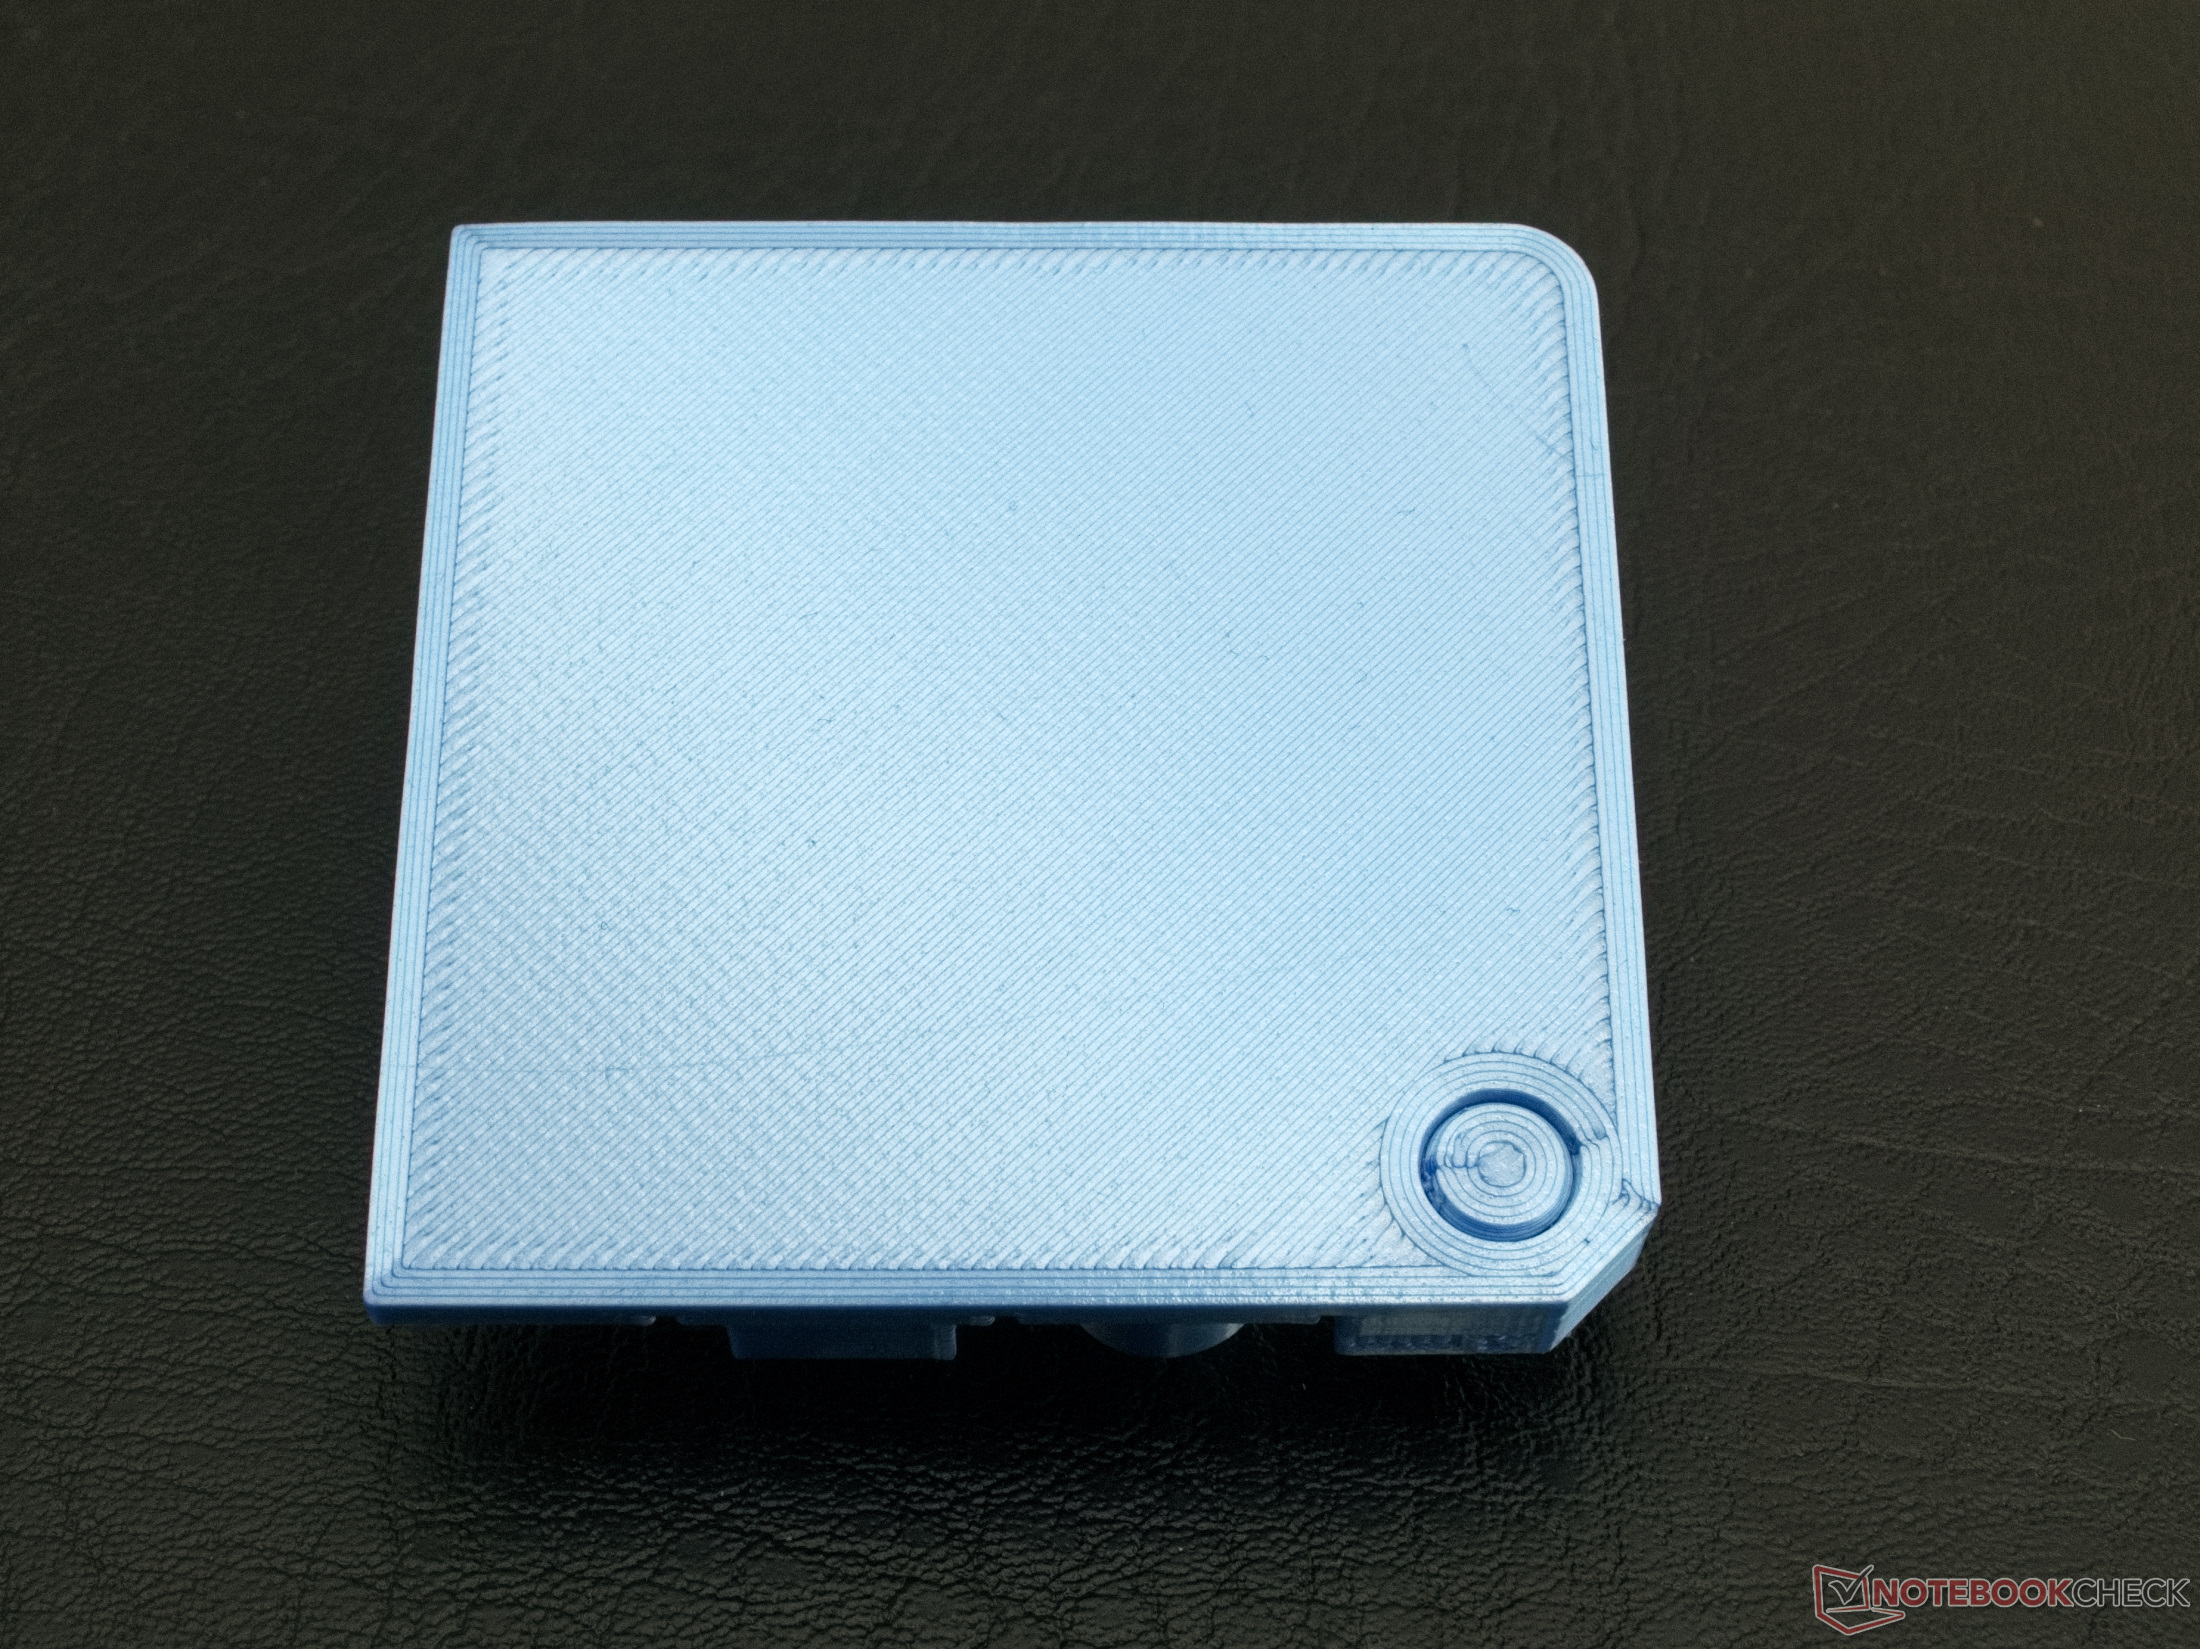
Print quality
Profiles for the Artillery Genius are already integrated in Cura 4.13.0 and in the current PrusaSlicer. There are not many innovations for the Genius Pro and so you can use these profiles almost as they come. Only the command M420 S1 Z10 should be placed in the start code of the printer to use the data from the auto-bed leveling when printing.
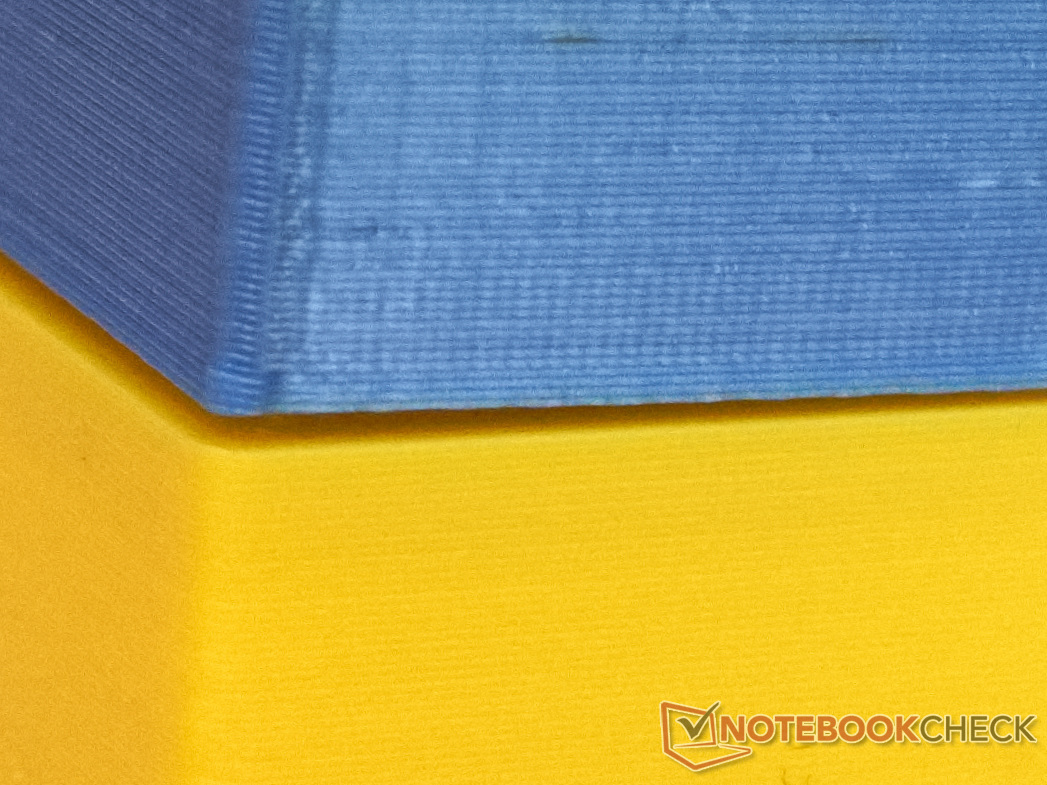
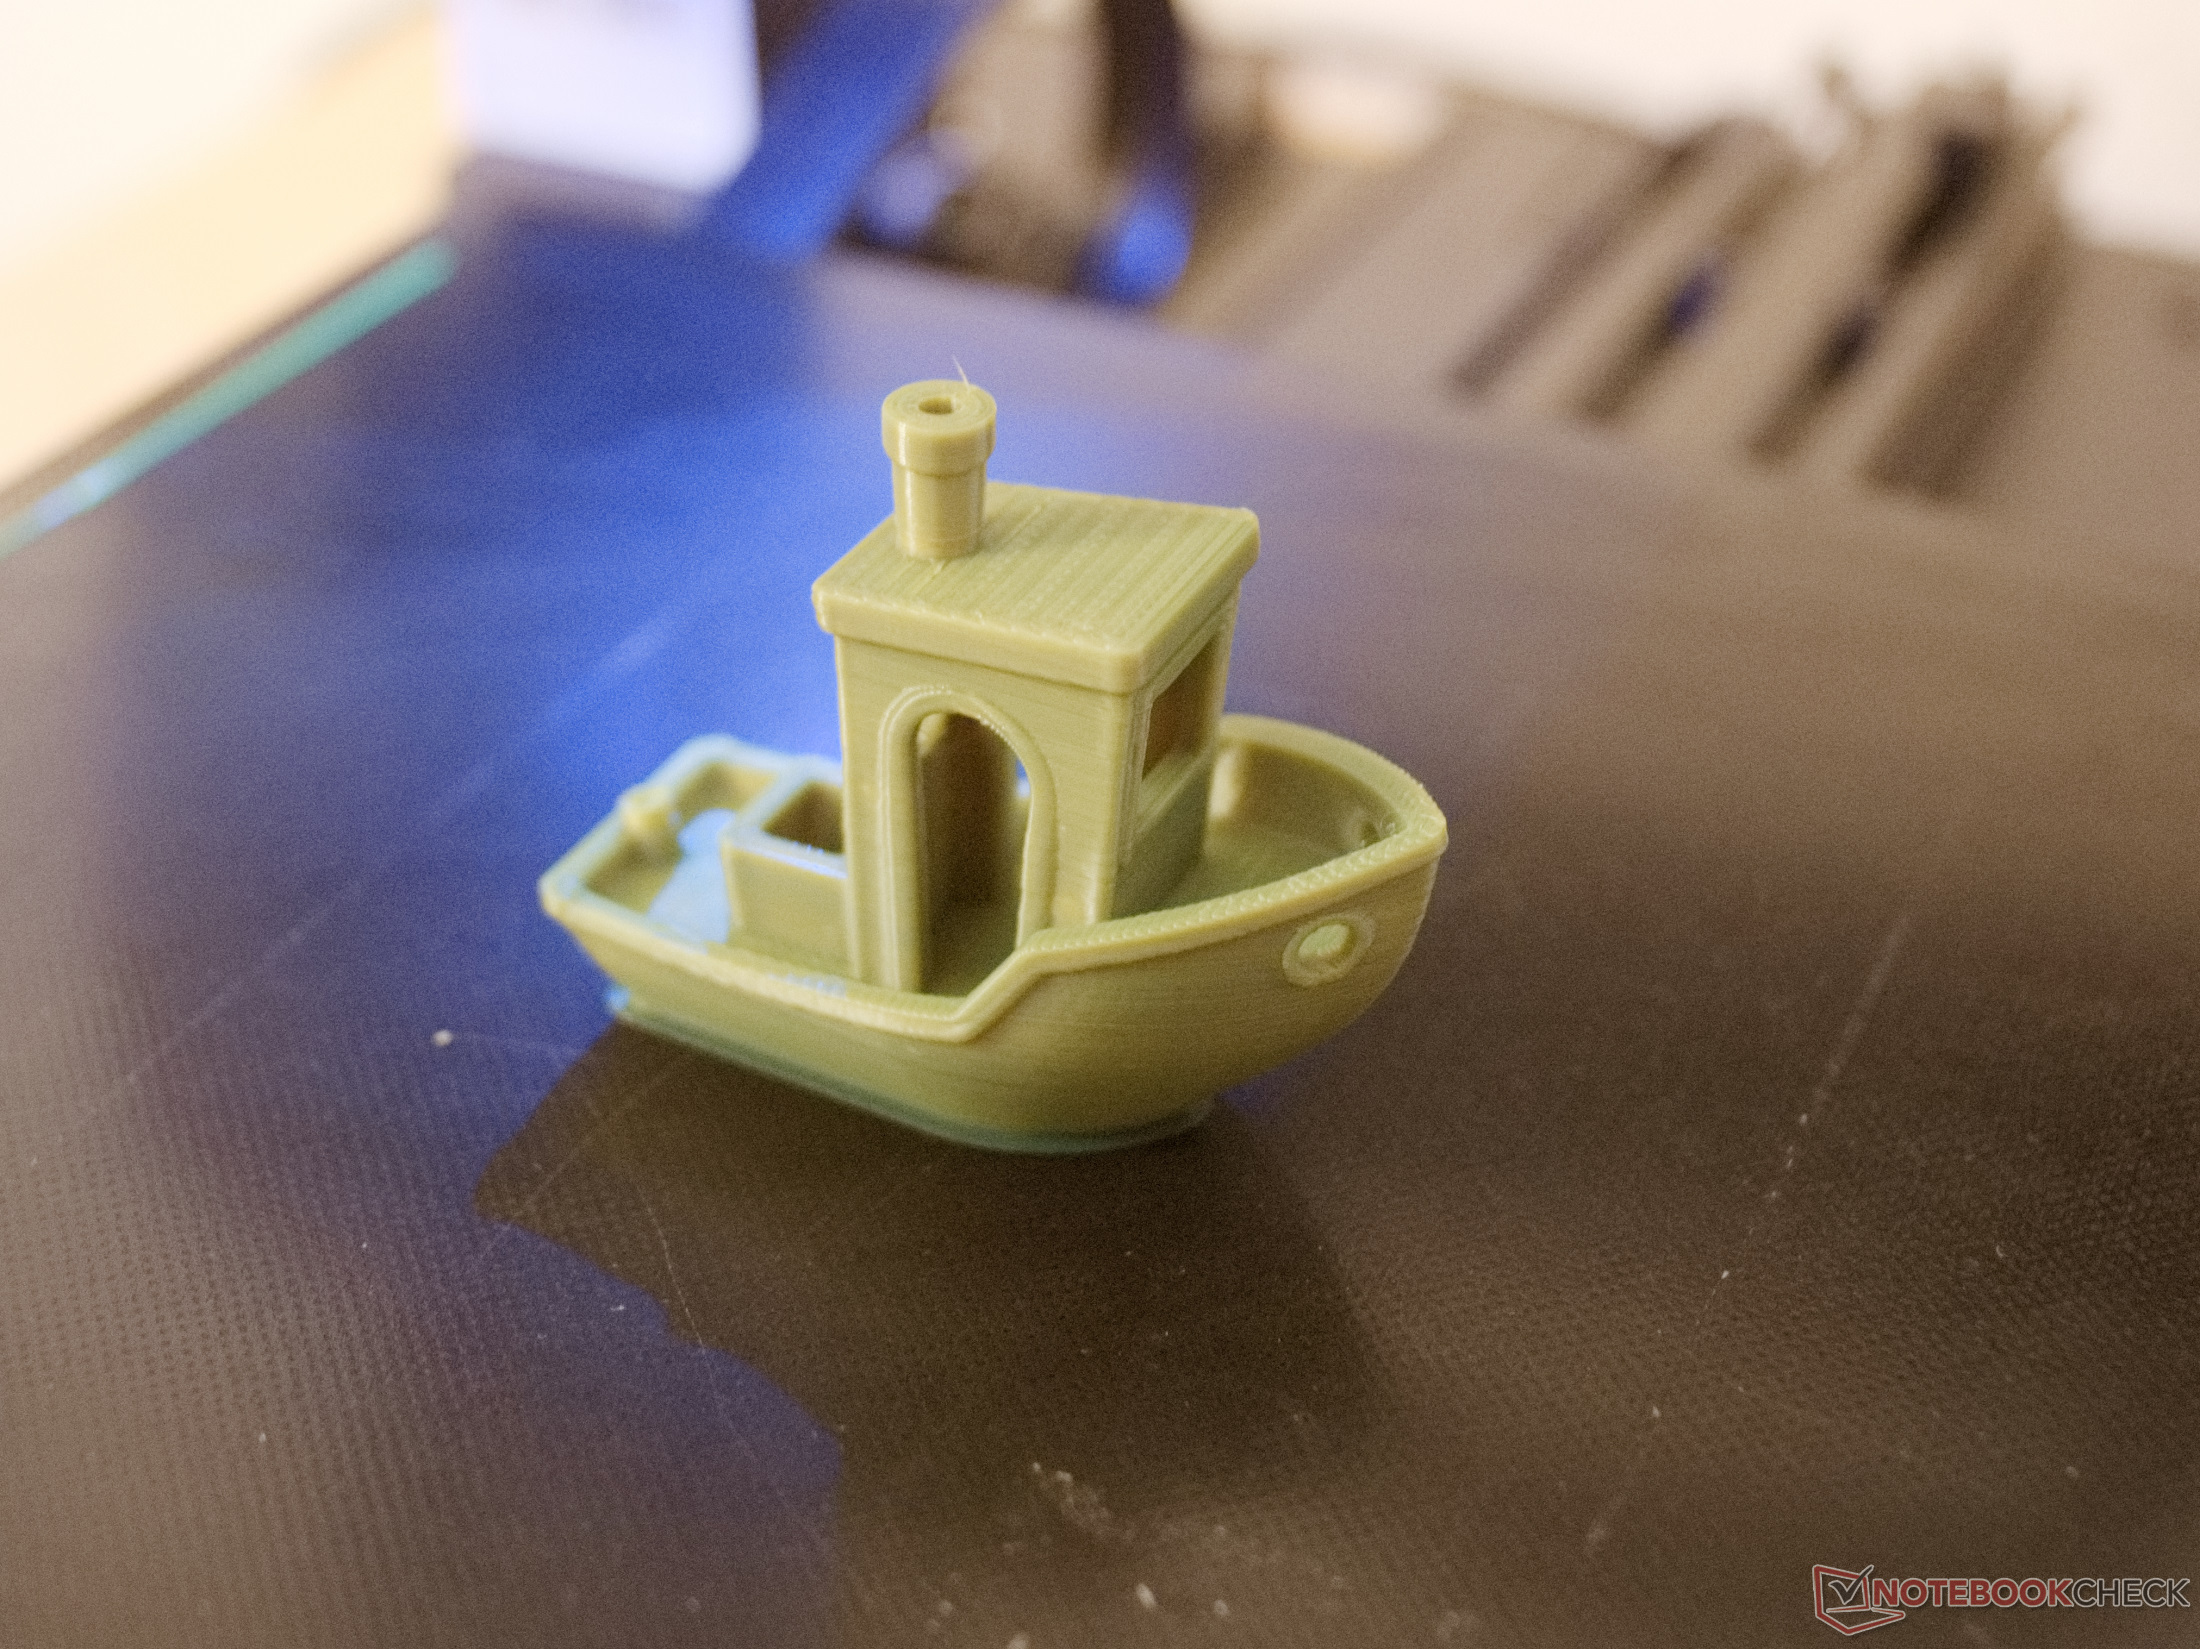
Our test model (here on Thingiverse) cannot prove any serious problems with the 3D printer. Only a few small flaws show that the retraction settings of the Cura profile could be improved. However, hardly any stringing and no filament blobs can be detected. In summary, all areas are dimensionally accurate, print bed adhesion is optimal and overhangs are also created without problems. The two print-in-place parts can be moved after printing. The print quality with the used silk-blue PLA filament is more than good.


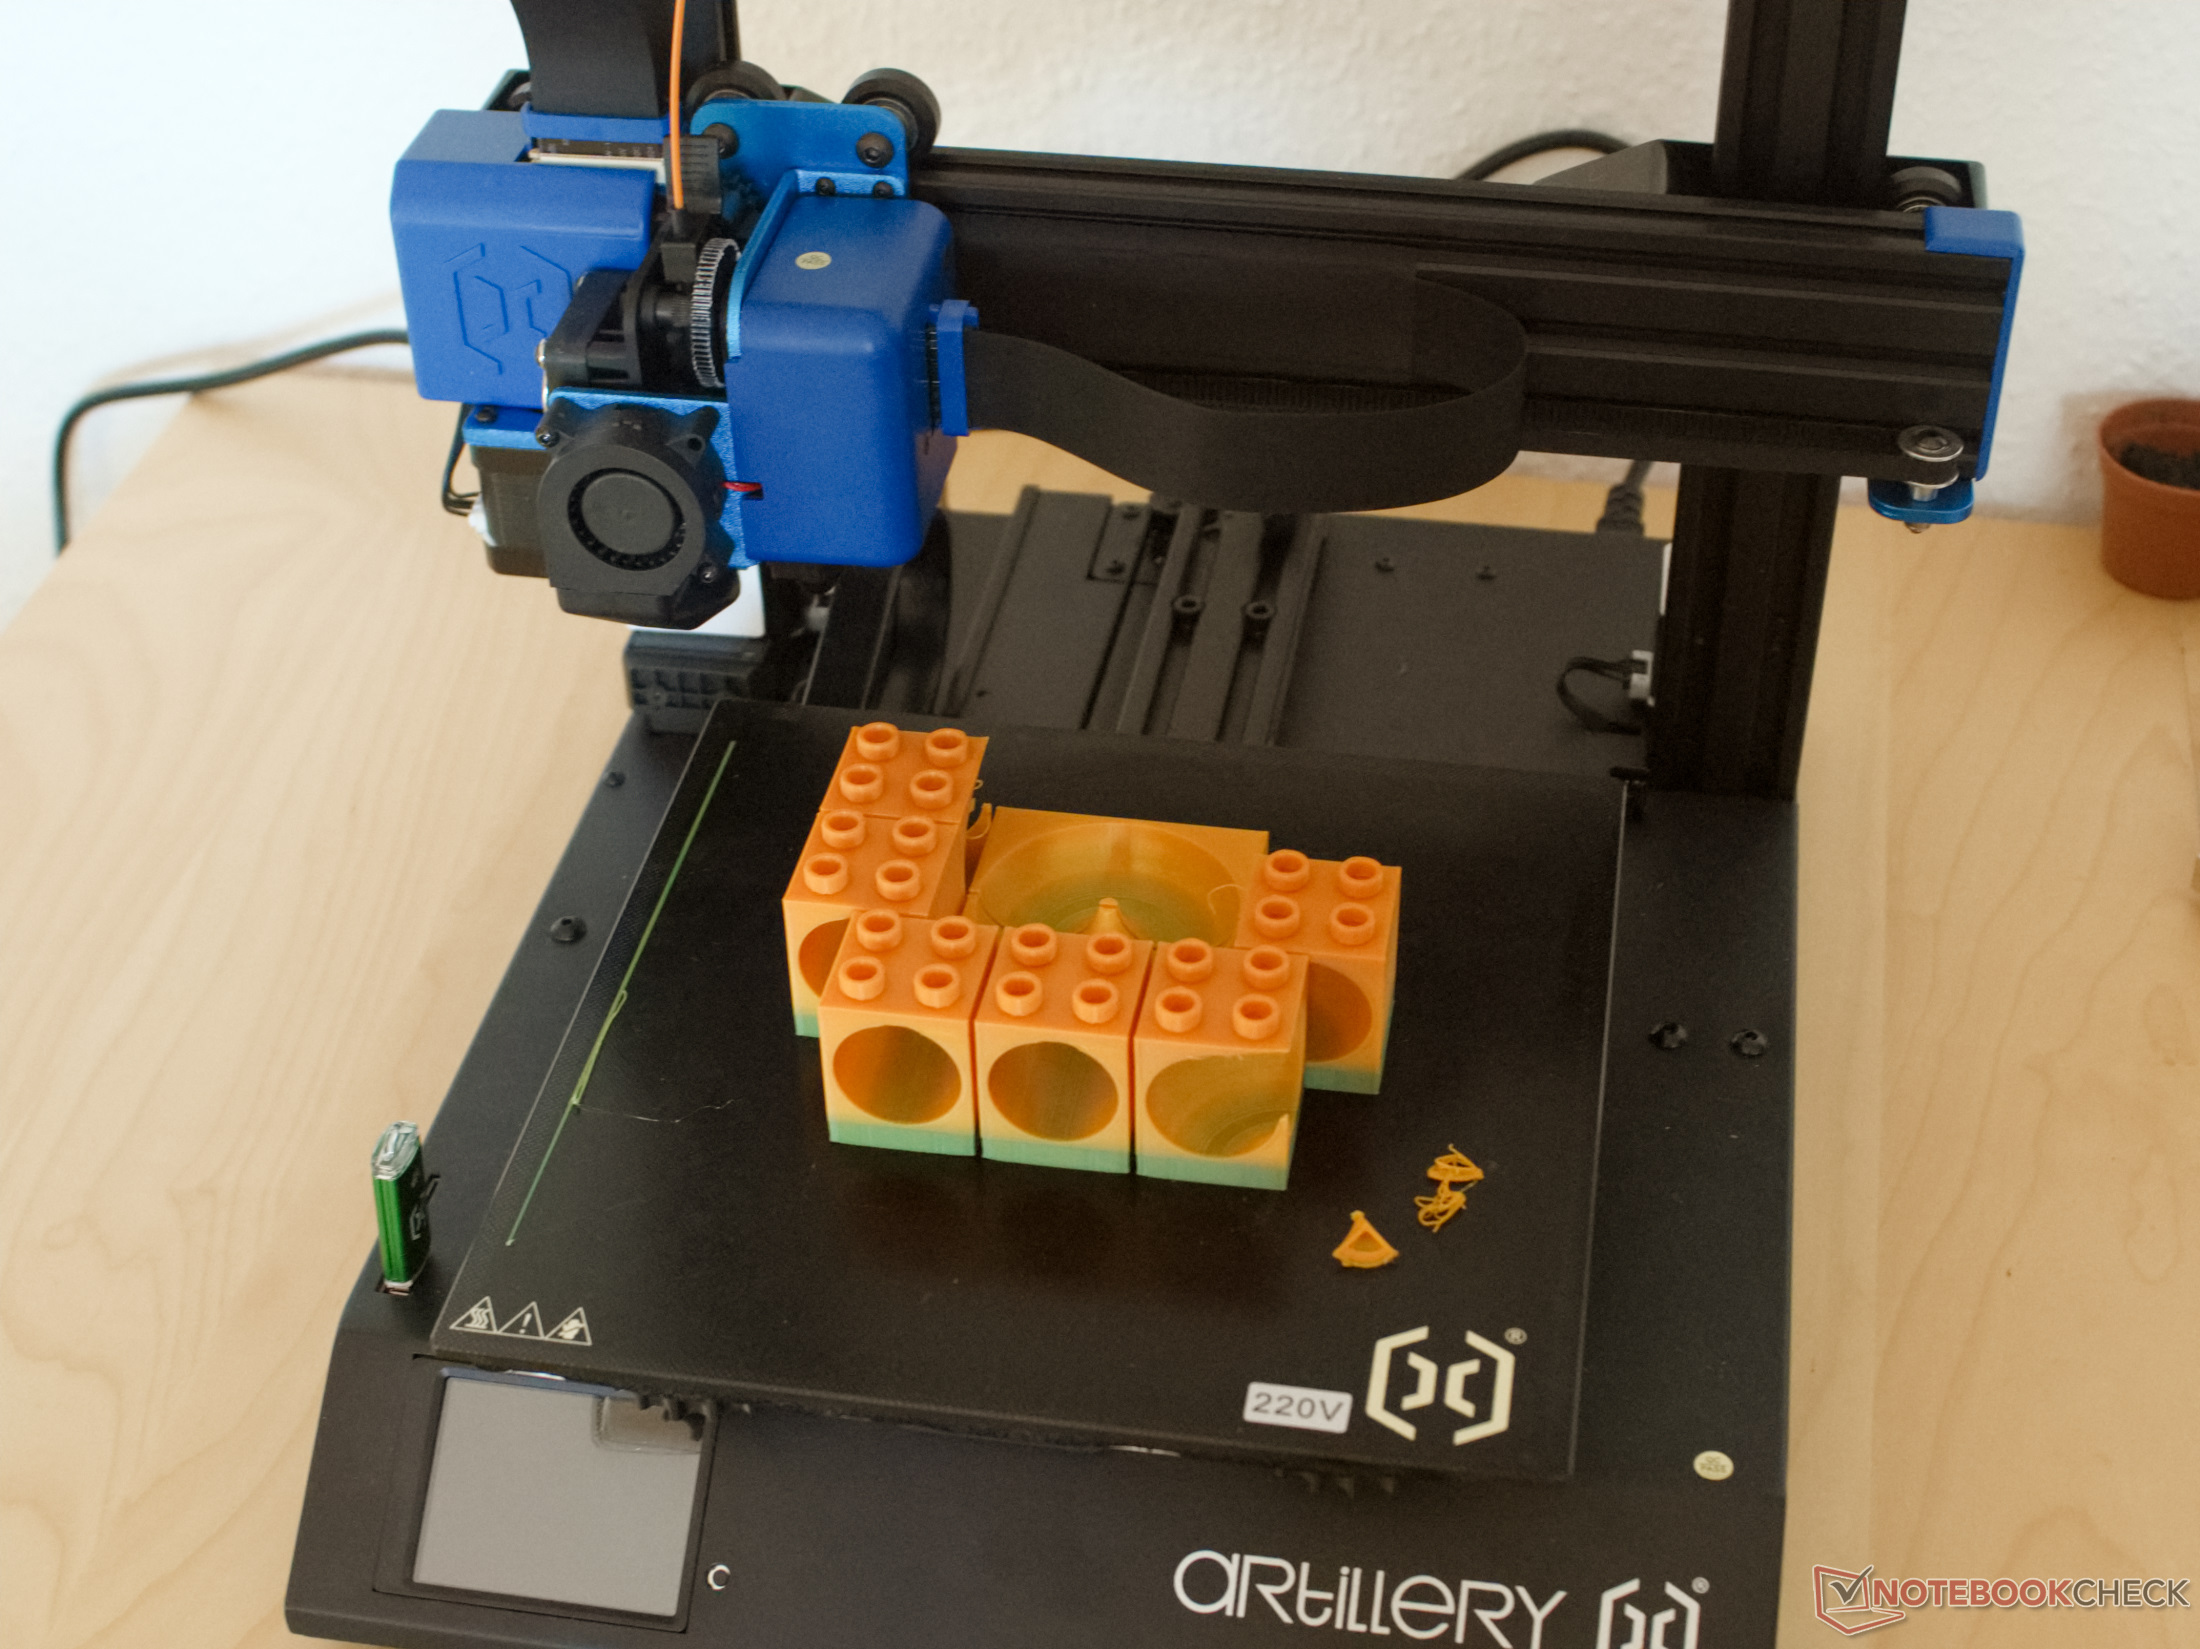
Practice
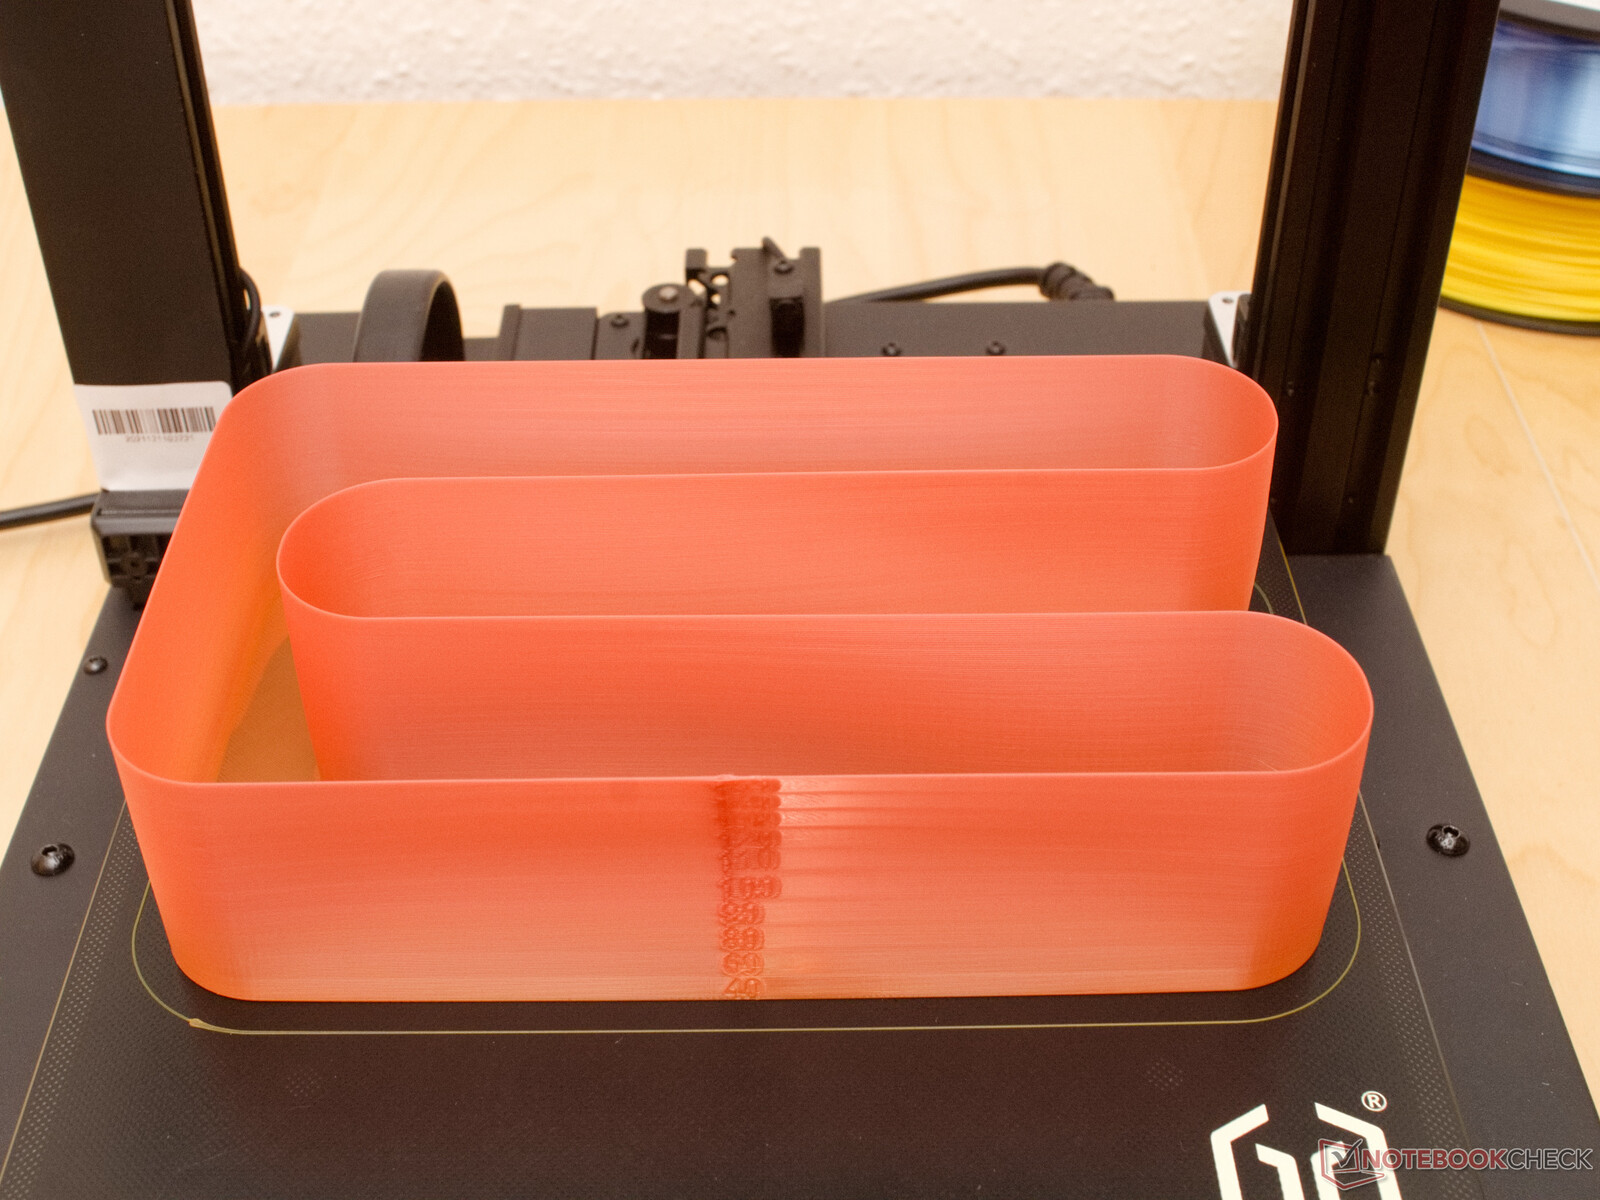
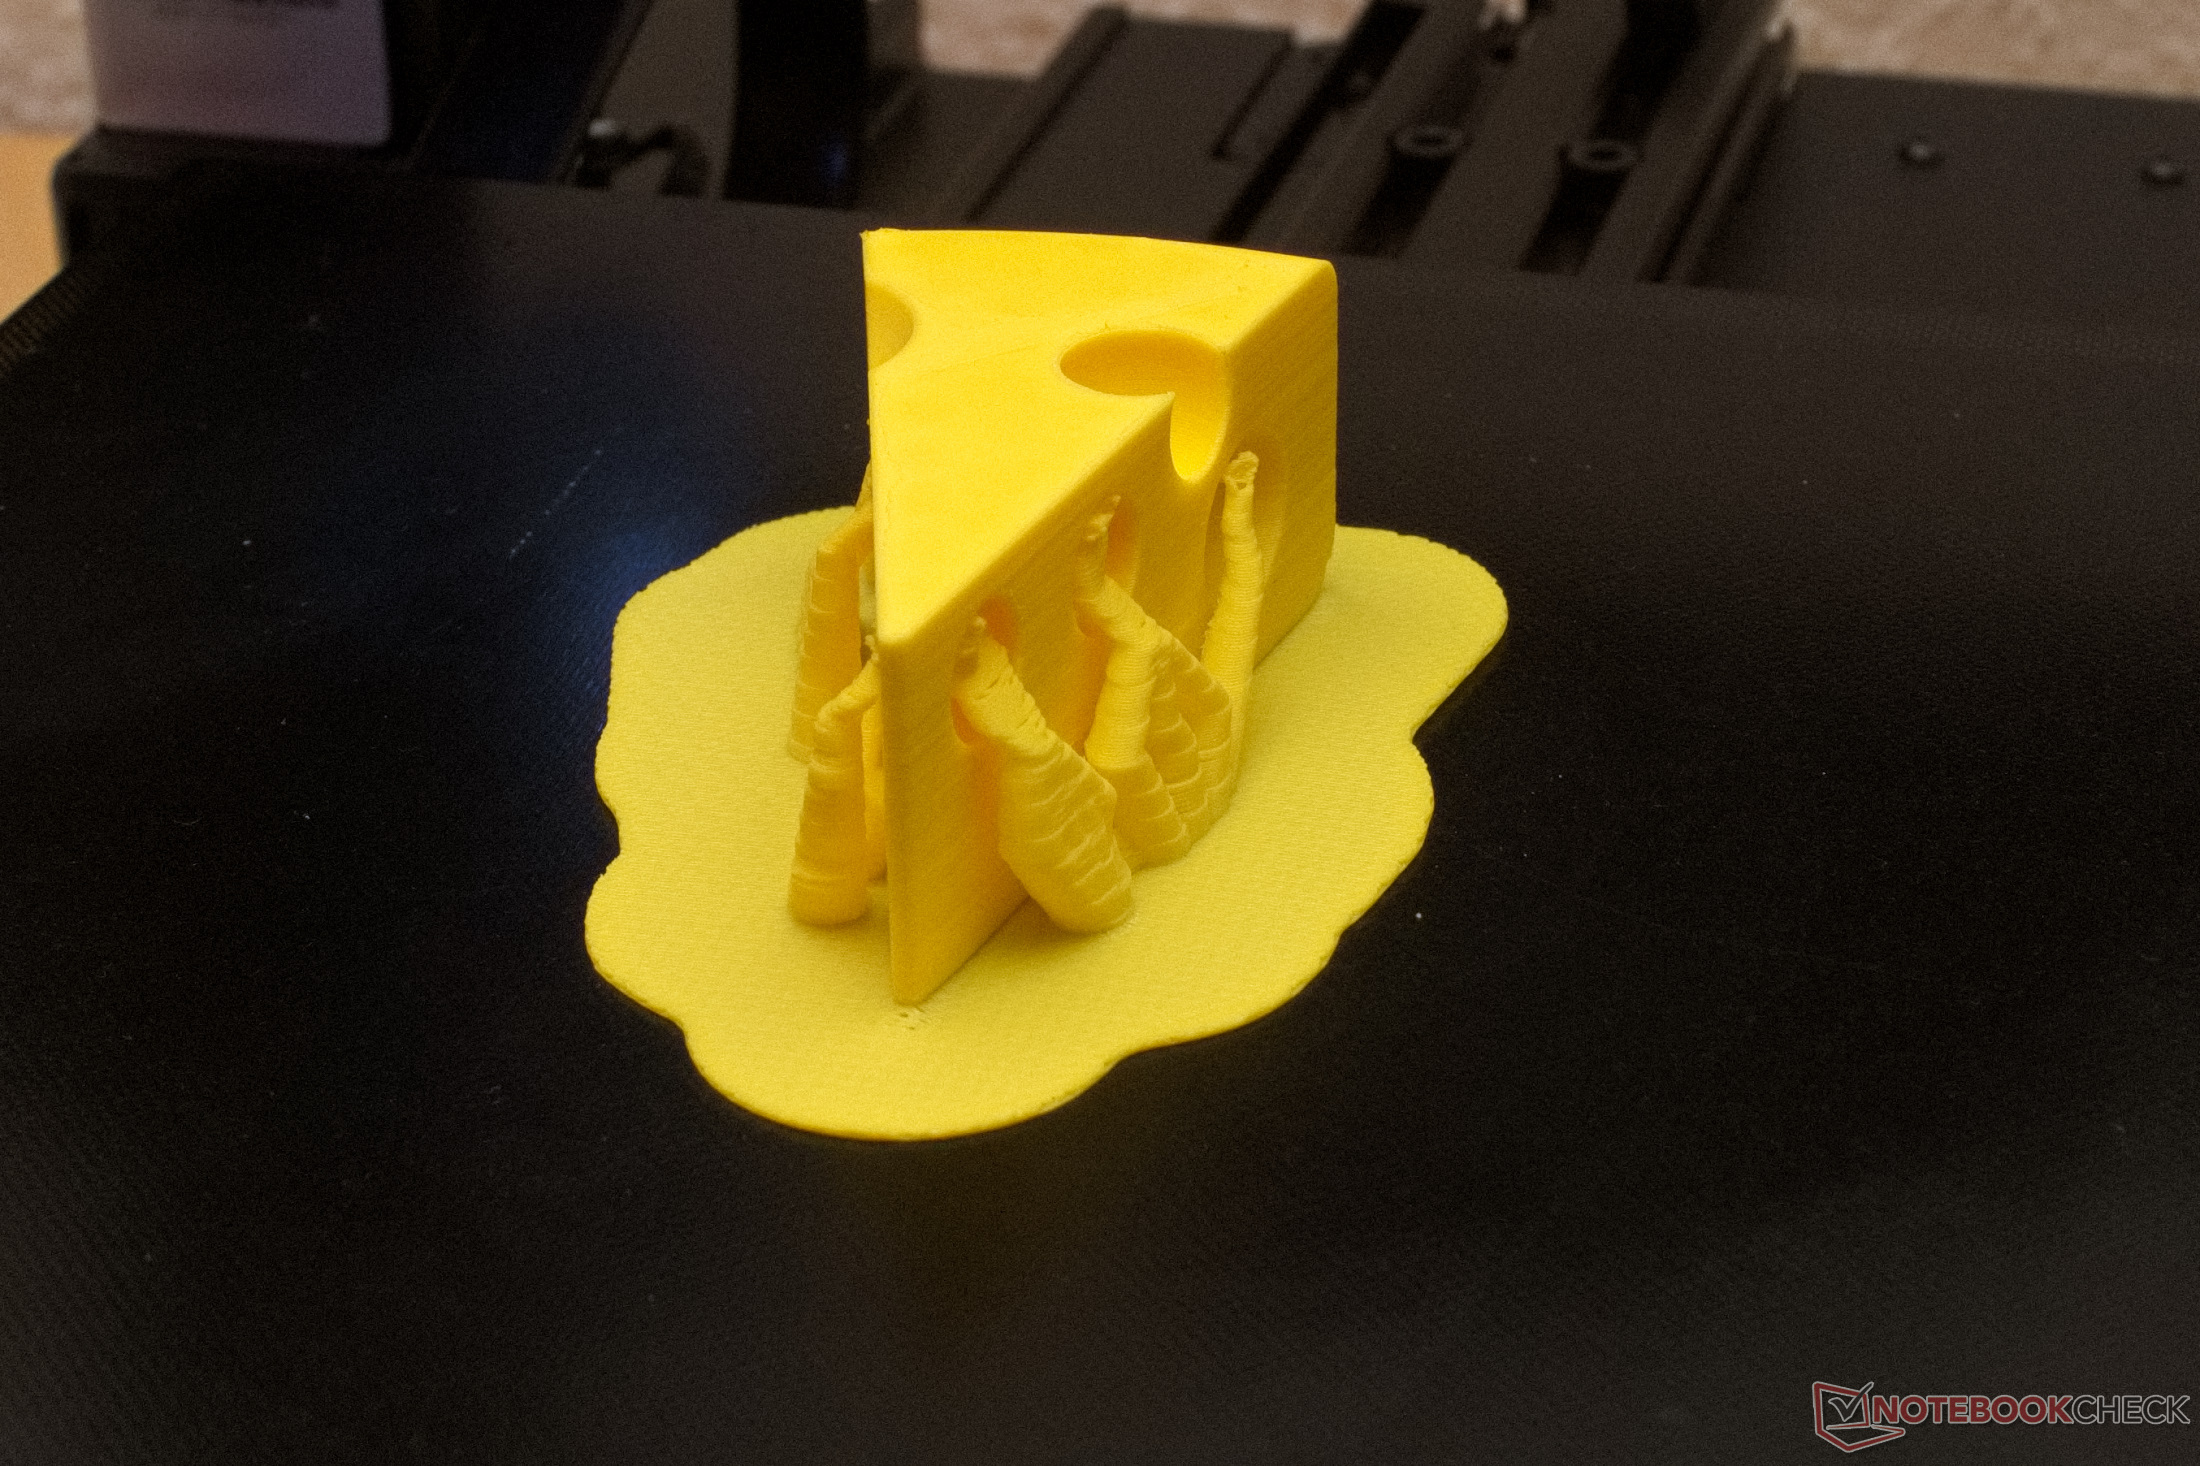
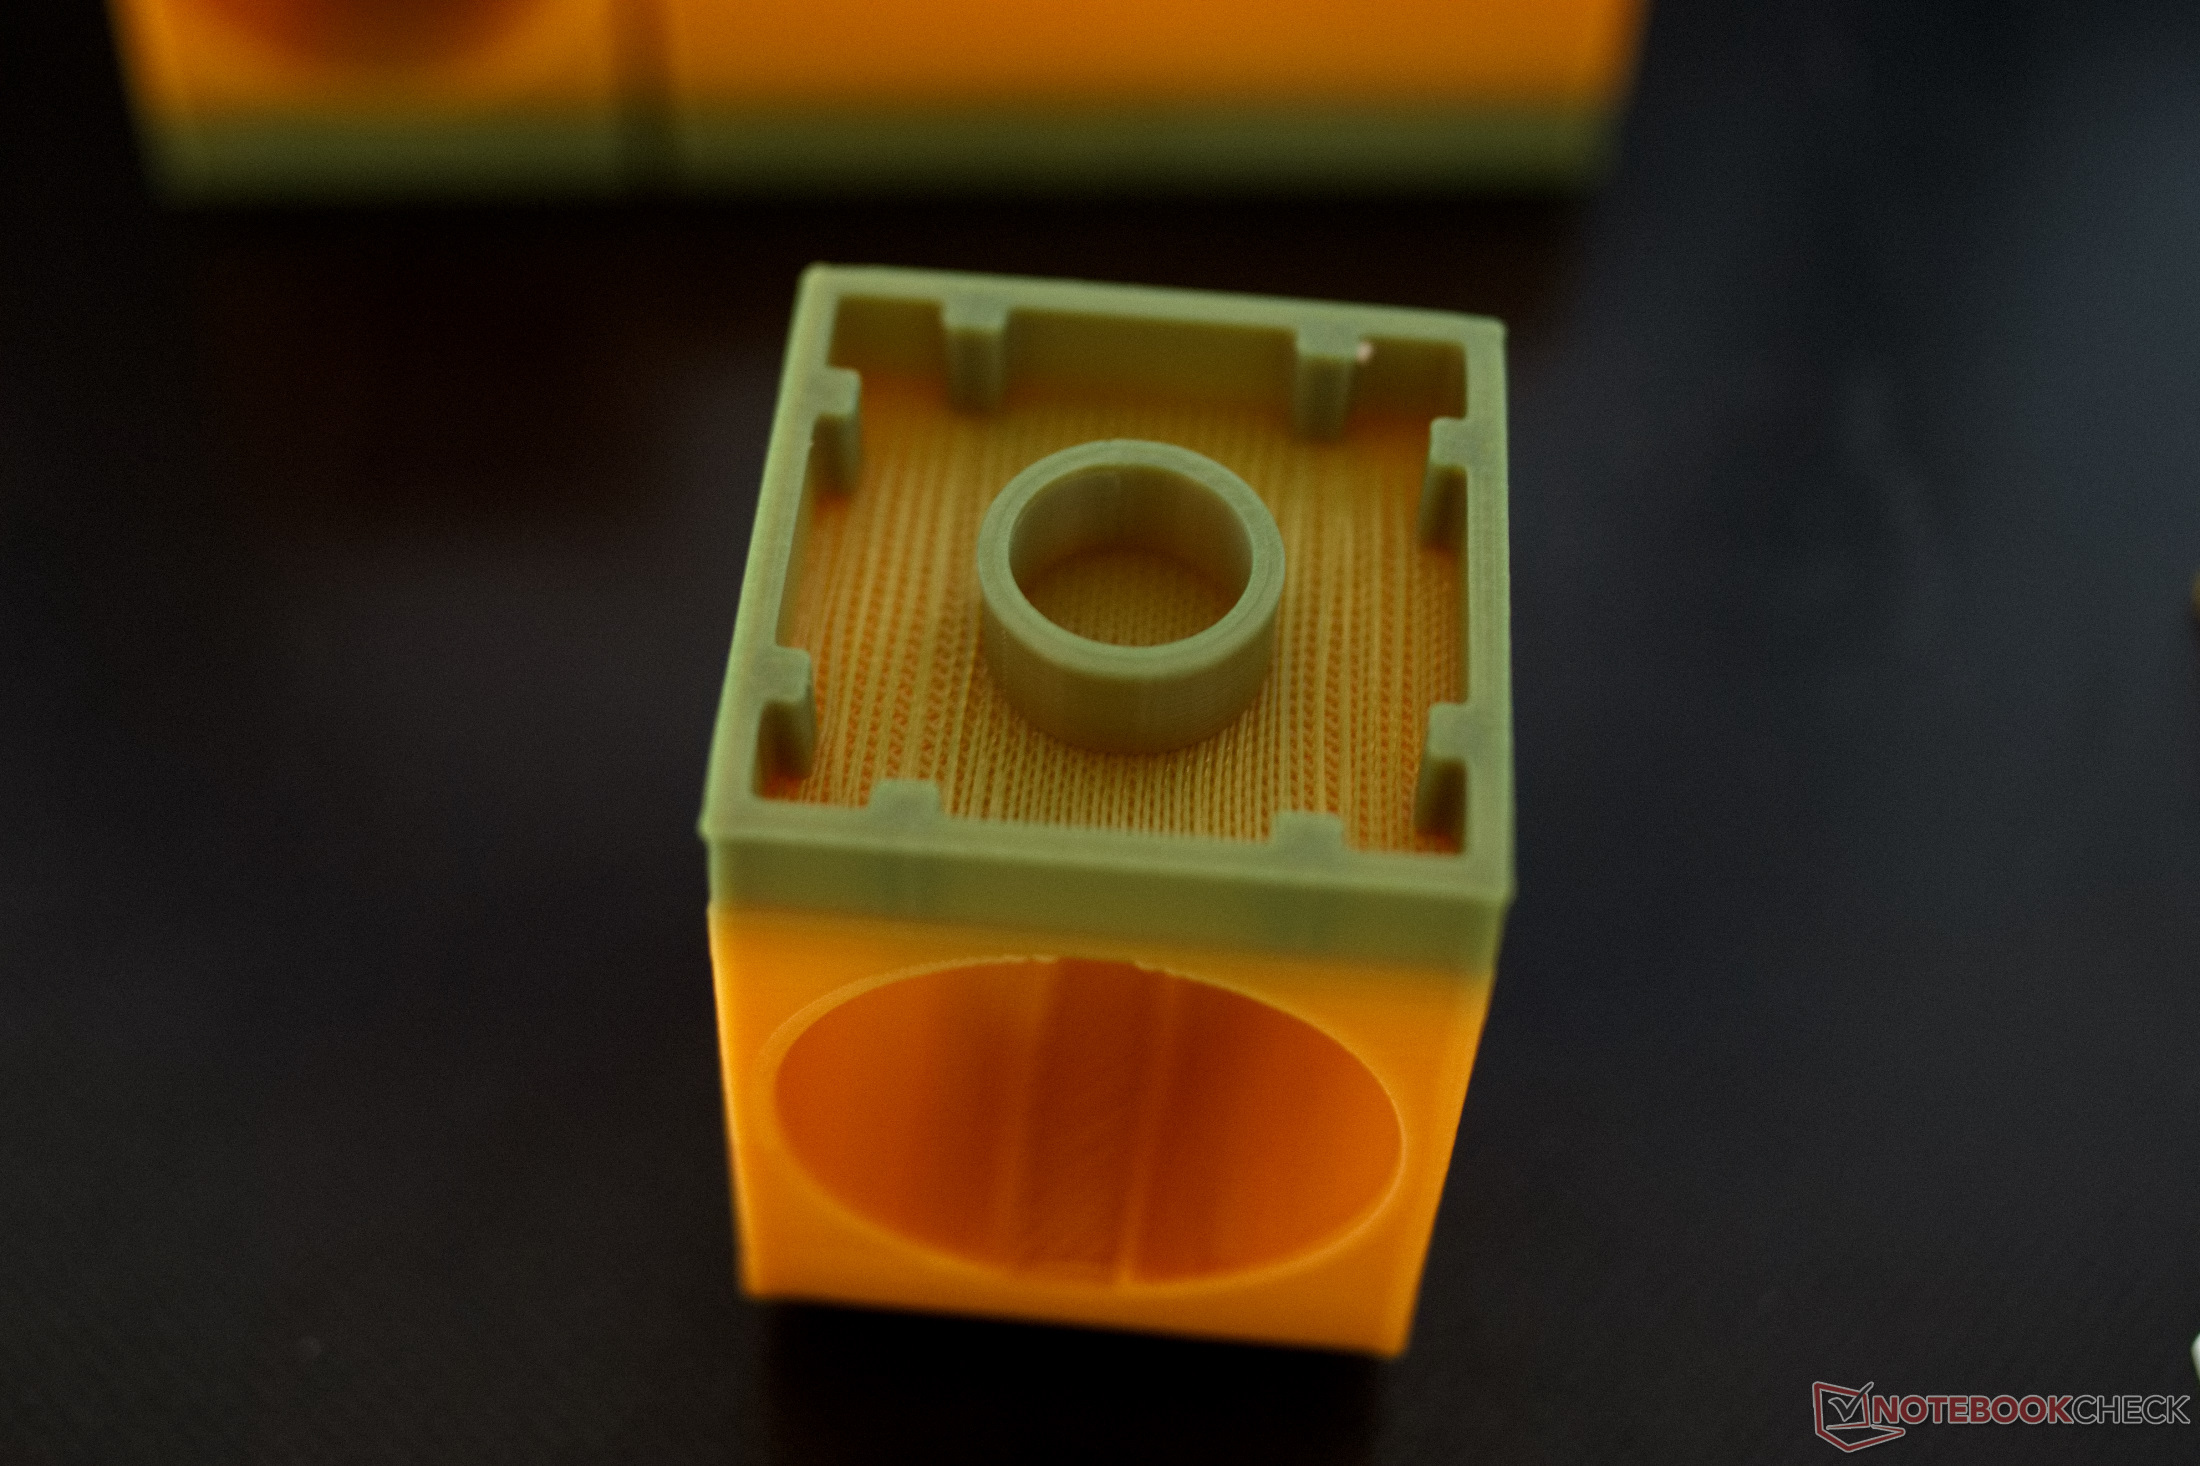
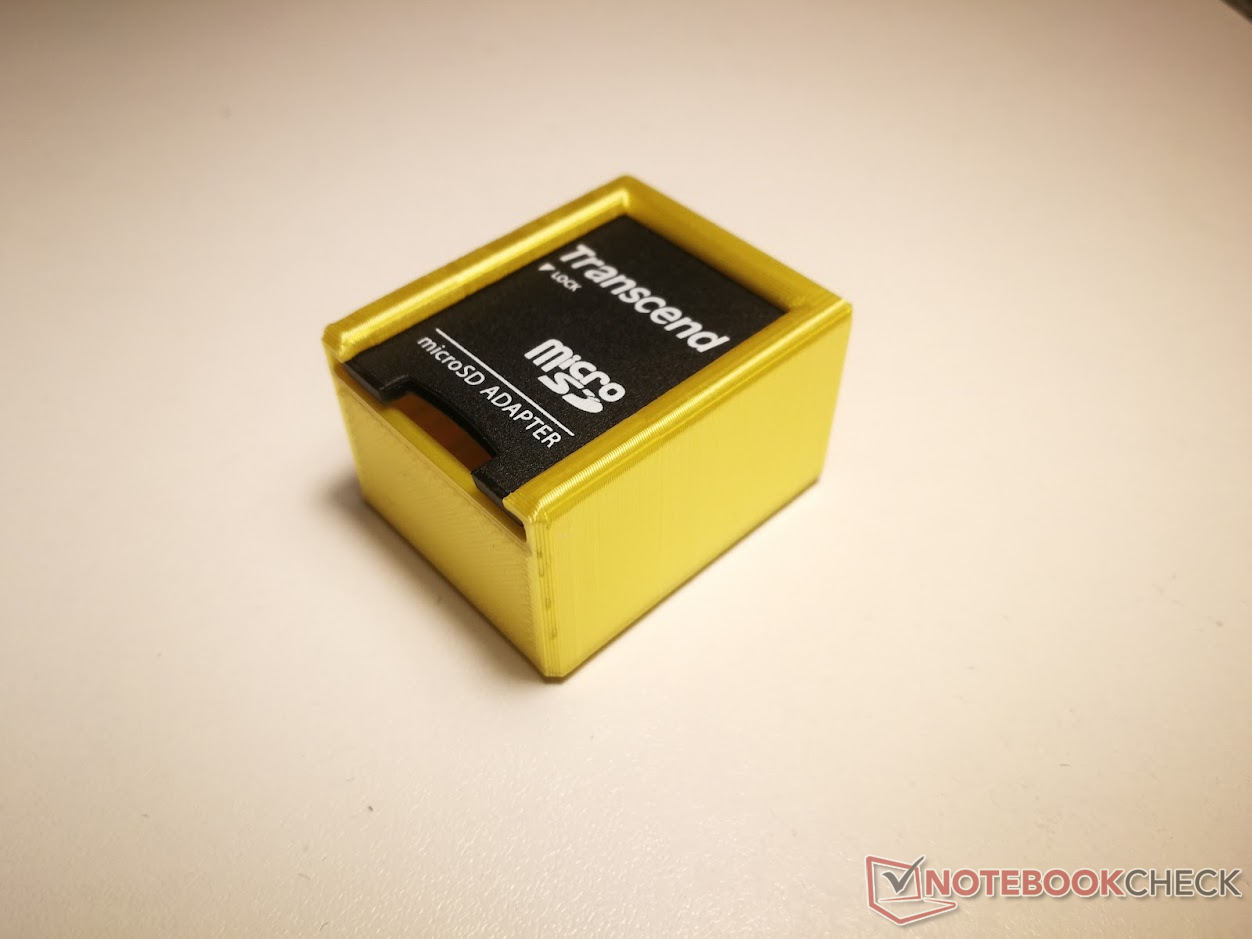
The Artillery Genius Pro works quickly and cleanly. The printer usually created both large and small objects without any noteworthy problems. Even if an object has a defect due to poor design or incorrect settings, 3D printing with the Artillery Genius Pro is not doomed to failure. This can be seen quite clearly in the clamping block for a marble run in the following pictures.
Security
The temperature protection shutdowns for hot end and heated print bed work flawlessly. The heating elements switch off reliably both when artificially heated up with a soldering iron or hair dryer and when suddenly cooled down. The firmware also detects short circuits or disconnected cables.
As far as safety is concerned, only the print bed operated with mains voltage presents us with problems. We can see that a protective conductor also leads to the print bed, but this cannot be traced non-destructively with a multimeter.
Emissions
Due to the open design, the odors of the plastic filament used spread throughout the room. Apart from that, no unpleasant vapors could be detected in the test.
The Artillery Genius Pro is relatively quiet in terms of noise. The fans used are all quite quiet and the stepper motors also only produce a little noise as long as the installation surface does not provide any resonance space. Noise only occurs at higher movement speeds of the X and Y axes. The Voltcraft SL-10 sound level meter determines a maximum noise level of around 50 dB(A). Under a printing speed of 60 to 70 mm/s (~2.36 to 2.76 in/s), the Artillery remains almost at whisper volume. Only the extruder's retractions are somewhat disturbing. Due to the design, the motor has to rotate rapidly during these, and so a whistling noise is produced with every retraction. Only after applying some grease to the gears did this become a bit more bearable.
Energy consumption
During the printing of a 3DBenchy the energy consumption of the Artillery Genius Pro was recorded over the entire print using a Voltcraft SEM6000. Over the print duration of 70 minutes, the printer requires an average of about 75 watts. Thus, the energy consumption for printing the known benchmark is about 0.088 kWh.
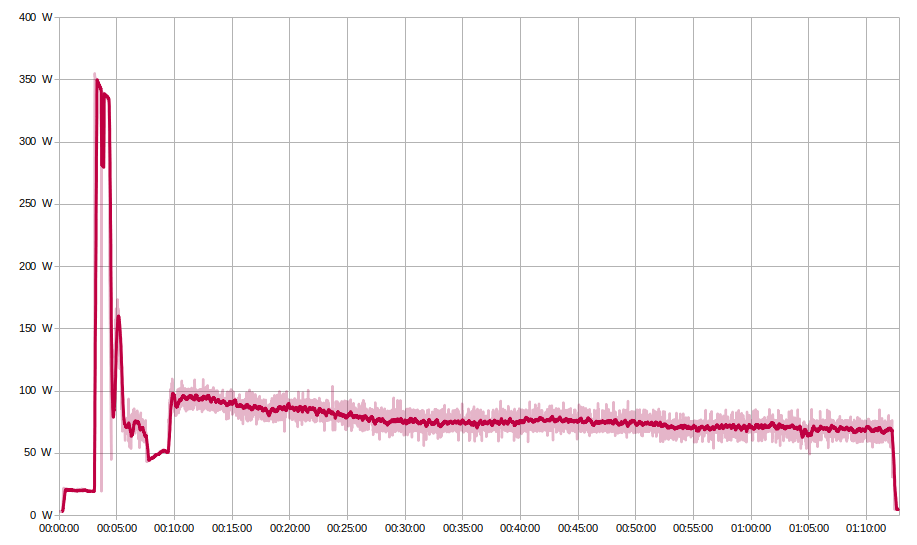
During the heat-up phase of the 3D printer, the print bed heats up with more than 300 W, followed by the heat-up of the hotend at around 75 watts. The first two layers of the 3DBenchy were printed particularly slowly and without using the fan. Thus, the energy consumption is relatively low from minute 7 to minute 9.
After that, the print runs at high speed and with the object cooling fan. Over the course of the printing process, the energy consumption of the printer drops somewhat, since the heated print bed does not have to be reheated as much. As the object height increases, less air blows onto the print bed, which means less heat is removed.
The relatively even energy consumption curve is also evidence of good PID tuning of the heating bed. Only the amount of energy that is needed to maintain the temperature is supplied.
Verdict
The Artillery Genius Pro convinces in the test. After the quick set-up and fast set-up of the print bed, the 3D printer leaves little to be desired in terms of quality. Especially beginners should be able to quickly create high-quality 3D prints with the already existing profiles in Cura and PrusaSlicer. The 3D printer is not silent, but the noise level is definitely below the values of the previously tested devices.
The Artillery Genius Pro is quickly set up and ready for use. The printer can show good results right from the start.
Above all, the robust design of the Genius Pro is pleasing. There are hardly any points of criticism worth mentioning here. The relatively unusual ribbon cables make for a very tidy image, but are also stable and should last a long time. Exposed cables are only found on the two Z-motors and the filament sensor. But these are not moved and do not come into contact with any moving components when properly plugged in.
For advanced and professional users, the 3D printer still offers some potential to reach high printing speeds. Relatively small adjustments to the retractions and linear advance should be enough to achieve good results.
Prices and availability
The Artillery Genius Pro is available among others at hekka.com for the equivalent of around 290 Euros (~$319), with the discount code Hekka3Dpro lowering the price to 260 Euros (~$286) at the time of this article's publication. Shipping from a European warehouse is currently free. Our test unit arrived after just three days. If you need more build space, you can also buy the larger Artillery Sidewinder X2 there for around 380 Euro (~$417).
Sources
Filaments

